
Sping ioc容器的入门学习
spring的作用:用于便捷的获取bean类,使用容器在容器内写出需要生成的bean,便可以在主函数中使用 一下来创建一个容器,并把xml文件地址写在后面
使用getbean方法来获取对应的类,或者使用扫描被标注的类来自动获取类。同时也可以为类配置上属性,也可以让属性自动装配。
ApplicationContext ioc = new ClassPathXmlApplicationContext("config/applicationContextAuto.xml");
1.基础工作(建立一个工程,引入jar包 , 配置工作环境)
<1> 创建一个Maven工程 填上对应的Group id 和 Artifact id
<2> 引入需要的jar包
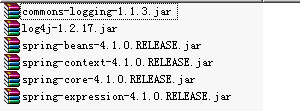
<dependencies>
<dependency>
<groupId>org.springframework</groupId>
<artifactId>spring-context</artifactId>
<version>5.2.0.RELEASE</version>
</dependency>
<dependency>
<groupId>org.springframework</groupId>
<artifactId>spring-core</artifactId>
<version>5.2.0.RELEASE</version>
</dependency>
<dependency>
<groupId>org.springframework</groupId>
<artifactId>spring-beans</artifactId>
<version>5.2.0.RELEASE</version>
</dependency>
<dependency>
<groupId>org.springframework</groupId>
<artifactId>spring-expression</artifactId>
<version>5.2.0.RELEASE</version>
</dependency>
</dependencies>
<3>工作环境的配置(包括p命名空间,util 的使用(可以引用set map 等表))
在src/main/resources 的位置创建一个配置文件夹 config 并在里面写入不同的配置文件 如applicationContext.xml
在该目录内写入以下内容
<?xml version="1.0" encoding="UTF-8"?>
<beans xmlns="http://www.springframework.org/schema/beans"
xmlns:util="http://www.springframework.org/schema/util"
xmlns:context="http://www.springframework.org/schema/context"
xmlns:xsi="http://www.w3.org/2001/XMLSchema-instance"
xmlns:p="http://www.springframework.org/schema/p"
xsi:schemaLocation="http://www.springframework.org/schema/beans
https://www.springframework.org/schema/beans/spring-beans.xsd
http://www.springframework.org/schema/context
https://www.springframework.org/schema/context/spring-context.xsd
http://www.springframework.org/schema/util
http://www.springframework.org/schema/util/spring-util.xsd
  ">
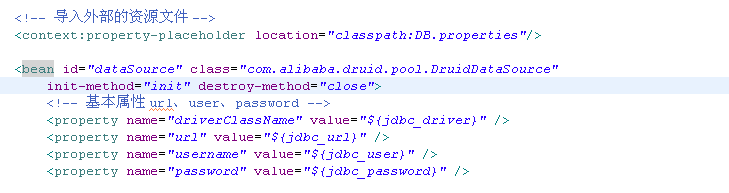
<4>引用外部属性文件
可以在导入外部文件后使用${var}来调用变量

2.spring的具体操作以及使用特点
<1> IOC的bean的配置(id在容器中是唯一的)
<bean id="apple" class="com.zzxtit.spring.ioc"></bean>
<2>对bean声明构造和销毁方法(在构造和销毁对象时候调用)
<bean id="apple" class="com.zzxtit.spring.ioc.factroy.Apple" init-method="initApple" destroy-method="destroyApple" scope="prototype"></bean>
<3>bean元素的scope属性
singleton:只有第一次获取bean时才会初始化bean
prototype:每次从容器中获取的bean都是新对象
request: 每次http请求都会创建一个新的bean,该作用域只在WebApplicationContext环境中
session: 和request类似,每次有新的会话时会创建一个新的bean,该作用域只适用于WebApplicationContext环境中
<4>注入方式:属性注入和构造器注入
属性注入:使用<property>元素,name属性为bean的属性名称,value属性为属性值
构造器注入:使用<constructor-arg>,可以是按索引注入,或者是按类型匹配入参
当给属性赋值时引用其他bean时需要使用ref属性
<bean id="userDao" class="com.zzxtit.spring.ioc.xml.UserDao">
    <property name="ban" ref="banana"></property>
     <property name="useName" value="小李"></property>

     <constructor-arg index="0" ref="banana"></constructor-arg>
     <constructor-arg index="1" value="小李"></constructor-arg>
     </bean>
<5> 若包含特殊字符需要用<![CDATA[ ]]>包含起来
<bean id="stu" class="com.zzxtit.spring.ioc">
    <property name="stuName" value="<![CDATA[吊炸天]]>">
</bean>
<6> 集合的注入:list set map 等
//list
<property name="course">
   <list>
       <value>弟弟</value>
        <value>你好</value>
        <value>哈撒k</value>
     </list>
<property >
//set
<property name="changyongyu">
   <set>
       <value>有手就行</value>
        <value>我们是冠军</value>
        <value>哈撒k</value>
     </set>
<property >
//map
<property name="changyongyu">
   <map>
     <entry key="你好" value="弟弟">
    <entry key="见好就收" value="我们是冠军">
</map>
<property>
或者使用 util schema里的集合标签
或者使用属性标签
<property name="1230">

   <props>
     <prop key="123">你好历<prop>
     <prop key="354">你好海<prop>
     <prop key="666">你好六<prop>
   <props>
</property>
或者使用util
<util:list id="score">
   <value>java<value>
    <value>c++<value>
    <value>python<value>
</util:list>
<7>继承
<bean id="stu" parent="newStu">
    <property name="course" ref="score">
</bean>
<8>p命名空间,可以便捷的使用属性来给属性赋值
<bean id="newStu" parent="stu" p:stuName="小米" p:courses-ref="score">
</bean>
<9>自动装配 autowire
byType:根据类型在容器中寻找符合的属性装配
byName:根据属性名字装配
constructor:与byType相似,只是应用了构造器参数
缺点:不能只装配个别属性
不能同时根据属性名和类型装配
<bean id="..." class="..." autowire="byType"/>
<10> classpath自动扫描bean
compoment:基本注解
responsitory:表识持久层
service:服务层
controller:表现层
在xml文件中:
<context:component-scan base-package="com.zzxtit.spring.ioc.xml.auto"></context:component-scan>
在类中的定义
@Component
public class DButil {

    private String UTF ="UTF-8";

    public String getUTF() {
        return UTF;
    }

    public void setUTF(String uTF) {
        UTF = uTF;
    }

    public void Print() {
        System.out.println(1+1);
    }
}
主函数中
public static void main(String[] args) {

        ApplicationContext ioc = new ClassPathXmlApplicationContext("config/applicationContextAuto.xml");
        User use1 = ioc.getBean("user",User.class);
        System.out.println(use1.getUseName());
        System.out.println(use1.getDb1());

    }
此时可以在主函数中直接申请获取该类

 浙公网安备 33010602011771号