

详细介绍:微服务的编程测评系统-修改登录逻辑为邮箱登录
提示:文章写完后,目录可以自动生成,如何生成可参考右边的帮助文档
前言
8. 修改登录逻辑为邮箱登录(本地)
<dependency>
  <groupId>org.springframework.boot</groupId>
    <artifactId>spring-boot-starter-mail</artifactId>
</dependency>spring:
mail:
# 指定邮件服务器地址
host: smtp.qq.com
# 登录账户
username: zjdsxc12@qq.com
# 登录密码
password: "itlrrgnfcovrcbdf"
# 端口
port: 465
# 默认编码
default-encoding: UTF-8
# 使用的协议
protocol: smtps
# 其他的属性
properties:
"mail.smtp.connectiontimeout": 5000
"mail.smtp.timeout": 3000
"mail.smtp.writetimeout": 5000
"mail.smtp.auth": true
"mail.smtp.starttls.enable": true
"mail.smtp.starttls.required": true@Component
@Slf4j
public class MailUtil {
private static final Logger logger =
LoggerFactory.getLogger(MailUtil.class);
@Value(value = "${spring.mail.username}")
private String from;
@Resource
private JavaMailSender javaMailSender;
public Boolean sendSampleMail(String to, String subject, String context) {
try {
MimeMessage mimeMessage = javaMailSender.createMimeMessage();//创建一个邮件消息
MimeMessageHelper message = new MimeMessageHelper(mimeMessage,true);
message.setFrom(from,"CK-OJ系统");
message.setTo(to);
message.setSubject(subject);
message.setText(context,true);
javaMailSender.send(mimeMessage);
} catch (Exception e) {
logger.error("向{}发送邮件失败!", to, e);
return false;
}
return true;
}
//生成邮箱验证码的html页面
public String createRegisterContext(String captcha) {
String s = "<!DOCTYPE html>\n" +
"<html xmlns=\"http://www.w3.org/1999/xhtml\" lang=\"zh-CN\">\n" +
"<head>\n" +
" <meta charset=\"UTF-8\">\n" +
" <meta name=\"viewport\" content=\"width=device-width, initial-scale=1.0\">\n" +
" <title>验证码确认</title>\n" +
" <style>\n" +
" /* 基础样式 - 保持简单以提高QQ邮箱兼容性 */\n" +
" body { font-family: Arial, sans-serif; margin: 0; padding: 0; }\n" +
" .container { max-width: 600px; margin: 0 auto; padding: 20px; }\n" +
" .header { background-color: #165DFF; color: white; padding: 20px; border-radius: 8px 8px 0 0; }\n" +
" .content { background-color: #f5f7fa; padding: 20px; border-radius: 0 0 8px 8px; }\n" +
" .code-box { background-color: white; border: 1px solid #e5e6eb; border-radius: 8px; padding: 20px; text-align: center; }\n" +
" .digit { display: inline-block; width: 35px; height: 45px; background-color: #165DFF; color: white; \n" +
" font-size: 24px; font-weight: bold; margin: 0 5px; border-radius: 4px; line-height: 45px; }\n" +
" .footer { text-align: center; color: #86909C; font-size: 12px; margin-top: 20px; }\n" +
" </style>\n" +
"</head>\n" +
"<body>\n" +
" <div class=\"container\">\n" +
" <!-- 头部 -->\n" +
" <div class=\"header\">\n" +
" <h1 style=\"margin: 0 auto; width: fit-content;\">安全验证</h1>\n" +
" </div>\n" +
" \n" +
" <!-- 主体内容 -->\n" +
" <div class=\"content\">\n" +
" <p>尊敬的用户:</p>\n" +
" <p>您正在进行账户验证,请使用以下验证码完成操作:</p>\n" +
" \n" +
" <!-- 验证码区域 -->\n" +
" <div class=\"code-box\">\n" +
" <p>您的验证码</p>\n" +
" <div>\n" +
" <span class=\"digit\">"+captcha.charAt(0)+"</span>\n" +
" <span class=\"digit\">"+captcha.charAt(1)+"</span>\n" +
" <span class=\"digit\">"+captcha.charAt(2)+"</span>\n" +
" <span class=\"digit\">"+captcha.charAt(3)+"</span>\n" +
" </div>\n" +
" <p style=\"color: #86909C; font-size: 14px; margin-top: 10px;\">\n" +
" 验证码有效期:<strong>1分钟</strong>\n" +
" </p>\n" +
" </div>\n" +
" \n" +
" <!-- 提示信息 -->\n" +
" <p style=\"color: #4E5969; font-size: 14px; margin-top: 20px;\">\n" +
" 如果您没有请求此验证码,请忽略此邮件。\n" +
" </p>\n" +
" </div>\n" +
" \n" +
" <!-- 底部 -->\n" +
" <div class=\"footer\">\n" +
" <p>© CK-OJ系统. 保留所有权利.</p>\n" +
" <p>请勿回复此邮件,此邮箱不接收回复</p>\n" +
" </div>\n" +
" </div>\n" +
"</body>\n" +
"</html>\n" +
" ";
return s;
}
}@Override
public boolean sendCode(UserSendCodeDTO dto) {
//先校验手机号格式对不对
// if(!checkPhone(dto.getPhone())){
// throw new ServiceException(ResultCode.PHONE_STYLE_ERR);
// }
if(!checkEmail(dto.getPhone())){
throw new ServiceException(ResultCode.PHONE_STYLE_ERR);
}
//生成六位随机数
log.info("sms.is-send:{}",isSend);
String code = isSend ? RandomUtil.randomNumbers(4) : Constants.DEFAULT_PHONE_CODE;
String registerContext = mailUtil.createRegisterContext(code);
mailUtil.sendSampleMail(dto.getPhone(),"CK-OJ系统验证码",registerContext);
log.info("手机号发送验证码为,code:{}",code);这样就可以了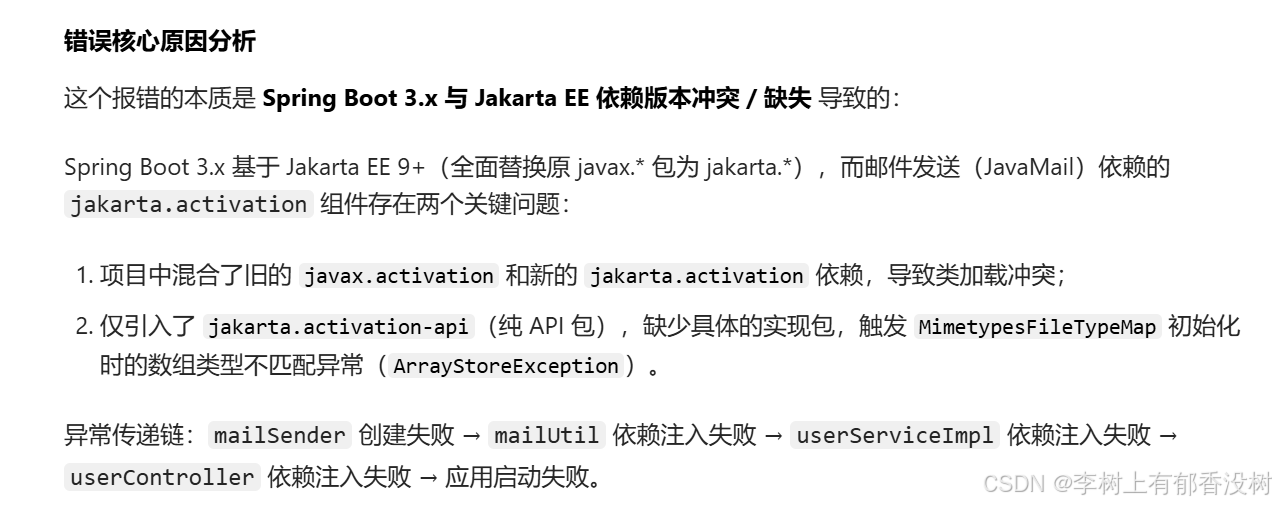
但是还是有问题
mail用的是Jakarta的依赖,我们项目中有javax的依赖,两个依赖同时加载有冲突了
所以我们要去掉项目中javax依赖
搜索javax
发现oj-conmon-file,还有oj-common-core里面有javax
<dependency>
  <groupId>javax.xml.bind</groupId>
    <artifactId>jaxb-api</artifactId>
      <version>${jaxb-api.version}</version>
        </dependency>
          <dependency>
            <groupId>javax.activation</groupId>
              <artifactId>activation</artifactId>
                <version>${activation.version}</version>
                  </dependency>
修改为
<!-- Jakarta EE 9+ 兼容性依赖 -->
  <dependency>
    <groupId>jakarta.xml.bind</groupId>
      <artifactId>jakarta.xml.bind-api</artifactId>
        <version>4.0.0</version>
          </dependency>
            <dependency>
              <groupId>jakarta.activation</groupId>
                <artifactId>jakarta.activation-api</artifactId>
                  <version>2.1.0</version>
                    </dependency>
但是oj-common-core中还是javax,不要改,因为要和jwt版本适应,只改oj-conmon-file吧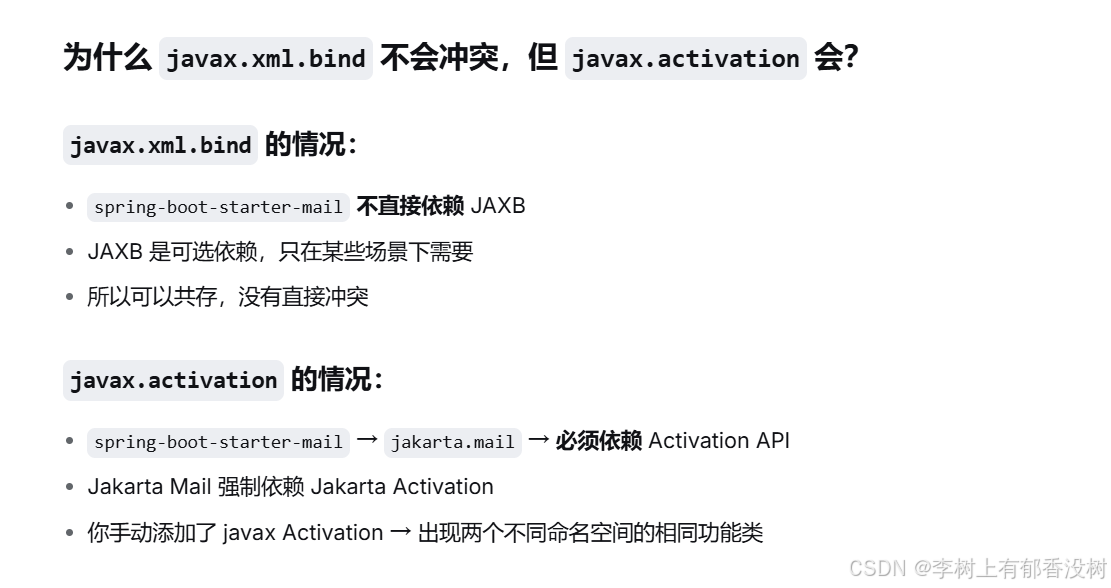
还有就是mail不依赖javax.xml.bind,所以javax.xml.bind可以不用修改,但是javax.activation就要修改为jakarta,这里要注意
PHONE_STYLE_ERR(3301, "邮箱格式错误"),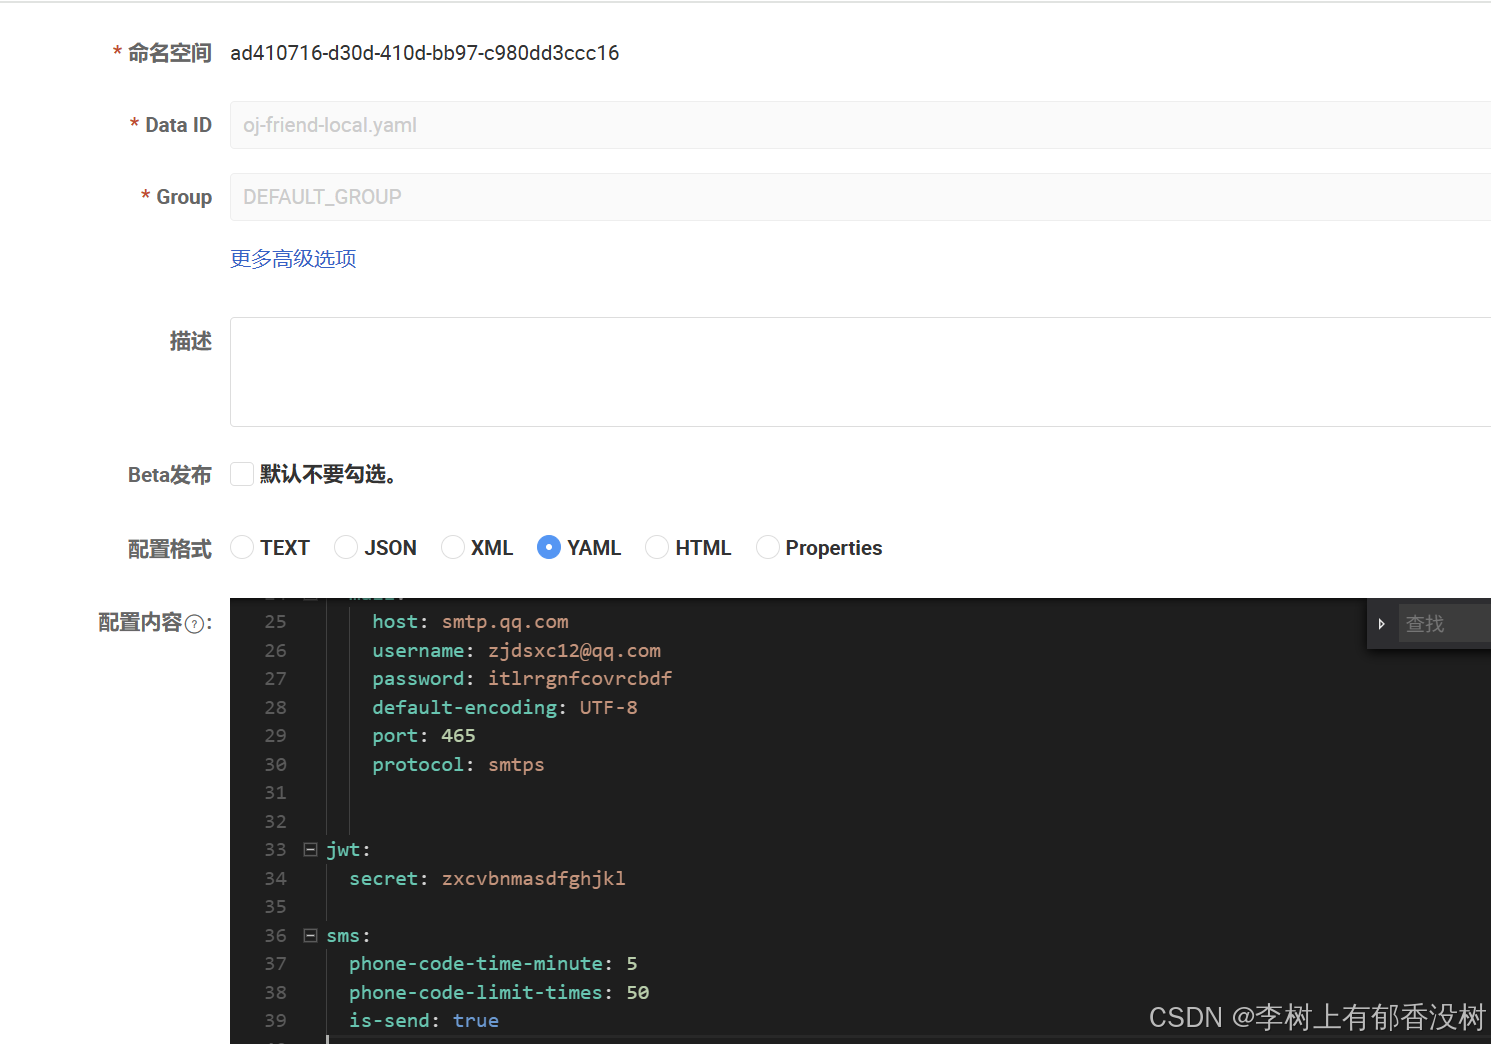
最后这个isSend修改为true就可以了
这里登录这里也要改为校验邮箱格式
还有数据库手机号那里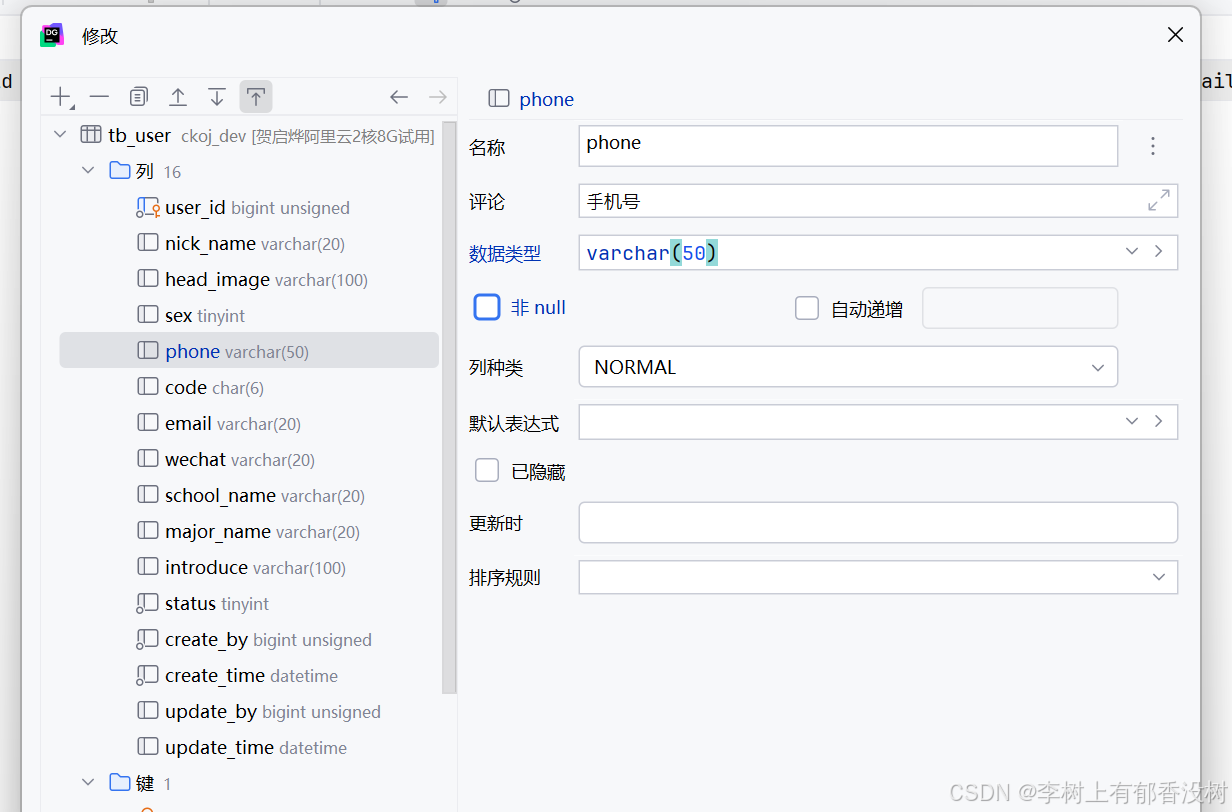
这里修改phone类型为varchar(50),本地和linux上的数据库都要改
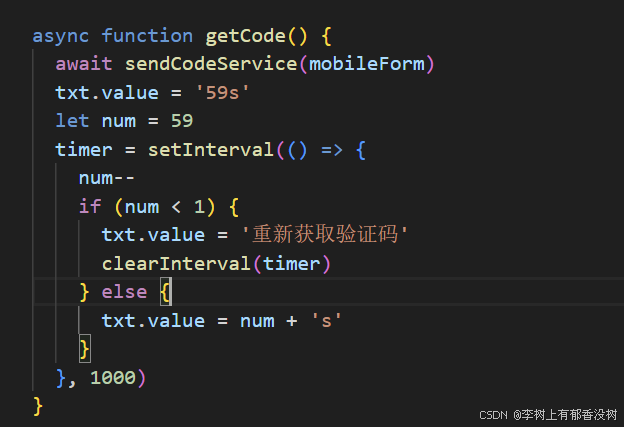
然后前端这里,有await,每次都要等待请求完成之后,才会变为59s----》感觉很卡,所以去掉await
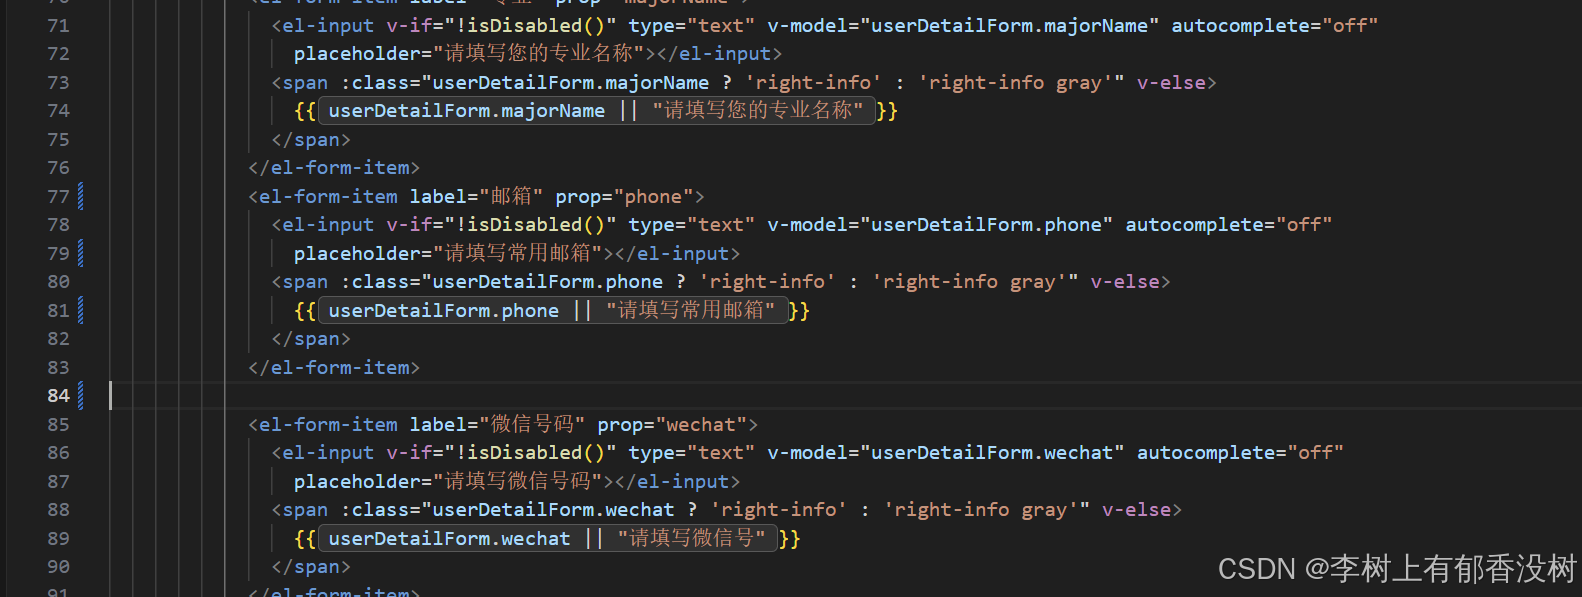
还有前端个人信息这里也要修改一下,把手机改为邮箱,然后去掉原来的手机字段展示
9. 热榜设计
export function getHotQuestionListService(){
return service({
url: "/user/question/hotQuestionList",
method: "get"
});
}
const hotQuestionList = ref([])
async function getHotQuestionList(){
const result = await getHotQuestionListService()
hotQuestionList.value = result.rows
}
getHotQuestionList()<div class="bot-box">
<div class="title"><img width="96px" height="24px" src="@/assets/rebang.png" alt=""></div>
<div class="hot-list">
<div class="list-item" v-for="(item, index) in hotQuestionList" :key="'hot_' + index">
<img class="index-box" v-if="index == 0" src="@/assets/images/icon_1.png" alt="">
<img class="index-box" v-if="index == 1" src="@/assets/images/icon_2.png" alt="">
<img class="index-box" v-if="index == 2" src="@/assets/images/icon_3.png" alt="">
<span class="index-box" v-if="index > 2 && index < 5">{{ index + 1 }}</span>
<span class="txt" :title="item.title" v-if="index >= 0 && index < 5">{{ item.title }}</span>
</div>
</div>
</div>@GetMapping("/hotQuestionList")
public TableDataInfo hotQuestionList(){
log.info("获取热榜列表");
return questionService.hotQuestionList();
}@Data
class HotQuestion{
private String title;
}
@Override
public TableDataInfo hotQuestionList() {
// 1. 查询所有examId为空的提交记录
List<UserSubmit> userSubmitList = userSubmitMapper.selectList(
new LambdaQueryWrapper<UserSubmit>()
.isNull(UserSubmit::getExamId)
.isNotNull(UserSubmit::getQuestionId) // 过滤无效的空题目ID
);
// 空数据直接返回空列表
if (userSubmitList.isEmpty()) {
return TableDataInfo.empty();
}
// 2. 按questionId分组,统计每个题目的提交数量,并按数量降序排序
Map<Long, Long> questionCountMap = userSubmitList.stream()
.collect(Collectors.groupingBy(
UserSubmit::getQuestionId, // 分组依据:questionId
Collectors.counting() // 统计每组提交数
));
// 将分组结果按提交量降序排序(数量相同则按questionId升序)
List<Map.Entry<Long, Long>> sortedEntryList = questionCountMap.entrySet().stream()
.sorted((entry1, entry2) -> {
int countCompare = entry2.getValue().compareTo(entry1.getValue());
return countCompare != 0 ? countCompare : entry1.getKey().compareTo(entry2.getKey());
})
.collect(Collectors.toList());
// 3. 批量查询所有涉及的题目(避免循环查库,优化性能)
List<Long> questionIds = sortedEntryList.stream()
.map(Map.Entry::getKey)
.collect(Collectors.toList());
List<Question> questionList = questionMapper.selectBatchIds(questionIds);
// 转Map方便快速取值
Map<Long, Question> questionMap = questionList.stream()
.collect(Collectors.toMap(Question::getQuestionId, q -> q));
// 4. 封装为HotQuestion列表(index从1开始)
List<HotQuestion> hotQuestionList = new ArrayList<>();
for (Map.Entry<Long, Long> entry : sortedEntryList) {
Long questionId = entry.getKey();
HotQuestion hotQuestion = new HotQuestion();
// 查询题目标题(无匹配则显示"未知题目")
Question question = questionMap.get(questionId);
hotQuestion.setTitle(question != null ? question.getTitle() : "未知题目");
hotQuestionList.add(hotQuestion);
}
System.out.println(hotQuestionList);
return TableDataInfo.success(hotQuestionList,hotQuestionList.size());
}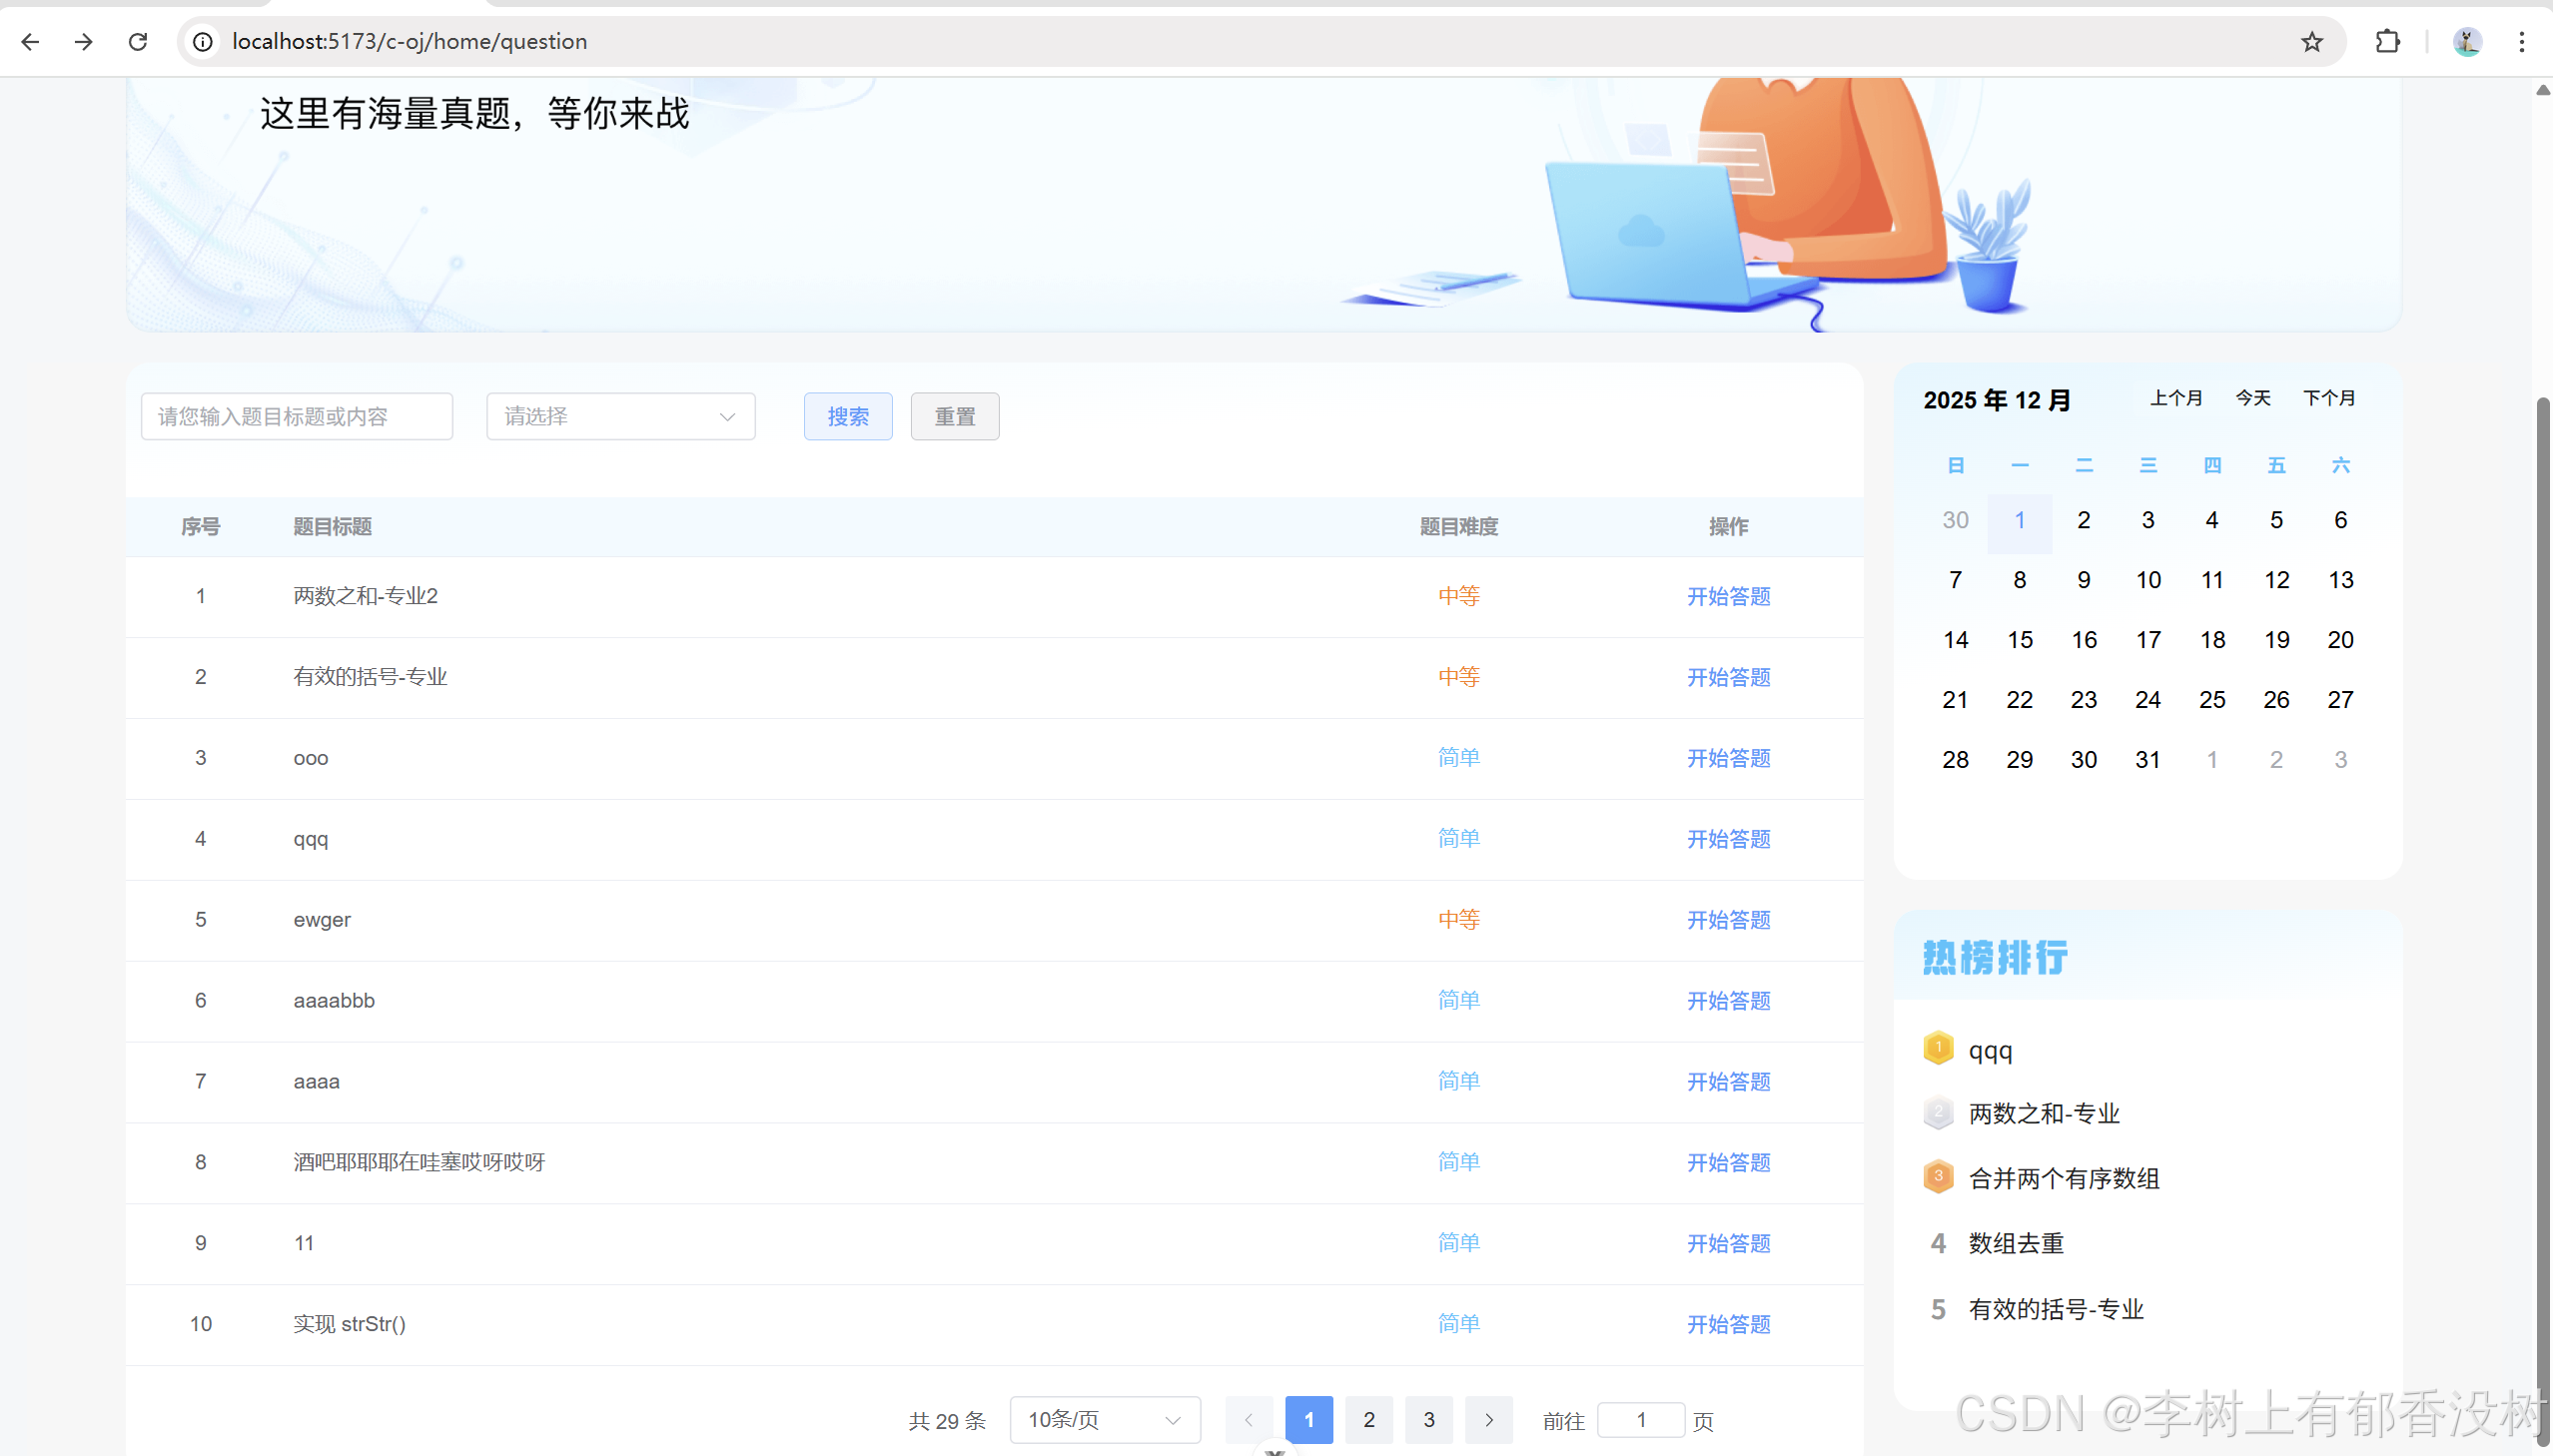
这样就成功了
10.部署
然后后端打包,上传jar包
前端打包
npm run build前端打包命令执⾏完成之后,B端和C端前端⼯程分别会创建出两个dist⽬录
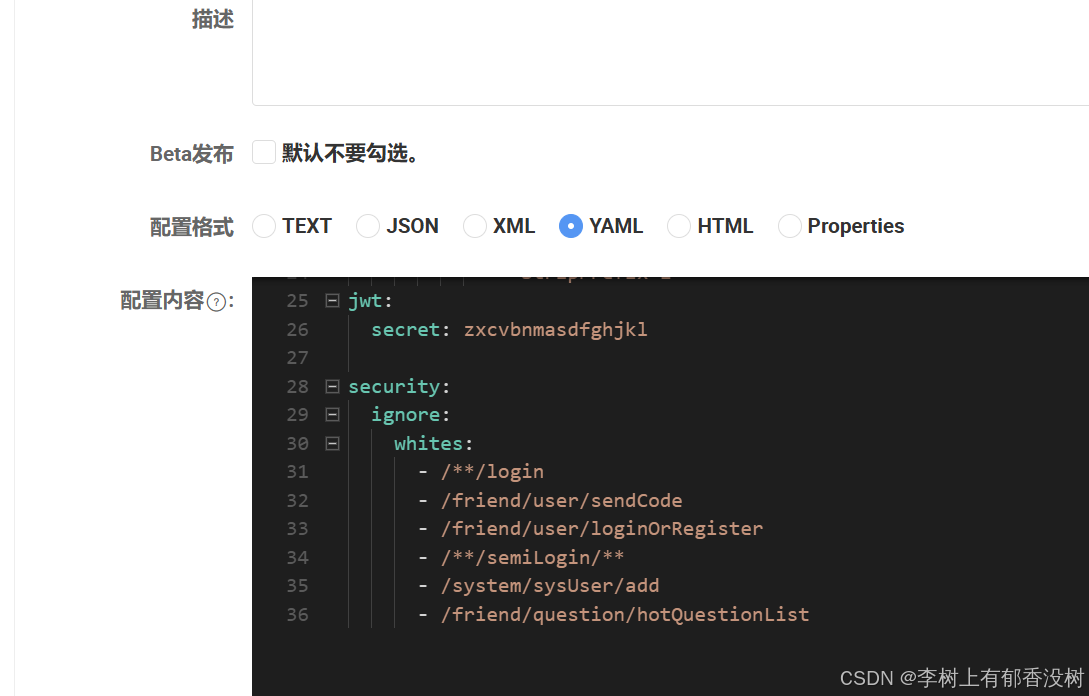
然后添加网关白名单
还有friend添加邮箱的配置
然后把isSend字段改为true,表示验证码不是默认的
async function getCode() {
if (txt.value !== '获取验证码' && txt.value !== '重新获取验证码') {
return
}
sendCodeService(mobileForm)
txt.value = '59s'
let num = 59
timer = setInterval(() => {
num--
if (num < 1) {
txt.value = '重新获取验证码'
clearInterval(timer)
} else {
txt.value = num + 's'
}
}, 1000)
}
前端这里发送手机号这里有问题,修改一下,不然可以一直点击发送
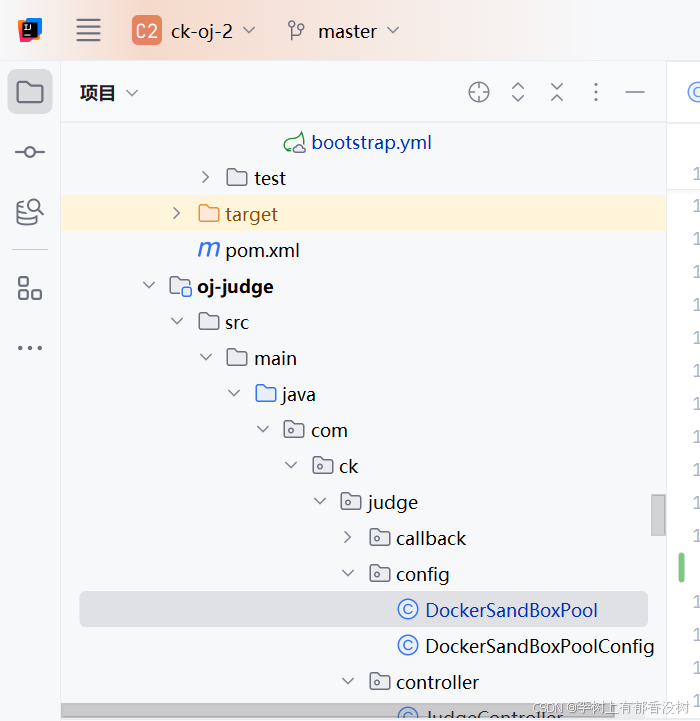
还有一点要注意的就是,由于我们复制了一个新的项目,所以目录就变了,所以
所以这个目录挂载到容器中的目录也要变,所以要删除以前的容器,不然的话,挂载的WIndows本地目录就还是ck-oj的,而不是ck-oj-2的
最后一个还有一个要改的就是DockerStartResultCallback中的isNotEmpty改为isNotBlank
@Override
public void onNext(Frame frame) {
StreamType streamType = frame.getStreamType();
if (StreamType.STDERR.equals(streamType)) {
if (StrUtil.isEmpty(errorMessage)) {
errorMessage = new String(frame.getPayload());
} else {
errorMessage = errorMessage + new String(frame.getPayload());
}
codeRunStatus = CodeRunStatus.FAILED;
} else {
String msgTmp = new String(frame.getPayload());
if (StrUtil.isNotBlank(msgTmp)) {
System.out.println("修改");
message = new String(frame.getPayload());
}
codeRunStatus = CodeRunStatus.SUCCEED;
}
super.onNext(frame);
}
为什么呢,因为
docker回调本身就是流试回调。所以它不一定是只回调一次并且一定带有完整字符串得
如果每次都是带有完整字符串,那么其实isempty都可以不用写
至于为什么要改写isNotBlank 是因为,有些时候,回调可能只带有,换行符这种,而这种转成string类型,
.isNotEmpty 是判断不出来得。 但是对于代码逻辑来说,只有换行符这种,并不是想要得
意思就是每次回调都是回调一部分的内容,最后拼在一起,如果第一次回调一个空字符比如\n这种,isNotBlank就会觉得false,不处理,而isNotEmpty的话,就会觉得为true,觉得他是非空的,然后给message 赋值,所以最后message 就会有\n这种,很长,看不到结果
因为isNotEmpty,只有null和""的时候才会返回false–》所有都是空字符–》觉得不为空
而isNotBlank:如果所有都是空字符–》返回true–》觉得为空
这样就OK了,全部完成,竞赛变为历史竞赛的操作–》凌晨自动进行

 浙公网安备 33010602011771号