
.NetCore使用Swagger进行单版本或多版本控制处理
前面已经介绍过了Swagger的基础使用了
下面继续分别详细说明下 不添加版本控制以及添加版本控制的使用情况,其实也基本一致,对看起来可能更加容易理解
第一步 导入nuget包
nuget导入Swashbuckle.AspNetCore (对应有Swashbuckle.AspNetCore.Swagger、Swashbuckle.AspNetCore.SwaggerGen、Swashbuckle.AspNetCore.SwaggerUI)
版本控制还需要引入
Microsoft.AspNetCore.Mvc.Versioning.ApiExplorer
Microsoft.AspNetCore.Mvc.Versioning
第二步 添加服务及配置
下面代码中都结合了IdentityServer4中的相关设置,可以忽略
非版本控制
ConfigServices中添加如下代码
services.AddSwaggerGen(options =>
            {
                options.SwaggerDoc("v1", new Swashbuckle.AspNetCore.Swagger.Info
                {
                    Version = "v1.0",
                   Title = "体检微服务接口"
                });


                var basePath = PlatformServices.Default.Application.ApplicationBasePath;
                var xmlPath = Path.Combine(basePath, "ExaminationServicesApi.xml");
                options.IncludeXmlComments(xmlPath);

                var xmlmodelPath =
                Path.Combine(basePath, "ExaminationServicesDomain.xml");
                options.IncludeXmlComments(xmlmodelPath);

                #region Swagger添加授权验证服务

                //options.AddSecurityDefinition("Bearer", new ApiKeyScheme
                //{
                //    Description = "JWT Bearer 授权 \"Authorization: Bearer+空格+token\"",
                //    Name = "Authorization",
                //    In = "header",
                //    Type = "apiKey"
                //});

                options.AddSecurityDefinition("oauth2", new OAuth2Scheme
                {
                    Type = "oauth2",
                    Flow = "implicit",
                    AuthorizationUrl = _authorityconfig.Authority + "/connect/authorize",
                    Scopes = new Dictionary<string, string>
                        {
                          //{ "openid", "身份信息" } ,
                          //{ "profile", "个人基本信息" } ,
                          { "userservicesapi", "用户服务" },
                          { "examinationservicesapi", "体检服务" }
                        }
                });
                options.OperationFilter<CustomOperationFilter>();
                #endregion

            });
 app.UseSwagger();
            app.UseSwaggerUI(c =>
            {
                c.SwaggerEndpoint("/swagger/v1/swagger.json", "WebApi");
                c.OAuthClientId("testuserservicesapiexaminationservicesapi");
                c.OAuthAppName("体检服务");
            });
这里要注意到我添加了2个xml 一个是apicontroller的获取注释描述,如果需要model相关的描述可以将model所在的应用程序集xml处理下,以便于在接口文档上可以看到model的先关说明
版本控制
ConfigServices中添加如下代码 只不过是动态的处理了版本信息
 services.AddApiVersioning(option =>
            {
                option.AssumeDefaultVersionWhenUnspecified = true;
                option.ReportApiVersions = false;
            })
            .AddMvcCore().AddVersionedApiExplorer(option => {
                option.GroupNameFormat = "'v'VVV";
                option.AssumeDefaultVersionWhenUnspecified = true;
            });
            services.AddSwaggerGen(options =>
            {
                var provider = services.BuildServiceProvider().GetRequiredService<IApiVersionDescriptionProvider>();
                foreach (var description in provider.ApiVersionDescriptions)
                {
                    options.SwaggerDoc(description.GroupName,
                         new Info()
                        {
                            Title = $"体检微服务接口 v{description.ApiVersion}",
                            Version = description.ApiVersion.ToString(),
                            Description = "切换版本请点右上角版本切换",
                            Contact = new Contact() { Name = "黎又铭", Email = "2939828886@qq.com" }
                        }
                    );
                }


                //options.SwaggerDoc("v1", new Swashbuckle.AspNetCore.Swagger.Info
                //{
                //    Version = "v1.0",
                //    Title = "体检微服务接口"
                //});


                var basePath = PlatformServices.Default.Application.ApplicationBasePath;
                var xmlPath = Path.Combine(basePath, "ExaminationServicesApi.xml");
                options.IncludeXmlComments(xmlPath);


                var xmlmodelPath =
                Path.Combine(basePath, "ExaminationServicesDomain.xml");
                options.IncludeXmlComments(xmlmodelPath);

                #region Swagger添加授权验证服务

                //options.AddSecurityDefinition("Bearer", new ApiKeyScheme
                //{
                //    Description = "JWT Bearer 授权 \"Authorization: Bearer+空格+token\"",
                //    Name = "Authorization",
                //    In = "header",
                //    Type = "apiKey"
                //});

                options.AddSecurityDefinition("oauth2", new OAuth2Scheme
                {
                    Type = "oauth2",
                    Flow = "implicit",
                    AuthorizationUrl = _authorityconfig.Authority + "/connect/authorize",
                    Scopes = new Dictionary<string, string>
                        {
                          //{ "openid", "身份信息" } ,
                          //{ "profile", "个人基本信息" } ,
                          { "userservicesapi", "用户服务" },
                          { "examinationservicesapi", "体检服务" }

                        }
                });
                options.OperationFilter<CustomOperationFilter>();
                #endregion

            });
 app.UseSwagger();
            app.UseSwaggerUI(c =>
            {

                foreach (var description in provider.ApiVersionDescriptions)
                {
                    c.SwaggerEndpoint($"/swagger/{description.GroupName}/swagger.json", description.GroupName.ToUpperInvariant());
                }
                //c.SwaggerEndpoint("/swagger/v1/swagger.json", "WebApi");
                c.OAuthClientId("testuserservicesapiexaminationservicesapi");
                c.OAuthAppName("体检服务");
            });
对比两种情况可以看出实际上就多出来一个办理版本信息而已,ApiVersionDescriptions 其实就是通过这个特性动态遍历了版本信息,所以多版本控制只需要在ApiController中添加好相关的属性标签即可
第三步 使用
[ApiVersion("1.0")]
[Route("api/v{api-version:apiVersion}/[controller]")]
 public class DemoController : ControllerBase
{

}
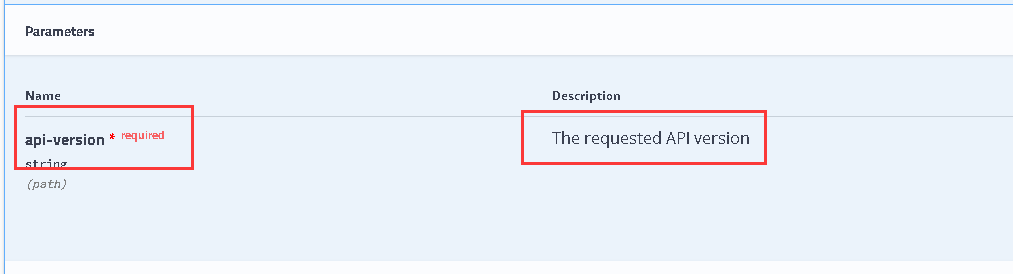
在前面代码中我们用到了 CustomOperationFilter这个处理,在这个操作过滤器中我在之前的代码中添加授权及文件上传,这里我们使用版本控制还需要在里面添加好版本参数描述处理
 public class CustomOperationFilter : IOperationFilter
    {
        public void Apply(Operation operation, OperationFilterContext context)
        {

            #region Swagger版本描述处理
            foreach (var parameter in operation.Parameters.OfType<NonBodyParameter>())
            {
                var description = context.ApiDescription.ParameterDescriptions.First(p => p.Name == parameter.Name);

                if (parameter.Description == null)
                {
                    parameter.Description = description.ModelMetadata.Description;
                }
            }

            #endregion

            #region Swagger授权过期器处理
            if (operation.Security == null)
                operation.Security = new List<IDictionary<string, IEnumerable<string>>>();
            var oAuthRequirements = new Dictionary<string, IEnumerable<string>>
                                        {

                                              {"oauth2", new List<string> { "openid", "profile", "examinationservicesapi" }}
                                        };
            operation.Security.Add(oAuthRequirements);
            #endregion

            #region Swagger 文件上传处理

            var files = context.ApiDescription.ActionDescriptor.Parameters.Where(n => n.ParameterType == typeof(IFormFile)).ToList();
            if (files.Count > 0)
            {
                for (int i = 0; i < files.Count; i++)
                {
                    if (i == 0)
                    {
                        operation.Parameters.Clear();
                    }
                    operation.Parameters.Add(new NonBodyParameter
                    {
                        Name = files[i].Name,
                        In = "formData",
                        Description = "Upload File",
                        Required = true,
                        Type = "file"
                    });

                }
                operation.Consumes.Add("multipart/form-data");
            }

            #endregion
        }
    }
运行程序看效果
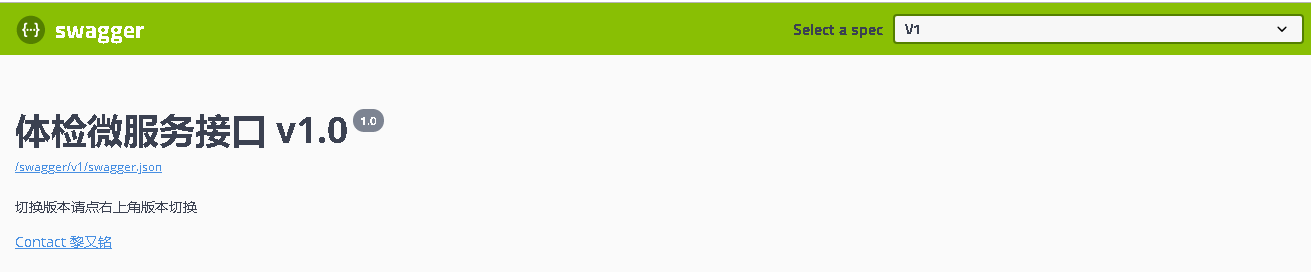

版本控制就搞定了,这里需要说明的是看下面的图
额外说明
版本是不是必须的、以及描述就是在CustomOperationFilter中处理下默认的说明,你可以这样写
 if (parameter.Description == null)
                {
                    parameter.Description ="填写版本号如:1.0";
                }

parameter.Required=false; //设置非必填或非必填
下面看下效果,已经有注释了和设置了的非必填项目

这里额外在说一点的就是
[ApiVersion("1.0", Deprecated = false)]
Deprecated 这个属性设置 True :标识是否弃用API ,在设置为true的情况下来看下效果
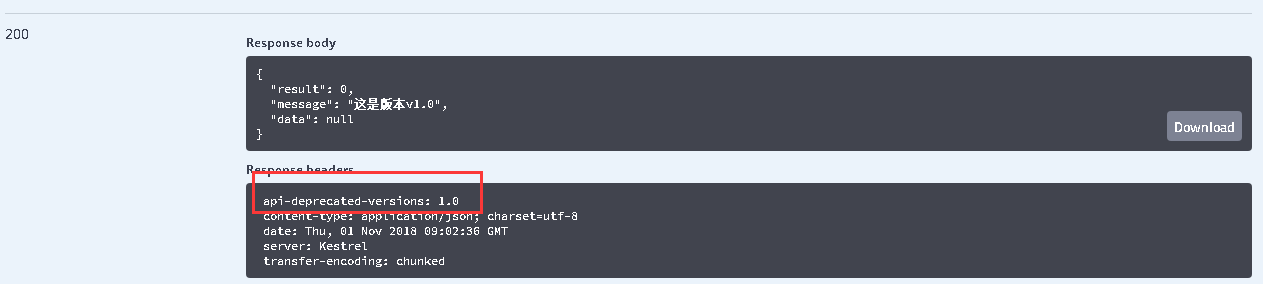
1.0版本已经是弃用了,这里又要额外说下与这个关联的属性了就是在服务配置选项中的 ReportApiVersions 设置 用下面的配置
 services.AddApiVersioning(option =>
            {
                option.ReportApiVersions = false;
            })
            .AddMvcCore().AddVersionedApiExplorer(option => {
                option.GroupNameFormat = "'v'VVV";
                option.AssumeDefaultVersionWhenUnspecified = true;
                option.DefaultApiVersion = new ApiVersion(1, 0);
            });
false:不再请求响应中添加 版本报告信息,下图中已经不会显示我一用的版本信息了

上面默认版本 DefaultApiVersion 我设置了1.0 在代码中出现2个版本路由地址一样,在没有填写版本号的情况下使用默认版本
AssumeDefaultVersionWhenUnspecified:true 是否在没有填写版本号的情况下使用默认版本
如果您觉得阅读本文对您有帮助,请点一下“推荐”按钮,您的“推荐”将是我最大的写作动力!
本文版权归作者和博客园共有,来源网址:http://www.cnblogs.com/liyouming欢迎各位转载,但是未经作者本人同意,转载文章之后必须在文章页面明显位置给出作者和原文连接。

 浙公网安备 33010602011771号