
编译 Secure Value Recovery项目
准备
下载
git clone https://codeup.aliyun.com/6306306f95064d67d44656e5/lxr1907/SecureValueRecovery.git
进入目录
cd SecureValueRecovery
编译enclave
make -C ./enclave
等待很长时间下载各种镜像后
报错:
Fatal error: can't create build/kbupd_enclave_t.o: No such file or directory
进入目录创建build目录
cd enclave
mkdir build
报错如下
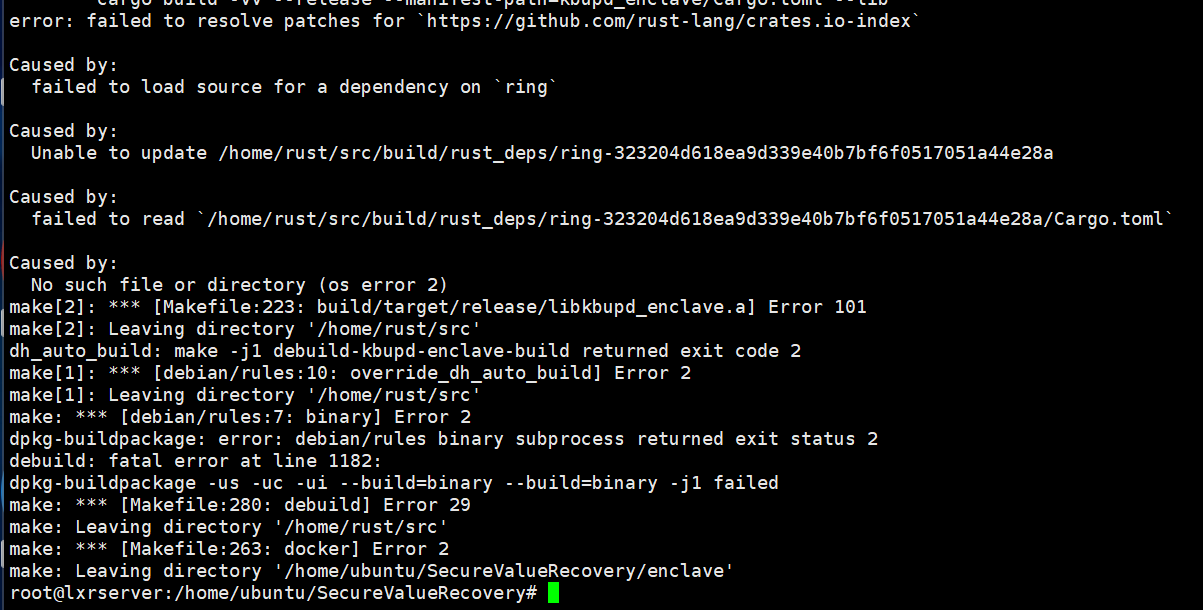
编译server
make -C ./service docker运行service的环境安装
下载intel-sgx,根据ubuntu版本
https://download.01.org/intel-sgx/sgx-linux/2.17/distro/ubuntu18.04-server/sgx_linux_x64_sdk_2.17.100.3.bin
或
https://download.01.org/intel-sgx/sgx-linux/2.17/distro/ubuntu20.04-server/sgx_linux_x64_sdk_2.17.100.3.bin
最新 sgx_linux_x64_sdk_2.19.100.3.bin
赋权限
chmod +x sgx_linux_x64_sdk_2.17.100.3.bin
安装
./sgx_linux_x64_sdk_2.17.100.3.bin
修改环境文件
vi sgxsdk/environment #把其中的sdk_libs目录名处,增加lib64
-----------------------
export SGX_SDK=/home/ubuntu/SecureValueRecovery/sgxsdk
export PATH=$PATH:$SGX_SDK/bin:$SGX_SDK/bin/x64
export PKG_CONFIG_PATH=$PKG_CONFIG_PATH:$SGX_SDK/pkgconfig
if [ -z "$LD_LIBRARY_PATH" ]; then
export LD_LIBRARY_PATH=$SGX_SDK/lib64:$SGX_SDK/sdk_libs
else
export LD_LIBRARY_PATH=$LD_LIBRARY_PATH:$SGX_SDK/lib64:$SGX_SDK/sdk_libs
fi
-----------------------
执行
source sgxsdk/environment
下载libsgx-enclave-common
https://download.01.org/intel-sgx/sgx_repo/ubuntu/pool/main/libs/libsgx-enclave-common/libsgx-enclave-common_2.17.100.3-focal1_amd64.deb
最新libsgx-enclave-common_2.19.100.3-focal1_amd64.deb
查看ubuntu的对应下载版本
lsb_release -a
focal对应focal版本
安装
dpkg -i libsgx-enclave-common_2.17.100.3-focal1_amd64.deb
查看help
service/build/target/release/kbupd help
运行 replica
service/build/target/release/kbupd --kbuptlsd-bin-file service/build/target/release/kbuptlsd --config-file ./service/config/replica.sample.yml --enclave-directory /home/ubuntu/SecureValueRecovery/service/kbupd/res/enclave/ replica --peer-ca-file certificate.txt --peer-key-file signal.lxrtalk.com.p12 --enclave-debug yes
运行service
nohup ./service/build/target/release/kbupd --config-file ./service/config/frontend.sample.yml --enclave-directory service/kbupd/res/enclave/ --kbuptlsd-bin-file service/ frontend --listen-api 127.0.0.1:8082 --peer-ca-file certificate.txt --peer-key-file signal.lxrtalk.com.p12 2>&1 &
报错

这个是psw安装错误,指向的urts so文件不对
psw安装
1.命令行运行以下命令添加下载Intel sgx psw的下载路径
echo 'deb [arch=amd64] https://download.01.org/intel-sgx/sgx_repo/ubuntu focal main' | sudo tee /etc/apt/sources.list.d/intel-sgx.list
注意,与ubuntu18.04不同,ubuntu20为ubuntu focal main。
2.进入如下网址下载密钥intel-sgx-deb.key
https://download.01.org/intel-sgx/sgx_repo/ubuntu/
3.进入下载目录,通过如下命令添加进仓库
sudo apt-key add intel-sgx-deb.key
运行后等一会儿看到【ok】就是运行成功。
4.更新一下apt-get的列表
sudo apt-get update
如果系统报错deb无法识别,进入/etc/apt/sources.list.d目录,修改intel-sgx.list文件,去掉deb [arch=amd64] https://download.01.org/intel-sgx/sgx_repo/ubuntu focal main两侧的引号。
5.分别安装SGX PSW 提供的3个服务
分别是launch、EPID-based attestation和Algorithm agnostic attestation,输入以下命令
sudo apt-get install libsgx-launch libsgx-urts
sudo apt-get install libsgx-epid libsgx-urts
sudo apt-get install libsgx-quote-ex libsgx-urts
sudo apt-get install libsgx-dcap-ql
20240604 报错 no device
进入bios,开启sgx,关闭虚拟线程,关闭secure boot

 浙公网安备 33010602011771号