keepalived的部署
keepalived的部署
准备环境
| 服务器类型 | Ip地址 | 系统 |
|---|---|---|
| 主服务器(master) | 192.168.7.10 | redhat7.4 |
| 从服务器(slave) | 192.168.7.11 | redhat7.4 |
配置主服务器
防火墙设置
 systemctl stop firewalld
 systemctl disable firewalld
 sed -ri 's/^(SELINUX=).*/\1disabled/g'/etc/selinux/config
 reboot
配置网络源并且下载epel源
curl -o /etc/yum.repos.d/CentOS7-Base-163.repo http://mirrors.163.com/.help/CentOS7-Base-163.repo
sed -i 's/\$releasever/7/g' /etc/yum.repos.d/CentOS7-Base-163.repo
sed -i 's/^enabled=.*/enabled=1/g' /etc/yum.repos.d/CentOS7-Base-163.repo
yum -y install epel-release
下载keepalived和nginx还有相关依赖
yum -y install  keepalived vim wget net-tools unzip zip gcc gcc-c++ nginx
#查看keepalived相关配置文件
rpm -ql keepalived
/etc/keepalived/keepalived.conf ----主配置文件
/usr/lib/systemd/system/keepalived.service ---服务文件地址
向nginx主页编写内容
cd /usr/share/nginx/html/
echo "matser" > index.html
systemctl start nginx
systemctl enable nginx
编写keepalived配置文件
#备份操作
mv /etc/keepalived/keepalived.conf{,.bak}
vim /etc/keepalived/keepalived.conf << EFO
! Configuration File for keepalived
global_defs {
   router_id lb01   #lb01是唯一标识
 }
vrrp_instance VI_1 {
    state MASTER
    interface ens33
    virtual_router_id 51
    priority 100	#优先级,一般主最高100
    advert_int 1	#刷新时间
    authentication {
        auth_type PASS
        auth_pass lzj123 #密码,主服务器与从服务器必须一样
    }
    virtual_ipaddress {
        192.168.7.100	#此为虚拟ip,自定义
    }
}
virtual_server 192.168.7.100 80 {
    delay_loop 6
    lb_algo rr
    lb_kind DR
    persistence_timeout 50
    protocol TCP
    real_server 192.168.7.10 80 {
        weight 1
        TCP_CHECK {
            connect_port 80
            connect_timeout 3
            nb_get_retry 3
            delay_before_retry 3
        }
    }
    real_server 192.168.7.11 80 {
        weight 1
        TCP_CHECK {
            connect_port 80
            connect_timeout 3
            nb_get_retry 3
            delay_before_retry 3
        }
    }
 }
EFO
systemctl start keepalived
systemctl enable keepalived
效果验证


从服务器配置
从服务器与主服务器几乎一致,就配置文件有所不同
一些操作省略........
编写nginx主页
cd /usr/share/nginx/html/
echo "slave" > index.html
systemctl start nginx
systemctl enable nginx
编写keepalived配置文件
#备份
mv /etc/keepalived/keepalived.conf{,.bak}
cat > /etc/keepalived/keepalived.conf << EOF
! Configuration File for keepalived
global_defs {
   router_id lb02
 }
vrrp_instance VI_1 {
    state BACKUP	#类型为从服务器
    interface ens33
    virtual_router_id 51
    priority 90
    advert_int 1
    authentication {
        auth_type PASS
        auth_pass lzj123
    }
    virtual_ipaddress {
        192.168.7.100	#虚拟ip,必须与主一样
    }
}
virtual_server 192.168.7.100 80 { #虚拟ip
    delay_loop 6
    lb_algo rr
    lb_kind DR
    persistence_timeout 50
    protocol TCP
    real_server 192.168.7.10 80 {   #主服务
        weight 1
        TCP_CHECK {
            connect_port 80
            connect_timeout 3
            nb_get_retry 3
            delay_before_retry 3
        }
    }
    real_server 192.168.7.11 80 {	#从服务
        weight 1
        TCP_CHECK {
            connect_port 80
            connect_timeout 3
            nb_get_retry 3
            delay_before_retry 3
        }
    }
 }
 EOF
 #启动 keepalived
 systemctl start keepalived nginx
 systemctl enable keepalived nginx
查看效果
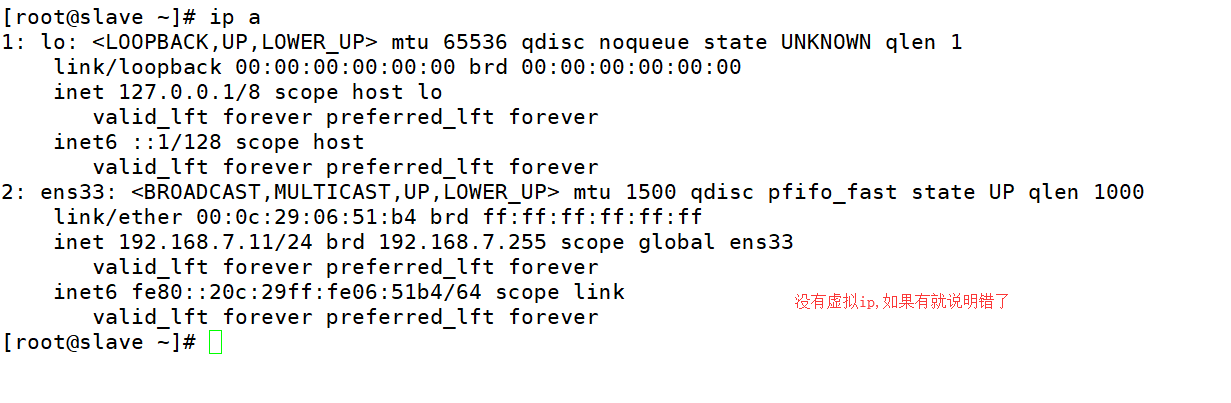
注意:从服务器是没有虚拟ip的
关闭主服务器的 keepalived和nginx,来查看效果
systemctl stop keepalived nginx
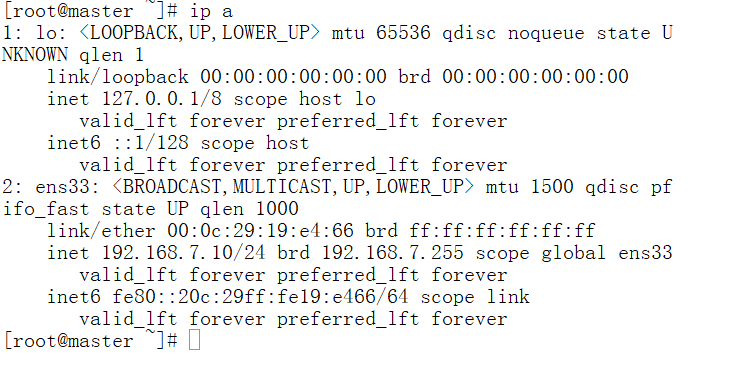
主服务器
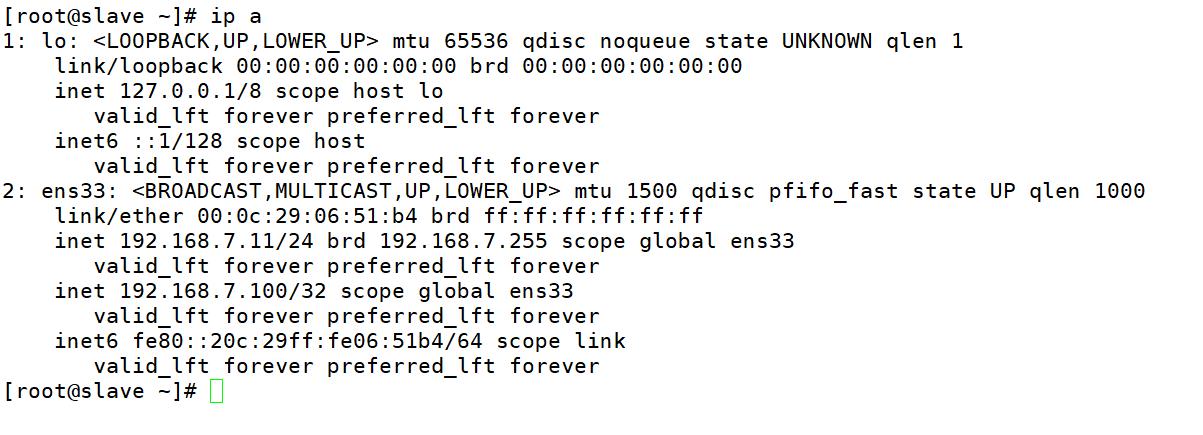
从服务器
可以看出从出现了虚拟ip,192.168.7.100


 浙公网安备 33010602011771号