

zabbix监控之mysql主从状态&mysql主从延迟
一、监控mysql主从状态
1、环境说明:
| 主机 | IP | 应用与系统版本 |
|---|---|---|
| 主数据库 | 192.168.56.22 | centos7/redhat7 mysql-5.7 |
| 从数据库 | 192.168.56.20 | centos7/redhat7 mysql-5.7 |
| zabbix服务器 | 192.168.56.23 | centos7/redhat7 |
2、mysql安装
安装主服务器(192.168.56.20)
//解压安装包至/usr/local下
[root@20liuzhenchao ~]# tar xf mysql-5.7.22-linux-glibc2.12-x86_64.tar.gz -C /usr/local/

//创建用户和组
[root@20liuzhenchao ~]# groupadd -r mysql
[root@20liuzhenchao ~]# useradd -M -s /sbin/nologin -g mysql mysql

//创建软链接并修改/usr/local/mysql目录属组
[root@20liuzhenchao local]# ln -sv mysql-5.7.22-linux-glibc2.12-x86_64/ mysql
"mysql" -> "mysql-5.7.22-linux-glibc2.12-x86_64/"
[root@20liuzhenchao local]# chown -R mysql.mysql mysql*
[root@20liuzhenchao local]# ll |grep mysql
lrwxrwxrwx   1 mysql mysql       36 5月  15 22:55 mysql -> mysql-5.7.22-linux-glibc2.12-x86_64/
drwxr-xr-x   9 mysql mysql      129 5月  15 22:46 mysql-5.7.22-linux-glibc2.12-x86_64

//添加环境变量
[root@20liuzhenchao local]# echo 'export PATH=/usr/local/mysql/bin:$PATH' > /etc/profile.d/mysql.sh
[root@20liuzhenchao local]# . /etc/profile.d/mysql.sh

//建立数据存放目录
[root@20liuzhenchao ~]# mkdir /opt/data
[root@20liuzhenchao ~]# chown -R mysql.mysql /opt/data
[root@20liuzhenchao ~]# ll /opt/data -d
drwxr-xr-x 2 mysql mysql 6 5月  15 23:02 /opt/data

//初始化数据库
[root@20liuzhenchao ~]# mysqld --initialize --user=mysql --datadir=/opt/data
2019-05-15T15:04:16.463631Z 0 [Warning] TIMESTAMP with implicit DEFAULT value is deprecated. Please use --explicit_defaults_for_timestamp server option (see documentation for more details).
2019-05-15T15:04:16.837927Z 0 [Warning] InnoDB: New log files created, LSN=45790
2019-05-15T15:04:16.899304Z 0 [Warning] InnoDB: Creating foreign key constraint system tables.
2019-05-15T15:04:17.011781Z 0 [Warning] No existing UUID has been found, so we assume that this is the first time that this server has been started. Generating a new UUID: b58e7a1c-7722-11e9-b5d5-000c29fc116c.
2019-05-15T15:04:17.012413Z 0 [Warning] Gtid table is not ready to be used. Table 'mysql.gtid_executed' cannot be opened.
2019-05-15T15:04:17.013201Z 1 [Note] A temporary password is generated for root@localhost: e88-hL,1?YRT//此处临时密码为:e88-hL,1?YRT

//修改配置文件
[root@20liuzhenchao ~]# vim /etc/my.cnf
[mysqld]
datadir=/opt/data
socket=/tmp/mysql.sock


//配置服务启动脚本
[root@20liuzhenchao ~]# cp -a /usr/local/mysql/support-files/mysql.server /etc/init.d/mysqld
[root@20liuzhenchao ~]# sed -ri 's#^(basedir=).*#\1/usr/local/mysql#g' /etc/init.d/mysqld
[root@20liuzhenchao ~]# sed -ri 's#^(datadir=).*#\1/opt/data#g' /etc/init.d/mysqld

//启动mysql
[root@20liuzhenchao ~]# service mysqld start
Starting MySQL. SUCCESS!
[root@20liuzhenchao ~]# ss -antl|grep 3306
LISTEN     0      80          :::3306                    :::*

//修改密码
[root@20liuzhenchao ~]# mysql -uroot -p'e88-hL,1?YRT' -e 'set password=password("liu123!");' --connect-expired-password
mysql: [Warning] Using a password on the command line interface can be insecure.从服务器(192.168.56.22)上mysql的安装略,与上同
3、mysql主从配置
//在主数据库里(192.168.56.22)创建一个同步账号授权给从数据库(192.168.56.20)使用
mysql> create user 'repl'@'192.168.56.20' identified by 'liu123!';
Query OK, 0 rows affected (0.00 sec)

mysql> grant replication slave on *.* to 'repl'@'192.168.56.20';
Query OK, 0 rows affected (0.00 sec)

mysql> flush privileges;
Query OK, 0 rows affected (0.00 sec)

//配置主数据库
[root@22liuzhenchao ~]# vim /etc/my.cnf
[mysqld]
server-id=1   //添加
log-bin=mysql-bin  //添加

//重启mysql并查看主库状态
[root@22liuzhenchao ~]# service mysqld restart
Shutting down MySQL.. SUCCESS!
Starting MySQL. SUCCESS!
[root@22liuzhenchao ~]# mysql -uroot -p'liu123!' -e 'show master status'
mysql: [Warning] Using a password on the command line interface can be insecure.
+------------------+----------+--------------+------------------+-------------------+
| File             | Position | Binlog_Do_DB | Binlog_Ignore_DB | Executed_Gtid_Set |
+------------------+----------+--------------+------------------+-------------------+
| mysql-bin.000001 |      154 |              |                  |                   |
+------------------+----------+--------------+------------------+-------------------+

//配置从数据库
[root@20liuzhenchao ~]# vim /etc/my.cnf
[mysqld]
basedir = /usr/local/mysql
datadir = /opt/data
socket = /tmp/mysql.sock
port = 3306
pid-file = /opt/data/mysql.pid
user = mysql
server-id = 2
relay-log = mysql-relay-bin

//重启数据库
[root@20liuzhenchao ~]# service mysqld restart
Shutting down MySQL.. SUCCESS!
Starting MySQL. SUCCESS!

//配置主从复制并查看状态
mysql> change master to master_host='192.168.56.22',master_user='repl',master_password='liu123!',master_log_file='mysql-bin.000001',master_log_pos=154;
Query OK, 0 rows affected, 2 warnings (2.23 sec)

mysql> start slave;
Query OK, 0 rows affected (0.00 sec)

mysql> show slave status \G
*************************** 1. row ***************************
               Slave_IO_State: Waiting for master to send event
                  Master_Host: 192.168.56.22
                  Master_User: repl
                  Master_Port: 3306
                Connect_Retry: 60
              Master_Log_File: mysql-bin.000001
          Read_Master_Log_Pos: 154
               Relay_Log_File: mysql-relay-bin.000002
                Relay_Log_Pos: 320
        Relay_Master_Log_File: mysql-bin.000001
             Slave_IO_Running: Yes
            Slave_SQL_Running: Yes
              Replicate_Do_DB:
                ....
                ....
4、监控mysql主从状态
1)监控主从状态配置
//在从数据库主机上添加监控用户zabbix,并赋予权限
mysql> create user 'zabbix'@'localhost' identified by 'liu123!';
Query OK, 0 rows affected (0.00 sec)
mysql> grant all on *.* to 'zabbix'@'localhost';
Query OK, 0 rows affected (0.00 sec)
mysql> flush privileges;
Query OK, 0 rows affected (0.01 sec)
//在从库上编辑zabbix-agent配置文件
[root@20liuzhenchao ~]# vim /usr/local/etc/zabbix_agentd.conf
UserParameter=db_status,mysql -uzabbix -p'liu123!' -e "show slave status\G" 2>/dev/null|egrep 'Slave_IO_Running|Slave_SQL_Running'|grep -v 'Slave_SQL_Running_State'|awk '{print $NF}'|grep -c Yes //添加此行
//重启zabbix_agentd服务
[root@20liuzhenchao ~]# pkill zabbix
[root@20liuzhenchao ~]# zabbix_agentd
//监控服务端测试
[root@zabbix ~]# zabbix_get -s 192.168.56.20 -k 'db_status'
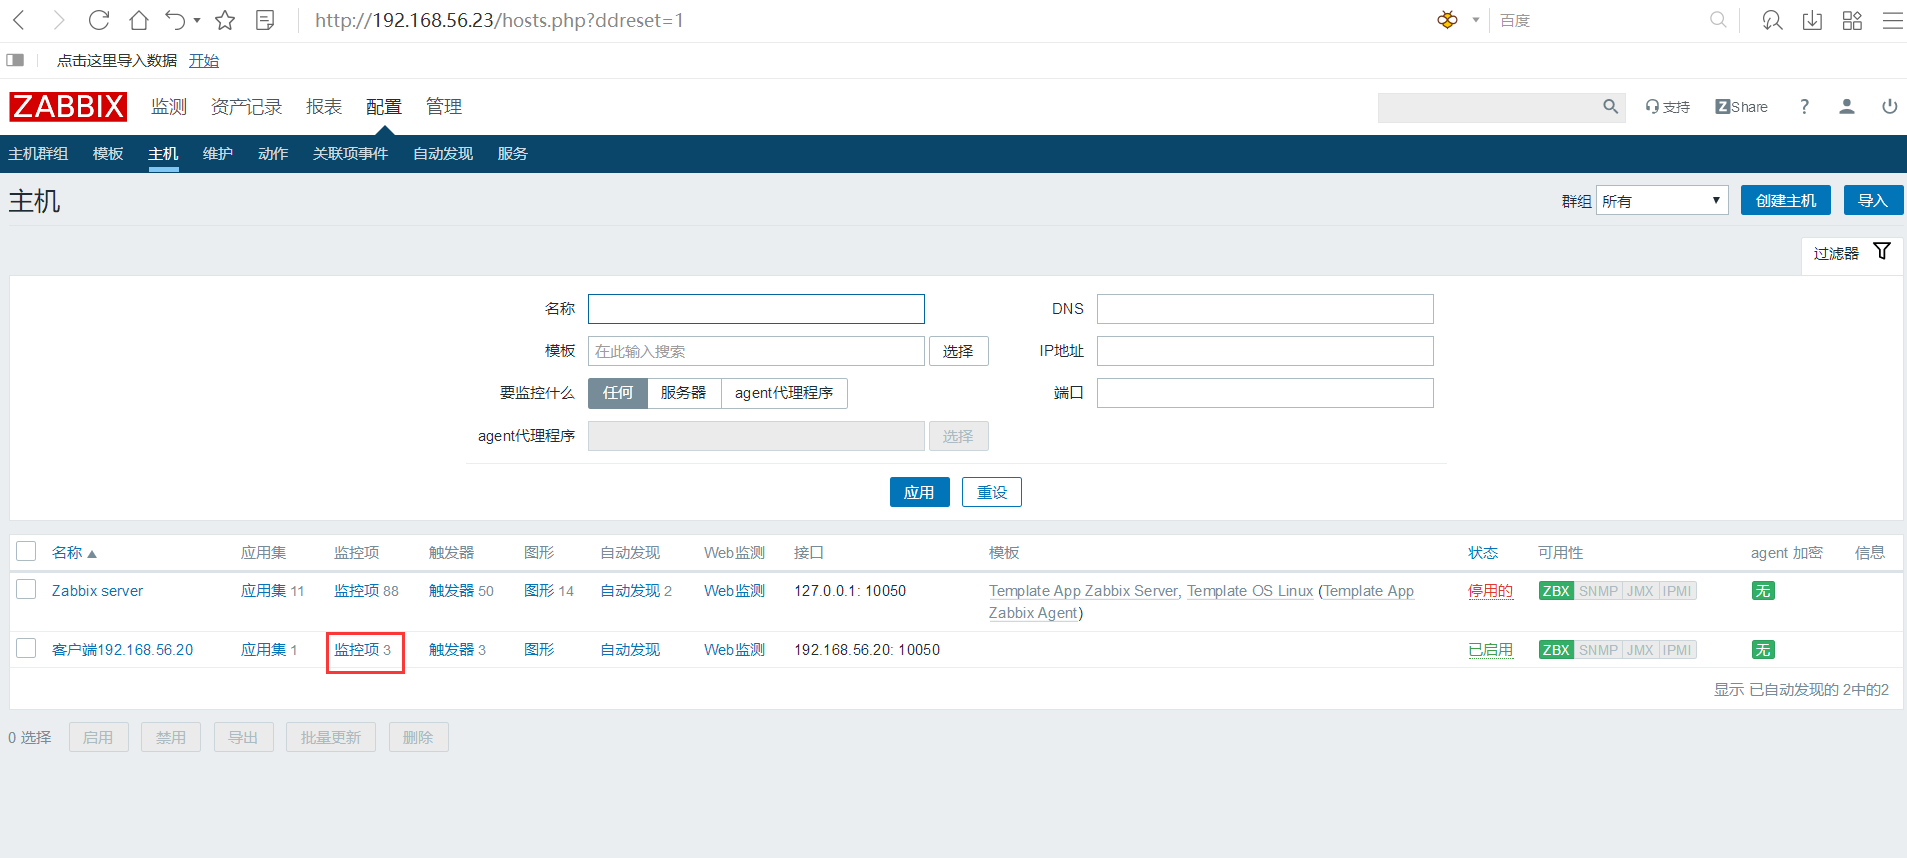
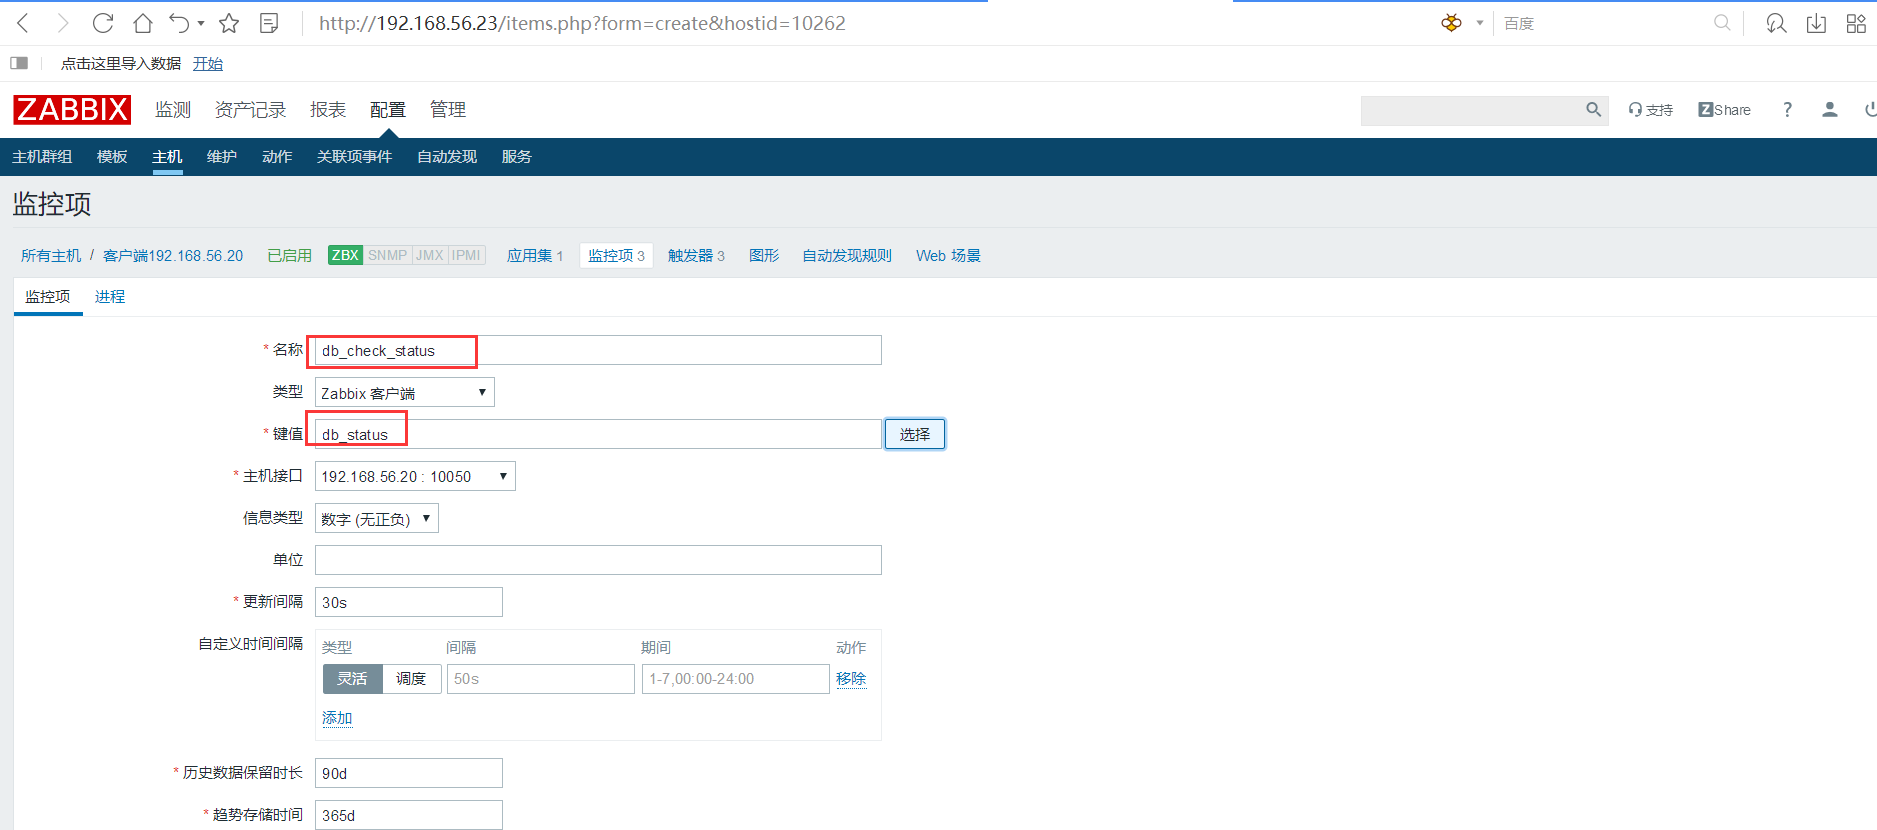
22)zabbix服务端web配置
创建监控项
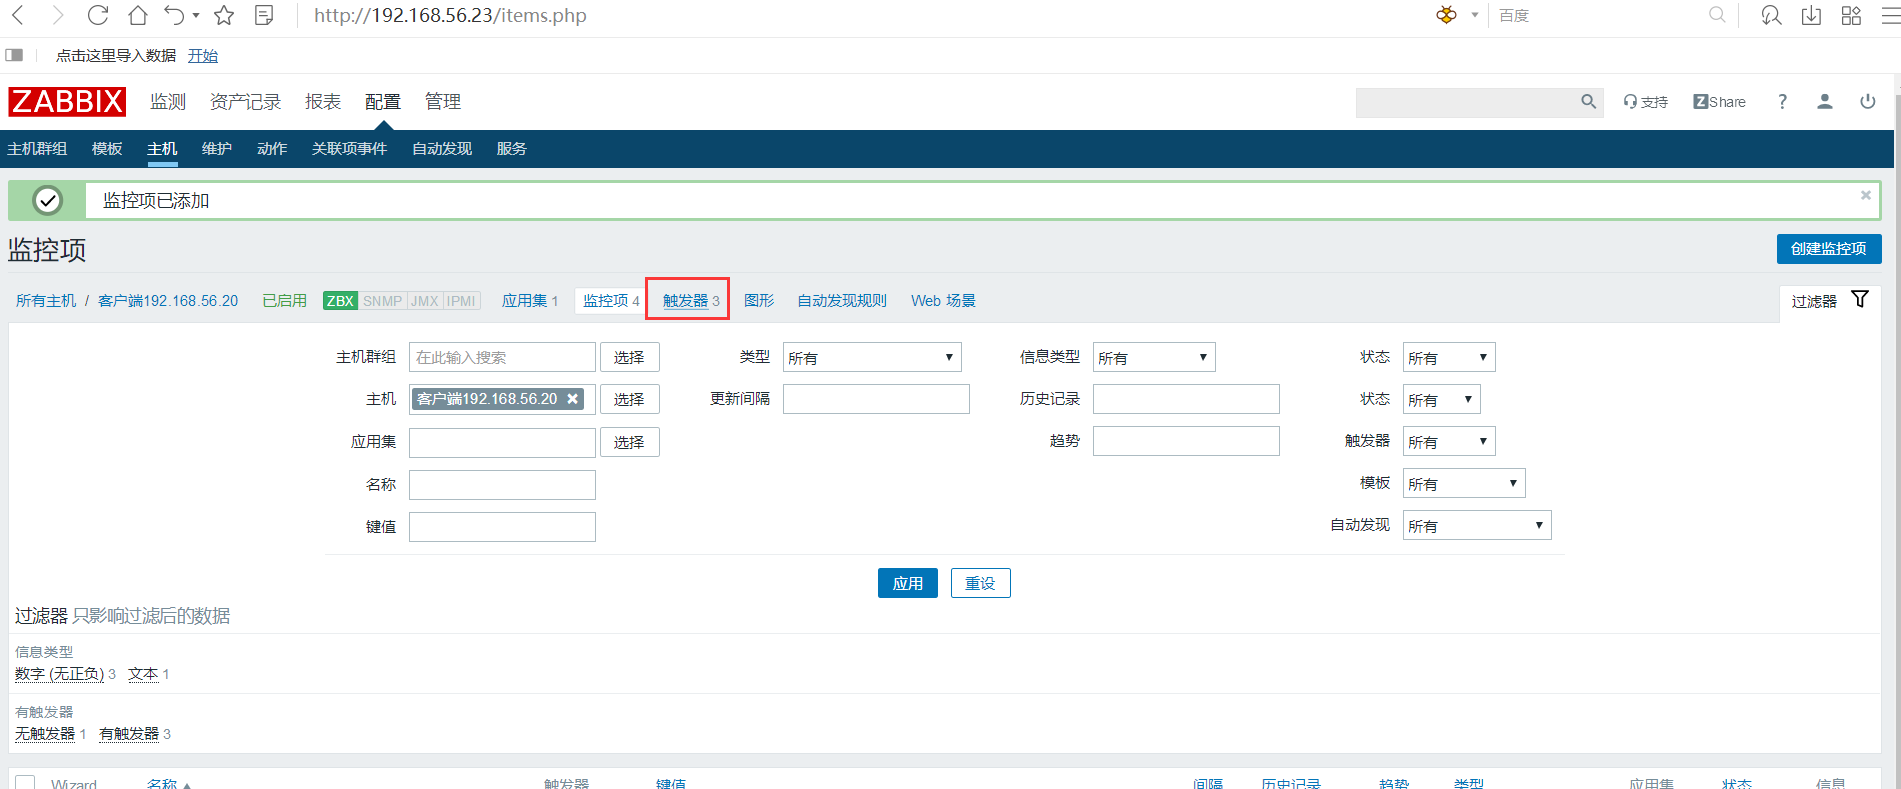
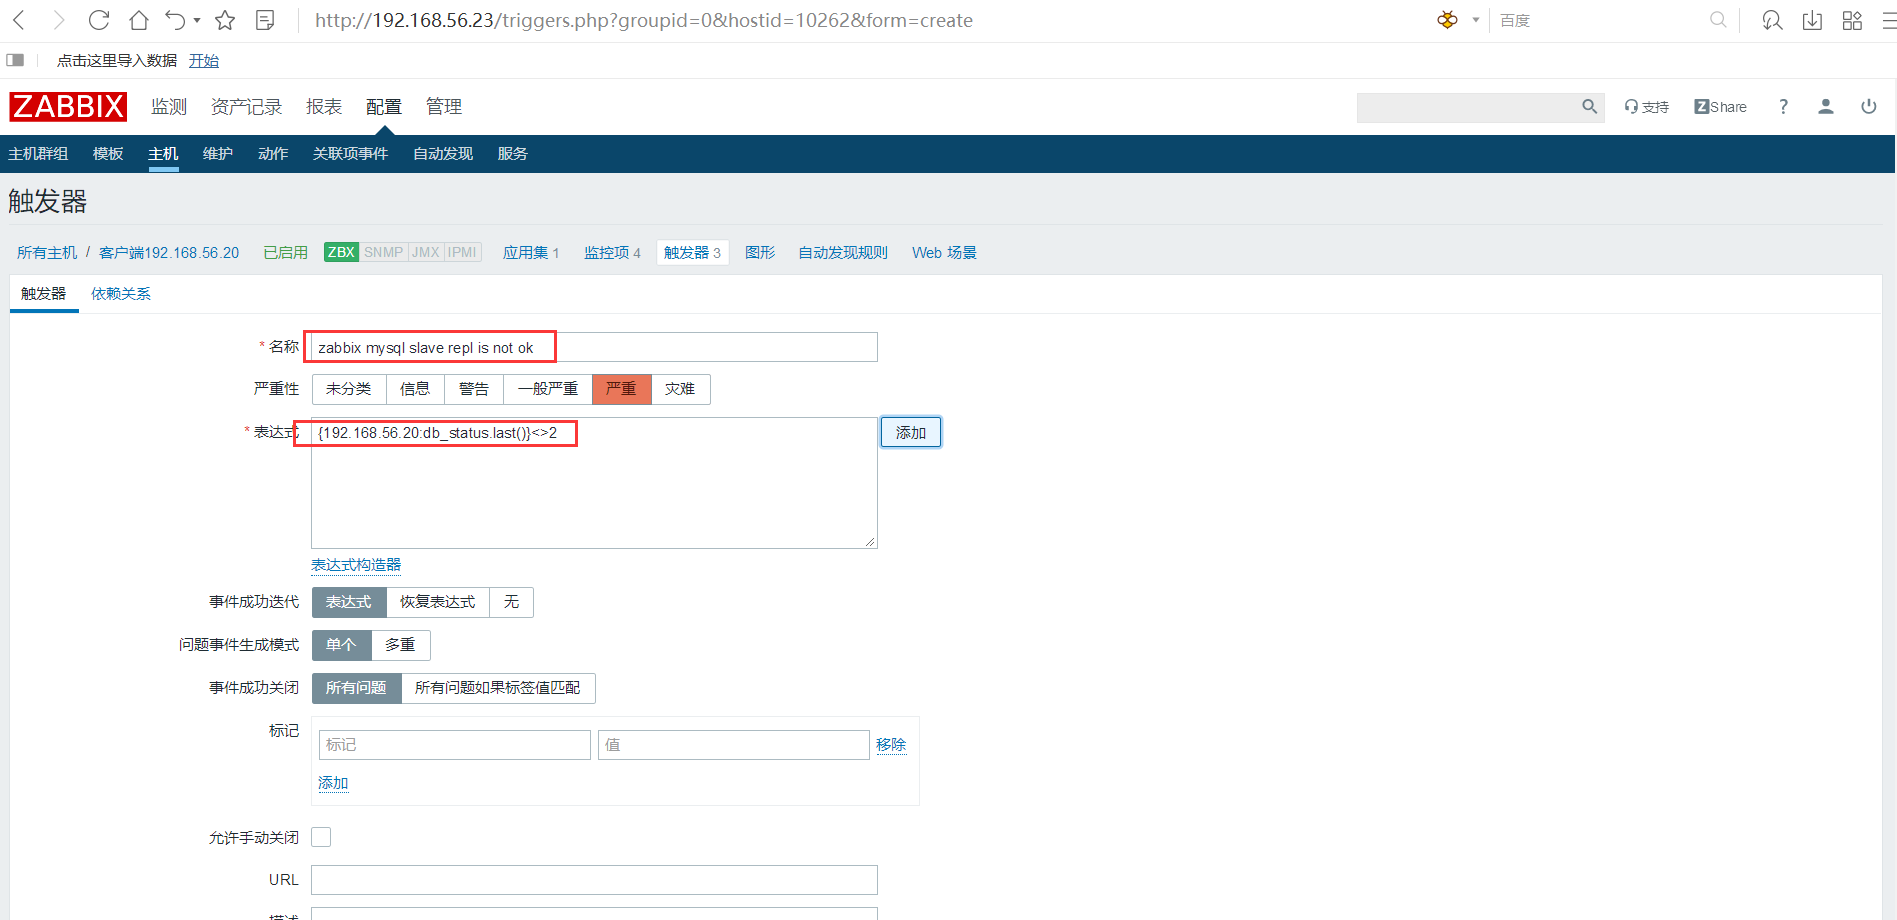
创建触发器
手动测试

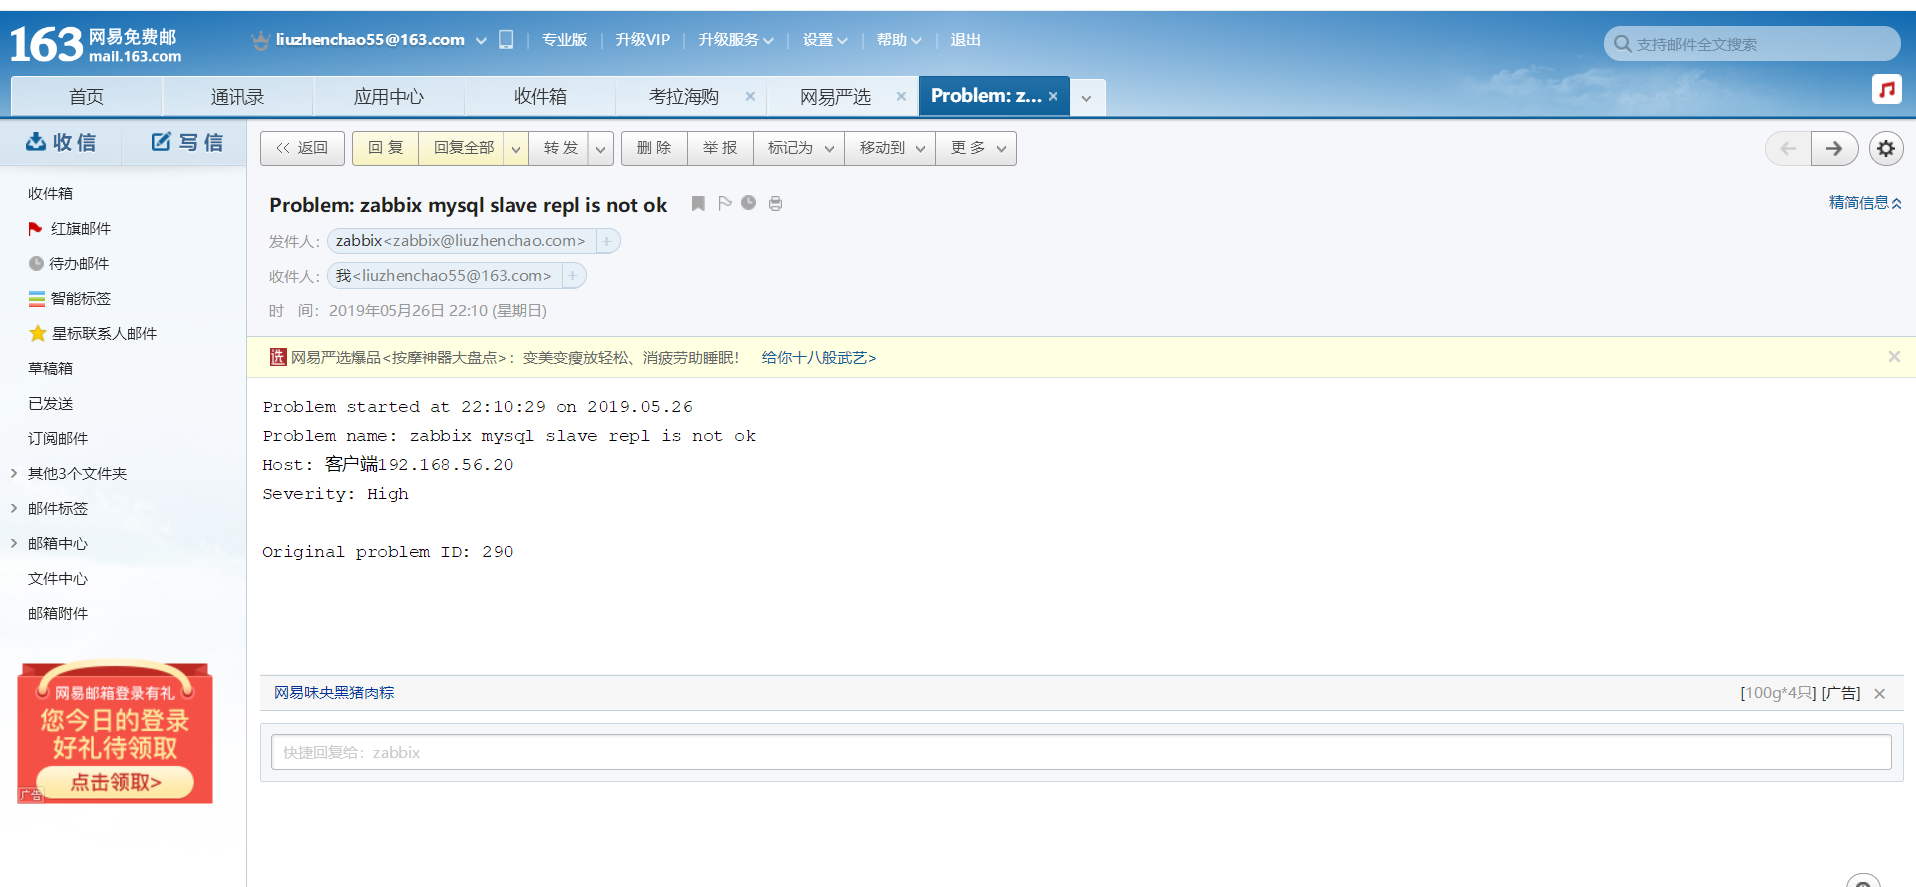
[root@20liuzhenchao ~]# mysql -uroot -p'liu123!'
mysql> stop slave;
Query OK, 0 rows affected (0.00 sec)
5、监控mysql主从延迟
1)//在从库上编辑zabbix-agent配置文件
[root@20liuzhenchao ~]# vim /usr/local/etc/zabbix_agentd.conf
UserParameter=db_delay,mysql -uzabbix -p'liu123!' -e "show slave status\G" 2>/dev/null|egrep 'Seconds_Behind_Master'|awk '{print $2}' //添加此行
//重启zabbix_agentd服务
[root@20liuzhenchao ~]# pkill zabbix
[root@20liuzhenchao ~]# zabbix_agentd
//监控服务端测试
[root@zabbix ~]# zabbix_get -s 192.168.56.20 -k db_delay
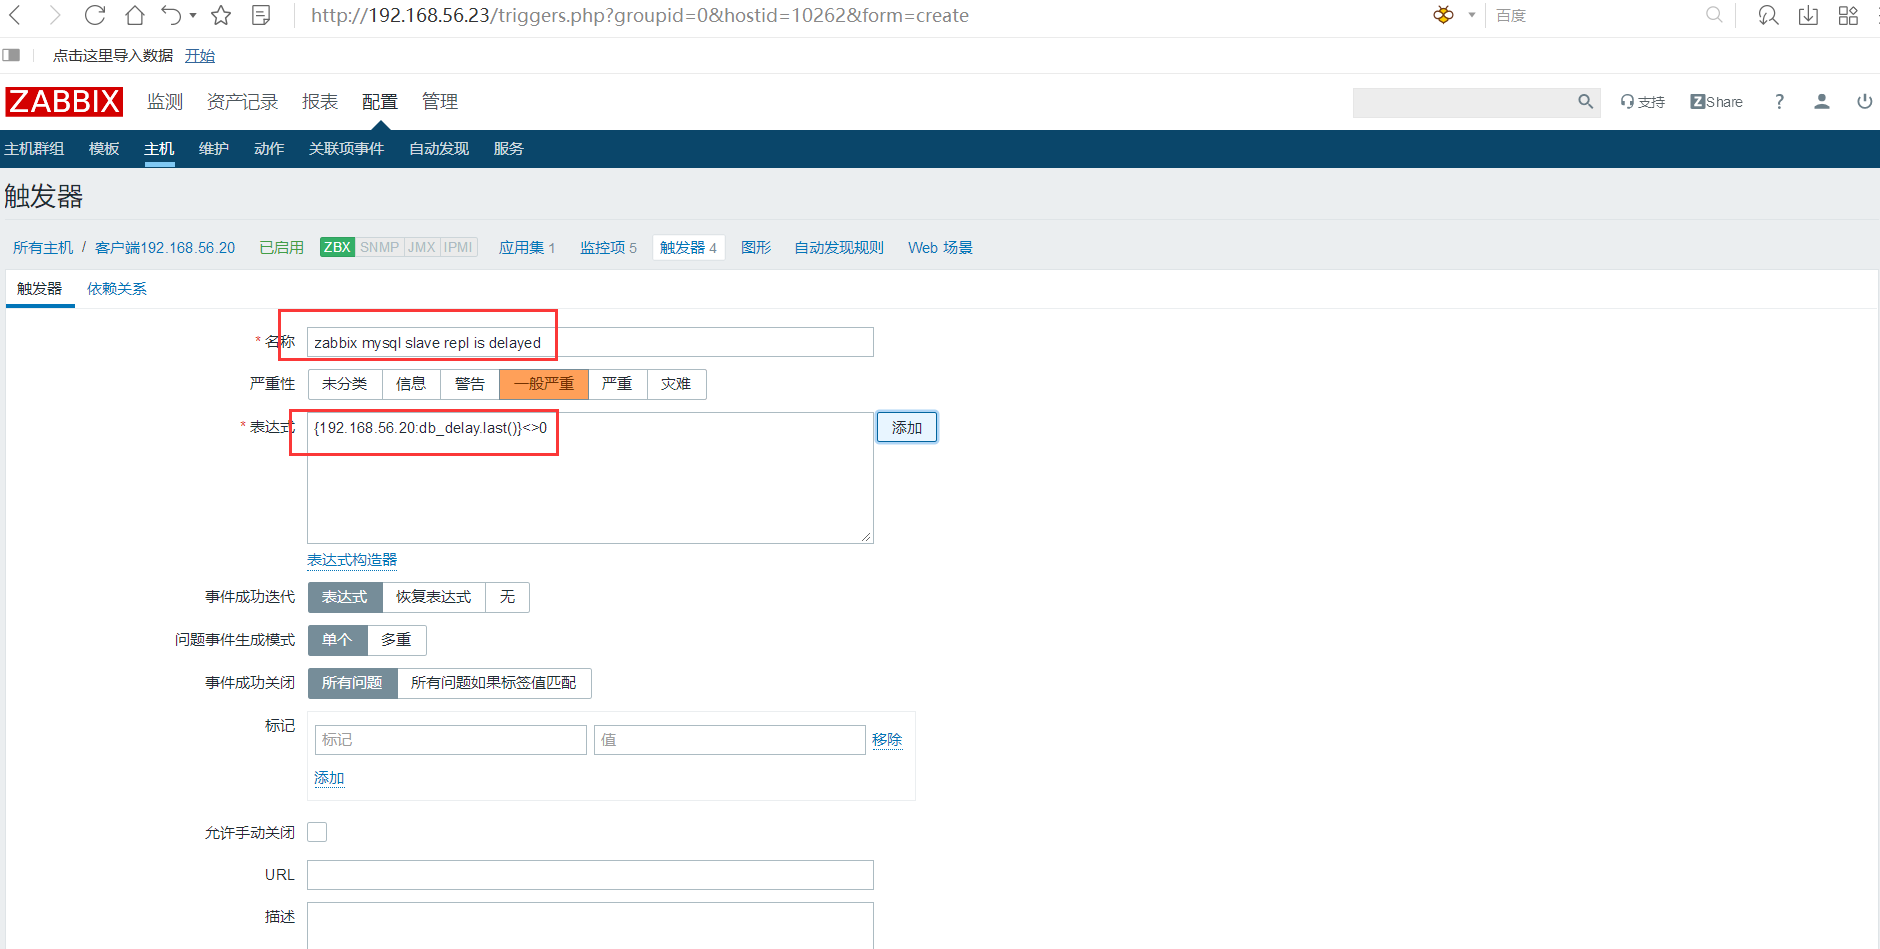
02)zabbix服务端web配置
创建监控项
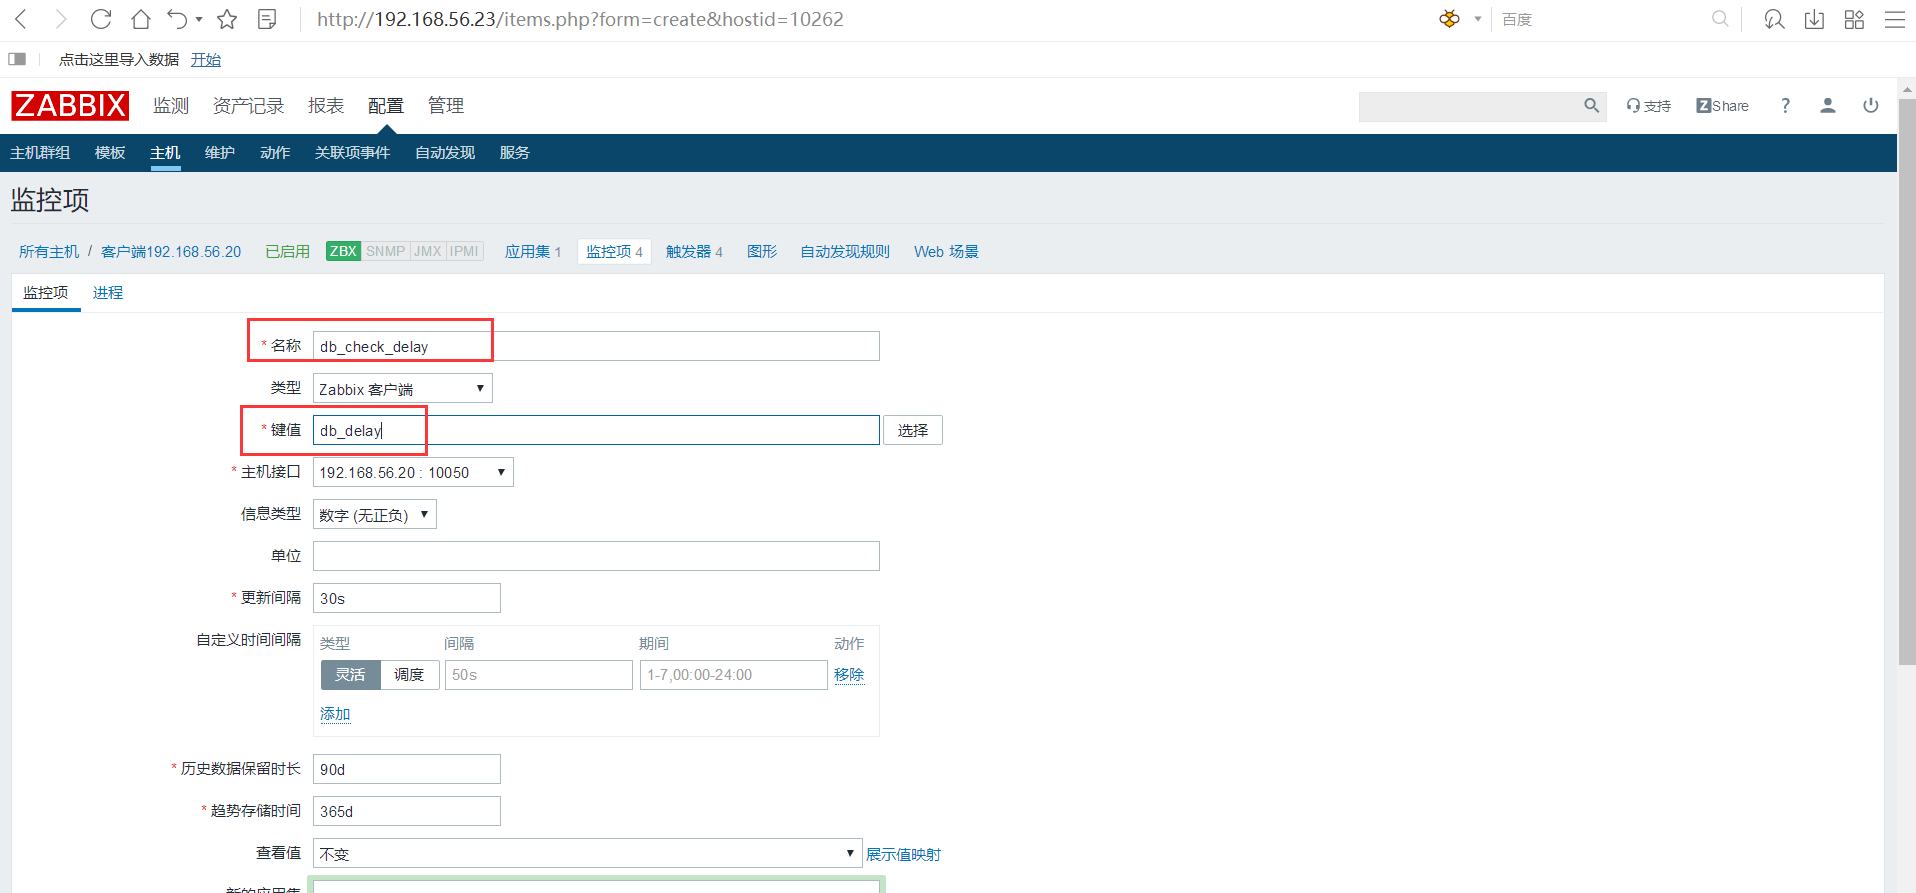
创建触发器
手动测试
[root@20liuzhenchao ~]# mysql -uroot -p'liu123!'
mysql> stop slave;
Query OK, 0 rows affected (0.00 sec)
//这里需要在主数据库中插入或改变庞大数据才能触发延迟,故这里无法测试告警 

 浙公网安备 33010602011771号