

HBase 2、HBase安装与初试牛刀
官方帮助文档:http://hbase.apache.org/book.html PDF:http://hbase.apache.org/apache_hbase_reference_guide.pdf
1、安装前准备
– Hadoop集群要启动正常
– Zookeeper集群启动正常
HBase 分布式存储的运行依托于Zookeeper和HDFS所以必须有一个完整的Hadoop分布式运行环境和Zookeeper运行环境;
Hadoop高可用安装参见:http://www.cnblogs.com/raphael5200/p/5154325.html
2、安装HBase
1)、配置hbase-env.sh
进入HBase 的conf目录下,编辑hbase-env.sh 添加如下配置:
# 指定HBase是否使用HBase本身自带的Zookeeper
export HBASE_MANAGES_ZK=false
# 指定Jdk目录
export JAVA_HOME=/usr/java/jdk1.7.0_79
# 指定Hadoop配置文件目录
export HBASE_CLASSPATH=/usr/local/hadoop-2.5.1/etc/hadoop
2)、配置hbase-site.xml
编辑conf目录下的hbase-site.xml,配置内容如下:
# 指定HDFS的根目录,在这个地方,如果想使用HBase高可用的话,必须配置成dfs.nameservices 不能配置节点名称
<property>
        <name>hbase.rootdir</name>
        <value>hdfs://raphael/hbase</value>
</property>
<property>
        <name>hbase.cluster.distributed</name>
        <value>true</value>
</property>
# 配置Zookeeper节点,配置可不加端口
<property>
        <name>hbase.zookeeper.quorum</name>
        <value>node5,node6,node7</value>
</property>
3)、配置reginservers,数据节点
编辑conf下的regionservers,在该文件中配置HBase的节点,每台节点占一行:
node5
node6
node7
4)、配置HBase环境变量
编辑/root/.bash_profile 在该文件中配置HBase的环境变量:
PATH=$PATH:$HOME/bin

JAVA_HOME=/usr/java/jdk1.7.0_79
PATH=$PATH:$JAVA_HOME/bin
export JAVA_HOME
HADOOP_HOME=/usr/local/hadoop-2.5.1
export HADOOP_HOME
HIVE_HOME=/usr/local/apache-hive-1.2.1
export HIVE_HOME
HBASE_HOME=/usr/local/hbase-1.1.3
export HBASE_HOME
PATH=$PATH:/usr/local/zookeeper-3.4.6/bin/:$HADOOP_HOME/bin/:$HADOOP_HOME/sbin/:$HIVE_HOME/bin/:$HBASE_HOME/bin
export PATH
配置完成以后,将HBase分发到其他的HBase节点上:
scp -r /usr/local/hbase root@node6:/usr/local/hbase
5)、启用HBase
#首先启动Zookeeper的节点
$ zkServer.sh start

#再启动Hadoop
$ start-all.sh

#最后启动HBase
$ start-hbase.sh
启动完成以后就可以访问 http://节点:16010 来查看了
在关闭节点之前必须先关闭HBase,否则下次启动HBase有可以会出错;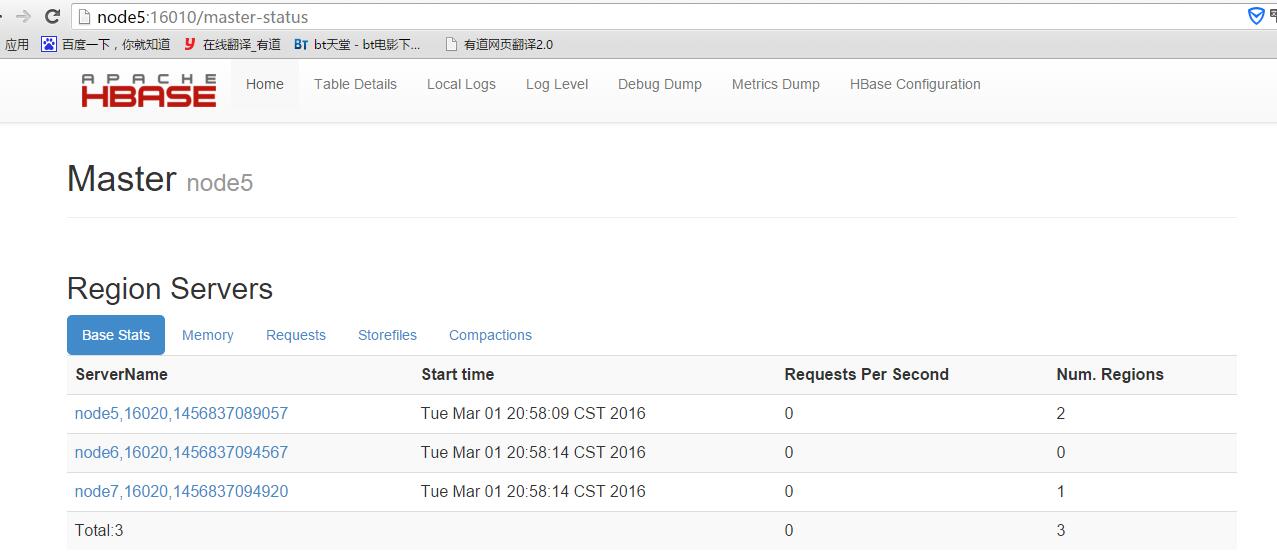
3、使用HBase 和 Hbase使用帮助
1)、进入HBase
#使用命令进入HBase Shell
$ hbase shell

The HBase shell is the (J)Ruby IRB with the above HBase-specific commands added.
For more on the HBase Shell, see http://hbase.apache.org/book.html
hbase(main):003:0>
2)、使用HBase帮助
HBase 提供了大量的帮助文档,只要在HBase 下使用命令help就能够查看HBase所有关键字的帮助
hbase(main):003:0> help

HBase Shell, version 1.1.3, r72bc50f5fafeb105b2139e42bbee3d61ca724989, Sat Jan 16 18:29:00 PST 2016
Type 'help "COMMAND"', (e.g. 'help "get"' -- the quotes are necessary) for help on a specific command.
Commands are grouped. Type 'help "COMMAND_GROUP"', (e.g. 'help "general"') for help on a command group.

COMMAND GROUPS:
  Group name: general
  Commands: status, table_help, version, whoami

  Group name: ddl
  Commands: alter, alter_async, alter_status, create, describe, disable, disable_all, drop, drop_all, enable, enable_all, exists, get_table, is_disabled, is_enabled, list, show_filters

  Group name: namespace
  Commands: alter_namespace, create_namespace, describe_namespace, drop_namespace, list_namespace, list_namespace_tables

  Group name: dml
  Commands: append, count, delete, deleteall, get, get_counter, get_splits, incr, put, scan, truncate, truncate_preserve

...
如果不知道某个关键字如何使用的话,只需要在Hbase下直接建入该关键字即可:
hbase(main):004:0> put

ERROR: wrong number of arguments (0 for 4)

Here is some help for this command:
Put a cell 'value' at specified table/row/column and optionally
timestamp coordinates.  To put a cell value into table 'ns1:t1' or 't1'
at row 'r1' under column 'c1' marked with the time 'ts1', do:

  hbase> put 'ns1:t1', 'r1', 'c1', 'value'
  hbase> put 't1', 'r1', 'c1', 'value'
  hbase> put 't1', 'r1', 'c1', 'value', ts1
  hbase> put 't1', 'r1', 'c1', 'value', {ATTRIBUTES=>{'mykey'=>'myvalue'}}
  hbase> put 't1', 'r1', 'c1', 'value', ts1, {ATTRIBUTES=>{'mykey'=>'myvalue'}}
  hbase> put 't1', 'r1', 'c1', 'value', ts1, {VISIBILITY=>'PRIVATE|SECRET'}

The same commands also can be run on a table reference. Suppose you had a reference
t to table 't1', the corresponding command would be:

  hbase> t.put 'r1', 'c1', 'value', ts1, {ATTRIBUTES=>{'mykey'=>'myvalue'}}
在HBase 下,如果输入内容错了,使用回退键是不管用的,必须使用Ctrl+回退键才行。
3)、创建表、插入数据、查询数据
进入hbase shell console
    $HBASE_HOME/bin/hbase shell
如果有kerberos认证,需要事先使用相应的keytab进行一下认证(使用kinit命令),认证成功之后再使用hbase shell进入可以使用whoami命令可查看当前用户
    hbase(main)> whoami
表的管理
1)查看有哪些表
    hbase(main)> list
2)创建表

    # 语法:create <table>, {NAME => <family>, VERSIONS => <VERSIONS>}
    # 例如:创建表t1,有两个family name:f1,f2,且版本数均为2
    hbase(main)> create 't1',{NAME => 'f1', VERSIONS => 2},{NAME => 'f2', VERSIONS => 2}
3)删除表
    分两步:首先disable,然后drop
    例如:删除表t1

    hbase(main)> disable 't1'
    hbase(main)> drop 't1'
4)查看表的结构

    # 语法:describe <table>
    # 例如:查看表t1的结构
    hbase(main)> describe 't1'
5)修改表结构
    修改表结构必须先disable

    # 语法:alter 't1', {NAME => 'f1'}, {NAME => 'f2', METHOD => 'delete'}
    # 例如:修改表test1的cf的TTL为180天
    hbase(main)> disable 'test1'
    hbase(main)> alter 'test1',{NAME=>'body',TTL=>'15552000'},{NAME=>'meta', TTL=>'15552000'}
    hbase(main)> enable 'test1'
权限管理
1)分配权限
    # 语法 : grant <user> <permissions> <table> <column family> <column qualifier> 参数后面用逗号分隔
    # 权限用五个字母表示: "RWXCA".
    # READ('R'), WRITE('W'), EXEC('X'), CREATE('C'), ADMIN('A')
    # 例如,给用户‘test'分配对表t1有读写的权限,
    hbase(main)> grant 'test','RW','t1'
2)查看权限

    # 语法:user_permission <table>
    # 例如,查看表t1的权限列表
    hbase(main)> user_permission 't1'
3)收回权限

    # 与分配权限类似,语法:revoke <user> <table> <column family> <column qualifier>
    # 例如,收回test用户在表t1上的权限
    hbase(main)> revoke 'test','t1'
表数据的增删改查
1)添加数据
    # 语法:put <table>,<rowkey>,<family:column>,<value>,<timestamp>
    # 例如:给表t1的添加一行记录:rowkey是rowkey001,family name:f1,column name:col1,value:value01,timestamp:系统默认
    hbase(main)> put 't1','rowkey001','f1:col1','value01'
    用法比较单一。
2)查询数据
  a)查询某行记录

    # 语法:get <table>,<rowkey>,[<family:column>,....]
    # 例如:查询表t1,rowkey001中的f1下的col1的值
    hbase(main)> get 't1','rowkey001', 'f1:col1'
    # 或者:
    hbase(main)> get 't1','rowkey001', {COLUMN=>'f1:col1'}
    # 查询表t1,rowke002中的f1下的所有列值
    hbase(main)> get 't1','rowkey001'
  b)扫描表

    # 语法:scan <table>, {COLUMNS => [ <family:column>,.... ], LIMIT => num}
    # 另外,还可以添加STARTROW、TIMERANGE和FITLER等高级功能
    # 例如:扫描表t1的前5条数据
    hbase(main)> scan 't1',{LIMIT=>5}
  c)查询表中的数据行数

    # 语法:count <table>, {INTERVAL => intervalNum, CACHE => cacheNum}
    # INTERVAL设置多少行显示一次及对应的rowkey,默认1000;CACHE每次去取的缓存区大小,默认是10,调整该参数可提高查询速度
    # 例如,查询表t1中的行数,每100条显示一次,缓存区为500
    hbase(main)> count 't1', {INTERVAL => 100, CACHE => 500}
3)删除数据
  a )删除行中的某个列值

    # 语法:delete <table>, <rowkey>,  <family:column> , <timestamp>,必须指定列名
    # 例如:删除表t1,rowkey001中的f1:col1的数据
    hbase(main)> delete 't1','rowkey001','f1:col1'
    注:将删除改行f1:col1列所有版本的数据
  b )删除行

    # 语法:deleteall <table>, <rowkey>,  <family:column> , <timestamp>,可以不指定列名,删除整行数据
    # 例如:删除表t1,rowk001的数据
    hbase(main)> deleteall 't1','rowkey001'
  c)删除表中的所有数据

    # 语法: truncate <table>
    # 其具体过程是:disable table -> drop table -> create table
    # 例如:删除表t1的所有数据
    hbase(main)> truncate 't1'
Region管理
1)移动region
    # 语法:move 'encodeRegionName', 'ServerName'
    # encodeRegionName指的regioName后面的编码,ServerName指的是master-status的Region Servers列表
    # 示例
    hbase(main)>move '4343995a58be8e5bbc739af1e91cd72d', 'db-41.xxx.xxx.org,60020,1390274516739'
2)开启/关闭region

    # 语法:balance_switch true|false
    hbase(main)> balance_switch
3)手动split

    # 语法:split 'regionName', 'splitKey'
4)手动触发major compaction

    #语法:
    #Compact all regions in a table:
    #hbase> major_compact 't1'
    #Compact an entire region:
    #hbase> major_compact 'r1'
    #Compact a single column family within a region:
    #hbase> major_compact 'r1', 'c1'
    #Compact a single column family within a table:
    #hbase> major_compact 't1', 'c1'
配置管理及节点重启
1)修改hdfs配置
    hdfs配置位置:/etc/hadoop/conf
    # 同步hdfs配置
    cat /home/hadoop/slaves|xargs -i -t scp /etc/hadoop/conf/hdfs-site.xml hadoop@{}:/etc/hadoop/conf/hdfs-site.xml
    #关闭:
    cat /home/hadoop/slaves|xargs -i -t ssh hadoop@{} "sudo /home/hadoop/cdh4/hadoop-2.0.0-cdh4.2.1/sbin/hadoop-daemon.sh --config /etc/hadoop/conf stop datanode"
    #启动:
    cat /home/hadoop/slaves|xargs -i -t ssh hadoop@{} "sudo /home/hadoop/cdh4/hadoop-2.0.0-cdh4.2.1/sbin/hadoop-daemon.sh --config /etc/hadoop/conf start datanode"
2)修改hbase配置
    hbase配置位置:

    # 同步hbase配置
    cat /home/hadoop/hbase/conf/regionservers|xargs -i -t scp /home/hadoop/hbase/conf/hbase-site.xml hadoop@{}:/home/hadoop/hbase/conf/hbase-site.xml

    # graceful重启
    cd ~/hbase
    bin/graceful_stop.sh --restart --reload --debug inspurXXX.xxx.xxx.org

 浙公网安备 33010602011771号