
Linux系统下命令静默安装weblogic12c
准备工作
1. 新建用户组 web
[root@edwcube3 ~]# groupadd web
2. 新建用户weblogic 并修改用户密码
[root@edwcube3 ~]# useradd -g web weblogic //添加用户,并用-g参数来制定 web用户组
[root@edwcube3 ~]
[root@edwcube3 ~]# passwd weblogic //passwd命令修改密码
3. 安装jdk,并配置环境变量
4. 下载weblogic包
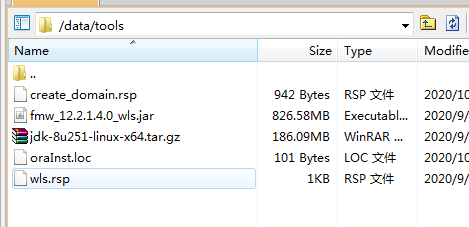
到oracle官网下载.jar结尾的weblogc包,然后放在weblogic用户下的/data/tools目录下(亦可以其他)。
开始安装
1. /data/tools下创建配置文件
创建oraInst.loc文件(此文件具体作用:Oralce的安装升级都需要用到这个目录。官方解释:If you plan to install Oracle products using Oracle Universal Installer in silent or suppressed mode, you must manually create the oraInst.loc file if it does not already exist. This file specifies the location of the Oracle Inventory directory where Oracle Universal Installer creates the inventory of Oracle products installed on the system.)
内容如下:
#Oracle Installer Location File Location
inventory_loc=/data/wls12c/oraInventory
inst_group=weblogic
创建 wls.rsp响应文件:
内容如下:
[ENGINE]
#DO NOT CHANGE THIS.
Response File Version=1.0.0.0.0
[GENERIC]
##The oracle home location. This can be an existing Oracle Home #or a new Oracle Home
#除了这里需要为需要安装的目录以外,别的地方不需要做修改
ORACLE_HOME=/data/wls12c/wlserver
##Set this variable value to the Installation Type selected. e.g. WebLogic Server, Coherence, Complete with Examples.
#
INSTALL_TYPE=WebLogic Server
#
##Provide the My Oracle Support Username. If you wish to ignore Oracle Configuration Manager configuration provide empty string for user name.
#
MYORACLESUPPORT_USERNAME=
#
##Provide the My Oracle Support Password
#
#MYORACLESUPPORT_PASSWORD=<SECURE VALUE>
MYORACLESUPPORT_PASSWORD=
#
##Set this to true if you wish to decline the security updates. Setting this to true and providing empty string for My Oracle Support username will ignore the Oracle Configuration Manager configuration
#
DECLINE_SECURITY_UPDATES=true
#
##Set this to true if My Oracle Support Password is specified
#
SECURITY_UPDATES_VIA_MYORACLESUPPORT=false
#
##Provide the Proxy Host
#
PROXY_HOST=
#
##Provide the Proxy Port
#
PROXY_PORT=
#
##Provide the Proxy Username
#
PROXY_USER=
#
##Provide the Proxy Password
#
PROXY_PWD=<SECURE VALUE>
#
##Type String (URL format) Indicates the OCM Repeater URL which should be of the format [scheme[Http/Https]]://[repeater host]:[repeater port]
#
COLLECTOR_SUPPORTHUB_URL=
2. 开始静默安装。
$ cd /data/tools/
$ java -jar fmw_12.2.1.4.0_wls.jar -silent -responsefile /data/tools/wls.rsp -invPtrLoc /data/tools/oraInst.loc
3. 创建域路径
$ mkdir -p /data/wls12c/wlserver/user_projects/domains/v7_domain
与weblogic安装路径保持一致。
4. /data/tools下创建 create_domain.rsp(域的 参数文件 (用户名,密码,端口等)
read template from "/data/wls12c/wlserver/wlserver/common/templates/wls/wls.jar";

set JavaHome "/data/weblogic/jdk1.8.0_251";

set ServerStartMode "prod";

find Server "AdminServer" as AdminServer;

set AdminServer.ListenAddress "";

set AdminServer.ListenPort "7001";

//set AdminServer.SSL.Enabled "true";
//set AdminServer.SSL.ListenPort "8002";
//We can directly create a new managed server.
//create Server "base" as BASE;
//set BASE.ListenAddress "";
//set BASE.ListenPort "8003";
//set BASE.SSL.Enabled "true";
//set BASE.SSL.ListenPort "8004″;
//Create Machine
//create Machine "base" as Machinename;
//use templates default weblogic user

find User "weblogic" as u1;

set u1.password "weblogic123";

//create a new user
//create User "weblogic2" as u2;
//set u2.password "weblogic123";

write domain to "/data/wls12c/wlserver/user_projects/domains/v7_domain";
//The domain name will be "demo-domain"
close template;
5. 开始静默创建域
$ cd /data/wls12c/wlserver/wlserver/common/bin/
$ ./config.sh -mode=silent -silent_script=/data/tools/create_domain.rsp -logfile=/data/tools/create_domain.log

6. 启动weblogic
$ cd /data/wls12c/wlserver/user_projects/domains/v7_domain/bin
$ ./startWebLogic.sh
7. 页面访问刚才创建好的域:成功
参考文件:
https://jingyan.baidu.com/article/59703552aea8bf8fc0074091.html

 浙公网安备 33010602011771号