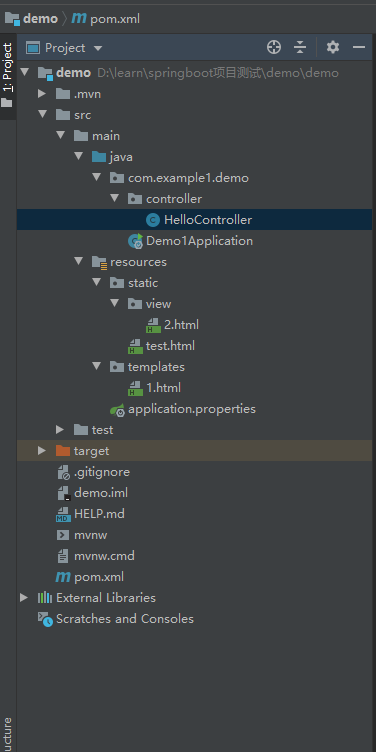
新建springboot项目,访问前端界面
直接在IDEA中下载依赖会比较慢,将常用依赖下载到本地,然后从本地加载依赖会比较快。(方法可以搜,很多)
pom.xml
<?xml version="1.0" encoding="UTF-8"?>
<project xmlns="http://maven.apache.org/POM/4.0.0" xmlns:xsi="http://www.w3.org/2001/XMLSchema-instance"
    xsi:schemaLocation="http://maven.apache.org/POM/4.0.0 https://maven.apache.org/xsd/maven-4.0.0.xsd">
    <modelVersion>4.0.0</modelVersion>
    <parent>
        <groupId>org.springframework.boot</groupId>
        <artifactId>spring-boot-starter-parent</artifactId>
        <version>2.7.17</version>

        <relativePath/> <!-- lookup parent from repository -->
    </parent>
    <groupId>com.example1</groupId>
    <artifactId>demo</artifactId>
    <version>1</version>
    <name>demo1</name>
    <packaging>war</packaging>
    <description>Demo project for Spring Boot</description>
    <properties>
        <java.version>1.8</java.version>
    </properties>
    <dependencies>
        <dependency>
            <groupId>org.springframework.boot</groupId>
            <artifactId>spring-boot-starter</artifactId>
        </dependency>

        <dependency>
            <groupId>org.springframework.boot</groupId>
            <artifactId>spring-boot-starter-test</artifactId>
            <scope>test</scope>
        </dependency>

        <dependency>
            <groupId>org.springframework.boot</groupId>
            <artifactId>spring-boot-starter-web</artifactId>
            <exclusions>
                <exclusion>
                    <groupId>org.springframework.boot</groupId>
                    <artifactId>spring-boot-starter-tomcat</artifactId>
                </exclusion>
            </exclusions>
        </dependency>

        <!-- thymeleaf依赖 -->
        <dependency>
            <groupId>org.springframework.boot</groupId>
            <artifactId>spring-boot-starter-thymeleaf</artifactId>
        </dependency>

        <dependency>
            <groupId>org.springframework.boot</groupId>
            <artifactId>spring-boot-starter-tomcat</artifactId>
            <!-- 该包只在编译和测试的时候使用 -->
            <scope>provided</scope><!--由JDK或者容器提供-->
        </dependency>
    </dependencies>

    <build>
        <plugins>
            <plugin>
                <groupId>org.springframework.boot</groupId>
                <artifactId>spring-boot-maven-plugin</artifactId>
            </plugin>
        </plugins>

        <resources>
            <resource>
                <directory>src/main/resources</directory>
                <includes>
<!--                    // 这里我们放行了 .properties 和 .xml 的文件-->
<!--                    // 但是 .html 和 css,js文件都没有放行-->
<!--                    // 所以造成资源访问不到的 404 错误-->
                    <include>**/*.properties</include>
                    <include>**/*.xml</include>

<!--                    // 加上以下几行正常访问-->
                    <include>**/*.html</include>
                    <include>**/*.js</include>
                    <include>**/*.css</include>

                </includes>
                <filtering>true</filtering>
            </resource>
            <resource>
                <directory>src/main/java</directory>
                <includes>
                    <include>**/*.properties</include>
                    <include>**/*.xml</include>
                </includes>
                <filtering>true</filtering>
            </resource>
        </resources>

    </build>

</project>
启动入口:
package com.example1.demo;

import org.slf4j.LoggerFactory;
import org.springframework.boot.SpringApplication;
import org.springframework.boot.autoconfigure.SpringBootApplication;
import org.springframework.boot.builder.SpringApplicationBuilder;
import org.springframework.boot.web.servlet.support.SpringBootServletInitializer;

import java.util.logging.Logger;


@SpringBootApplication
public class Demo1Application extends SpringBootServletInitializer {

//    public static void main(String[] args) {
//        SpringApplication.run(Demo1Application.class, args);
//    }
//    @Override
//    protected SpringApplicationBuilder configure(SpringApplicationBuilder application) {
//        return application.sources(Demo1Application.class);
//    }

    public static void main(String[] args) {
        System.out.println(Thread.currentThread().getName());
        System.out.println("app begin to start...");
        SpringApplication.run(Demo1Application.class, args);
        System.out.println("app start success...");

    }
    @Override
    protected SpringApplicationBuilder configure(SpringApplicationBuilder application) {
        return application.sources(Demo1Application.class);
    }
}
Controller
package com.example1.demo.controller;

import org.springframework.stereotype.Controller;
import org.springframework.web.bind.annotation.RequestMapping;

//可以返回视图
//自动为springboot应用进行配置
//@EnableAutoConfiguration


 @Controller
public class HelloController {

    @RequestMapping("/myIndex")
    public String index() {
        System.out.println("hello.springboot的第一个controller");
        return "1";
    }
}
打包成jar包的话,直接运行 java -jar xxx.jar
浏览器访问:
http://localhost:8080/test.html
http://localhost:8080/view/2.html
http://localhost:8080/myIndex
打成war包:放到tomcat的webapps目录,运行tomcat,会得到一个xxx项目的文件夹
浏览器访问:注意需要加项目名
http://localhost:8080/demo-1/test.html
http://localhost:8080/demo-1/view/2.html
http://localhost:8080/demo-1/myIndex
如果不想在路径上加项目名,要去配置tomcat的server.xml 。参考:项目war包部署到第三方Tomcat,访问路径必须加上项目名称的坑-CSDN博客
<Context docBase="D:/ruanjian/apache-tomcat-8.5.38-windows-x64/apache-tomcat-8.5.38/webapps/message" path="" reloadable="true" crossContext="true"/>
此文仅为鄙人学习笔记之用,朋友你来了,如有不明白或者建议又或者想给我指点一二,请私信我。liuw_flexi@163.com/QQ群:582039935.
我的gitHub: (学习代码都在gitHub)
https://github.com/nwgdegitHub/

 浙公网安备 33010602011771号