

Appium入门指南 - 环境搭建和Case编写
本文档将详细介绍如何搭建 Appium 的运行环境,以及如何编写一个简单的 UI 自动化测试用例。其中,也会穿插讲解一些 Appium 的基本知识。关于 Appium 的更多信息,大家可以查看官方文档。
注意事项:
- 本文档是在 macOS 系统的基础上讲解相关操作
- 编程语言选择了:Python 2.7
- Appium 是跨平台的 UI 自动化测试框架,支持 Android、iOS 等系统,本次只介绍基于 Android 的自动化测试
安装 Appium
Appium 的安装有两种方式:
1、下载 Appium Desktop,这个是 Appium 的客户端软件,包含了运行 Appium 所需要的一切,下载后安装即可,支持 Mac、Windows、Linux 三大系统。因为安装过程实在是太简单了,所以不做详细说明。
2、通过命令行的方式进行安装,这个比较复杂,需要依次下载安装多种配置/依赖来满足 Appium 的运行条件。着重介绍此种安装方式。
命令行安装
以下命令都是在终端(Terminal)上运行的
1、安装包管理工具 Homebrew
/usr/bin/ruby -e "$(curl -fsSL https://raw.githubusercontent.com/Homebrew/install/master/install)"
2、安装 Node.js
brew install node
3、安装 Appium 服务端
npm install -g appium
4、安装 appium-doctor
npm install -g appium-doctor
5、运行 appium-doctor,检查 Appium 需要的所有依赖是否都满足
appium-doctor --android
其中有几个依赖项是必须要满足的:
- Node.js
- ANDROID_HOME
- JAVA_HOME
- adb
- android
- emulator
- $JAVA_HOME/bin
大家可根据这个命令运行结束后的提示信息去完成相应的依赖添加:

6、安装 Appium 客户端
pip install Appium-Python-Client
7、最后,因为需要使用 Python 语言编写自动化测试用例,建议安装 Python 语言的 IDE:PyCharm
脚本编写
脚本编写前的准备工作
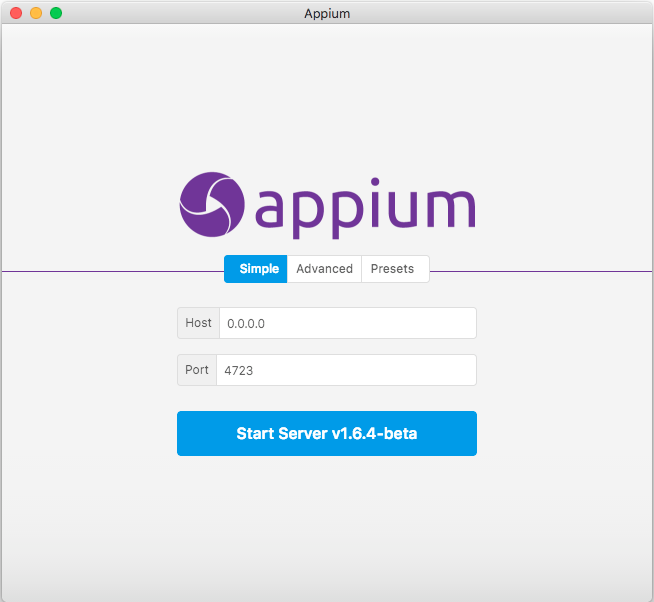
1、启动 Appium
(1)如果安装了 Appium Desktop,可直接打开软件点击 "Start" 启动 Appium 服务
(2)如果是通过命令行方式安装的 Appium,则在终端(Terminal)输入:
appium

2、启动模拟器/测试设备连接至电脑
#启动模拟器
emulator @<emulator_name>
#测试设备连接至电脑
(1)Settings-Developer options-USB debugging //打开usb调试模式
(2)adb devices //查看手机是否成功连接至电脑
3、安装待测应用到模拟器/测试设备中
adb install <path_to_apk>
本次讲解计算器应用 iClever Calculator Lite 为例,可自行到 Google Play 上下载该应用,包名为:weightloss.constellation.education.tools
创建脚本
在完成以上三步后,打开 Pycharm 或者其他 IDE,新建一个 py 文件,完成自动化测试脚本基础代码的编写。
1、新建 calculator_test.py 文件
2、导入类库和包
#导入unittest测试框架
import unittest
#导入appium客户端库
from appium import webdriver
#导入time模块
from time import sleep
3、创建一个类 CalculatorTest,继承自 Python 的测试类 unittest.TestCase
class CalculatorTest(unittest.TestCase):
    pass
unittest 是 Python 的一个单元测试框架,包含了四个部分:
- TestFixture
- setUp
- TestCase
- TearDown
- TestCase
- TestSuite
- TestRunner
关于各部分的概念和应用,在下面章节里说明(参见代码注释)。
4、在类中创建三个方法:setUP()、tearDown()、test_case_1(),然后在类外面创建一个程序入口
class CalculatorTest(unittest.TestCase):
    # pass

    #SetUP,case运行前的环境初始化
    def setUp(self):
        pass

    #TearDown,case运行后的环境恢复
    def tearDown(self):
        pass

    #TestCase,测试用例1
    def test_case_1(self):
        pass


#程序入口
if __name__ == '__main__':
    #TestSuite,将所有测试用例载入suite
    suite = unittest.TestLoader().loadTestsFromTestCase(CalculatorTest)
    #TestRunner,运行测试用例
    unittest.TextTestRunner(verbosity=2).run(suite)
5、在 setUP() 中添加字典变量 desired_caps,初始化配置,提供建立 Session 所需要的信息
    #SetUP,case运行前的环境初始化
    def setUp(self):
        # pass
        #字典变量,初始化配置,提供建立session的所有必要信息:http://appium.io/docs/en/writing-running-appium/caps/index.html
        desired_caps = {}
        #被测应用平台:iOS/Android
        desired_caps['platformName'] = 'Android'
        #被测应用平台版本:adb shell getprop ro.build.version.release
        desired_caps['platformVersion'] = '8.0.0'
        #测试设备名:adb devices
        desired_caps['deviceName'] = 'CB512FCM14'
        #被测应用包名
        desired_caps['appPackage'] = 'weightloss.constellation.education.tools'
        #被测应用启动时的活动名
        desired_caps['appActivity'] = 'com.weightloss.constellation.education.tools.SplashActivityAlias'
        #服务端等待客户端发送消息的超时时间
        desired_caps['newCommandTimeout'] = 150
        #在一个session开始前不重置被测程序的状态
        desired_caps['noReset'] = True
        #是否支持uicode的键盘(输入中文需设置)
        desired_caps['unicodeKeyboard'] = True
        #以desired_caps作为参数初始化WebDriver连接
        #Appium服务器的IP:http://localhost
        #端口号:4723
        self.driver = webdriver.Remote('http://localhost:4723/wd/hub', desired_caps)
        sleep(10)
其中,有两个变量 "platformVersion" 和 "deviceName" 需要大家自行修改,可通过以下命令获取测试设备系统版本号和设备名
adb shell getprop ro.build.version.release //获取测试设备系统版本号
adb devices //获取设备名
6、在 tearDown() 中调用 quit(),退出driver,关闭被测应用所有的关联窗口
    #TearDown,case运行后的环境恢复
    def tearDown(self):
        # pass
        #退出driver,关闭被测应用所有的关联窗口
        self.driver.quit()
7、至此,一个基础的 Appium 自动化测试脚本已编写完成。通过终端(Terminal)进入脚本所在的目录,输入以下语句运行脚本
python calculator_test.py

自动化测试用例的编写
在完成上述步骤后,一个基础的自动化测试脚本便生成了。接下来,具体讲解如何编写 case。
case 的编写,简而言之有三步:
- 1.动作执行
- 查找和识别元素
- 操作元素
- 2.结果判断
- 3.报告展示
动作执行
查找和识别元素
元素,在这里指的是应用程序用户界面上的控件。可以通过谷歌官方提供的工具 uiautomatorviewer 进行查找和识别。
1、进入 Android SDK 的 bin 目录
cd ${ANDROID_HOME}/tools/bin //每个人的Android sdk的目录名不一样哦
2、启动 uiautomatorviewer
uiautomatorviewer

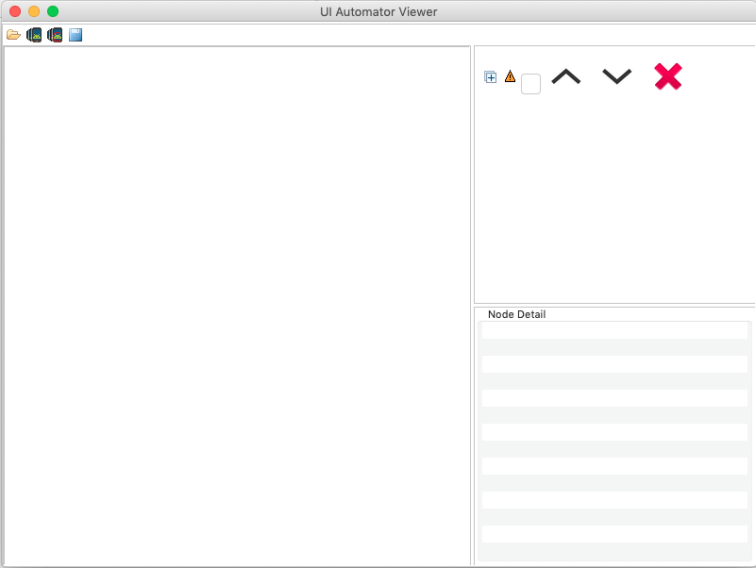
3、在测试设备上启动应用,进入需要识别和操作的用户界面。在 uiautomatorviewer 上,点击左上角第二个按钮"Device Screenshot(uiautomator dump)",对当前界面上的元素进行查找和识别
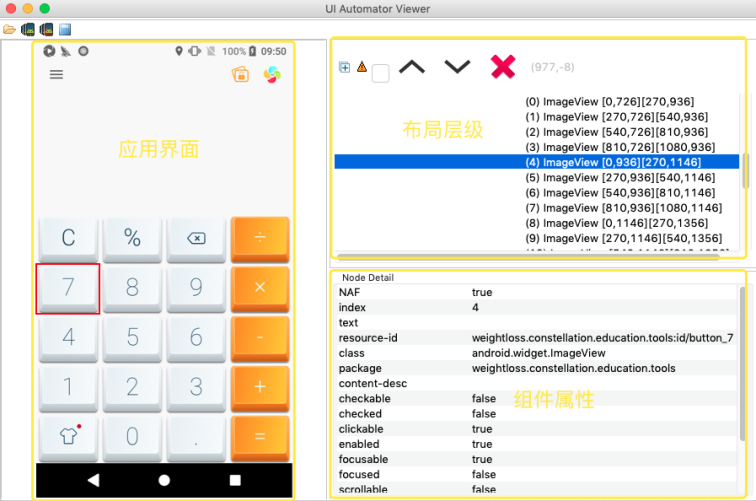
4、在获取到界面上元素的布局层级及其属性后,可以通过如下一些方法进行元素的识别
- find_element_by_id---对应组件属性中的"resource_id"
- find_element_by_class_name---对应组件属性中的"class"
- find_element_by_name---对应组件属性中的"text"
- find_element_by_accessibility_id---对应组件属性中的"content-desc"
更多方法,请查看 Appium 的官方文档
http://appium.io/docs/en/writing-running-appium/finding-elements/
http://appium.io/docs/en/commands/element/find-elements/index.html#selector-strategies
https://github.com/SeleniumHQ/mobile-spec/blob/master/spec-draft.md
http://appium.io/docs/en/writing-running-appium/android/uiautomator-uiselector/index.html
操作元素
元素操作的方法,分为三种:
-
- text(self)---获取文本信息
- click(self)---点击
- clear(self)---清空文本
- is_enabled(self)---是否可用
- is_selected(self)---是否已选
- is_displayed(self)---是否显示
- send_keys(self, *value)---模拟输入文本
-
- tap(self, positions, duration=None)---点击,自定义坐标
- swipe(self, start_x, start_y, end_x, end_y, duration=None)---滑动
- flick(self, start_x, start_y, end_x, end_y)---快速滑动
- pinch(self, element=None, percent=200, steps=50)---缩小
- zoom(self, element=None, percent=200, steps=50)---放大
- scroll(self, origin_el, destination_el)---滚动
- drag_and_drop(self, origin_el, destination_el)---拖曳
-
- press_keycode()---模拟按键
- long_press_keycode()---模拟长按键
- reset()---重置程序到初始状态
- pull_file()---从手机上拉取文件
- launch_app()---启动应用程序
- start_activity()---启动活动
- shake()---晃动手机
- get_screenshot_as_file()---获取截图并保存在电脑上
- push_file()---推送文件到手机
更多操作元素的方法,请查看 Appium 的官方文档
本次实例,以 iClever Calculator Lite 为被测应用,创建一个 test_plus() 方法,查找和识别以及操作元素
    def test_plus(self):
        #预期结果等于10
        result = 10
        #通过ID找到7
        seven = self.driver.find_element_by_id("weightloss.constellation.education.tools:id/button_7")
        #通过ID找到3
        three = self.driver.find_element_by_id("weightloss.constellation.education.tools:id/button_3")
        #通过ID找到+
        plus = self.driver.find_element_by_id("weightloss.constellation.education.tools:id/button_plus")
        #通过ID找到=
        equal = self.driver.find_element_by_id("weightloss.constellation.education.tools:id/button_equal")
        #通过ID找到结果
        real_result = self.driver.find_element_by_id("weightloss.constellation.education.tools:id/display")
        #点击7
        seven.click()
        #点击+
        plus.click()
        #点击3
        three.click()
        #点击=
        equal.click()
结果判断
在找到元素并对元素进行相应操作后,需要确认结果是否符合预期
结果判断有两种方式:
- 断言
- assertEqual(a, b)---判断a==b
- assertNotEqual(a, b)---判断a!=b
- assertTrue(x)---bool(x) is True
- assertFalse(x)---bool(x) is False
- 截图对比
- get_screenshot_as_file(self, filename)
- save_screenshot(self, filename)
- get_screenshot_as_png(self)
- get_screenshot_as_base64(self)
在 test_plus() 里添加断言和截图:
    def test_plus(self):
        #预期结果等于10
        result = "10"
        #通过ID找到7
        seven = self.driver.find_element_by_id("weightloss.constellation.education.tools:id/button_7")
        #通过ID找到3
        three = self.driver.find_element_by_id("weightloss.constellation.education.tools:id/button_3")
        #通过ID找到+
        plus = self.driver.find_element_by_id("weightloss.constellation.education.tools:id/button_plus")
        #通过ID找到=
        equal = self.driver.find_element_by_id("weightloss.constellation.education.tools:id/button_equal")
        #通过ID找到结果
        real_result = self.driver.find_element_by_id("weightloss.constellation.education.tools:id/display")
        #点击7
        seven.click()
        #点击+
        plus.click()
        #点击3
        three.click()
        #点击=
        equal.click()
        #断言结果是否相等
        self.assertEqual(real_result.text, result)
        #截图
        self.driver.get_screenshot_as_file(self.SCREEN_SHOT_PATH + "plus_result.png")
报告展示
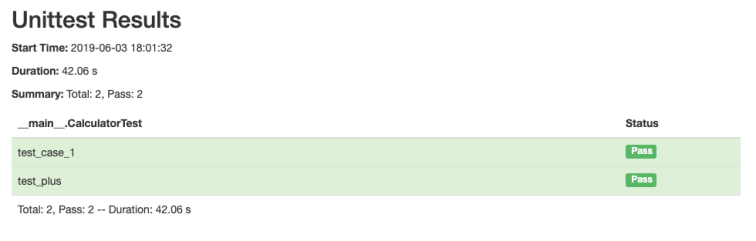
当运行完所有的 test case 后,如何以直观的形式展示结果?
Github 上有一个开源项目---HtmlTestRunner,能够以 HTML 的形式输出报告。
1、安装 HtmlTestRunner
pip install html-testRunner
2、导入 HtmlTestRunner 模块,使用 HTMLTestRunner 替换 unittest.TextTestRunner
#导入HtmlTestRunner
import HtmlTestRunner

...

#程序入口
if __name__ == '__main__':
    #TestSuite,将所有测试用例载入suite
    suite = unittest.TestLoader().loadTestsFromTestCase(CalculatorTest)
    #TestRunner,运行测试用例
    # unittest.TextTestRunner(verbosity=2).run(suite)

    #运行case+输出报告
    runner = HtmlTestRunner.HTMLTestRunner(output='cc_report')
    runner.run(suite)
示例:
附上完整的代码:
#!/usr/bin/env python
# -*- coding: utf-8 -*-
# @Author  : Shengjie.Liu
# @Time    : 2019-06-03 14:47
# @File    : calculator_test.py
# @Desc    :

#导入unittest测试框架
import unittest
#导入appium客户端库
from appium import webdriver
#导入time模块
from time import sleep
#导入HtmlTestRunner
import HtmlTestRunner

class CalculatorTest(unittest.TestCase):
    # pass

    # 截图路径
    SCREEN_SHOT_PATH = "/Users/liushengjie/PycharmProjects/AppiumTest/share/"

    #SetUP,case运行前的环境初始化
    def setUp(self):
        # pass
        #字典变量,初始化配置,提供建立session的所有必要信息:http://appium.io/docs/en/writing-running-appium/caps/index.html
        desired_caps = {}
        #被测应用平台:iOS/Android
        desired_caps['platformName'] = 'Android'
        #被测应用平台版本:adb shell getprop ro.build.version.release
        desired_caps['platformVersion'] = '8.0.0'
        #测试设备名:adb devices
        desired_caps['deviceName'] = 'CB512FCM14'
        #被测应用包名
        desired_caps['appPackage'] = 'weightloss.constellation.education.tools'
        #被测应用启动时的活动名
        desired_caps['appActivity'] = 'com.weightloss.constellation.education.tools.SplashActivityAlias'
        #服务端等待客户端发送消息的超时时间
        desired_caps['newCommandTimeout'] = 150
        #在一个session开始前不重置被测程序的状态
        desired_caps['noReset'] = True
        #是否支持uicode的键盘(输入中文需设置)
        desired_caps['unicodeKeyboard'] = True
        #以desired_caps作为参数初始化WebDriver连接
        #Appium服务器的IP:http://localhost
        #端口号:4723
        self.driver = webdriver.Remote('http://localhost:4723/wd/hub', desired_caps)
        sleep(10)

    #TearDown,case运行后的环境恢复
    def tearDown(self):
        # pass
        #退出driver,关闭被测应用所有的关联窗口
        self.driver.quit()

    #TestCase,测试用例1
    def test_case_1(self):
        pass

    def test_plus(self):
        #预期结果等于10
        result = "10"
        #通过ID找到7
        seven = self.driver.find_element_by_id("weightloss.constellation.education.tools:id/button_7")
        #通过ID找到3
        three = self.driver.find_element_by_id("weightloss.constellation.education.tools:id/button_3")
        #通过ID找到+
        plus = self.driver.find_element_by_id("weightloss.constellation.education.tools:id/button_plus")
        #通过ID找到=
        equal = self.driver.find_element_by_id("weightloss.constellation.education.tools:id/button_equal")
        #通过ID找到结果
        real_result = self.driver.find_element_by_id("weightloss.constellation.education.tools:id/display")
        #点击7
        seven.click()
        #点击+
        plus.click()
        #点击3
        three.click()
        #点击=
        equal.click()
        #断言结果是否相等
        self.assertEqual(real_result.text, result)
        #截图
        self.driver.get_screenshot_as_file(self.SCREEN_SHOT_PATH + "plus_result.png")


#程序入口
if __name__ == '__main__':
    #TestSuite,将所有测试用例载入suite
    suite = unittest.TestLoader().loadTestsFromTestCase(CalculatorTest)
    #TestRunner,运行测试用例
    # unittest.TextTestRunner(verbosity=2).run(suite)

    #运行case+输出报告
    runner = HtmlTestRunner.HTMLTestRunner(output='cc_report')
    runner.run(suite)
此份文档仅做抛砖引玉之用,希望同学们可以根据此文档完成第一个 UI 自动化测试用例。至于之后的编写,需要大家勤查资料,多看官网。

 浙公网安备 33010602011771号