
这是使用`vuetify3`可以开发的一个登录实例。
它包含了一个经典的包含系统消息、登录按钮、更换主题按钮的工具栏(toolbar)、轮播(carousel)和登录表单控件。
> [vuetify官网的组件部分]有大量控件,我想绝大部分应用使用这些控件拼凑就足够酷了。
<!--more-->
新建项目
可以使用之前的文章:[用最快捷的方法创建vuetify3项目]的方法新建项目。
## 工具栏(toolbar)控件
可以在 [veutify官网] 选择一款`工具栏(toolbar)`,可以在网页上直接查看实际效果,也可以直接把代码拷贝出来使用。 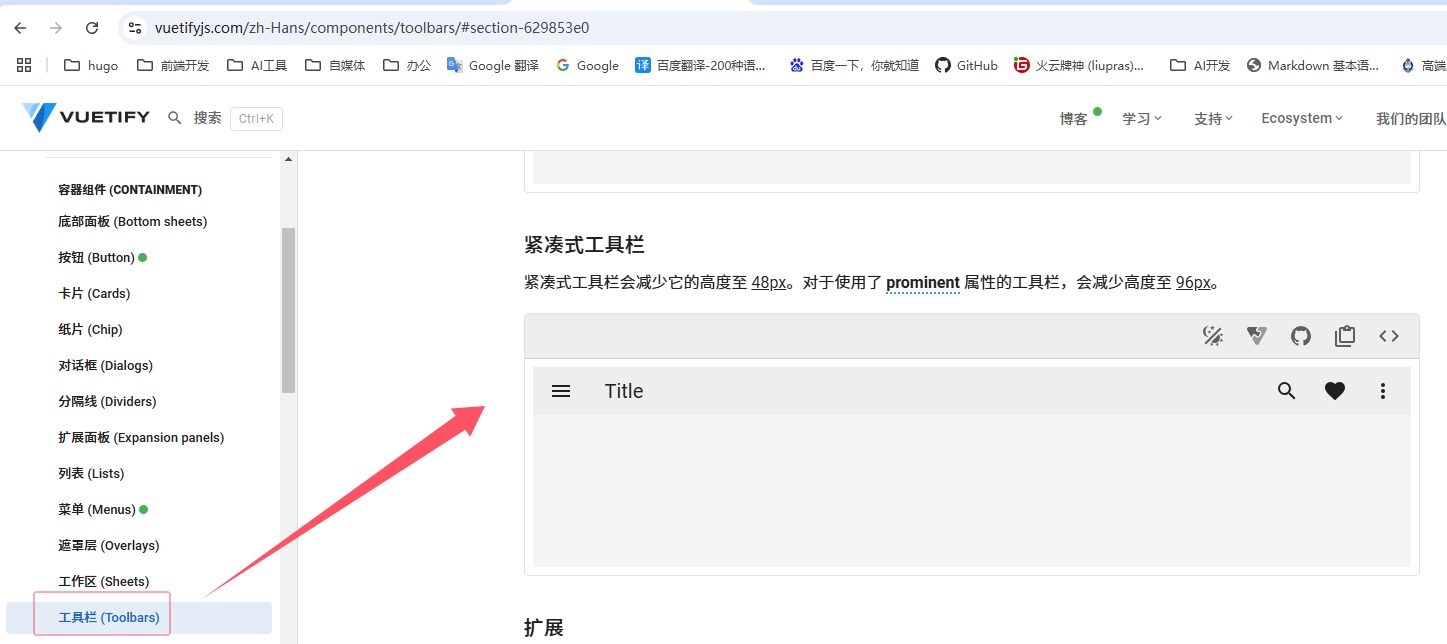
在项目的 `components` 文件夹中新建文件 `ToolBar.vue`,然后把从官网拷贝的代码粘贴过来,修改一下,我们自定义的工具栏控件就做好了。
下面是`ToolBar.vue`的代码:
<template>
  <v-toolbar density="compact">
    <v-toolbar-title>
      <router-link to="/">
        <v-icon icon="mdi-home" class="mr-4"></v-icon
        >Vuerify3登录演示</router-link
      >
    </v-toolbar-title>

    <v-spacer></v-spacer>

    <v-btn icon @click="changeTheme">
      <v-icon  :icon="myTheme ? 'mdi-weather-night' : 'mdi-weather-sunny'"></v-icon>
    </v-btn>

    <v-menu transition="scale-transition">
      <template v-slot:activator="{ props }">
        <v-btn icon class="mr-12" v-bind="props">
          <v-badge color="red-darken-2" content="8">
            <v-icon icon="mdi-bell" color="blue-darken-4"></v-icon>
          </v-badge>
        </v-btn>
      </template>
      <v-list>
        <v-list-item
          v-for="(item, index) in notifications"
          :key="index"
          :value="index"
        >
          <v-list-item-title><v-icon :icon="item.icon" :color="item.color"></v-icon>{{ item.title }}</v-list-item-title>
        </v-list-item>
      </v-list>
    </v-menu>

    <v-btn icon>
      <v-btn variant="outlined" class="mr-12" color="red-darken-2" to="/login">
        登录 <v-icon>mdi-login-variant</v-icon>
      </v-btn>
    </v-btn>
  </v-toolbar>
</template>

<script setup>

import { ref } from "vue";
import {useTheme} from 'vuetify'

const notifications = [
  { title: "消息1",icon:"mdi-email",color:"red" },
  { title: "消息2" ,icon:"mdi-email",color:"blue" },
  { title: "消息3" ,icon:"mdi-email",color:"green" },
  { title: "消息4" ,icon:"mdi-email",color:"yellow" },
];

const myTheme = ref(true)

const theme = useTheme();

// 切换主题
function changeTheme() {
  myTheme.value = !myTheme.value;
  theme.global.name.value = myTheme.value ? "dark" : "light";
}

</script>
> vuetify3自带`dark`和`light`两种主题。
通过`to`,点击登录按钮可以跳转到`login`页面。
轮播(carousel)控件
我们可以在`vuetify`官网上找到轮播(carousel)控件拿来用: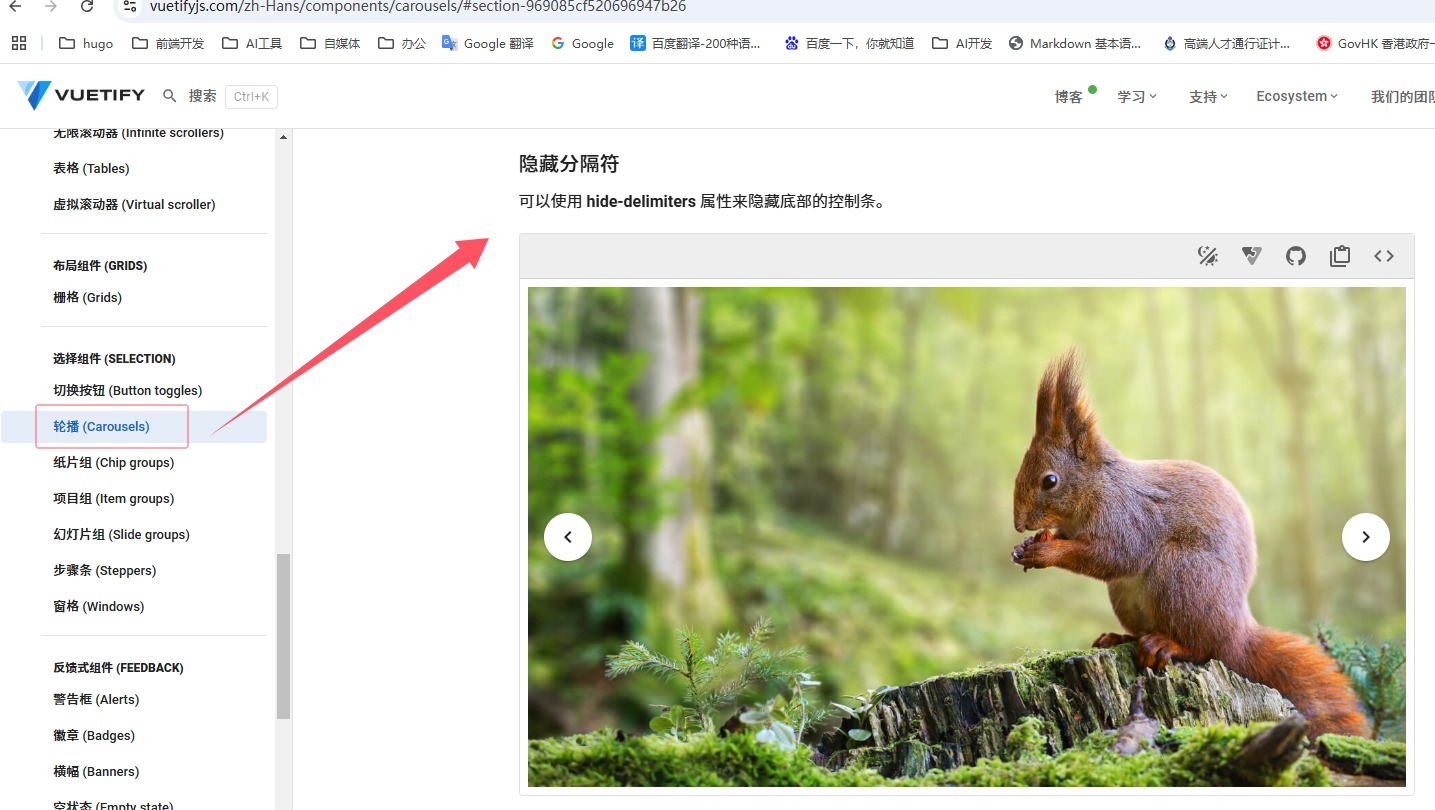
在`compoents`下面新增`Carousel.vue`,是该控件`Carousel.vue`的代码:
<template>
  <v-carousel :show-arrows="true" :height="carouselHeight">
    <v-carousel-item
      v-for="(item, i) in items"
      :key="i"
      :src="item.src"
      cover
    ></v-carousel-item>
  </v-carousel>
</template>
  <script setup>
import { reactive, computed } from "vue";

const items = reactive([
  {
    src: "https://cdn.vuetifyjs.com/images/carousel/bird.jpg",
  },
  {
    src: "https://cdn.vuetifyjs.com/images/carousel/planet.jpg",
  },
  {
    src: "https://cdn.vuetifyjs.com/images/carousel/squirrel.jpg",
  },
  {
    src: "https://cdn.vuetifyjs.com/images/carousel/sky.jpg",
  },
]);

const carouselHeight = computed(() => {
  return "calc(100vh - 64px)"; //toolbar默认高度是64px,这样刚好可以填满整个屏幕
});
</script>
上述控件使用了计算字段设置其高度,以使得轮播图能占满整个屏幕。
登录页面
在`pages`文件夹中新增`login.vue`文件,这里实现了登录表单、字段校验,通过`v-progress-circular`实现提交时的蒙版效果。
下面是该页面的代码,通过代码应该可以更加清晰的了解实现思路。
<template>
  <v-container fluid>
    <v-row justify="center">
      <v-col md="4">
        <v-overlay :model-value="isLoading" class="justify-center align-center">
          <v-progress-circular
            indeterminate
            color="white"
          ></v-progress-circular>
        </v-overlay>
        <v-card class="pa-8 mx-auto">
          <v-card-title class="text-center">登录</v-card-title>
          <v-card-item>
            <v-sheet>
              <v-form @submit.prevent>
                <v-text-field
                  v-model="form_data.email"
                  label="电子邮件地址"
                  variant="solo"
                  prepend-inner-icon="mdi-email"
                  :rules="[rules.required, rules.email, rules.max]"
                ></v-text-field>
                <v-text-field
                  type="password"
                  v-model="form_data.password"
                  label="密码"
                  variant="solo"
                  prepend-inner-icon="mdi-key"
                  :rules="[rules.required, rules.max]"
                ></v-text-field>
                <v-checkbox
                  v-model="form_data.remember"
                  color="red"
                  label="30天内免登录"
                  hide-details
                ></v-checkbox>
                <v-btn type="submit" color="red-darken-2" @click="submit" block>
                  <span>登录</span>
                </v-btn>
              </v-form>
            </v-sheet>
          </v-card-item>
          <v-card-actions>
            <div class="mx-4">
              <v-btn block to="/register">注册</v-btn>
            </div>
          </v-card-actions>
        </v-card>
      </v-col>
    </v-row>
  </v-container>
</template>

<script setup>
import { ref } from "vue";

//表单数据
const form_data = ref({
  email: "",
  password: "",
  remember: false,
});

const isLoading = ref(false);

//提交
function submit() {
  if (form_data.value.email === "" || form_data.value.password === "") {
    return;
  }
  isLoading.value = true;
  setTimeout(() => {
    isLoading.value = false;
  }, 3000);
  alert(JSON.stringify(form_data.value));
}

//校验规则
const rules = {
  required: (value) => !!value || "不能为空。",
  max: (value) => value.length <= 20 || "最多20个字符。",
  email: (value) => {
    const pattern =
      /^(([^<>()[\]\\.,;:\s@"]+(\.[^<>()[\]\\.,;:\s@"]+)*)|(".+"))@((\[[0-9]{1,3}\.[0-9]{1,3}\.[0-9]{1,3}\.[0-9]{1,3}])|(([a-zA-Z\-0-9]+\.)+[a-zA-Z]{2,}))$/;
    return pattern.test(value) || "Invalid e-mail.";
  },
};
</script>
> 这个文件创建在`pages`文件夹内,由于`App.vue`中的`router-view`的动态路由的作用,所以无需手工配置路由,在浏览器中输入`http://localhost:3000/login`即可直接打开此页面。
> 可以尝试在此文件夹中增加`register.vue`,然后在浏览器打开`http://localhost:3000/register`看看实际效果。
登录页面可以基于官网的代码演示修改: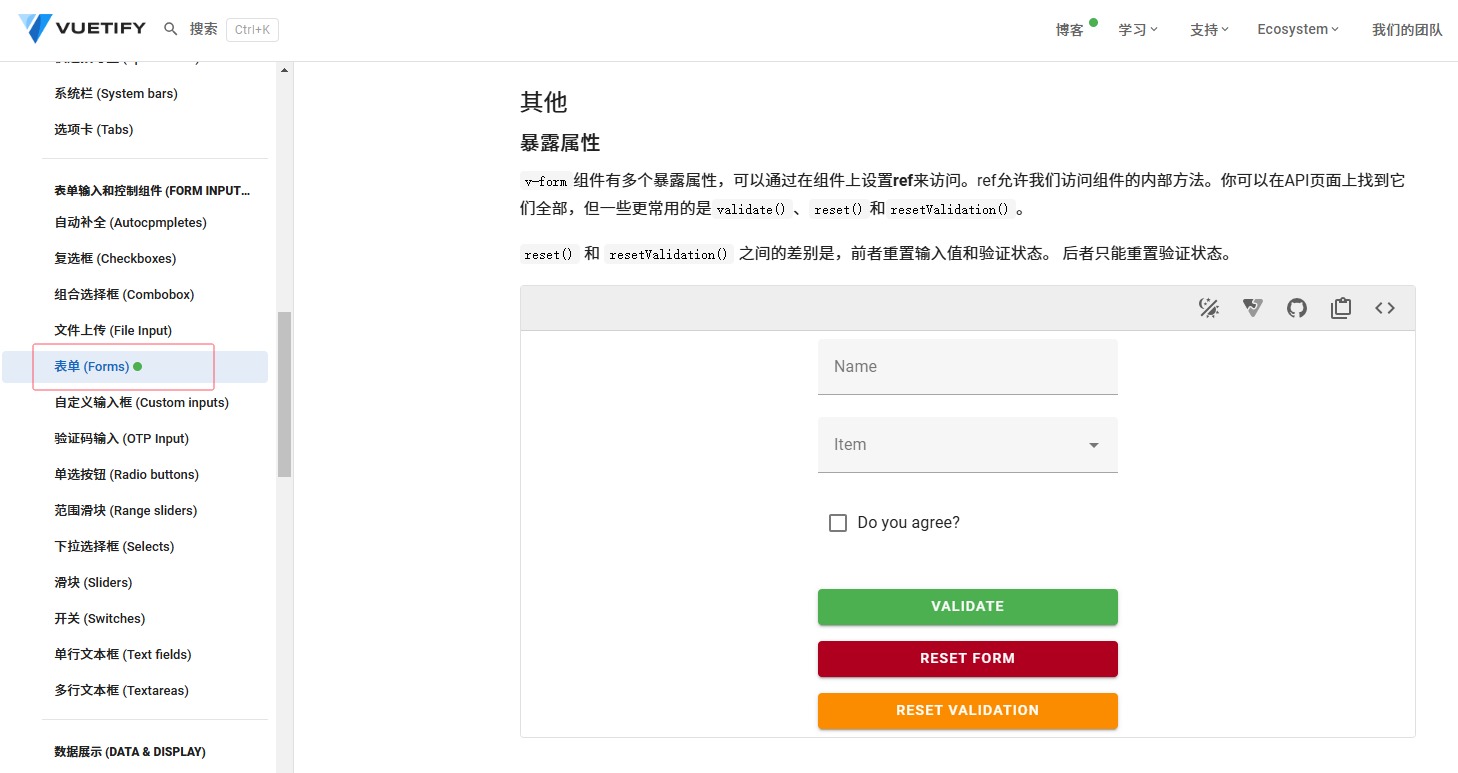
组合控件,见证成果
修改`App.vue`,下面是代码:
<template>
  <v-app>
    <!--对整个应用进行导航-->
    <ToolBar />
    <v-main>
      <!--所有页面跳转时都会出现的动画-->
      <v-slide-x-transition>
        <router-view />
      </v-slide-x-transition>
    </v-main>
  </v-app>
</template>
把`ToolBar`放在`App.vue`中使得该工具栏应用于整个应用,同样`v-slide-x-transition`将使得整个应用在页面切换时都会在`v-main`中播放动画效果。
在应用程序的根目录下运行:
```bash
pnpm dev
```
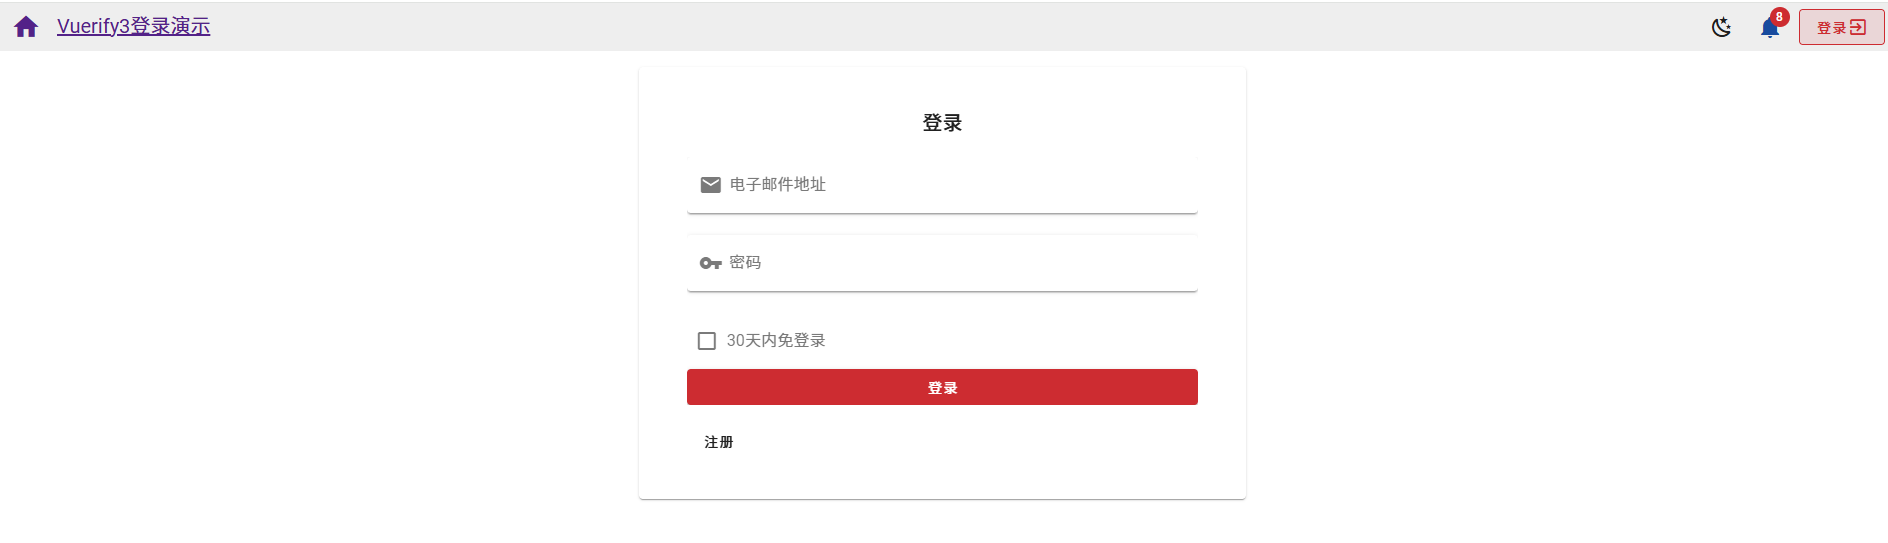
程序启动后会出现下图所示页面,并且自动打开浏览器:
总结
通过几个简单的控件组合,我们就实现了一个经典的首页框架和登录页面,这里面也使用了很多控件可以应用在其它很多场合,相信能对您使用`vuetify3`起到入门的功效。
查看完整代码
- [github]
- [gitee]
- [gitcode]
---
🪐祝好运🪐

 浙公网安备 33010602011771号