


Flask 和pythonweb框架介绍
 1 # python web框架,本质都一样,都是有一个请求对象,有一个响应对象,有视图函数,有路由这些东西
 2
 3 --------------------------------------------------
 4 # 同步框架
 5
 6 -django:大而全,内置的app多,第三方app也多【orm\缓存\认证】
 7              -django-ninja
 8 -Flask:小而精,没有过多的内置组件,
 9         只完成web框架最基本的功能(处理请求,匹配路由,执行视图函数,返回)
10         需要借助于第三方,完成更丰富的功能
11
12 -web.py:是一个小巧灵活的Python框架,它简单而且功能强大(国内几乎没有用的)
13
14 ---------------------------------------------------
15 # 异步web框架
16
17 # fastapi和flask操作百分之80的一样!!!   百分之二十写异步的地方不一样!!!
18 -fastapi:python的异步web框架,不少公司再用,很火!! 官方文档 https://fastapi.tiangolo.com/zh/
19 -sanic: python的异步web框架,供支持异步高并发请求的 web 服务
20 -tornado:老牌的异步框架,现在用的比较少了
21
22 ------------------------------------------------
23
24 # 同步框架和异步框架的区别
25     -djagno是同步框架还是异步框架,djagno 3.x以后支持异步
26
27     -同步框架的意思:一个线程只处理一个请求
28     -异步框架的意思:一个线程可以处理多个请求,多个线程的情况下,并发量就上来了
29
30     异步框架,会让耗时的任务让worker去执行,线程直接返回,处理另外的请求了
31     所以异步框架可以很显著的提高项目的并发量
32     用了异步框架后,框架前面用的web服务器就不是uwsgi这些了,有专门的,web服务器支持异步才行
33
34
35 # 一般计算密集型的项目推荐用同步框架
36 # io密集型的推荐使用异步框架
37
38 -----------------------------------------------------
39 #  flask框架:Werkzeug WSGI工具包和Jinja2模板引擎
40
41 # 0 Flask是一个用Python编写的Web应用框架。它由Armin Ronacher开发,他领导着一个名为Pocco的国际Python爱好者团队。Flask基于Werkzeug WSGI工具包和Jinja2模板引擎。两者都是Pocco项目
42
43 # 1 Flask是一个基于Python开发并且依赖jinja2模板和Werkzeug WSGI服务的一个微型框架,对于Werkzeug本质是Socket服务端,其用于接收http请求并对请求进行预处理,然后触发Flask框架,开发人员基于Flask框架提供的功能对请求进行相应的处理,并返回给用户,
如果要返回给用户复杂的内容时,需要借助jinja2模板来实现对模板的处理,即:将模板和数据进行渲染,将渲染后的字符串返回给用户浏览器
44
45 # 2 “微”(micro) 并不表示你需要把整个 Web 应用塞进单个 Python 文件(虽然确实可以),也不意味着 Flask 在功能上有所欠缺。微框架中的“微”意味着 Flask 旨在保持核心简单而易于扩展。Flask 不会替你做出太多决策——比如使用何种数据库。
而那些 Flask 所选择的——比如使用何种模板引擎——则很容易替换。除此之外的一切都由可由你掌握
46
47 # 3 默认情况下,Flask 不包含数据库抽象层、表单验证,或是其它任何已有多种库可以胜任的功能。然而,Flask 支持用扩展来给应用添加这些功能,如同是 Flask 本身实现的一样。
众多的扩展提供了数据库集成、表单验证、上传处理、各种各样的开放认证技术等功能。Flask 也许是“微小”的,但它已准备好在需求繁杂的生产环境中投入使用
48
49 # 4 Flask depends on the Werkzeug WSGI toolkit, the Jinja template engine, and the Click CLI toolkit
50
51
Werkzeug介绍
Werkzeug是一个WSGI工具包,他可以作为一个Web框架的底层库。这里稍微说一下, werkzeug 不是一个web服务器,也不是一个web框架,而是一个工具包,
官方的介绍说是一个 WSGI 工具包,它可以作为一个 Web 框架的底层库,因为它封装好了很多 Web 框架的东西,例如 Request,Response 等等
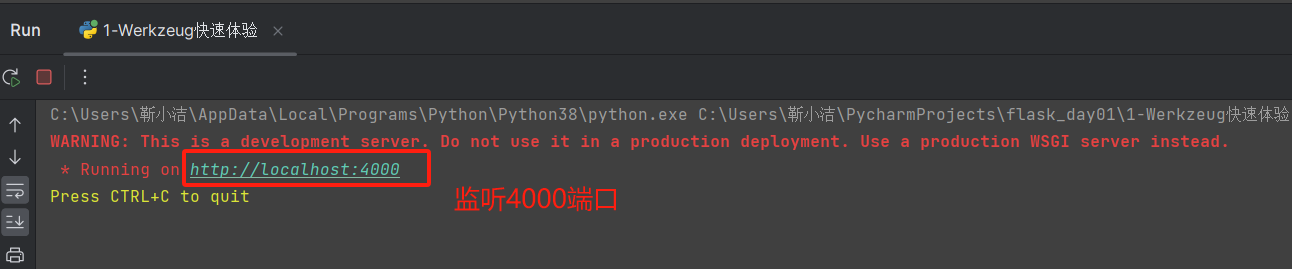
 1 #1  wsgi :python web 网关接口  协议
 2 #2  具体实现:
 3     wsgiref
 4     uwsgi
 5     gunicorn
 6
 7 #3  Werkzeug 工具包---》遵循wsgi协议---》又做了一些封装
 8
 9
10
11 # 4 Werkzeug介绍
12 Werkzeug is a comprehensive WSGI web application library. It began as a simple collection of various utilities for WSGI applications and has become one of the most advanced WSGI utility libraries.
13 Werkzeug 是一个综合性 WSGI Web 应用程序库。它最初是 WSGI 应用程序的各种实用程序的简单集合,现已成为最先进的 WSGI 实用程序库之一。
14
15 Werkzeug doesn’t enforce any dependencies. It is up to the developer to choose a template engine, database adapter, and even how to handle requests
16 Werkzeug 不强制执行任何依赖关系。由开发人员选择模板引擎、数据库适配器,甚至如何处理请求
17
18 # https://werkzeug.palletsprojects.com/en/3.0.x/
19
20
21
22 # 5 Werkzeug 快速体验
23 pip insatll flask
24 ------------------------------------------
25 from werkzeug.wrappers import Request, Response
26
27
28 @Request.application
29 def hello(request):
30     return Response('Hello World!')
31
32
33 if __name__ == '__main__':
34     from werkzeug.serving import run_simple
35
36     run_simple('localhost', 4000, hello)
 1 最简单的Web应用就是先把HTML用文件保存好,用一个现成的HTTP服务器软件,接收用户请求,从文件中读取HTML,返回。
 2
 3 如果要动态生成HTML,就需要把上述步骤自己来实现。不过,接受HTTP请求、解析HTTP请求、发送HTTP响应都是苦力活,如果我们自己来写这些底层代码,还没开始写动态HTML呢,就得花个把月去读HTTP规范。
 4
 5 正确的做法是底层代码由专门的服务器软件实现,我们用Python专注于生成HTML文档。因为我们不希望接触到TCP连接、HTTP原始请求和响应格式,所以,需要一个统一的接口协议来实现这样的服务器软件,让我们专心用Python编写Web业务。这个接口就是WSGI:Web Server Gateway Interface。而wsgiref模块就是python基于wsgi协议开发的服务模块
 6
 7 --------------------------------------------------------------------------------------
 8 快速体验
 9
10 from wsgiref.simple_server import make_server
11
12 def mya(environ, start_response):
13     print(environ)  # http请求的所有东西都在environ中
14     start_response('200 OK', [('Content-Type', 'text/html')])
15     if environ.get('PATH_INFO') == '/index':
16         with open('index.html','rb') as f:
17             data=f.read()  # flask返回的是[data]
18
19     elif environ.get('PATH_INFO') == '/login':
20         with open('login.html', 'rb') as f:
21             data = f.read()
22     else:
23         data=b'<h1>Hello, web!</h1>'
24     return [data]
25
26 if __name__ == '__main__':
27     myserver = make_server('', 8011, mya)
28     print('监听8011') # 请求来了会执行mya加括号,并且还会传两个参数,http请求所有的东西,http所有响应的东西
29     myserver.serve_forever()
30
31 --------------------------------------------------------
32 html页面
33
34 <!DOCTYPE html>
35 <html lang="en">
36 <head>
37     <meta charset="UTF-8">
38     <title>Title</title>
39
40 </head>
41 <body>
42 <h1>首页</h1>
43 </body>
44 </html>

mya函数就是可调用对象,可以加括号运行
environ参数接收的,就是http请求所有的数据,start_response参数接收的是http响应所有的东西!!!
就等同于django中的wsgi.py文件中的application对象( WSGIHandler类加括号生成的对象 )
对于django而言请求来了,会执行application对象加括号,触发类里的双下call方法,并传两个参数


。
。
Jinja2 介绍
Jinja is a fast, expressive, extensible templating engine. Special placeholders in the template allow writing code similar to Python syntax. Then the template is passed data to render the final document
Jinja 是一个快速、富有表现力、可扩展的模板引擎。模板中的特殊占位符允许编写类似于 Python 语法的代码。然后向模板传递数据以渲染最终文档
# https://jinja.palletsprojects.com/en/3.1.x/
# 1 Click is a Python package for creating beautiful command line interfaces in a composable way with as little code as necessary.
It’s the “Command Line Interface Creation Kit”. It’s highly configurable but comes with sensible defaults out of the box
Click 是一个 Python 包,用于以可组合的方式使用尽可能少的代码创建漂亮的命令行界面。它是“命令行界面创建工具包”。它具有高度可配置性,但具有开箱即用的合理默认值

# 2  It aims to make the process of writing command line tools quick and fun while also preventing any frustration caused by the inability to implement an intended CLI API
它的目的是使编写命令行工具的过程变得快速而有趣,同时也防止因无法实现预期的 CLI API 而造成的任何挫败感

# 3  Click in three points:
  arbitrary nesting of commands
  automatic help page generation
  supports lazy loading of subcommands at runtime
Click三点:
  命令的任意嵌套
  自动生成帮助页面
  支持运行时延迟加载子命令
快速使用

。
。
。
flask创建和运行

python-dotenv


watchdog(监控文件变化,重启服务)

。
。
虚拟环境
 1 Use a virtual environment to manage the dependencies for your project, both in development and in production.
 2 # 在开发和生产中,使用虚拟环境来管理项目的依赖关系
 3
 4 What problem does a virtual environment solve? The more Python projects you have, the more likely it is that you need to work with different versions of Python libraries, or even Python itself. Newer versions of libraries for one project can break compatibility in another project.
 5 # 虚拟环境解决什么问题?您拥有的 Python 项目越多,您就越有可能需要使用不同版本的 Python 库,甚至是 Python 本身。一个项目的较新版本的库可能会破坏另一项目的兼容性。
 6
 7 Virtual environments are independent groups of Python libraries, one for each project. Packages installed for one project will not affect other projects or the operating system’s packages.
 8 # 虚拟环境是一组独立的 Python 库,每个项目对应一个。为一个项目安装的软件包不会影响其他项目或操作系统的软件包
 9
10 Python comes bundled with the venv module to create virtual environments.
11 # Python 使用 venv 模块来创建虚拟环境
12
13 -------------------------------------------------------
14 Mac/linux创建虚拟环境
15
16 # 创建虚拟环境
17 mkdir myproject
18 cd myproject
19 python3 -m venv .venv
20 # 激活虚拟环境
21 . .venv/bin/activate
22
23 ----------------------------------------------------------
24 win创建虚拟环境
25
26 # 创建虚拟环境
27 mkdir myproject
28 cd myproject
29 python -m venv .venv
30 # 激活虚拟环境
31 .venv\Scripts\activate

。
。
快速入门
多种方式运行flask
 1 from flask import Flask
 2
 3 app = Flask(__name__)
 4
 5
 6 # 配置路由和视图函数对应关系--》基于装饰器
 7
 8 # @app.route('/',methods=['GET'])
 9 @app.get('/')
10 def index():
11     return 'hello flask'
12
13
14 # 运行flask项目的几种方式
15 # 方式一命令行: python -m flask --app 6-第一个flask run
16 # 方式二: flask --app 6-第一个flask run
17 # 方式三: flask run --host=0.0.0.0   # py文件必须叫app.py
18 # flask --app hello run --debug,以debug模式运行
19 # 方式四:使用pycharm快速运行  配置一个 flaskserver
20 # 方式五:直接右键运行,必须加入如下代码
21 '''
22 if __name__ == '__main__':
23     app.run()
24 '''
25
26 '''
27 # 运行当前项目
28 python -m flask --app hello run
29 # 或者
30 flask --app hello run
31 flask run --host=0.0.0.0
32 '''
方式四的用法


。
。
fastapi 快速使用
 1 # pip3 install fastapi
 2
 3 from fastapi import FastAPI
 4 from pydantic import BaseModel
 5
 6 app = FastAPI()
 7
 8
 9 class Item(BaseModel):
10     name: str
11     age: int
12
13
14 @app.get('/')
15 async def index():
16     return {'code': 100, 'msg': '成功'}
17     # 运行方式一命令行运行:uvicorn 7-第一个fastapi:app --reload
18
19 @app.post('/login')
20 async def login(item: Item):
21     print(item.name)
22     print(item.age)
23     return item
24
25
26 if __name__ == '__main__':
27     import uvicorn
28
29     uvicorn.run(app='7-第一个fastapi:app', port=8001)

try it out


。
。
。
显示用户案例
''' 学到的
1 返回新手四件套
    - 返回字符串--》return '字符串'
    - 返回模板--》render_template('detail.html',info=user)
    - 返回重定向--》redirect('/login')
    - 返回json--》jsonify({'code':100,'msg':'成功'})

2 request对象,是全局的--》from flask import  request
    -request.path
    -request.method
    .... 有很多,不展开讲--》记django的request---》类似


3 前端传入的:请求体   请求参数
    -请求体:request.form--->编码格式是 urlencoded
    -请求参数:request.args-->路径后的  /demo01?name=lqz&age=19

4 渲染 模板--》跟django 90%---》它比django更强大--》可以加括号--》字典可以.get   []
    for   {{}}

5 session 使用
    - 设置 app.secret_key='adsfa33w9SAD##@sdr434l'
    - 设置值:session['username']
    - 取值:session.get('username')


6 路由转换器
    @app.route('/detail/<int:pk>', methods=['GET'])
'''
app.py
 1 from flask import Flask, render_template, request, redirect, session,jsonify
 2
 3 app = Flask(__name__, template_folder="templates", static_folder="static")
 4 app.secret_key='adsfa33w9SAD##@sdr434l' #如果使用session,必须加秘钥
 5
 6 # 用户信息
 7 USERS = {
 8     1: {'name': '刘亦菲', 'age': 18, 'gender': '男', 'text': "刘亦菲,1987年8月25日出生于湖北省武汉市,华语影视女演员、歌手,毕业于北京电影学院2002级表演系本科",'img':'https://img2.woyaogexing.com/2021/10/16/e3ccba623848430ba83209c0621a2256!400x400.jpeg'},
 9     2: {'name': '彭于晏', 'age': 28, 'gender': '男', 'text': "彭于晏,1982年3月24日出生于中国台湾省澎湖县,毕业于不列颠哥伦比亚大学,华语影视男演员。。。。。。。。",'img':'https://img2.woyaogexing.com/2021/10/16/e71aa35728c34313bccb4c371192990f!400x400.jpeg'},
10     3: {'name': '迪丽热巴', 'age': 38, 'gender': '女', 'text': "迪丽热巴(Dilraba),1992年6月3日出生于中国新疆乌鲁木齐市,毕业于上海戏剧学院,中国内地影视女演员",'img':'https://img2.woyaogexing.com/2021/10/30/6a34146dde2d4f1c832463a5be1ed027!400x400.jpeg'},
11     4: {'name': '亚瑟', 'age': 38, 'gender': '男', 'text': "亚瑟,是腾讯手游《王者荣耀》中一名战士型英雄角色,也是《王者荣耀》的新手英雄之一,既可攻又可守",'img':'https://img2.woyaogexing.com/2021/10/30/371b2aa7a03c4f53b7b1bc86f877d7d1!400x400.jpeg'},
12 }
13 @app.route('/')
14 def index():
15     # 7 判断用户是否登录,如果登录了,返回模板
16     if session.get('username'):
17         # 1 返回模板,渲染到模板中
18         return render_template('index.html',user_dict=USERS)
19     # 如果没登录,重定向到login
20     else:
21         return redirect('/login')
22
23
24 @app.route('/login', methods=['GET', 'POST'])
25 def login():
26     # 2 判断是get请求还是post请求,需要使用request对象
27     ## 2.1 request 正常每次请求都是新的request---》现在flask中全局就一个request--》它会不会乱套?
28     if request.method == 'GET':
29         return render_template('login.html')
30     else:
31         # 3 取出用户名密码--》请求对象中取--》request
32         username = request.form.get('username')
33         password = request.form.get('password')
34         if username == 'lqz' and password == '123':
35             # 6 登录成功--》登录信息写入cookie--》使用session写入
36             session['username'] = username
37             # 4 登录成功--》重定向到 index
38             return redirect('/')
39         else:
40             # 5 登录失败--》返回login.html 页面,但是页面中渲染错误信息
41             return render_template('login.html', error='用户名密码错误')
42
43 @app.route('/detail/<int:pk>', methods=['GET'])
44 def detail(pk):
45     if session.get('username'):
46         user = USERS.get(pk)
47         return render_template('detail.html',info=user)
48     else:
49         return redirect('/login')
50
51 @app.route('/demo01', methods=['GET'])
52 def demo01():
53     request.args
54     return jsonify({'code':100,'msg':'成功'})
55
56 if __name__ == '__main__':
57     app.run()
index.html
  1 <!DOCTYPE html>
  2 <html lang="en">
  3 <head>
  4     <meta charset="UTF-8">
  5     <link rel="stylesheet" href="https://cdn.jsdelivr.net/npm/bootstrap@5.3.0-alpha1/dist/css/bootstrap.min.css">
  6     <script src="https://cdn.jsdelivr.net/npm/bootstrap@5.3.0-alpha1/dist/js/bootstrap.bundle.min.js"></script>
  7     <title>Title</title>
  8 </head>
  9 <body>
 10 <div class="container">
 11
 12     <!--    头部-->
 13     <div class="sticky-top">
 14         <header class="d-flex flex-wrap justify-content-center py-3 mb-4 border-bottom">
 15             <a href="/" class="d-flex align-items-center mb-3 mb-md-0 me-md-auto text-dark text-decoration-none">
 16                 <svg class="bi me-2" width="40" height="32">
 17                     <use xlink:href="#bootstrap"></use>
 18                 </svg>
 19                 <span class="fs-4">交友平台</span>
 20             </a>
 21
 22             <ul class="nav nav-pills">
 23                 <li class="nav-item"><a href="#" class="nav-link active" aria-current="page">首页</a></li>
 24                 <li class="nav-item"><a href="#" class="nav-link">女生</a></li>
 25                 <li class="nav-item"><a href="#" class="nav-link">男生</a></li>
 26                 <li class="nav-item"><a href="#" class="nav-link">国产</a></li>
 27                 <li class="nav-item"><a href="#" class="nav-link">欧美</a></li>
 28             </ul>
 29         </header>
 30     </div>
 31     <!--轮播图-->
 32     <div>
 33         <div class="bd-example-snippet bd-code-snippet">
 34             <div class="bd-example">
 35                 <div id="carouselExampleCaptions" class="carousel slide" data-bs-ride="carousel">
 36                     <div class="carousel-indicators">
 37                         <button type="button" data-bs-target="#carouselExampleCaptions" data-bs-slide-to="0" class=""
 38                                 aria-label="Slide 1"></button>
 39                         <button type="button" data-bs-target="#carouselExampleCaptions" data-bs-slide-to="1"
 40                                 aria-label="Slide 2" class="active" aria-current="true"></button>
 41                         <button type="button" data-bs-target="#carouselExampleCaptions" data-bs-slide-to="2"
 42                                 aria-label="Slide 3" class=""></button>
 43                     </div>
 44                     <div class="carousel-inner">
 45                         <div class="carousel-item">
 46                             <img src="https://img.zcool.cn/community/01fb5458fedf57a801214550f9677a.jpg@2o.jpg" alt=""
 47                                  width="100%" height="300">
 48                             <div class="carousel-caption d-none d-md-block">
 49                                 <h5>激情绿荫</h5>
 50                                 <p>Some representative placeholder content for the first slide.</p>
 51                             </div>
 52                         </div>
 53                         <div class="carousel-item active">
 54                             <img src="https://img2.baidu.com/it/u=2951612437,4135887500&fm=253&fmt=auto&app=138&f=JPEG"
 55                                  alt="" width="100%" height="300">
 56                             <div class="carousel-caption d-none d-md-block">
 57                                 <h5>品牌雨伞</h5>
 58                                 <p>Some representative placeholder content for the second slide.</p>
 59                             </div>
 60                         </div>
 61                         <div class="carousel-item">
 62                             <img src="https://img1.baidu.com/it/u=1417689082,3333220267&fm=253&fmt=auto&app=138&f=JPEG"
 63                                  alt="" width="100%" height="300">
 64                             <div class="carousel-caption d-none d-md-block">
 65                                 <h5>家装节</h5>
 66                                 <p>Some representative placeholder content for the third slide.</p>
 67                             </div>
 68                         </div>
 69                     </div>
 70                     <button class="carousel-control-prev" type="button" data-bs-target="#carouselExampleCaptions"
 71                             data-bs-slide="prev">
 72                         <span class="carousel-control-prev-icon" aria-hidden="true"></span>
 73                         <span class="visually-hidden">Previous</span>
 74                     </button>
 75                     <button class="carousel-control-next" type="button" data-bs-target="#carouselExampleCaptions"
 76                             data-bs-slide="next">
 77                         <span class="carousel-control-next-icon" aria-hidden="true"></span>
 78                         <span class="visually-hidden">Next</span>
 79                     </button>
 80                 </div>
 81             </div>
 82         </div>
 83
 84     </div>
 85
 86     <!--    内容-->
 87     <div class="row row-cols-md-2" style="padding: 10px">
 88         {% for k,v in user_dict.items() %}
 89         <div class="card">
 90             <div class="row " style="padding: 10px">
 91                 <img src="{{v.get('img')}}" alt="" class="col-md-4">
 92                 <div class="col-md-8">
 93                     <div class="card-body">
 94                         <h5 class="card-title">{{v['name']}}</h5>
 95                         <p class="card-text">性别:{{v.gender}}</p>
 96                         <p class="card-text">年龄:{{v.age}}</p>
 97                         <p class="card-text">
 98                             <a href="/detail/{{k}}" class="btn btn-danger">查看详细</a>
 99                         </p>
100                     </div>
101                 </div>
102
103             </div>
104
105         </div>
106         {%endfor%}
107     </div>
108     <!--    table-->
109     <div class="bd-example" style="margin-top: 30px">
110         <table class="table table-hover table-striped table-bordered">
111             <thead>
112             <tr class="table-danger">
113                 <th colspan="3" class="text-center">更多交友</th>
114             </tr>
115             </thead>
116             <tbody>
117             <tr class="table-success">
118                 <th>杨幂</th>
119                 <td>女</td>
120                 <td>33</td>
121             </tr>
122             <tr class="table-warning">
123                 <th scope="row">刘亦菲</th>
124                 <td>未知</td>
125                 <td>40</td>
126             </tr>
127             <tr class="table-success">
128                 <th scope="row">彭于晏</th>
129                 <td>男</td>
130                 <td>23</td>
131             </tr>
132             <tr class="table-warning">
133                 <th scope="row">陈奕迅</th>
134                 <td>男</td>
135                 <td>44</td>
136             </tr>
137             <tr class="table-success">
138                 <th scope="row">薛之谦</th>
139                 <td>男</td>
140                 <td>36</td>
141             </tr>
142             <tr class="table-warning">
143                 <th>李清照</th>
144                 <td>女</td>
145                 <td>未知</td>
146             </tr>
147
148             </tbody>
149         </table>
150     </div>
151     <!--分页-->
152     <div class="d-flex justify-content-center">
153         <ul class="pagination pagination-lg">
154             <li class="page-item">
155                 <a class="page-link" href="#" aria-label="Previous">
156                     <span aria-hidden="true">«</span>
157                 </a>
158             </li>
159             <li class="page-item"><a class="page-link" href="#">1</a></li>
160             <li class="page-item"><a class="page-link" href="#">2</a></li>
161             <li class="page-item"><a class="page-link" href="#">3</a></li>
162             <li class="page-item"><a class="page-link" href="#">4</a></li>
163             <li class="page-item"><a class="page-link" href="#">5</a></li>
164             <li class="page-item"><a class="page-link" href="#">6</a></li>
165             <li class="page-item">
166                 <a class="page-link" href="#" aria-label="Next">
167                     <span aria-hidden="true">»</span>
168                 </a>
169             </li>
170         </ul>
171     </div>
172
173     <!--    尾部-->
174     <div>
175         <footer class="py-3 my-4">
176             <ul class="nav justify-content-center border-bottom pb-3 mb-3">
177                 <li class="nav-item"><a href="#" class="nav-link px-2 text-muted">首页</a></li>
178                 <li class="nav-item"><a href="#" class="nav-link px-2 text-muted">特性</a></li>
179                 <li class="nav-item"><a href="#" class="nav-link px-2 text-muted">联系我们</a></li>
180                 <li class="nav-item"><a href="#" class="nav-link px-2 text-muted">资料获取</a></li>
181                 <li class="nav-item"><a href="#" class="nav-link px-2 text-muted">关于</a></li>
182             </ul>
183             <p class="text-center text-muted">Copyright © 1998 - 2029 liuqingzheng. All Rights Reserved. </p>
184         </footer>
185     </div>
186 </div>
187 </body>
188 </html>
login.html
 1 <!DOCTYPE html>
 2 <html lang="en">
 3 <head>
 4     <meta charset="UTF-8">
 5     <link rel="stylesheet" href="https://cdn.jsdelivr.net/npm/bootstrap@5.3.0-alpha1/dist/css/bootstrap.min.css">
 6     <title>登录</title>
 7 </head>
 8 <body>
 9 <div class="container col-xl-10 col-xxl-8 px-4 py-5">
10     <div class="row align-items-center g-lg-5 py-5">
11         <div class="col-lg-7 text-center text-lg-start">
12             <h1 class="display-4 fw-bold lh-1 mb-3">亚洲最大交友平台</h1>
13             <p class="col-lg-10 fs-4">Bootstrap是Twitter推出的一个用于前端开发的开源工具包。它由Twitter的设计师Mark
14                 Otto和Jacob Thornton合作开发,是一个CSS/HTML框架。目前,Bootstrap最新版本为5.0</p>
15         </div>
16         <div class="col-md-10 mx-auto col-lg-5">
17             <form class="p-4 p-md-5 border rounded-3 bg-light" method="post">
18                 <div class="form-floating mb-3">
19                     <input type="text" class="form-control" id="floatingInput" placeholder="name@example.com" name="username">
20                     <label for="floatingInput">用户名</label>
21                 </div>
22                 <div class="form-floating mb-3">
23                     <input type="password" class="form-control" id="floatingPassword" placeholder="Password" name="password">
24                     <label for="floatingPassword">密码</label>
25                 </div>
26                 <div class="checkbox mb-3">
27                     <label>
28                         <input type="checkbox" value="remember-me"> 记住密码
29                     </label>
30                 </div>
31                 <button class="w-100 btn btn-lg btn-primary" type="submit">登录</button>
32                 <hr class="my-4">
33                 <small class="text-muted">{{error}}</small>
34             </form>
35         </div>
36     </div>
37 </div>
38 </body>
39 </html>
detai.html
 1 <!DOCTYPE html>
 2 <html lang="en">
 3 <head>
 4     <meta charset="UTF-8">
 5     <link rel="stylesheet" href="https://cdn.jsdelivr.net/npm/bootstrap@5.3.0-alpha1/dist/css/bootstrap.min.css">
 6     <script src="https://cdn.jsdelivr.net/npm/bootstrap@5.3.0-alpha1/dist/js/bootstrap.bundle.min.js"></script>
 7     <title>Title</title>
 8 </head>
 9 <body>
10 <div class="container">
11
12
13     <div class="sticky-top">
14         <header class="d-flex flex-wrap justify-content-center py-3 mb-4 border-bottom">
15             <a href="/" class="d-flex align-items-center mb-3 mb-md-0 me-md-auto text-dark text-decoration-none">
16                 <svg class="bi me-2" width="40" height="32">
17                     <use xlink:href="#bootstrap"></use>
18                 </svg>
19                 <span class="fs-4">交友平台</span>
20             </a>
21
22             <ul class="nav nav-pills">
23                 <li class="nav-item"><a href="#" class="nav-link active" aria-current="page">首页</a></li>
24                 <li class="nav-item"><a href="#" class="nav-link">女生</a></li>
25                 <li class="nav-item"><a href="#" class="nav-link">男生</a></li>
26                 <li class="nav-item"><a href="#" class="nav-link">国产</a></li>
27                 <li class="nav-item"><a href="#" class="nav-link">欧美</a></li>
28             </ul>
29         </header>
30     </div>
31
32     <div class="position-relative overflow-hidden p-3 p-md-5 m-md-3 text-center bg-light">
33         <div class="col-md-5 p-lg-5 mx-auto my-5">
34             <h1 class="display-4 fw-normal">{{info.name}}</h1>
35             <img src="{{info.img}}" alt=""
36                  width="300px" height="300px" style="margin: 20px">
37
38             <p class="lead fw-normal">{{info.text}}</p>
39             <a class="btn btn-outline-secondary" href="#">收藏</a>
40         </div>
41         <div class="product-device shadow-sm d-none d-md-block"></div>
42         <div class="product-device product-device-2 shadow-sm d-none d-md-block"></div>
43     </div>
44     <div>
45         <footer class="py-3 my-4">
46             <ul class="nav justify-content-center border-bottom pb-3 mb-3">
47                 <li class="nav-item"><a href="#" class="nav-link px-2 text-muted">首页</a></li>
48                 <li class="nav-item"><a href="#" class="nav-link px-2 text-muted">特性</a></li>
49                 <li class="nav-item"><a href="#" class="nav-link px-2 text-muted">联系我们</a></li>
50                 <li class="nav-item"><a href="#" class="nav-link px-2 text-muted">资料获取</a></li>
51                 <li class="nav-item"><a href="#" class="nav-link px-2 text-muted">关于</a></li>
52             </ul>
53             <p class="text-center text-muted">Copyright © 1998 - 2029 liuqingzheng. All Rights Reserved. </p>
54         </footer>
55     </div>
56
57 </div>
58 </body>
59 </html>
。
。
登录认证装饰器
# 问题一:登录装饰器,放上还是下 放下面
# 问题二:每个路由有个别名【反向解析】--》这个别名如果不写--》会以函数名作为别名--》一旦加了登录认证装饰器,所有别名都变成了 inner
# 1 使用装饰器装饰装饰器 @wraps(func)
# 2 每个人都指定别名
 1 from flask import Flask, render_template, request, redirect, session, jsonify
 2
 3 app = Flask(__name__, template_folder="templates", static_folder="static")
 4 app.secret_key = 'adsfa33w9SAD##@sdr434l'  # 如果使用session,必须加秘钥
 5
 6 from functools import wraps
 7 # 用户登录,写个装饰器
 8 def login_required(func):
 9     # @wraps(func)
10     def inner(*args, **kw):
11         # 判断有没有登录
12         if session.get('username'):
13             res = func(*args, **kw)
14             return res
15         else:
16             return redirect('/login')
17
18     return inner
19
20
21 # 用户信息
22 USERS = {
23     1: {'name': '刘亦菲', 'age': 18, 'gender': '男', 'text': "刘亦菲,1987年8月25日出生于湖北省武汉市,华语影视女演员、歌手,毕业于北京电影学院2002级表演系本科",
24         'img': 'https://img2.woyaogexing.com/2021/10/16/e3ccba623848430ba83209c0621a2256!400x400.jpeg'},
25     2: {'name': '彭于晏', 'age': 28, 'gender': '男', 'text': "彭于晏,1982年3月24日出生于中国台湾省澎湖县,毕业于不列颠哥伦比亚大学,华语影视男演员。。。。。。。。",
26         'img': 'https://img2.woyaogexing.com/2021/10/16/e71aa35728c34313bccb4c371192990f!400x400.jpeg'},
27     3: {'name': '迪丽热巴', 'age': 38, 'gender': '女', 'text': "迪丽热巴(Dilraba),1992年6月3日出生于中国新疆乌鲁木齐市,毕业于上海戏剧学院,中国内地影视女演员",
28         'img': 'https://img2.woyaogexing.com/2021/10/30/6a34146dde2d4f1c832463a5be1ed027!400x400.jpeg'},
29     4: {'name': '亚瑟', 'age': 38, 'gender': '男', 'text': "亚瑟,是腾讯手游《王者荣耀》中一名战士型英雄角色,也是《王者荣耀》的新手英雄之一,既可攻又可守",
30         'img': 'https://img2.woyaogexing.com/2021/10/30/371b2aa7a03c4f53b7b1bc86f877d7d1!400x400.jpeg'},
31 }
32
33 # 问题一:登录装饰器,放上还是下  放下面
34 # 问题二:每个路由有个别名【反向解析】--》这个别名如果不写--》会以函数名作为别名--》一旦加了登录认证装饰器,所有别名都变成了 inner
35     # 1 使用装饰器装饰装饰器  @wraps(func)
36     # 2 每个人都指定别名
37
38 @app.route('/',endpoint='index')
39 @login_required
40 def index():
41     return render_template('index.html', user_dict=USERS)
42
43
44 @app.route('/login', methods=['GET', 'POST'])
45 def login():
46     # 2 判断是get请求还是post请求,需要使用request对象
47     ## 2.1 request 正常每次请求都是新的request---》现在flask中全局就一个request--》它会不会乱套?
48     if request.method == 'GET':
49         return render_template('login.html')
50     else:
51         # 3 取出用户名密码--》请求对象中取--》request
52         username = request.form.get('username')
53         password = request.form.get('password')
54         if username == 'lqz' and password == '123':
55             # 6 登录成功--》登录信息写入cookie--》使用session写入
56             session['username'] = username
57             # 4 登录成功--》重定向到 index
58             return redirect('/')
59         else:
60             # 5 登录失败--》返回login.html 页面,但是页面中渲染错误信息
61             return render_template('login.html', error='用户名密码错误')
62
63
64 @app.route('/detail/<int:pk>', methods=['GET'],endpoint='detail')
65 @login_required
66 def detail(pk):
67     user = USERS.get(pk)
68     return render_template('detail.html', info=user)
69
70
71 @app.route('/demo01', methods=['GET'])
72 def demo01():
73     request.args
74     return jsonify({'code': 100, 'msg': '成功'})
75
76
77 if __name__ == '__main__':
78     app.run()
。
。
flask的配置文件
  1 from flask import Flask
  2
  3 app = Flask(__name__)
  4 # 方式二:
  5 # app.config['DEBUG'] = True
  6 # app.config['SECRET_KEY'] = 'aaaa'
  7 # 方式三:
  8 app.config.from_pyfile('settings.py')
  9 # 配置项  默认配置信息是字典,都在config这里面
 10 print(app.config)
 11 '''
 12 <Config {'DEBUG': False, 'TESTING': False, 'PROPAGATE_EXCEPTIONS': None,
 13 'SECRET_KEY': None, 'PERMANENT_SESSION_LIFETIME': datetime.timedelta(days=31),
 14 'USE_X_SENDFILE': False, 'SERVER_NAME': None,
 15 'APPLICATION_ROOT': '/', 'SESSION_COOKIE_NAME': 'session',
 16 'SESSION_COOKIE_DOMAIN': None, 'SESSION_COOKIE_PATH': None,
 17 'SESSION_COOKIE_HTTPONLY': True, 'SESSION_COOKIE_SECURE': False,
 18 'SESSION_COOKIE_SAMESITE': None, 'SESSION_REFRESH_EACH_REQUEST': True,
 19 'MAX_CONTENT_LENGTH': None, 'SEND_FILE_MAX_AGE_DEFAULT': None,
 20 'TRAP_BAD_REQUEST_ERRORS': None, 'TRAP_HTTP_EXCEPTIONS': False,
 21 'EXPLAIN_TEMPLATE_LOADING': False, 'PREFERRED_URL_SCHEME': 'http',
 22 'TEMPLATES_AUTO_RELOAD': None, 'MAX_COOKIE_SIZE': 4093}>
 23
 24 '''
 25
 26
 27 @app.get('/')
 28 def index():
 29     return 'hello flask'
 30
 31
 32 if __name__ == '__main__':
 33     app.run()
 34
 35
 36
 37 -------------------------------------------------------
 38 # 1 django中配置文件用的是: settings.py
 39     -实际开发中用了两套配置文件
 40
 41
 42 # 2 flask配置文件使用--之 默认配置项- -debug --SECRET_KEY
 43     print(app.config)
 44
 45 flask中的配置文件是一个flask.config.Config对象(继承字典),默认配置为:
 46  {
 47         'DEBUG':                                get_debug_flag(default=False),  是否开启Debug模式
 48         'TESTING':                              False,                          是否开启测试模式
 49         'PROPAGATE_EXCEPTIONS':                 None,
 50         'PRESERVE_CONTEXT_ON_EXCEPTION':        None,
 51         'SECRET_KEY':                           None,
 52         'PERMANENT_SESSION_LIFETIME':           timedelta(days=31),
 53         'USE_X_SENDFILE':                       False,
 54         'LOGGER_NAME':                          None,
 55         'LOGGER_HANDLER_POLICY':               'always',
 56         'SERVER_NAME':                          None,
 57         'APPLICATION_ROOT':                     None,
 58         'SESSION_COOKIE_NAME':                  'session',
 59         'SESSION_COOKIE_DOMAIN':                None,
 60         'SESSION_COOKIE_PATH':                  None,
 61         'SESSION_COOKIE_HTTPONLY':              True,
 62         'SESSION_COOKIE_SECURE':                False,
 63         'SESSION_REFRESH_EACH_REQUEST':         True,
 64         'MAX_CONTENT_LENGTH':                   None,
 65         'SEND_FILE_MAX_AGE_DEFAULT':            timedelta(hours=12),
 66         'TRAP_BAD_REQUEST_ERRORS':              False,
 67         'TRAP_HTTP_EXCEPTIONS':                 False,
 68         'EXPLAIN_TEMPLATE_LOADING':             False,
 69         'PREFERRED_URL_SCHEME':                 'http',
 70         'JSON_AS_ASCII':                        True,
 71         'JSON_SORT_KEYS':                       True,
 72         'JSONIFY_PRETTYPRINT_REGULAR':          True,
 73         'JSONIFY_MIMETYPE':                     'application/json',
 74         'TEMPLATES_AUTO_RELOAD':                None,
 75     }
 76
 77
 78
 79
 80 # 3 修改默认
 81     # 方式一:直接在app上改,实际他们在config属性上(开发阶段用,只能改这两个)
 82             app.debug=True
 83         app.secret_key='asdfasdf'
 84         # 方式二:通过app.config改--》celery就是这样
 85             app.config['DEBUG']=True
 86         app.config['SECRET_KEY']='aaaa'
 87
 88     # 方式三:app.config.from_pyfile("python文件名称")--跟django一样
 89             1 写一个 settings.py
 90             2 app.config.from_pyfile('settings.py')
 91
 92     # 方式四:app.config.from_object('settings.TestingConfig')
 93                 class Config(object):
 94                     DEBUG = False
 95                     TESTING = False
 96                     DATABASE_URI = '127.0.0.1'
 97                     DATABASE_PORT = 3306
 98                 class ProductionConfig(Config):
 99                     DATABASE_URI = '192.168.1.11'
100                     DATABASE_PORT = 3308
101                 class DevelopmentConfig(Config):
102                     DEBUG = True
103     # 方式其他:
104         app.config.from_envvar("环境变量名称")
105     app.config.from_json("json文件名称")
106     app.config.from_mapping({'DEBUG': True}) #可能会用
107         - 配置中心---》服务--》有个地址,发送请求会返回一对json格式配置文件
108         -nocos
109
110     # dotenv的使用
111
112
113
114 # 4 设置自己(跟修改默认一样)
115     -app.config['DB_PASSWORD']='lqz123'

 浙公网安备 33010602011771号