前端开发随笔
前端技术栈以 Jinja2 为模板,TailwindCSS 负责样式,而 Alpine.js 则是实现所有客户端交互的“魔法棒”。Alpine.js 允许我们直接在 HTML 中编写组件逻辑,极大地简化了前端开发。
- aimap_fusion.html:三步联动的 AI 融创流程
此页面是项目的核心,它通过三个阶段——解构、构想、呈现——将用户的图片转化为全新的 AI 设计。这背后是一个清晰的状态流转和两次关键的 API 调用。
关键逻辑:fusionApp 组件逻辑
<script>
    function fusionApp() {
        return {
            // --- 状态定义 ---
            previewUrl: null,         // 用于图片本地预览的 URL
            file: null,               // 用户上传的文件对象
            isLoading: false,         // “解析”阶段的加载状态
            isGeneratingImage: false, // “生成视觉图”阶段的加载状态
            recognitionResult: null,  // 第一次 API 调用返回的“元素解构”结果
            fusionDesign: null,       // 第一次 API 调用返回的“融合构想”结果
            generatedImageUrl: null,  // 第二次 API 调用返回的最终图片 URL

            // --- 方法定义 ---
            // 文件处理 (选择或拖拽)
            processFile(f) {
                this.file = f;
                this.previewUrl = URL.createObjectURL(f);
            },

            // 第一步:开始识别与构想
            startRecognition() {
                if(!this.file) return;
                this.isLoading = true;
                const fd = new FormData();
                fd.append('file', this.file);

                fetch('/api/recognize_costume', {method:'POST', body:fd})
                .then(r=>r.json()).then(d=>{
                    if(d.success){
                        // 更新状态,触发 UI 变化
                        this.recognitionResult = d.recognition;
                        this.fusionDesign = d.fusion_design;
                    }
                })
                .finally(()=>this.isLoading=false);
            },

            // 第二步:生成视觉图
            generateImage() {
                this.isGeneratingImage = true;
                // 从上一步的结果中获取用于生成图片的 prompt
                const prompt = this.fusionDesign.image_prompt || this.fusionDesign.fusion_design;

                fetch('/api/generate_costume_image', {
                    method:'POST',
                    headers:{'Content-Type':'application/json'},
                    body:JSON.stringify({image_prompt:prompt})
                })
                .then(r=>r.json()).then(d=>{
                    if(d.success) {
                        // 更新状态,显示最终生成的图片
                        this.generatedImageUrl = d.image_url;
                    }
                })
                .finally(()=>this.isGeneratingImage=false);
            }
        }
    }
</script>
fusionApp 定义了清晰的状态变量,如 isLoading 和 isGeneratingImage 分别控制两个不同阶段的加载动画,recognitionResult 和 generatedImageUrl 则用于存储 API 返回的数据。当这些状态改变时,HTML 中使用 x-show 或 x-text 指令的元素会自动更新
效果图:

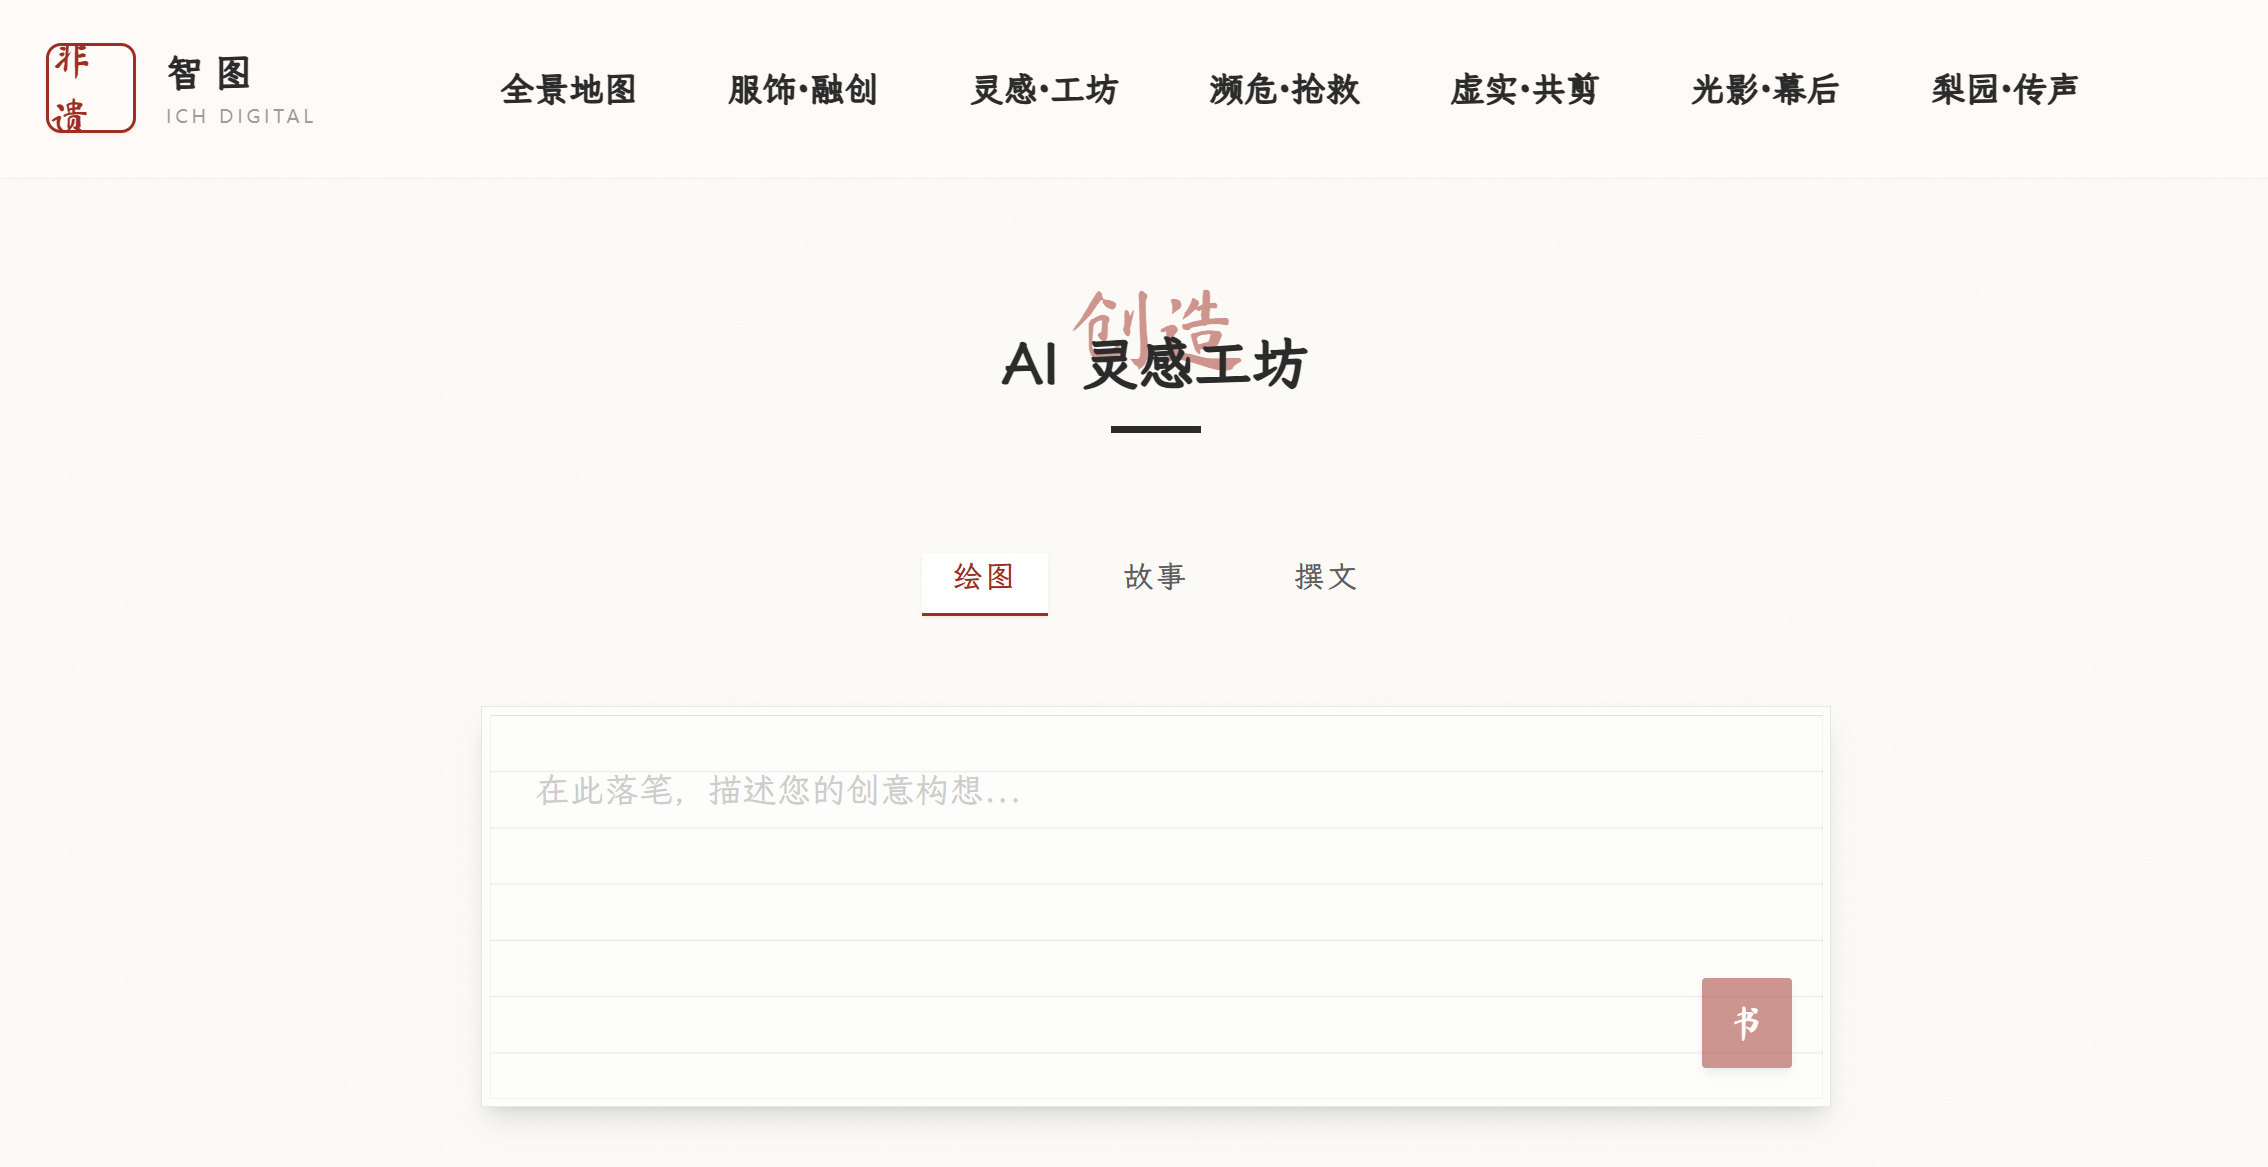
- ai_create.html:灵活的通用 AI 内容工坊
这个页面提供了一个统一的界面来处理绘图、故事和撰文三种不同的 AI 生成任务。它的精妙之处在于用同一个 API 和结果对象,通过 type 状态来区分处理逻辑和展示方式。
关键代码逻辑:
<script>
function createApp() {
    return {
        // --- 状态定义 ---
        type: 'image',      // 当前生成类型 ('image', 'story', 'copy')
        prompt: '',         // 用户输入的文本
        loading: false,     // 加载状态
        result: null,       // 存储 API 返回的完整结果对象

        // --- 方法定义 ---
        submit() {
            this.loading = true;
            this.result = null;
            fetch('/api/ai/generate', {
                method: 'POST',
                headers: {'Content-Type': 'application/json'},
                // 将 prompt 和 type 一同发送给后端
                body: JSON.stringify({prompt: this.prompt, generation_type: this.type})
            })
            .then(r=>r.json())
            .then(d=>{
                if(d.success) {
                    // 直接将返回的 JSON 对象赋给 result
                    this.result = d;
                }
            })
            .finally(()=>this.loading=false);
        }
    }
}
</script>
submit 方法将用户的 prompt 和当前的 type 一起打包发送到统一的 /api/ai/generate 接口。后端可以根据 generation_type 字段来决定调用哪个 AI 模型
效果图:
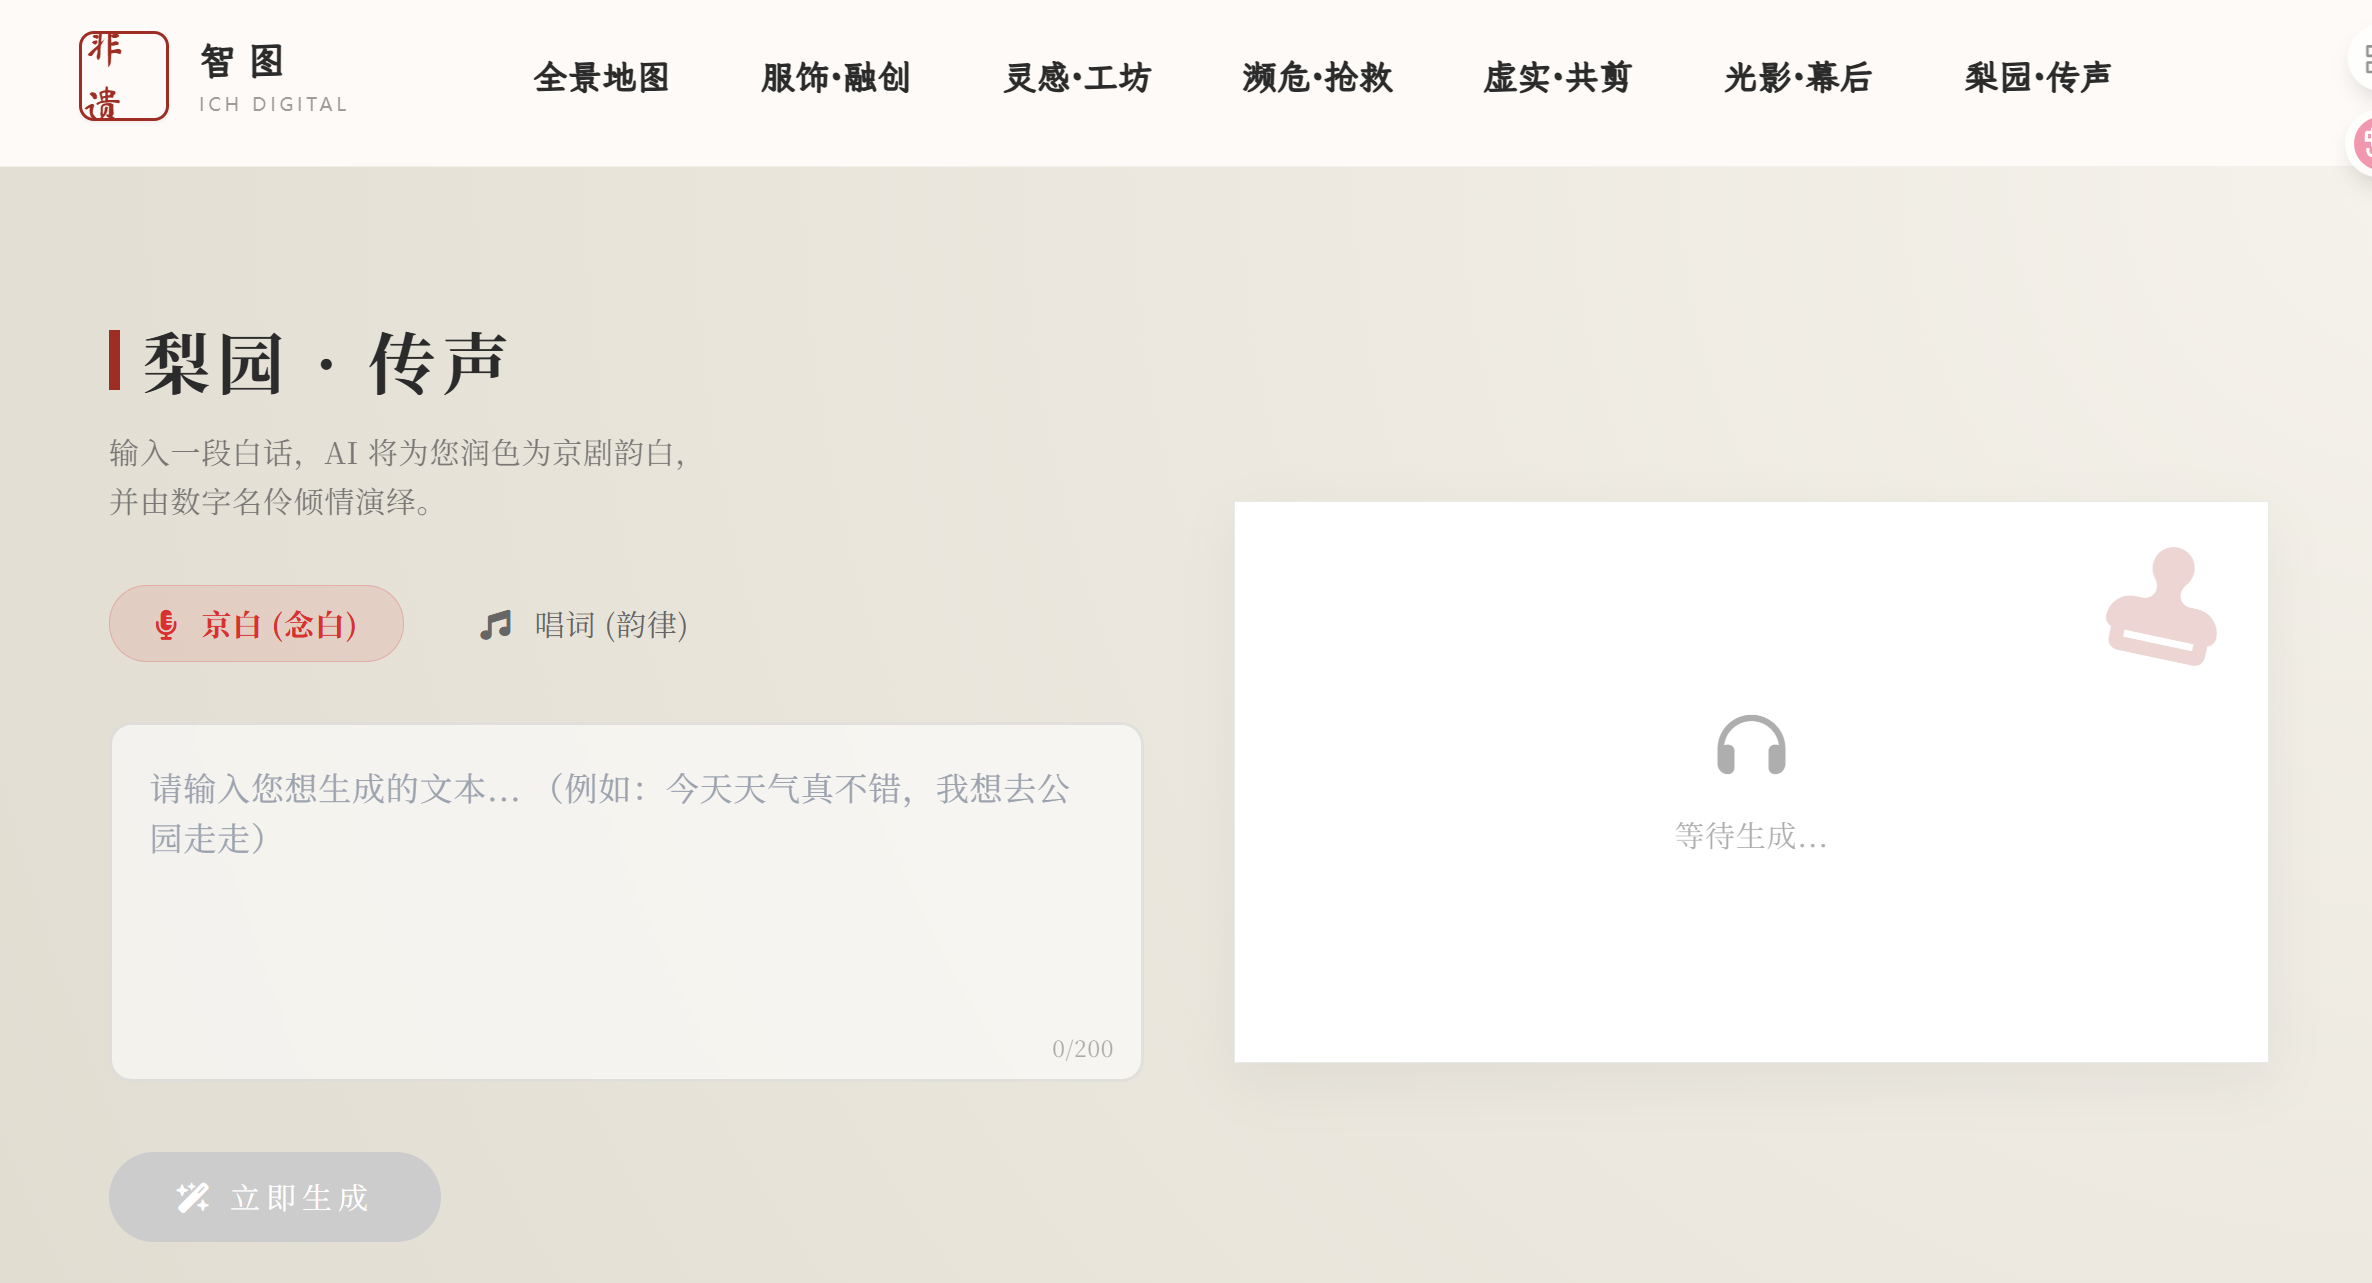
- jingju_synthesis.html:融合 AI 与音频播放
此页面实现了从文本到京剧韵白音频的转换,并内置了播放器。代码的重点在于 API 调用、音频元素 (
关键代码逻辑:
<script>
    function jingjuApp() {
        return {
            // --- 状态定义 ---
            inputText: '',          // 用户输入的原文
            resultText: '',         // AI 润色后的京剧文本
            audioUrl: '',           // 生成的音频文件 URL
            style: 'jingju_nianbai',// 'jingju_nianbai' 或 'jingju_changci'
            isPlaying: false,       // 是否正在播放
            loading: false,

            // --- 方法定义 ---
            generateAudio() {
                // ... 省略非核心代码 ...
                this.loading = true;
                const audio = this.$refs.audioPlayer; // 通过 x-ref 获取 audio 元素
                audio.pause();

                fetch('/api/jingju', {
                    method: 'POST',
                    headers: {'Content-Type': 'application/json'},
                    body: JSON.stringify({ text: this.inputText, prompt_style: this.style })
                })
                .then(res => res.json())
                .then(data => {
                    if (data.ok) {
                        this.resultText = data.jingju_text;
                        this.audioUrl = data.wav_url;

                        audio.src = this.audioUrl; // 设置音频源
                        audio.load();
                        audio.play().then(() => {
                            this.isPlaying = true; // 播放成功后更新状态
                        });
                    }
                })
                .finally(() => { this.loading = false; });
            },

            togglePlay() {
                const audio = this.$refs.audioPlayer;
                if (this.isPlaying) {
                    audio.pause();
                } else {
                    if (this.audioUrl) audio.play();
                }
                // isPlaying 状态会通过 audio 元素的 @play 和 @ended 事件自动更新
            }
        }
    }
</script>
通过在
效果图:
- recognize.html:纯粹的 API 测试与展示
这个页面功能最直接:上传图片,调用 API,然后将返回的原始 JSON 数据完整显示。在主项目中没有展示,测试效果良好
关键代码逻辑:
<script>
 function recognizeApp() {
   return {
     // ... 状态定义: file, previewUrl, loading, error ...
     raw: null, // 用于存储完整的 API 响应 JSON

     async submit() {
       this.error = "";
       this.raw = null;
       if (!this.file) return;
       this.loading = true;

       try {
         const form = new FormData();
         form.append("file", this.file);

         const resp = await fetch("/api/recognize", { method: "POST", body: form });
         const data = await resp.json().catch(() => ({})); // 防止 JSON 解析失败

         if (!resp.ok || !data.success) {
           this.error = (data && data.error) ? data.error : `请求失败 (HTTP ${resp.status})`;
           return;
         }
         this.raw = data; // 将整个成功响应赋给 raw
       } catch (e) {
         this.error = String(e);
       } finally {
         this.loading = false;
       }
     },
     // ...
   }
 }
</script>
结果直接存储在 raw 状态中。HTML 中使用
将其格式化后优雅地展示出来效果图:


 浙公网安备 33010602011771号