
Centos7安装Z配置abbix4.4(最简单完整刘基础小白也可以学会的安装教程)
一,yum安装mysql 5.7
1. 从官网下载mysql yum源
#wget https://repo.mysql.com//mysql80-community-release-el7-1.noarch.rpm
2. 安装 yum源
#yum localinstall mysql80-community-release-el7-1.noarch.rpm
3. 配置yum源
cd /etc/yum.repos.d/
进入yum源目录
#ls
#vim mysql-community.repo
【建议安装mysql 5.5】
把eabled=0 改为=1 意为默认安装该版本,同时把下面8.0版本的 enabled=1改为=0

4. 安装mysql
#yum install mysql-community-server
5. 启动mysql
#systemctl start mysqld.service
二,安装zabbix
1.选择您Zabbix服务器的平台
本文选择安装目前最新的zabbix4.4版本,4.4版本相对于老版本更新了更多的新功能。
本文中使用的环境为 zabbix4.4+Centos7.6+mysql_5.5+Apache
2.开始安装Zabbix
a. 安装 数据库
# rpm -Uvh https://repo.zabbix.com/zabbix/4.4/rhel/7/x86_64/zabbix-release-4.4-1.el7.noarch.rpm
# yum clean all
b. 安装Zabbix server,Web前端,agent
# yum install zabbix-server-mysql zabbix-web-mysql zabbix-agent
【注:很多时候因为中国长城防火墙的原因,访问外网网址收部分闲置,zabbix尽享yum安装的时候会报错安装失败等,可以选择使用更换yum源的方式进行解决,参考:https://www.cnblogs.com/liruoxiao/p/12779359.html】
c. 创建初始数据库
# mysql -uroot -p
password
mysql> create database zabbix character set utf8 collate utf8_bin;
mysql> grant all privileges on zabbix.* to zabbix@localhost identified by 'password';
mysql> quit;
导入初始架构和数据,系统将提示您输入新创建的密码。
# zcat /usr/share/doc/zabbix-server-mysql*/create.sql.gz | mysql -uzabbix -p zabbix
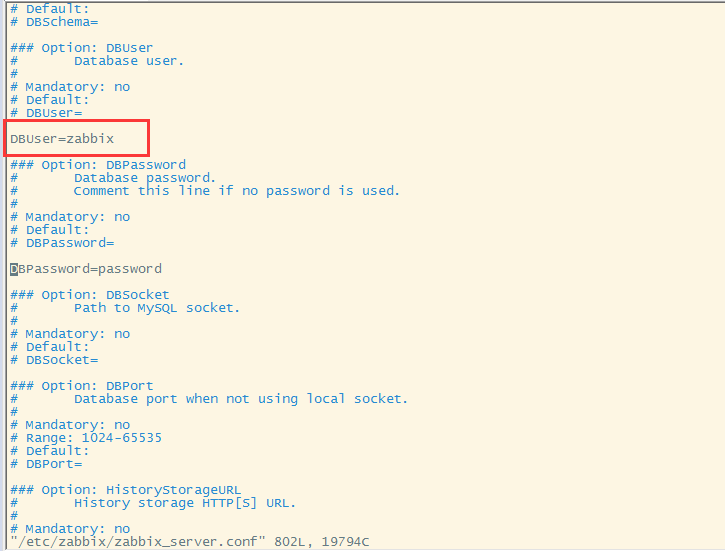
d. 为Zabbix server配置数据库
编辑配置文件 /etc/zabbix/zabbix_server.conf
在配置文件中增加 DBPassword=password
#vim /etc/zabbix/zabbix_server.conf
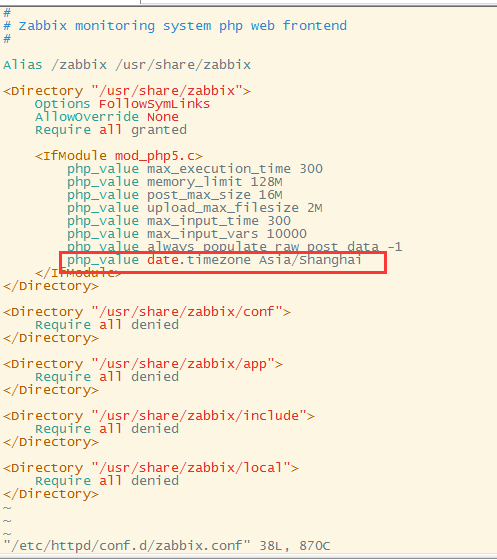
e. 为Zabbix前端配置PHP
辑配置文件 /etc/httpd/conf.d/zabbix.conf 修改时区为中国时区
#vim /etc/httpd/conf.d/zabbix.conf
f. 启动Zabbix server和agent进程
启动Zabbix server和agent进程,并为它们设置开机自启:
# systemctl restart zabbix-server zabbix-agent httpd
# systemctl enable zabbix-server zabbix-agent httpd
g.启动apache 并设为开机启动
sudo systemctl enable httpd
sudo systemctl start httpd
h.关闭防火墙或者开放80端口
systemctl stop firewalld.service
开启80端口
# firewall-cmd --zone=public --add-port=80/tcp --permanent
# firewall-cmd --reload
i.访问zabbix wed页面
http://server_ip_or_name/zabbix
完成!

 浙公网安备 33010602011771号