


CentOS 7.5 安装配置tigervnc-server
系统版本:
|
1
2
|
[root@s10 ~]# cat /etc/redhat-releaseCentOS Linux release 7.5.1804 (Core) |
1.安装 Gnome 包
|
1
|
[root@s10 ~]# yum groupinstall "GNOME Desktop" "Graphical Administration Tools" -y |
2.更新系统的运行级别 (此步骤不是必须)
自动进入图形界面,那么我们需要更改系统的运行级别,输入下面的命令来启用图形界面。
|
1
|
[root@s10 ~]# ln -sf /lib/systemd/system/runlevel5.target /etc/systemd/system/default.target |
3.安装vnc软件包
|
1
2
3
4
5
6
7
8
9
10
11
12
13
14
15
16
17
18
19
20
21
22
23
24
25
26
27
28
29
30
31
32
33
34
35
36
37
38
39
40
41
42
43
44
45
46
47
48
49
50
|
[root@s10 ~]# yum -y install tigervnc-server已加载插件:fastestmirror, langpacksLoading mirror speeds from cached hostfile * base: mirrors.aliyun.com * epel: mirrors.aliyun.com * extras: mirrors.163.com * updates: mirrors.cn99.comhttp://mirrors.163.com/centos/7.5.1804/virt/x86_64/libvirt-latest/repodata/repomd.xml: [Errno 14] HTTP Error 404 - Not Found正在尝试其它镜像。To address this issue please refer to the below wiki articlehttps://wiki.centos.org/yum-errorsIf above article doesn't help to resolve this issue please use https://bugs.centos.org/.正在解决依赖关系--> 正在检查事务---> 软件包 tigervnc-server.x86_64.0.1.8.0-13.el7 将被 安装--> 解决依赖关系完成依赖关系解决============================================================================================================================================================================================= Package 架构 版本 源 大小=============================================================================================================================================================================================正在安装: tigervnc-server x86_64 1.8.0-13.el7 base 215 k事务概要=============================================================================================================================================================================================安装 1 软件包总下载量:215 k安装大小:509 kDownloading packages:tigervnc-server-1.8.0-13.el7.x FAILED http://mirrors.cqu.edu.cn/CentOS/7.6.1810/os/x86_64/Packages/tigervnc-server-1.8.0-13.el7.x86_64.rpm: [Errno 14] curl#56 - "Recv failure: Connection reset by peer"/s | 0 B --:--:-- ETA正在尝试其它镜像。tigervnc-server-1.8.0-13.el7.x86_64.rpm | 215 kB 00:00:00 Running transaction checkRunning transaction testTransaction test succeededRunning transaction 正在安装 : tigervnc-server-1.8.0-13.el7.x86_64 1/1 验证中 : tigervnc-server-1.8.0-13.el7.x86_64 1/1已安装: tigervnc-server.x86_64 0:1.8.0-13.el7 完毕! |
4.关闭防火墙
|
1
2
|
[root@s10 ~]# systemctl stop firewalld[root@s10 ~]# systemctl disable firewalld |
5.复制配置文件
|
1
|
[root@s10 ~]# cp /usr/lib/systemd/system/vncserver@.service /etc/systemd/system/vncserver@:1.service |
6.修改配置文件
|
1
2
3
4
5
6
7
8
9
10
11
12
13
14
15
16
17
18
19
20
21
22
23
24
25
26
27
28
29
30
31
32
33
34
35
36
37
38
39
40
41
42
43
44
45
46
47
48
49
50
51
52
53
54
55
56
57
58
59
60
61
62
63
64
|
[root@s10 ~]# vim /etc/systemd/system/vncserver@\:1.service 1 # The vncserver service unit file 2 # 3 # Quick HowTo: 4 # 1. Copy this file to /etc/systemd/system/vncserver@.service 5 # 2. Replace <USER> with the actual user name and edit vncserver 6 # parameters appropriately 7 # (ExecStart=/usr/sbin/runuser -l <USER> -c "/usr/bin/vncserver %i" 1 # The vncserver service unit file 2 # 3 # Quick HowTo: 4 # 1. Copy this file to /etc/systemd/system/vncserver@.service 5 # 2. Replace <USER> with the actual user name and edit vncserver 6 # parameters appropriately 7 # (ExecStart=/usr/sbin/runuser -l <USER> -c "/usr/bin/vncserver %i" 1 # The vncserver service unit file 2 # 3 # Quick HowTo: 4 # 1. Copy this file to /etc/systemd/system/vncserver@.service 5 # 2. Replace <USER> with the actual user name and edit vncserver 6 # parameters appropriately 7 # (ExecStart=/usr/sbin/runuser -l <USER> -c "/usr/bin/vncserver %i" 8 # PIDFile=/home/<USER>/.vnc/%H%i.pid) 9 # 3. Run `systemctl daemon-reload` 10 # 4. Run `systemctl enable vncserver@:<display>.service` 11 # 12 # DO NOT RUN THIS SERVICE if your local area network is 13 # untrusted! For a secure way of using VNC, you should 14 # limit connections to the local host and then tunnel from 15 # the machine you want to view VNC on (host A) to the machine 16 # whose VNC output you want to view (host B) 17 # 18 # [user@hostA ~]$ ssh -v -C -L 590N:localhost:590M hostB 19 # 20 # this will open a connection on port 590N of your hostA to hostB's port 590M 21 # (in fact, it ssh-connects to hostB and then connects to localhost (on hostB). 22 # See the ssh man page for details on port forwarding) 23 # 24 # You can then point a VNC client on hostA at vncdisplay N of localhost and with 25 # the help of ssh, you end up seeing what hostB makes available on port 590M 26 # 27 # Use "-nolisten tcp" to prevent X connections to your VNC server via TCP. 28 # 29 # Use "-localhost" to prevent remote VNC clients connecting except when 30 # doing so through a secure tunnel. See the "-via" option in the 31 # `man vncviewer' manual page. 32 33 34 [Unit] 35 Description=Remote desktop service (VNC) 36 After=syslog.target network.target 37 38 [Service] 39 Type=forking 40 41 # Clean any existing files in /tmp/.X11-unix environment 42 ExecStartPre=/bin/sh -c '/usr/bin/vncserver -kill %i > /dev/null 2>&1 || :' 43 ExecStart=/usr/sbin/runuser -l <USER> -c "/usr/bin/vncserver %i" 44 PIDFile=/home/<USER>/.vnc/%H%i.pid 45 ExecStop=/bin/sh -c '/usr/bin/vncserver -kill %i > /dev/null 2>&1 || :' 46 47 [Install] 48 WantedBy=multi-user.target |
将第43、44行中的<USER>修改为root或者你想通过vnc登录的账号,如tom 或jerry 如下所示:
|
1
2
|
43 ExecStart=/usr/sbin/runuser -l root -c "/usr/bin/vncserver %i" |
7.重新加载systemd服务
|
1
|
[root@s10 ~]# systemctl daemon-reload |
8.设置VNC密码
|
1
2
3
4
5
6
|
[root@s10 ~]# vncpasswdPassword:Verify:Would you like to enter a view-only password (y/n)? yPassword:Verify: |
9.启动VNC服务
|
1
2
3
4
5
6
7
8
9
10
11
12
13
14
15
|
[root@s10 ~]# systemctl start vncserver@\:1.service[root@s10 ~]# systemctl enable vncserver@\:1.serviceCreated symlink from /etc/systemd/system/multi-user.target.wants/vncserver@:1.service to /etc/systemd/system/vncserver@:1.service.[root@s10 ~]# systemctl status vncserver@\:1.service● vncserver@:1.service - Remote desktop service (VNC) Loaded: loaded (/etc/systemd/system/vncserver@:1.service; disabled; vendor preset: disabled) Active: active (running) since 二 2019-04-02 15:02:08 CST; 7s ago Process: 29678 ExecStart=/usr/sbin/runuser -l root -c /usr/bin/vncserver %i (code=exited, status=0/SUCCESS) Process: 29675 ExecStartPre=/bin/sh -c /usr/bin/vncserver -kill %i > /dev/null 2>&1 || : (code=exited, status=0/SUCCESS) Main PID: 29705 (Xvnc) CGroup: /system.slice/system-vncserver.slice/vncserver@:1.service ‣ 29705 /usr/bin/Xvnc :1 -auth /root/.Xauthority -desktop s10.sangame.com:1 (root) -fp catalogue:/etc/X11/fontpath.d -geometry 1024x768 -pn -rfbauth /root/.vnc/passwd -rfbport...4月 02 15:02:04 s10.sangame.com systemd[1]: Starting Remote desktop service (VNC)...4月 02 15:02:08 s10.sangame.com systemd[1]: Started Remote desktop service (VNC). |
查看VNC服务端口启动状态:
|
1
2
3
4
5
6
7
|
[root@s10 ~]# netstat -tunpl |grep :590tcp 0 0 0.0.0.0:5900 0.0.0.0:* LISTEN 4334/qemu-kvm tcp 0 0 0.0.0.0:5901 0.0.0.0:* LISTEN 29705/Xvnc tcp 0 0 0.0.0.0:5903 0.0.0.0:* LISTEN 5876/qemu-kvm tcp 0 0 0.0.0.0:5904 0.0.0.0:* LISTEN 5644/qemu-kvm tcp 0 0 0.0.0.0:5905 0.0.0.0:* LISTEN 5710/qemu-kvm tcp6 0 0 :::5901 :::* LISTEN 29705/Xvnc |
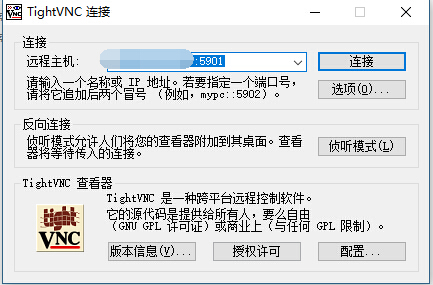
10.测试连接

 浙公网安备 33010602011771号