在CentOS7.9上搭建以太坊私链
为了方便了解以太坊的操作流程,故在CentOS7上搭建以太坊的私链。下面,介绍在CentOS7.9 x64上部署以太坊的私链。
常用的以太坊源码是用Go语言编写的,所以要安装Go。这里选择Go 1.15.6。
1、搭建Go软件环境
安装方法,请参考这篇文章:
https://blog.csdn.net/sanqima/article/details/113623784
2、设置Go访问代理
go env -w GOPROXY=https://goproxy.cn,direct
3、设置CentOS的镜像源
将CentOS的镜像源设置为阿里云,具体请参考这篇文章:
https://blog.csdn.net/sanqima/article/details/117634934
4、安装工具软件
yum install git  wget bzip2 vim gcc-c++ ntp epel-release nodejs cmake -y
yum update

5、下载以太坊源码(Go Ethereum)
5.1 下载源码并编译
这里选择 Go Ethereum v1.9.25
下载地址: https://github.com/ethereum/go-ethereum/archive/refs/tags/v1.9.25.tar.gz
将go-ethereum-1.9.25.tar.gz存放到如下目录:
/home/levent/myProject/unit01/ethBase
依次使用如下命令:
cd /home/levent/myProject/unit01/ethBase
sudo tar -zxvf go-ethereum-1.9.25.tar.gz
cd go-ethereum-1.9.25
make all
5.2 设置geth环境
a) 打开/etc/profile
vim /etc/profile
1
b) 在/etc/profile里,添加如下语句:
export GOROOT=/usr/local/go
export GOPATH=/usr/local/gocode
export ETH_Base=/home/levent/myProject/unit01/ethBase/go-ethereum-1.9.25
export PATH=$PATH:$GOROOT/bin:$GPPATH/bin:${ETH_Base}/build/bin
c) 使能profile
source /etc/profile
d) 查看geth的版本信息
geth version
1
效果如下:
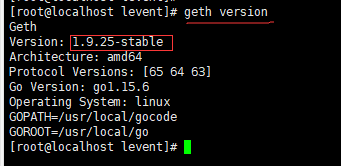
图(1) 查看geth的版本信息
若可以查看geth的版本信息,则说明geth环境配置成功。7、升级cmake到3.x
//卸载旧版本的cmake
yum remove cmake

//安装cmake 3.19.8
wget -c https://github.com/Kitware/CMake/releases/download/v3.19.8/cmake-3.19.8.tar.gz
sudo tar -zxvf cmake-3.19.8.tar.gz
cd cmake-3.19.8
./bootstrap && make && make install
8、启动网络时间同步
systemctl enable ntpd

systemctl start ntpd
9、关闭防火墙
geth会用到8078和30303端口,放开防火墙端口 8078与30303
systemctl stop firewalld
10、设置ETH环境
a) 在/home/levent/myProject/unit01/ethBase里新建一个文件夹名称为ethdata

cd /home/levent/myProject/unit01/ethBase
mkdir ethdata
cd ethdata
mkdir db
touch gensis.json
其目录结构如下:
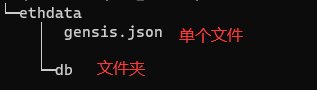
图(2) ethdata的目录结构
   gensis.json的内容如下:

{
  "nonce": "0x0000000000000042",
  "timestamp": "0x00",
  "parentHash": "0x0000000000000000000000000000000000000000000000000000000000000000",

  "extraData": "0x00",
  "gasLimit": "0x80000000",
  "difficulty": "0x400",
  "mixhash": "0x0000000000000000000000000000000000000000000000000000000000000000",
  "coinbase": "0x1d756B49b5401d9713bEA016bcC7cC09E1259A5f",
  "alloc": {},

  "config": {

    "chainId": 15,
    "homesteadBlock": 0,
    "eip155Block": 0,
    "eip158Block": 0

  }

}
b) 初始化
cd /home/levent/myProject/unit01/ethBase/ethdata

geth --datadir "./db" init gensis.json
初始化之后,会生成db/geth、db/keystore等文件夹; 其中,db/geth/chaindata中存放的是区块数据,db/keystore中存放的是账户数据。
c)启动私有链
cd /home/levent/myProject/unit01/ethBase/ethdata

geth --datadir "./db" --nodiscover console 2>>geth.log
d) 创建用户
//创建3个用户
personal.newAccount("password1")
personal.newAccount("password2")
personal.newAccount("password3")

//查看用户
eth.accounts

//查看用户1的余额
eth.getBalance(eth.accounts[0])

//查看用户2的余额
eth.getBalance(eth.accounts[1])

//查看用户3的余额
eth.getBalance(eth.accounts[2])
用户的公钥文件保存在 ethdata/db/keystore里
ls /home/levent/myProject/unit01/ethBase/ethdata/db/keystore
e) 开启挖矿
//设置挖矿奖励的地址,选择第一个创建的用户
miner.setEtherbase(eth.accounts[0])

//查看挖矿地址
eth.coinbase

//开启挖矿
miner.start()
f) 停止挖矿
miner.stop()

 浙公网安备 33010602011771号