kali源
apt源:
#中科大
deb http://mirrors.ustc.edu.cn/kali kali-rolling main non-free contrib
deb-src http://mirrors.ustc.edu.cn/kali kali-rolling main non-free contrib

#阿里云
deb http://mirrors.aliyun.com/kali kali-rolling main non-free contrib
deb-src http://mirrors.aliyun.com/kali kali-rolling main non-free contrib

#清华大学
deb http://mirrors.tuna.tsinghua.edu.cn/kali kali-rolling main contrib non-free
deb-src https://mirrors.tuna.tsinghua.edu.cn/kali kali-rolling main contrib non-free

#浙大
deb http://mirrors.zju.edu.cn/kali kali-rolling main contrib non-free
deb-src http://mirrors.zju.edu.cn/kali kali-rolling main contrib non-free

#东软大学
deb http://mirrors.neusoft.edu.cn/kali kali-rolling/main non-free contrib
deb-src http://mirrors.neusoft.edu.cn/kali kali-rolling/main non-free contrib

#官方源
deb http://http.kali.org/kali kali-rolling main non-free contrib
deb-src http://http.kali.org/kali kali-rolling main non-free contrib
故障解决:
故障现象:
[root@host01 ~]# ssh 10.105.139.144
no hostkey alg
查看详细信息:
[root@host01 ssh]# ssh -v 10.105.139.144
OpenSSH_5.3p1, OpenSSL 1.0.1e-fips 11 Feb 2013
debug1: Reading configuration data /etc/ssh/ssh_config
debug1: Applying options for *
debug1: Connecting to 10.105.139.144 [10.105.139.144] port 22.
debug1: Connection established.
debug1: permanently_set_uid: 0/0
debug1: identity file /root/.ssh/identity type -1
debug1: identity file /root/.ssh/identity-cert type -1
debug1: identity file /root/.ssh/id_rsa type 1
debug1: identity file /root/.ssh/id_rsa-cert type -1
debug1: identity file /root/.ssh/id_dsa type -1
debug1: identity file /root/.ssh/id_dsa-cert type -1
debug1: identity file /root/.ssh/id_ecdsa type -1
debug1: identity file /root/.ssh/id_ecdsa-cert type -1
debug1: Remote protocol version 2.0, remote software version OpenSSH_7.8p1 Debian-1
debug1: match: OpenSSH_7.8p1 Debian-1 pat OpenSSH*
debug1: Enabling compatibility mode for protocol 2.0
debug1: Local version string SSH-2.0-OpenSSH_5.3
debug1: SSH2_MSG_KEXINIT sent
debug1: SSH2_MSG_KEXINIT received
debug1: kex: server->client aes128-ctr hmac-sha1 none
debug1: kex: client->server aes128-ctr hmac-sha1 none
no hostkey alg
解决方法:
在服务端执行以下命令:
ssh-keygen -t rsa -f /etc/ssh/ssh_host_rsa_key
ssh-keygen -t dsa -f /etc/ssh/ssh_host_dsa_key
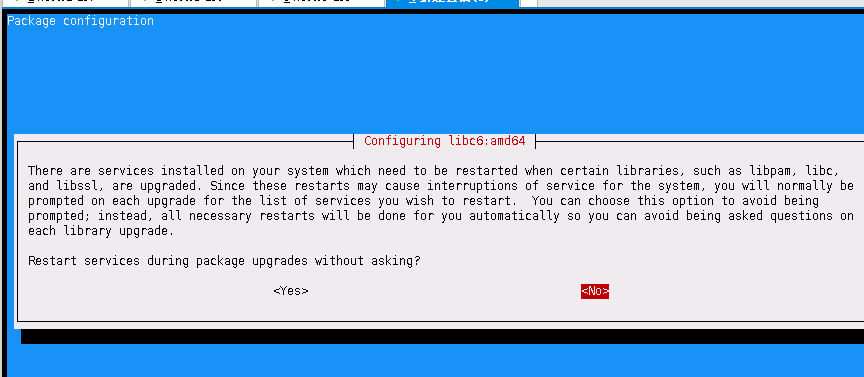
There are services installed on your system which need to be restarted when certain libraries, such as libpam, libc, x
and libssl, are upgraded. Since these restarts may cause interruptions of service for the system, you will normally be x
prompted on each upgrade for the list of services you wish to restart. You can choose this option to avoid being x
prompted; instead, all necessary restarts will be done for you automatically so you can avoid being asked questions on x
each library upgrade. x
Restart services during package upgrades without asking?
kali关闭iptables
安装
apt-get install ufw关闭
ufw disable # To disable the firewall开启
ufw enable # To enable the firewall
下面简单讲一下这个问题的原理和比较长久的解决方案。
1、ssh会把你每个你访问过计算机的公钥(public key)都记录在~/.ssh/known_hosts。当下次访问相同计算机时,OpenSSH会核对公钥。如果公钥不同,OpenSSH会发出警告, 避免你受到DNS Hijack之类的攻击。
2、SSH对主机的public_key的检查等级是根据StrictHostKeyChecking变量来配置的。默认情况下,StrictHostKeyChecking=ask。
1.StrictHostKeyChecking=no
#最不安全的级别。如果连接server的key在本地不存在,那么就自动添加到文件中(默认是known_hosts),并且给出一个警告。
2.StrictHostKeyChecking=ask  #默认的级别,就是出现刚才的提示了。如果连接和key不匹配,给出提示,并拒绝登录。
3.StrictHostKeyChecking=yes  #最安全的级别,如果连接与key不匹配,就拒绝连接,不会提示详细信息。
ask状态:

vim /etc/ssh/ssh_config
StrictHostKeyChecking no
UserKnownHostsFile /dev/null
(注:这里为了简便,将knownhostfile设为/dev/null,就不保存在known_hosts中了)
SSH 登录失败:Host key verification failed 的处理方法
问题1:
SSH 登录失败:Host key verification failed
######################################
由于公钥不一样了,所以无法登录,提示信息是 KEY 验证失败。
解决方法是:
在 /root/.ssh/known_hosts 文件里面将原来的公钥信息删除即可。
1. .ssh/known_hosts 裡面记录的目标主机 key 值不正确。这是最普遍的情况,只要删除对应的主机记录就能恢复正常。
运行命令: sudo rm /home/yourname/.ssh/known_hosts
2. .ssh 目录或者 .ssh/known_hosts 对当前用户的权限设置不正确。这种情况比较少,一般正确设置读写权限以后也能恢复正常。
3. /dev/tty 对 other 用户没有放开读写权限。这种情况极为罕见。出现的现象是,只有 root 用户能够使用 ssh client,而所有其他的普通用户都会出现错误。
我今天遇到的就是第三种情况,修改 /dev/tty 的权限后,一切正常。为了避免以后忘记解决方法,记录在这里。
问题2:
ssh_exchange_identification: Connection closed by remote host
##################################################
解决办法:
修改/etc/hosts.allow文件,加入 sshd:ALL。
符相关配制说明: vi /etc/ssh/ssh_config
-------------------------------------------------
下面逐行说明上面的选项设置:
Host * :选项“Host”只对能够匹配后面字串的计算机有效。“*”表示所有的计算机。
ForwardAgent no :“ForwardAgent”设置连接是否经过验证代理(如果存在)转发给远程计算机。
ForwardX11 no :“ForwardX11”设置X11连接是否被自动重定向到安全的通道和显示集(DISPLAY set)。
RhostsAuthentication no :“RhostsAuthentication”设置是否使用基于rhosts的安全验证。
RhostsRSAAuthentication no :“RhostsRSAAuthentication”设置是否使用用RSA算法的基于rhosts的安全验证。
RSAAuthentication yes :RSAAuthentication”设置是否使用RSA算法进行安全验证。
PasswordAuthentication yes :“PasswordAuthentication”设置是否使用口令验证。
FallBackToRsh no:“FallBackToRsh”设置如果用ssh连接出现错误是否自动使用rsh。
UseRsh no :“UseRsh”设置是否在这台计算机上使用“rlogin/rsh”。
BatchMode no :“BatchMode”如果设为“yes”,passphrase/password(交互式输入口令)的提示将被禁止。当不能交互式输入口令的时候,这个选项对脚本文件和批处理任务十分有用。
CheckHostIP yes :“CheckHostIP”设置ssh是否查看连接到服务器的主机的IP地址以防止DNS欺骗。建议设置为“yes”。
StrictHostKeyChecking no :“StrictHostKeyChecking”如果设置成“yes”,ssh就不会自动把计算机 的密匙加入“$HOME/.ssh/known_hosts”文件,并且一旦计算机的密匙发生了变化,就拒绝连接。
IdentityFile ~/.ssh/identity :“IdentityFile”设置从哪个文件读取用户的RSA安全验证标识。
Port 22 :“Port”设置连接到远程主机的端口。
Cipher blowfish :“Cipher”设置加密用的密码。
EscapeChar ~ :“EscapeChar”设置escape字符。
https://blog.csdn.net/qq_42103479/article/details/90111365


 浙公网安备 33010602011771号