Openstack入门篇(十八)之Cinder服务-->使用NFS作为后端存储
-
1.安装cinder-volume组件以及nfs
[root@linux-node2 ~]# yum install -y openstack-cinder python-keystone
[root@linux-node2 ~]# yum install -y nfs-utils rpcbind
[root@linux-node2 ~]# mkdir -p /data/nfs
[root@linux-node2 ~]# vim /etc/exports
/data/nfs *(rw,no_root_squash)
[root@linux-node2 ~]# systemctl start rpcbind
[root@linux-node2 ~]# systemctl start nfs
-
2.配置cinder使用nfs
[root@linux-node1 ~]# scp /etc/cinder/cinder.conf 192.168.56.12:/etc/cinder
[root@linux-node2 ~]# vim /etc/cinder/cinder.conf
删除[lvm]的内容
[default]
enabled_backends = nfs

[nfs]
volume_driver = cinder.volume.drivers.nfs.NfsDriver
nfs_shares_config=/etc/cinder/nfs_shares
nfs_mount_point_base=$state_path/mnt
驱动查找:
查看在此文件:/usr/lib/pythone.27/site-packages/cinder/volume/drivers/nfs.py内是否有这样的类

 [root@linux-node2 ~]# vim /etc/cinder/nfs_shares
192.168.56.12:/data/nfs
-
3.修改配置文件的权限,否则cinder服务无法读取
[root@linux-node2 ~]# chown root.cinder /etc/cinder/nfs_shares
[root@linux-node2 ~]# chmod 640 /etc/cinder/nfs_shares
-
4.启动openstack-cinder-volume服务
[root@linux-node2 ~]# systemctl enable openstack-cinder-volume
[root@linux-node2 ~]# systemctl start openstack-cinder-volume
-
5.查看volume服务
[root@linux-node1 ~]# source admin-openstack
[root@linux-node1 ~]# openstack volume service list
+------------------+-----------------+------+---------+-------+----------------------------+
| Binary            | Host           | Zone | Status  | State | Updated At                 |
+------------------+-----------------+------+---------+-------+----------------------------+
| cinder-scheduler | linux-node1     | nova | enabled | up    | 2017-12-11T06:28:29.000000 |
| cinder-volume    | linux-node1@lvm | nova | enabled | up    | 2017-12-11T06:28:28.000000 |
| cinder-volume    | linux-node2@nfs | nova | enabled | up    | 2017-12-11T06:28:26.000000 |
+------------------+-----------------+------+---------+-------+----------------------------+
-
6.创建云硬盘类型NFS和ISCSI
[root@linux-node1 ~]# cinder type-create NFS
[root@linux-node1 ~]# cinder type-create ISCSI
-
7.将后端存储和云硬盘类型关联
[root@linux-node1 ~]# vim /etc/cinder/cinder.conf
使用lvm本地存储就需要在[lvm]加入
[lvm]
volume_backend_name = ISCSI-Storage

[root@linux-node1 ~]# systemctl restart openstack-cinder-volume
[root@linux-node2 ~]# vim /etc/cinder/cinder.conf
使用NFS网络存储就需要在[nfs]加入
[nfs]
volume_backend_name = NFS-Storage

[root@linux-node2 ~]# systemctl restart openstack-cinder-volume

在配置文件cinder.conf加入volume_backend_name可以实现多类型的云硬盘挂载,如ISCSI,NFS

[root@linux-node1 ~]# cinder type-key NFS set volume_backend_name=NFS-Storage
[root@linux-node1 ~]# cinder type-key ISCSI set volume_backend_name=ISCSI-Storage
-
8.创建卷
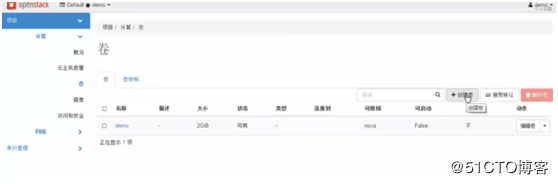
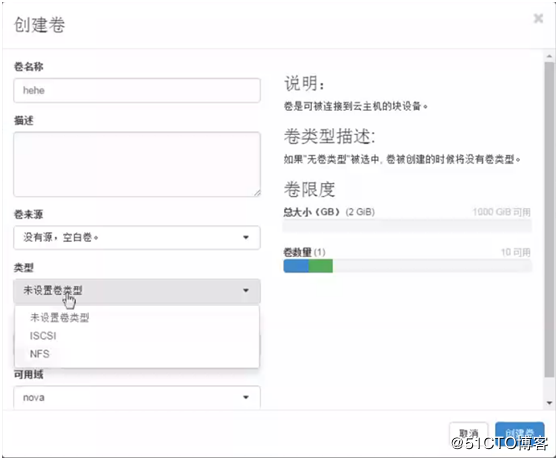
"卷"-->"管理连接"-->"连接云主机"-->在云主机内fdisk -l进行查看
小结:
cinder后端存储步骤:
(1)把存储准备好,如NFS,ISCSI
(2)安装cinder-volume
(3)vim /etc/cinder/cinder.conf
[xxx]
volume_driver=xxx
......
volume_backend_name=xxx-Storage
(4)创建类型:cinder type-create xxx
(5)关联类型:cinder type-key xxx set volume_backend_name=xxx-Storage
Don't forget the beginner's mind

 浙公网安备 33010602011771号