Openstack入门篇(十五)之如何创建生产使用的openstack镜像
在linux-node1节点上:
[root@linux-node1 ~]# yum install -y openstack-nova-compute
[root@linux-node1 ~]# yum install -y libvirt qemu-kvm
[root@linux-node1 ~]# systemctl start libvirtd
[root@linux-node1 ~]# systemctl enable libvirtd
[root@linux-node1 ~]# vim /etc/nova/nova.conf
增加novncproxy的地址:
novncproxy_base_url=http://192.168.56.11:6080/vnc_auto.html

[root@linux-node1 ~]# systemctl start openstack-nova-compute
[root@linux-node1 ~]# systemctl enable openstack-nova-compute
[root@linux-node1 ~]# source admin-openstack
[root@linux-node1 ~]# nova service-list

当需要删除该节点时,只能从命令行进行删除:nova service-delete ID。在horizon界面上是只能关闭服务,无法进行删除。
创建openstack镜像的过程:
(1)创建一个虚拟机硬盘,格式qcow2,大小为10G
[root@linux-node1 ~]# qemu-img create -f qcow2 /tmp/centos.qcow2 10G
Formatting '/tmp/centos.qcow2', fmt=qcow2 size=10737418240 encryption=off cluster_size=65536 lazy_refcounts=off refcount_bits=16
(2)创建虚拟机
[root@linux-node1 ~]# virt-install --virt-type kvm --name centos --ram 1024 \
  --disk /tmp/centos.qcow2,format=qcow2 \
  --network network=default \
  --graphics vnc,listen=0.0.0.0 --noautoconsole \
  --os-type=linux --os-variant=centos7.0 \
  --location=/tmp/CentOS-7-x86_64-Minimal-1511.iso

[root@linux-node1 ~]# virsh list --all
 Id    名称                         状态
----------------------------------------------------
 -     centos                         关闭

[root@linux-node1 ~]# virsh start centos
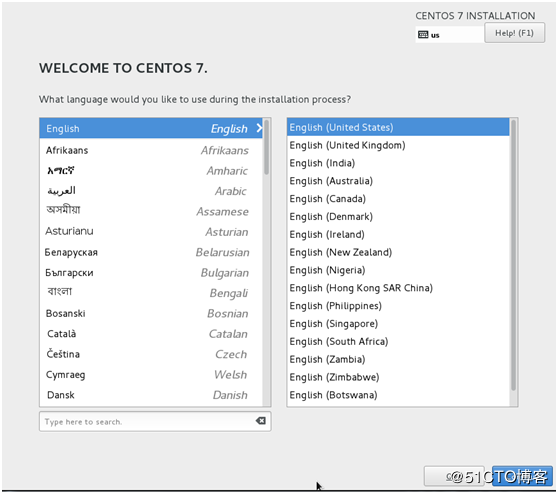
(3)TightVNC链接192.168.56.11进入系统安装
只分根分区,私有云不分swap分区
(4)启动虚拟机
[root@linux-node1 ~]# virsh start centos
(5)在虚拟机内安装默认的软件,或基础优化
yum install net-tools tree screen wget git vim
(6)openstack上传镜像
[root@linux-node1 ~]# openstack image create "Centos-7-x86_64" --file=/tmp/centos.qcow2 --disk-format qcow2 --container-format bare --public
+------------------+------------------------------------------------------+
| Field            | Value                                                |
+------------------+------------------------------------------------------+
| checksum         | 4ac6fb14f7e5bb3c9889df4bda71474a                     |
| container_format | bare                                                 |
| created_at       | 2017-12-07T08:06:55Z                                 |
| disk_format      | qcow2                                                |
| file             | /v2/images/5aa6e9a1-4aea-467c-a684-51080c326887/file |
| id               | 5aa6e9a1-4aea-467c-a684-51080c326887                 |
| min_disk         | 0                                                    |
| min_ram          | 0                                                    |
| name             | Centos-7-x86_64                                      |
| owner            | 21a45d59913d4c05b46ad3ec92e61656                     |
| protected        | False                                                |
| schema           | /v2/schemas/image                                    |
| size             | 1145896960                                           |
| status           | active                                               |
| tags             |                                                      |
| updated_at       | 2017-12-07T08:08:42Z                                 |
| virtual_size     | None                                                 |
| visibility       | public                                               |
+------------------+------------------------------------------------------+

[root@linux-node1 ~]# openstack image list
+--------------------------------------+-----------------+--------+
| ID                                   | Name            | Status |
+--------------------------------------+-----------------+--------+
| 5aa6e9a1-4aea-467c-a684-51080c326887 | Centos-7-x86_64 | active |
| 51e1e125-dbe3-49c6-a3d5-55c89f195f55 | cirros          | active |
+--------------------------------------+-----------------+--------+
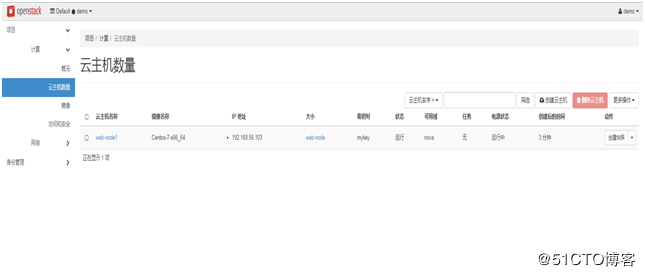
(7)通过上传的镜像创建centos7云主机
使用admin账户创建云主机类型,后使用demo用户进行创建云主机
Don't forget the beginner's mind

 浙公网安备 33010602011771号