【第六课】Nginx常用配置下详解
Nginx常用配置下详解
1、Nginx虚拟主机
所谓虚拟主机,在Web服务当中就是一个独立的网站站点,这个站点对应独立的域名(也有可能是IP或者端口),具有独立的程序和资源目录,可以独立地对外提供服务供用户访问。
这个独立的站点在配置里是由一定格式的标签进行标记,和apache相对比,apache的虚拟主机的标签段通常是以
进行标注的,而Nginx则是以Server{}标签段来标示一个虚拟主机。一个Web服务中支持多个虚拟主机站点。 和apache一样,虚拟主机主要有3种:
- (1)基于域名的虚拟主机
- (2)基于端口的虚拟主机
- (3)基于IP的虚拟主机
(1)基于域名域名的虚拟主机配置
(1)修改主配置文件nginx.conf,加载虚拟主机配置
[root@localhost conf]# grep -Ev "^$|#" nginx.conf
user  nginx;
worker_processes  auto;
events {
    worker_connections  1024;
}
http {
    include       mime.types;
    default_type  application/octet-stream;
    log_format  main  '$remote_addr - $remote_user [$time_local] "$request" '
                      '$status $body_bytes_sent "$http_referer" '
                      '"$http_user_agent" "$http_x_forwarded_for"';
    sendfile        on;
    tcp_nopush     on;
    keepalive_timeout  65;
    include /usr/local/nginx/conf/vhosts/*.conf;  #包含虚拟主机配置
}

(2)创建虚拟主机配置文件,并增加虚拟主机
[root@localhost conf]# mkdir vhosts && cd vhosts/
[root@localhost vhosts]# vim www.abc.org.conf
server {
        listen 80;
        server_name www.abc.org;
        root /vhosts/html/www;
        index index.html index.htm index.php;
}
[root@localhost vhosts]# cp www.abc.org.conf bbs.abc.org.conf
[root@localhost vhosts]# cp www.abc.org.conf blog.abc.org.conf
[root@localhost vhosts]# vim bbs.abc.org.conf
server {
        listen 80;
        server_name bbs.abc.org;
        root /vhosts/html/bbs;
        index index.html index.htm index.php;
}
[root@localhost vhosts]# vim blog.abc.org.conf
server {
        listen 80;
        server_name blog.abc.org;
        root /vhosts/html/blog;
        index index.html index.htm index.php;
}

(3)创建虚拟主机主页
[root@localhost vhosts]# mkdir /vhosts/html/{www,bbs,blog}
[root@localhost vhosts]# echo "welcome to www.abc.org" >> /vhosts/html/www/index.html
[root@localhost vhosts]# echo "welcome to bbs.abc.org" >> /vhosts/html/bbs/index.html
[root@localhost vhosts]# echo "welcome to blog.abc.org" >> /vhosts/html/blog/index.html

(4)检查语法,重载nginx
[root@localhost vhosts]# /usr/local/nginx/sbin/nginx -t
nginx: the configuration file /usr/local/nginx1.15.1/conf/nginx.conf syntax is ok
nginx: configuration file /usr/local/nginx1.15.1/conf/nginx.conf test is successful
[root@localhost vhosts]# /usr/local/nginx/sbin/nginx -s reload
windows下做hosts解析
192.168.56.11 www.abc.org bbs.abc.org blog.abc.org 分别访问


(2)基于端口的虚拟主机配置
(1)修改bbs和blog站点监听端口
[root@localhost vhosts]# vim bbs.abc.org.conf
listen 8081;
[root@localhost vhosts]# vim blog.abc.org.conf
listen 8082
[root@localhost vhosts]# export PATH=/usr/local/nginx/sbin/:$PATH

(2)检查语法,重载nginx
[root@localhost vhosts]# nginx -t
nginx: the configuration file /usr/local/nginx1.15.1/conf/nginx.conf syntax is ok
nginx: configuration file /usr/local/nginx1.15.1/conf/nginx.conf test is successful
[root@localhost vhosts]# nginx -s reload

(3)测试访问页面
[root@localhost ~]# curl www.abc.org
welcome to www.abc.org
[root@localhost ~]# curl bbs.abc.org:8081
welcome to bbs.abc.org
[root@localhost ~]# curl blog.abc.org:8082
welcome to blog.abc.org
以上端口可以随意更改,但是不能和已有服务冲突,原则上应该是大于1024小于65535的任意端口
(3)基于IP的虚拟主机配置
(1)增加虚拟网卡eth0:0和eth0:1
[root@localhost ~]# ifconfig eth0:0 192.168.56.110/24 up
[root@localhost ~]# ifconfig eth0:1 192.168.56.111/24 up
[root@localhost ~]# ifconfig eth0:0
eth0:0: flags=4163<UP,BROADCAST,RUNNING,MULTICAST>  mtu 1500
        inet 192.168.56.110  netmask 255.255.255.0  broadcast 192.168.56.255
        ether 00:0c:29:ce:31:fd  txqueuelen 1000  (Ethernet)

[root@localhost ~]# ifconfig eth0:1
eth0:1: flags=4163<UP,BROADCAST,RUNNING,MULTICAST>  mtu 1500
        inet 192.168.56.111  netmask 255.255.255.0  broadcast 192.168.56.255
        ether 00:0c:29:ce:31:fd  txqueuelen 1000  (Ethernet)

(2)修改虚拟主机配置server_name为ip访问
[root@localhost vhosts]# vim bbs.abc.org.conf
listen 8081;
server_name 192.168.56.110;
[root@localhost vhosts]# vim blog.abc.org.conf
listen 8082;
server_name 192.168.56.111;

(3)检测语法,重载nginx,测试访问
[root@localhost vhosts]# nginx -t
nginx: the configuration file /usr/local/nginx1.15.1/conf/nginx.conf syntax is ok
nginx: configuration file /usr/local/nginx1.15.1/conf/nginx.conf test is successful
[root@localhost vhosts]# nginx -s reload
[root@localhost ~]# curl http://192.168.56.110:8081/
welcome to bbs.abc.org
[root@localhost ~]# curl http://192.168.56.111:8082/
welcome to blog.abc.org
2、部署wordpress开源博客
(1)MySQL数据库配置准备
[root@localhost tools]# wget https://cn.wordpress.org/wordpress-4.9.4-zh_CN.tar.gz    //下载wordpress源码包
[root@localhost tools]# mysql -uroot -p
Enter password:
Welcome to the MySQL monitor.  Commands end with ; or \g.
Your MySQL connection id is 24
Server version: 5.6.35 MySQL Community Server (GPL)

Copyright (c) 2000, 2016, Oracle and/or its affiliates. All rights reserved.

Oracle is a registered trademark of Oracle Corporation and/or its
affiliates. Other names may be trademarks of their respective
owners.

Type 'help;' or '\h' for help. Type '\c' to clear the current input statement.

mysql> create database wordpress default character set = 'utf8';    //创建wordpress专用数据库,用于存放blog数据
Query OK, 1 row affected (0.00 sec)

mysql> show databases like "wordpress";
+----------------------+
| Database (wordpress) |
+----------------------+
| wordpress            |
+----------------------+
row in set (0.02 sec)

mysql> grant all on wordpress.* to wordpress@'%' identified by '123456';    //授权数据库管理用户
Query OK, 0 rows affected (0.02 sec)

mysql> flush privileges;
Query OK, 0 rows affected (0.01 sec)

mysql> quit;
Bye
(2)Nginx和PHP配置准备
[root@localhost vhosts]# vim wordpress.conf     //编辑博客虚拟主机配置
server {
        listen 80;
        server_name blog.test.com;
        root /vhosts/html/wordpress;
        index index.html index.php index.htm;

        access_log logs/blog.test.com_access.log main;
        error_log logs/blog.test.com_error.log info;

        location ~ \.php$ {
            root           /vhosts/html/wordpress;
            fastcgi_pass   127.0.0.1:9000;
            fastcgi_index  index.php;
            fastcgi_param  SCRIPT_FILENAME  $document_root$fastcgi_script_name;
            include        fastcgi_params;
        }


}
[root@localhost tools]# tar -zxf wordpress-4.9.4-zh_CN.tar.gz     //解压博客源码包
[root@localhost tools]# mv wordpress /vhosts/html/
[root@localhost wordpress]# chown -R nginx.nginx /vhosts/html/wordpress        //更改所属权限
[root@localhost wordpress]# nginx -t
nginx: the configuration file /usr/local/nginx1.15.1/conf/nginx.conf syntax is ok
nginx: configuration file /usr/local/nginx1.15.1/conf/nginx.conf test is successful
[root@localhost wordpress]# nginx -s reload
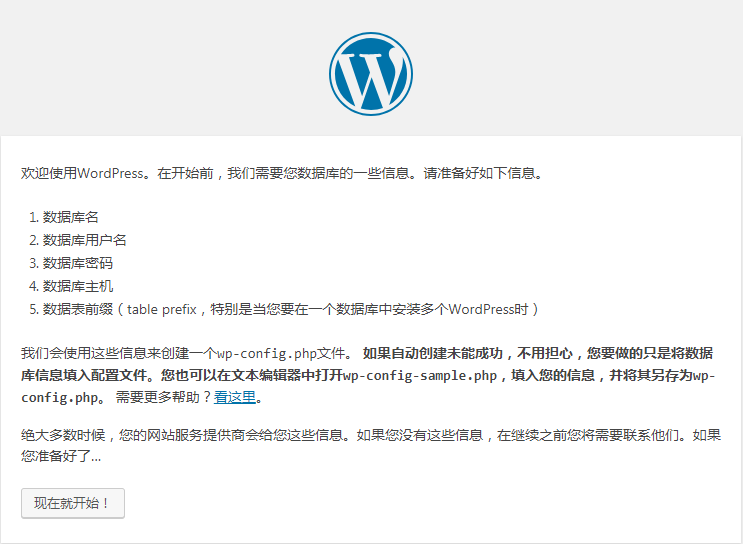
windows下做hosts域名解析 192.168.56.11 blog.test.com,访问blog.test.com,出现以下界面,进行安装wordpress
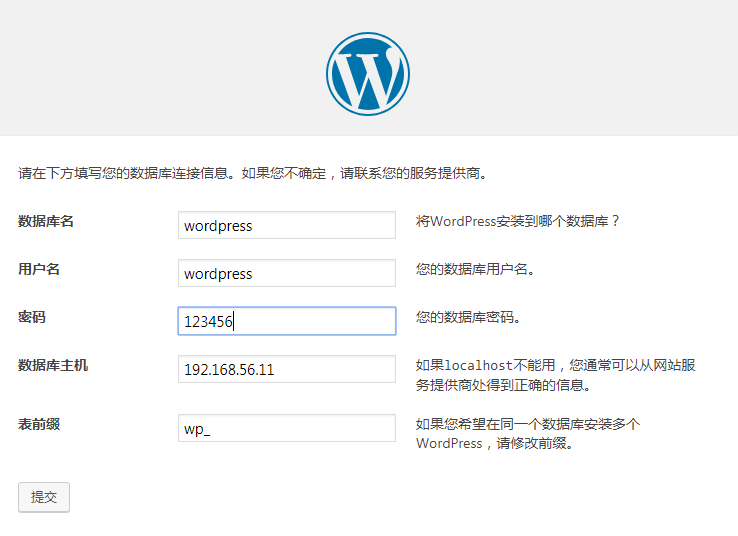
填写数据库相关信息
提交后,点击现在安装,而后输入博客相关信息。完成后登录博客,可进入到博客内部,如图:
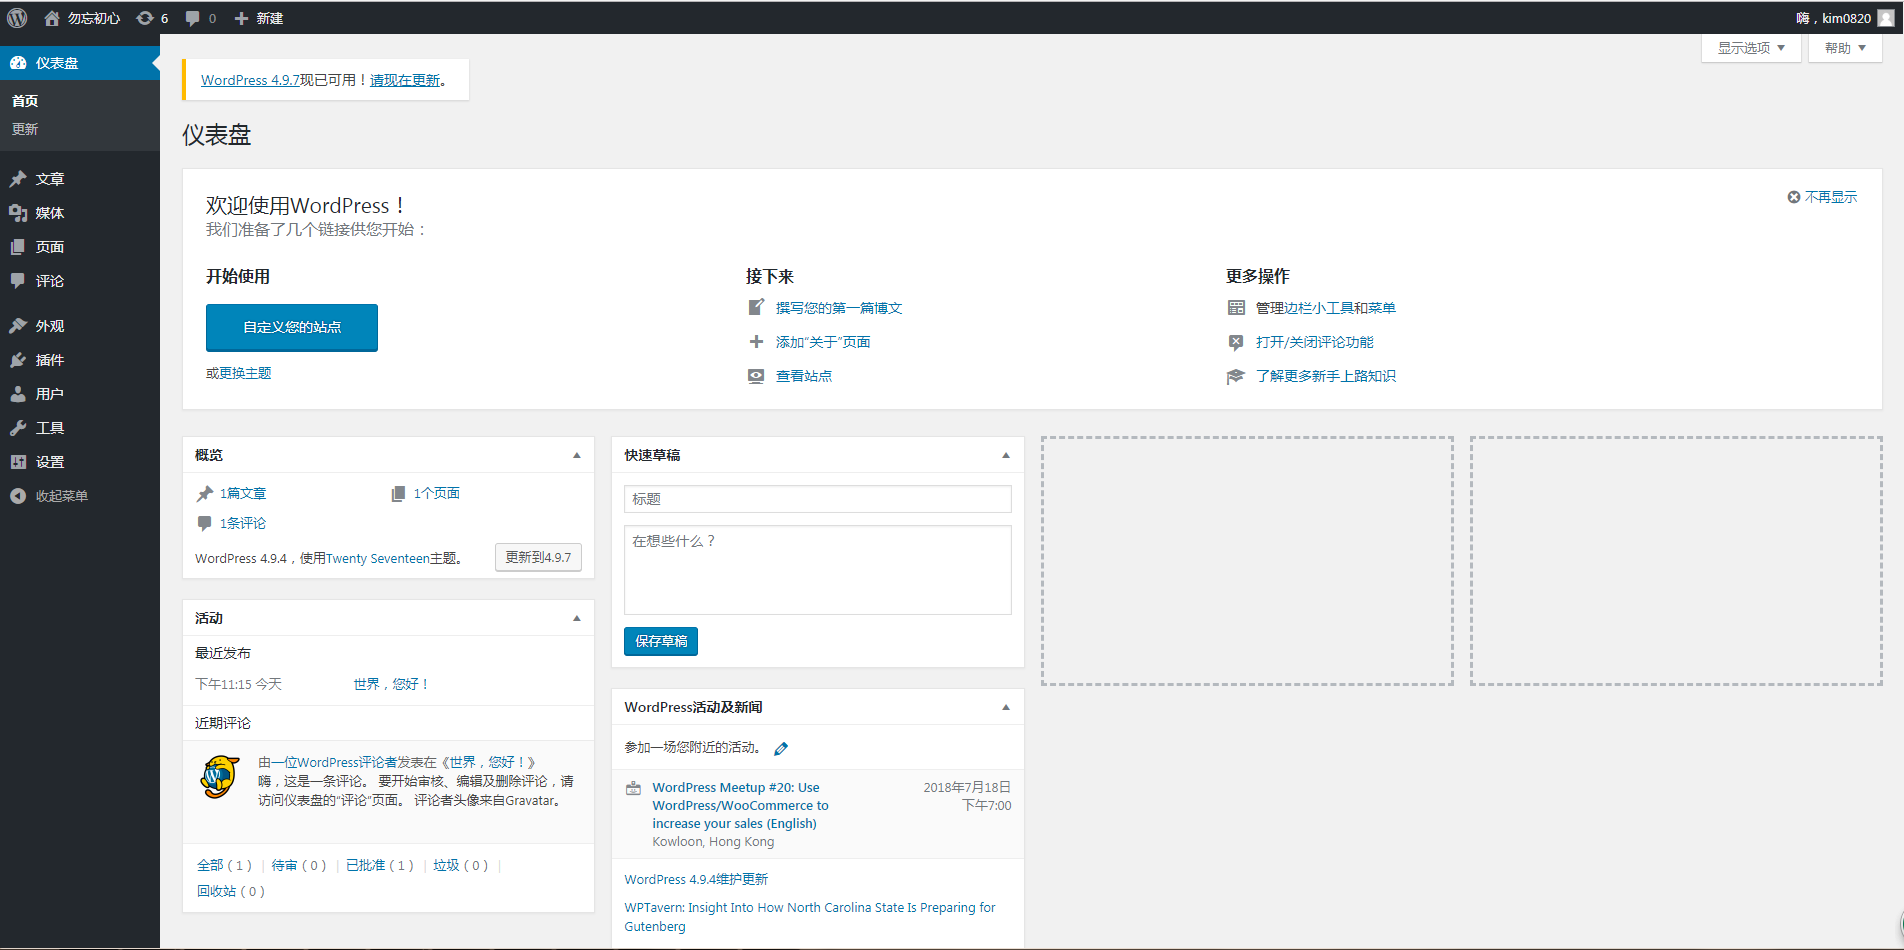
在此界面可以进行发布文章,发布完成后,重新访问blog.test.com时,则跳到了正常的博客访问页面。
3、部署discuz开源论坛
[root@localhost web]# git clone https://gitee.com/ComsenzDiscuz/DiscuzX.git    #下载discuz论坛源码包
Cloning into 'DiscuzX'...
remote: Enumerating objects: 7404, done.
remote: Counting objects: 100% (7404/7404), done.
remote: Compressing objects: 100% (4767/4767), done.
remote: Total 7404 (delta 2663), reused 7153 (delta 2588)
Receiving objects: 100% (7404/7404), 12.12 MiB | 471.00 KiB/s, done.
Resolving deltas: 100% (2663/2663), done.

[root@localhost vhost]# cp -r /data/web/DiscuzX/upload /data/web/discuz    #拷贝源码到站点根目录

[root@localhost vhost]# cat discuz.conf     #增加论坛虚拟主机配置
server {
    listen       80;
    server_name  192.168.56.11;
    root /data/www/discuz;
    index index.php index.html index.htm;

    location / {
        try_files $uri $uri/ /index.php$is_args$args;
    }

    location ~ \.php$ {
        try_files $uri = 404;
        fastcgi_pass   127.0.0.1:9000;
        fastcgi_index  index.php;
        fastcgi_param  SCRIPT_FILENAME  $document_root$fastcgi_script_name;
        include        fastcgi_params;
    }
}

[root@localhost vhost]# nginx -t
nginx: the configuration file /usr/local/nginx/conf/nginx.conf syntax is ok
nginx: configuration file /usr/local/nginx/conf/nginx.conf test is successful
[root@localhost vhost]# systemctl reload nginx

[root@localhost vhost]# mysql -uroot -p    #登录数据库,创建需要的库和用户名
Enter password:
Welcome to the MariaDB monitor.  Commands end with ; or \g.
Your MariaDB connection id is 3
Server version: 10.1.20-MariaDB MariaDB Server

Copyright (c) 2000, 2016, Oracle, MariaDB Corporation Ab and others.

Type 'help;' or '\h' for help. Type '\c' to clear the current input statement.

MariaDB [(none)]> create database discuz default charset utf8;
Query OK, 1 row affected (0.05 sec)

MariaDB [(none)]> grant all privileges on discuz.* to discuz@"%" identified by "123456";
Query OK, 0 rows affected (0.00 sec)

MariaDB [(none)]> flush privileges;
Query OK, 0 rows affected (0.00 sec)
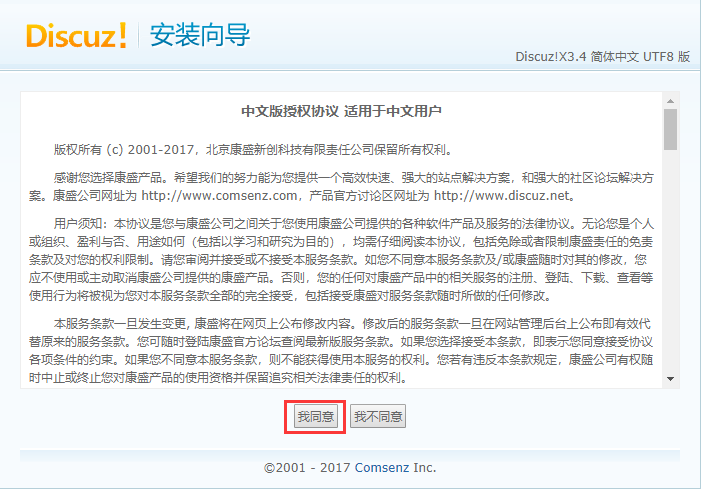
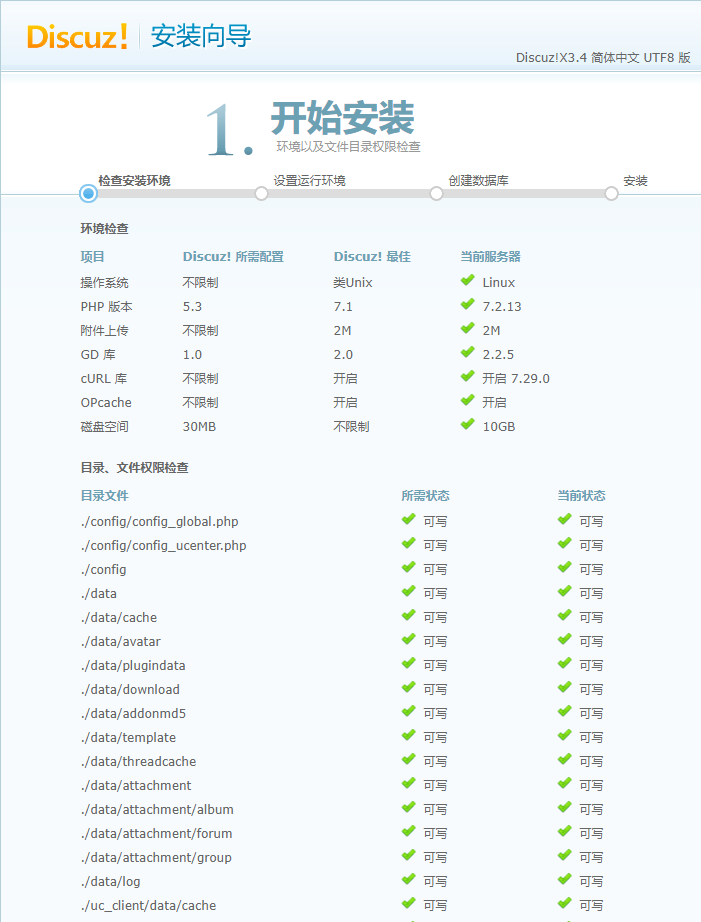
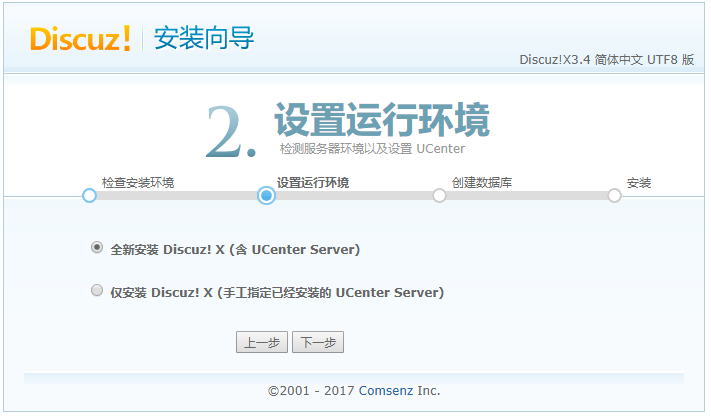
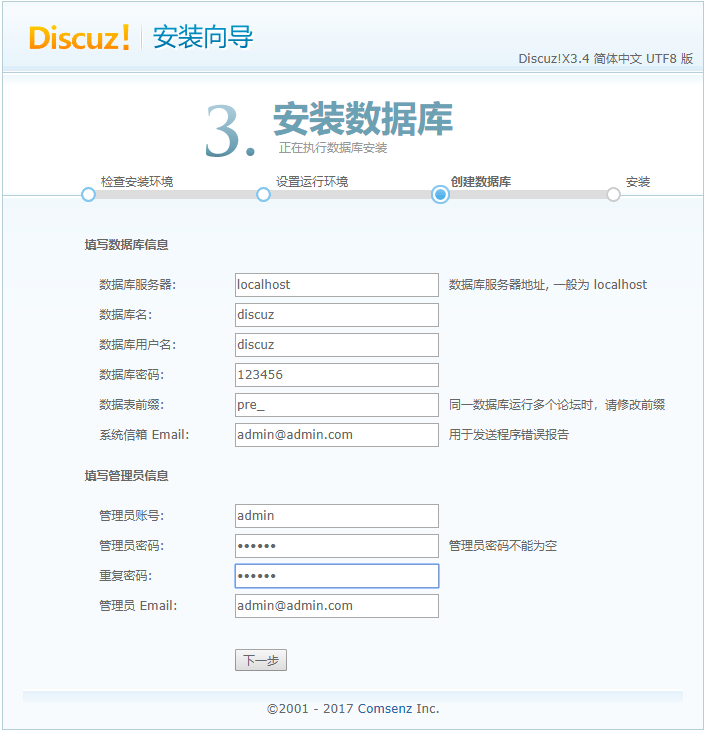
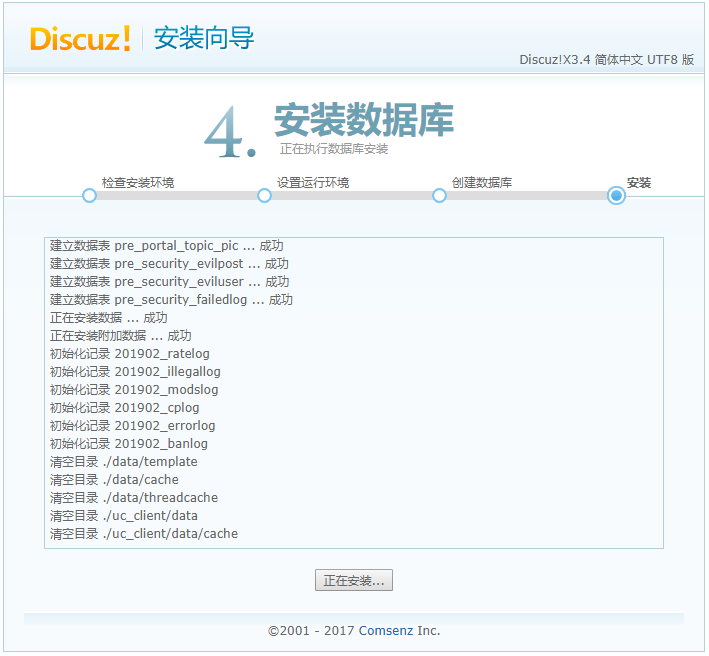
访问192.168.56.11,可以进入安装界面,如图:

4、域名重定向
需求:访问blog.bbb.com域名,可以自动跳转到blog.aaa.com域名进行访问
[root@localhost vhost]# curl blog.aaa.com    #访问页面
welcome to blog index.html
[root@localhost vhost]# vim blog.conf
server {
    listen       80;
    server_name  blog.aaa.com blog.bbb.com;
    root /data/web/blog;
    index index.php index.html index.htm;

    location / {
        try_files $uri $uri/ /index.php$is_args$args;
    }

    if ($host = blog.bbb.com) {    #使用if进行判断,如果域名为blog.bbb.com则进行跳转
    	rewrite /(.*) http://blog.aaa.com/$1 permanent;
    }

    location ~ \.php$ {
        try_files $uri = 404;
        fastcgi_pass   127.0.0.1:9000;
	fastcgi_index  index.php;
        fastcgi_param  SCRIPT_FILENAME  $document_root$fastcgi_script_name;
        include        fastcgi_params;
    }
}

[root@localhost vhost]# nginx -t
nginx: the configuration file /usr/local/nginx/conf/nginx.conf syntax is ok
nginx: configuration file /usr/local/nginx/conf/nginx.conf test is successful
[root@localhost vhost]# systemctl reload nginx

[root@localhost vhost]# vim /etc/hosts
127.0.0.1   localhost localhost.localdomain localhost4 localhost4.localdomain4
::1         localhost localhost.localdomain localhost6 localhost6.localdomain6
192.168.56.11 blog.aaa.com blog.bbb.com

[root@localhost vhost]# curl blog.bbb.com    #访问blog.bbb.com会提示301跳转信息
<html>
<head><title>301 Moved Permanently</title></head>
<body bgcolor="white">
<center><h1>301 Moved Permanently</h1></center>
<hr><center>nginx/1.12.2</center>
</body>
</html>
[root@localhost vhost]# curl blog.bbb.com -I
HTTP/1.1 301 Moved Permanently
Server: nginx/1.12.2
Date: Thu, 14 Feb 2019 07:07:46 GMT
Content-Type: text/html
Content-Length: 185
Connection: keep-alive
Location: http://blog.aaa.com/
5、Nginx用户认证
(1)添加test用户,并使用md5加密
[root@localhost vhosts]# htpasswd -c -m /usr/local/nginx/conf/htpasswd test
New password: 123456
Re-type new password: 123456
Adding password for user test

(2)修改虚拟主机配置文件
[root@localhost vhosts]# vim www.abc.org.conf
server {
        listen 80;
        server_name www.abc.org;
        root /vhosts/html/www;
        index index.html index.htm index.php;

        location /nginx_status {
                auth_basic "Please input your acount";  #添加认证提示
                auth_basic_user_file /usr/local/nginx/conf/htpasswd;  #指定basic的密码文件
                stub_status on;
                access_log off;

        }
}

(3)检测语法,重载nginx
[root@localhost vhosts]# nginx -t
nginx: the configuration file /usr/local/nginx1.15.1/conf/nginx.conf syntax is ok
nginx: configuration file /usr/local/nginx1.15.1/conf/nginx.conf test is successful
[root@localhost vhosts]# nginx -s reload

6、Nginx访问日志配置
Nginx软件会把每个用户访问网站的日志信息都记录到指定的日志文件中,可以让运维人员更好地分析用户的浏览行为,该功能由ngx_http_log_module模块负责。其访问日志主要有2个参数控制:
log_format:定义记录日志的格式
access_log:指定日志子文件的路径以及使用哪种日志格式记录。
Nginx的默认日志格式如下:
log_format  main  '$remote_addr - $remote_user [$time_local] "$request" '
                      '$status $body_bytes_sent "$http_referer" '
                      '"$http_user_agent" "$http_x_forwarded_for"';

日志中的变量说明:
$remote_addr:记录访问网站的客户端地址
$http_x_forwarded_for:当前端有代理服务器时,设置Web节点记录客户端地址的配置,此参数生效的前提是代理服务器上也进行了相关的x_forwarded_for设置
$remote_user:远程客户端用户名称
$time_local:记录访问时间和时区
$request:用户的http请求起始行信息
$status:http状态码,记录请求返回的状态,例如:200、503
$body_bytes_sents:服务器发送给客户端的响应主体字节数
$http_referer:记录此次请求是从哪个链接访问过来的,可以根据referer进行防盗链设置
$http_user_agent:记录客户端访问信息,例如:浏览器、手机客户端等
记录日志配置如下:
access_log logs/access.log main;
实际应用例子:
[root@localhost vhosts]# cat /usr/local/nginx/logs/www.abc.org_access.log   #每个对应相应的颜色
192.168.56.1 - test [17/Jul/2018:07:20:44 -0400] "GET / HTTP/1.1" 304 0 "-" "Mozilla/5.0 (Windows NT 6.1; Win64; x64) AppleWebKit/537.36 (KHTML, like Gecko) Chrome/67.0.3396.87 Safari/537.36" "-"
$remoote_addr - $remote_user [time_local]       $request  $status  $body_bytes_sent  $http_referer  $$http_user_agent                                         $http_x_forwarded_for
在记录日志参数中加上buuffer和flush选项,可以在高并发的场景下提升网站的访问性能。buffer=size为存放访问日志的缓冲区大小,flush=time为将缓冲区的日志刷到磁盘的时间,gzip[=level]表示压缩级别。配置举例如下:
access_log logs/www.abc.org_access.log main gzip buffer=32k flush=5s;
7、Nginx日志不记录静态文件和静态文件过期缓存
由于日志记录会逐渐庞大,可以对某些资源的访问日志取消记录,配置如下:
location ~.*\.(gif|jpg|jpeg|png|bmp|swf|js|css)$
{
expires 30d;       //配置图片缓存时间
access_log off;    //表示不记录gif|jpg等类型文件
}

location ~ .*\.(js|css)$
{
     expires 12h;     //配置图片缓存时间
     access_log off;
}

过期时间指的是图片会在浏览器存储指定时间,超过这个时间就会重新刷新,配置缓存的目的是为了让网站的访问速度更加快,节省带宽。
8、日志切割
默认的情况下Nginx会把所有的访问日志都输出到一个access.log的日志当中,时间久了,就会导致日志臃肿,不利于分析和处理,所以有必要地对日志进行按天或按小时进行切割保存。切割的方式Nginx并没有像apache一样自带日志切割工具(rotatelogs),所以只能使用脚本的方式对日志进行切割。脚本如下:
[root@localhost ~]# vim cut_nginx_log.sh
#!/bin/bash
Dateformat=$(date +%Y%m%d)
Basedir="/usr/local/nginx"
Nginxlogdir="$Basedir/logs"
Logname="access_www"
[ -d $Nginxlogdir ] && cd $Nginxlogdir || exit 1
[ -f ${Logname}.log || exit 1
/bin/mv ${Logname}.log ${Dateformat}_${Logname}.log
$Basedir/sbin/nginx -s reload

[root@localhost ~] crontab -e  #定时任务实现每天00点执行日志切割脚本
00 * * * /bin/bash /root/cut_nginx_log.sh >/dev/null 2>&1
9、Nginx配置防盗链
如果一个网站的图片较多,比如淘宝,每个商品都有很多图片来展示商品,本公司也是做电商产品,有自己的平台,图片也是较多的。但是如果相应的同行就会有竞争,如果被竞争对手拿到了公司网站上的图片链接,然后放到他的网站上访问,这样竞争对手网站上的图片走的访问路径是走本公司的,流量也就在本公司服务器上产生,这会导致成本的增加,所以需要禁止别的网站转载自己网站上的图片。可在虚拟主机中配置:
location ~.*\.(gif|jpg|jpeg|png|bmp|swf|flv|rar|zip|gz|bz2)$
{
               expires 30d;       //配置图片缓存时间
               access_log off;    //表示不记录gif|jpg等类型文件
               valid_referers none blocked servernames *.taobao.com *.baidu.com *.google.com;
               if ($invalid_referer )
               {
                        return 403;
                        rewirte ^/http://www.abc.org/nophoto.gif;
               }
}


valid_referers是可用的来源链,
none bolocked server_names是不进行防盗的主机域名,加起来是对于这些可用的链接不进行拦截而是加入白名单。
$invalid_referer,这里用$作为一个变量,变量名是不可用的来源链,和可用的正好相反
盗用我们图片的人访问这些图片时会跳转到 http://www.abc.org/nophoto.gif ,也可以直接显示403,这样更节省资源。
10、Nginx的访问控制
为了实现网站的安全,或者说是某些页面的限制访问,又或者是某个恶意ip的拒绝访问,都可以通过ngx_http_access_module模块允许限制对某些客户端地址的访问。
官方文档示例:
location / {
    deny  192.168.1.1;
    allow 192.168.1.0/24;
    allow 10.1.1.0/16;
    allow 2001:0db8::/32;
    deny  all;
}
按顺序检查规则,直到找到第一个匹配项。在此示例中,仅允许IPv4网络 10.1.1.0/16以及192.168.1.0/24 但不包括地址192.168.1.1,以及IPv6网络2001:0db8::/32对网站进行访问。如果有很多规则, 最好使用 ngx_http_geo_module模块变量。
语法:
语法:    allow address | CIDR | unix: | all;
默认值:    —
应用区段:    http, server, location, limit_except

允许访问的IP。如果unix:指定了特殊值(1.5.1),则允许访问所有UNIX域套接字。

语法:    deny address | CIDR | unix: | all;
默认值:    —
应用区段:    http, server, location, limit_except

拒绝访问的IP。如果unix:指定了特殊值(1.5.1),则拒绝所有UNIX域套接字的访问。
实际应用举例,对nginx_status进行限制访问
[root@localhost vhosts]# vim www.abc.org.conf   #修改虚拟主机配置文件
server {
        listen 80;
        server_name www.abc.org abc.org;
        root /vhosts/html/www;
        index index.html index.htm index.php;
        if ( $host != www.abc.org )
        {
                rewrite ^/(.*)$ http://www.abc.org/$1 permanent;
        }

        access_log logs/www.abc.org_access.log main;
        error_log logs/www.abc.org_error.log crit;
        location /nginx_status {
                #auth_basic "Please input your acount";
                #auth_basic_user_file /usr/local/nginx/conf/htpasswd;
                allow 192.168.56.11;  #允许192.168.56.11该ip访问
                deny all;         #拒绝其他所有的访问
                stub_status on;
                access_log off;

        }
}
[root@localhost vhosts]# nginx -t
nginx: the configuration file /usr/local/nginx1.15.1/conf/nginx.conf syntax is ok
nginx: configuration file /usr/local/nginx1.15.1/conf/nginx.conf test is successful
[root@localhost vhosts]# nginx -s reload
[root@localhost ~]# curl http://www.abc.org/nginx_status  #本机访问测试,可以获取到nginx的状态信息
Active connections: 1
server accepts handled requests
36 38
Reading: 0 Writing: 1 Waiting: 0
windows下访问: http://www.abc.org/nginx_status ,会直接提示403,权限拒绝了其他访问

还可以将访问的规则定义在整个server段,表示对网站的访问进行限制,也可以在http段进行限制,表示对全局的站点进行限制访问。
11、生成SSL秘钥加密网站
要生成ssl加密网站,就需要用到nginx的另一个模块:ngx_http_ssl_module,该模块提供https支持,默认情况下不会使用该模块,需要在编译时增加编译参数:--with-http_ssl_module,且该模块还需要openssl库的支持
示例配置:
worker_processes auto;  #配置work进程数量

http {

    ...

    server {
        listen              443 ssl;  #监听443端口,启用ssl
        keepalive_timeout   70;     #启用保持活动连接

        ssl_protocols       TLSv1 TLSv1.1 TLSv1.2;  #ssl写协议配置
        ssl_ciphers         AES128-SHA:AES256-SHA:RC4-SHA:DES-CBC3-SHA:RC4-MD5;  #ssl加密方式
        ssl_certificate     /usr/local/nginx/conf/cert.pem;  #指定证书文件
        ssl_certificate_key /usr/local/nginx/conf/cert.key;  #指定私钥文件
        ssl_session_cache   shared:SSL:10m;  #启用共享会话缓存
        ssl_session_timeout 10m;  #ssl会话延时配置

        ...
    }
https配置实例:
(1)生成pem证书和私钥
[root@localhost conf]# openssl genrsa -out cert.key 2048    //生成私钥
Generating RSA private key, 2048 bit long modulus
...................................+++
....+++
e is 65537 (0x10001)
[root@localhost conf]# openssl req -new -x509 -key cert.key -out cert.pem    //生成证书
You are about to be asked to enter information that will be incorporated
into your certificate request.
What you are about to enter is what is called a Distinguished Name or a DN.
There are quite a few fields but you can leave some blank
For some fields there will be a default value,
If you enter '.', the field will be left blank.
-----
Country Name (2 letter code) [XX]:zhongshan
string is too long, it needs to be less than  2 bytes long
Country Name (2 letter code) [XX]:zhognshan
string is too long, it needs to be less than  2 bytes long
Country Name (2 letter code) [XX]:zx
State or Province Name (full name) []:zx
Locality Name (eg, city) [Default City]:zx
Organization Name (eg, company) [Default Company Ltd]:
Organizational Unit Name (eg, section) []:
Common Name (eg, your name or your server's hostname) []:
Email Address []:

(2)查看证书
[root@localhost conf]# ll cert.*
-rw-r--r-- 1 root root 1675 Jul 17 09:59 cert.key
-rw-r--r-- 1 root root 1229 Jul 17 10:00 cert.pem

(3)配置虚拟主机
[root@localhost vhosts]# cat www.abc.org.conf www.abc.org.ssl.conf
server {
    listen 80;
    server_name www.abc.org abc.org;
    root /vhosts/html/www;
    index index.html index.htm index.php;
    rewrite ^/(.*)$ https://$host/$1 permanent;    //配置http访问时强制跳转到https

    access_log logs/www.abc.org_access.log main;
    error_log logs/www.abc.org_error.log crit;

}
server {                //ssl站点配置
    listen 443 ssl;
    server_name www.abc.org abc.org;
    root /vhosts/html/www;
    index index.html index.htm index.php;
      ssl_protocols       TLSv1 TLSv1.1 TLSv1.2;
        ssl_ciphers         AES128-SHA:AES256-SHA:RC4-SHA:DES-CBC3-SHA:RC4-MD5;
        ssl_certificate     /usr/local/nginx/conf/cert.pem;
        ssl_certificate_key /usr/local/nginx/conf/cert.key;
        ssl_session_cache   shared:SSL:10m;
        ssl_session_timeout 10m;
    location /nginx_status {
                #auth_basic "Please input your acount";
                #auth_basic_user_file /usr/local/nginx/conf/htpasswd;
                #allow 192.168.56.11;
                #deny all;
                #include deny.ip;
                stub_status on;
                access_log off;

        }

}
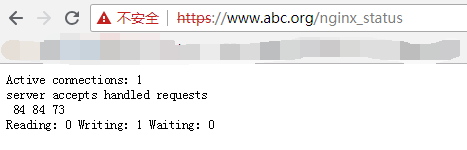
访问:http://www.abc.org/nginx_status会自动跳转到 https://www.abc.org/nginx_status ,如图:
网站添加了https证书后,当http方式访问网站时就会报404错误,所以需要做http到https的强制跳转设置。以下总结http跳转https的方法:
- 下面是将所有的http请求通过rewrite重写到https上。
[root@localhost vhosts]# vim www.abc.org.conf     //仅修改www.abc.org.conf
server {
        listen 80;
        server_name www.abc.org abc.org;
        root /vhosts/html/www;
        index index.html index.htm index.php;
        #rewrite ^/(.*)$ https://$host/$1 permanent;        //方法一:这是nginx早前写法,一直有效
        #return 301 https//$server_name$request_uri;        //方法二:这是nginx支持的最新写法
        #if ($host ~* "^abc.org$"){                            //方法三:用if判断跳转,适用于多域名,即使访问abc.org也会跳转
        #        rewrite ^/(.*)$ https//www.abc.org/ permanent;
        #}
        if ($host  = "www.abc.org"){                        //方法四:对$host做精确判断跳转
                rewrite ^/(.*)$ https://www.abc.org/ permanent;
        }
        access_log logs/www.abc.org_access.log main;
        error_log logs/www.abc.org_error.log crit;

}
2)采用nginx的497状态码
497 - normal request was sent to HTTPS
解释:当网站只允许https访问时,当用http访问时nginx会报出497错误码
思路:
利用error_page命令将497状态码的链接重定向到https://www.abc.org这个域名上
[root@localhost vhosts]# vim www.abc.org.conf
server {
        listen 80;
        server_name www.abc.org abc.org;
        root /vhosts/html/www;
        index index.html index.htm index.php;
        error_page 497 https://$host$uri?$args;        //访问www.abc.org或abc.org的http都会强制跳转到https
        access_log logs/www.abc.org_access.log main;
        error_log logs/www.abc.org_error.log crit;

}
也可以将80和43端口放在一起
server {
        listen 443 ssl;
        listen 80;
        server_name www.abc.org abc.org;
        root /vhosts/html/www;
        index index.html index.htm index.php;
        ssl_protocols       TLSv1 TLSv1.1 TLSv1.2;
        ssl_ciphers         AES128-SHA:AES256-SHA:RC4-SHA:DES-CBC3-SHA:RC4-MD5;
        ssl_certificate     /usr/local/nginx/conf/cert.pem;
        ssl_certificate_key /usr/local/nginx/conf/cert.key;
        ssl_session_cache   shared:SSL:10m;
        ssl_session_timeout 10m;
        error_page 497 https://$host$uri?$args;
        location /nginx_status {
                stub_status on;
                access_log off;

        }

}
3)利用meta的刷新作用将http跳转到https
上述的方法均会耗费服务器的资源,可以借鉴百度使用的方法:巧妙的利用meta的刷新作用,将http跳转到https
[root@localhost vhosts]# cat /vhosts/html/www/index.html     //修改index.html页面
<html>
<meta http-equiv="refresh" content="0;url=https://www.abc.org/">     //元数据刷新
welcome to www.abc.org
</html>
[root@localhost vhosts]# cat www.abc.org.conf
server {
    listen 80;
    server_name www.abc.org abc.org;
    index index.html index.php index.htm;
    error_page 404 https://www.abc.org/;    //将404的页面重定向到https的首页
    access_log logs/www.abc.org_access.log main;
    error_log logs/www.abc.org_error.log crit;
    location ~ / {
        root /vhosts/html/www;
        index index.html index.php index.htm;
    }

}
[root@localhost vhosts]# cat www.abc.org.ssl.conf
server {
    listen 443 ssl;
    server_name www.abc.org abc.org;
    root /vhosts/html/www;
    index index.html index.htm index.php;
      ssl_protocols       TLSv1 TLSv1.1 TLSv1.2;
    ssl_ciphers         AES128-SHA:AES256-SHA:RC4-SHA:DES-CBC3-SHA:RC4-MD5;
    ssl_certificate     /usr/local/nginx/conf/cert.pem;
    ssl_certificate_key /usr/local/nginx/conf/cert.key;
    ssl_session_cache   shared:SSL:10m;
    ssl_session_timeout 10m;
    location /nginx_status {
                stub_status on;
                access_log off;

        }

}
4)通过proxy_redirec方式
[root@localhost vhosts]# cat www.abc.org.conf
server {
    listen 80;
    server_name www.abc.org abc.org;
    index index.html index.php index.htm;
    access_log logs/www.abc.org_access.log main;
    error_log logs/www.abc.org_error.log crit;
    proxy_redirect http:// https://;
    location ~ / {
        root /vhosts/html/www;
        index index.html index.php index.htm;
    }

}

 浙公网安备 33010602011771号