【第五课】LNMP环境的入门
一、 LNMP环境介绍
LNMP(Linux + Nginx + Mysql/Mariadb + PHP)是目前互联网公司最常用的经典Web服务环境组合。
- Nginx:是一高性能的HTTP和反向代理服务器。
- Mysql/Mariadb:是 一个小型关系型数据库管理系统,用于存储数据库(如用户名、密码、文章等)
- PHP:是一种在服务器端执行的嵌入HTML文档的脚本语言。
这3个软件均为免费开源软件,组合在一起跑在Linux系统之上,成为一个免费、高效、扩展性强的网站服务系统。
LNMP组合工作流程:
- 用户通过浏览器输入域名请求Nginx web服务,如果请求的是静态资源,则由Nginx解析并返回给用户;
- 如果是动态请求(.php结尾),那么Nginx就会将该请求通过FastCGI接口发送给PHP引擎服务(FastCGI进程php-fpm)进行解析;
- 如果该动态请求需要读取数据库的数据,那么PHP就会继续向后端请求Mysql/Mariadb数据库,以读取需要的数据,而后通过Nginx服务将获取的数据返回给用户。
需要注意的是,这里所谓的静态和动态元素
- 所谓静态,是指Nginx可以直接处理的图片、js、css、视频、音频、flash等等。
- 所谓动态,是指这些请求需要和数据库进行链接。比如用户的登录,博客文章的查看和编写。
如下图:

二、Mysql的二进制免编译安装
(1)下载二进制免编译版本mysql 5.6.35
[root@localhost tools]# wget http://mirrors.sohu.com/mysql/MySQL-5.6/mysql-5.6.35-linux-glibc2.5-x86_64.tar.gz
[root@localhost tools]# wget http://cn.php.net/distributions/php-7.2.5.tar.gz

(2)增加mysql运行用户
[root@localhost tools]# useradd -s /sbin/nologin -M mysql

(3)解压并移动Mysql到指定的安装路径
[root@localhost tools]# tar -zxf mysql-5.6.35-linux-glibc2.5-x86_64.tar.gz
[root@localhost tools]# mv mysql-5.6.35-linux-glibc2.5-x86_64 /usr/local/mysql-5.6.35

(4)创建软连接并更改目录所属
[root@localhost tools]# ln -sv /usr/local/mysql-5.6.35 /usr/local/mysql
‘/usr/local/mysql’ -> ‘/usr/local/mysql-5.6.35’
[root@localhost mysql]# chown -R mysql.mysql /usr/local/mysql

(5)初始化Mysql
[root@localhost mysql]# scripts/mysql_install_db --basedir=/usr/local/mysql --datadir=/usr/local/mysql/data --user=mysql

(6)拷贝Mysql启动脚本,并修改脚本权限启动
[root@localhost mysql]# cp support-files/mysql.server /etc/init.d/mysqld
[root@localhost mysql]# chmod 755 /etc/init.d/mysqld
[root@localhost mysql]# vim /etc/init.d/mysqld
basedir=/usr/local/mysql
datadir=/usr/local/mysql/data
[root@localhost mysql]# cp support-files/my-default.cnf /etc/my.cnf
[root@localhost mysql]# /etc/init.d/mysqld start
Starting MySQL.Logging to '/usr/local/mysql/data/localhost.err'.
... SUCCESS!
[root@localhost mysql]# netstat -tulnp |grep 3306
tcp6       0      0 :::3306                 :::*                    LISTEN      62679/mysqld

(7)加入开机启动,测试登录
[root@localhost mysql]# chkconfig --add mysqld
[root@localhost mysql]# chkconfig mysqld on
[root@localhost mysql]# export PATH=/usr/local/mysql/bin/:$PATH
[root@localhost mysql]# mysql
Welcome to the MySQL monitor.  Commands end with ; or \g.
Your MySQL connection id is 1
Server version: 5.6.35 MySQL Community Server (GPL)

Copyright (c) 2000, 2016, Oracle and/or its affiliates. All rights reserved.

Oracle is a registered trademark of Oracle Corporation and/or its
affiliates. Other names may be trademarks of their respective
owners.

Type 'help;' or '\h' for help. Type '\c' to clear the current input statement.

mysql> quit;

(8)mysql安全设置
[root@localhost mysql]# mysqladmin -uroot password '123456'        //配置mysql的root用户密码
Warning: Using a password on the command line interface can be insecure.
[root@localhost mysql]# mysql
ERROR 1045 (28000): Access denied for user 'root'@'localhost' (using password: NO)
[root@localhost mysql]# mysql -uroot -p123456 -e "show databases;"
Warning: Using a password on the command line interface can be insecure.
+--------------------+
| Database           |
+--------------------+
| information_schema |
| mysql              |
| performance_schema |
| test               |
+--------------------+

[root@localhost mysql]# mysql -uroot -p        //清理无用的Mysql用户和库
Enter password:

mysql> select user,host from mysql.user;
+------+-----------+
| user | host      |
+------+-----------+
| root | 127.0.0.1 |
| root | ::1       |
|      | localhost |
| root | localhost |
+------+-----------+
rows in set (0.01 sec)

mysql> drop user "root"@"::1"
    -> ;
Query OK, 0 rows affected (0.00 sec)

mysql> drop user ""@"localhost";
Query OK, 0 rows affected (0.00 sec)

mysql> select user,host from mysql.user;
+------+-----------+
| user | host      |
+------+-----------+
| root | 127.0.0.1 |
| root | localhost |
+------+-----------+
rows in set (0.00 sec)

有时使用drop命令删除不了用户,可能是大写或者是特殊的Linux主机名导致的,如下:
mysql> drop user ''@'MySQL';
ERROR 1396 (HY000): Operation DROP USER failed for ''@'mysql'

解决办法如下:
mysql> delete from mysql.user where user='' and host='MySQL';
mysql> flush privileges;
三、PHP 7.2.5编译部署
1、CGI和FastCGI
CGI(Common Gateway Interface)通用网关接口,为HTTP服务器与其他机器上的程序服务通信交流的一种工具,CGI程序必须要在网络服务器上运行。传统的CGI接口方式存在很大的缺点就是性能较差。每次HTTP服务器遇到动态程序时,都需要重新启动解析器来执行解析,之后结果才会被返回给HTTP服务器,而这种方式在高并发的场景下是无法使用的,为了解决这一问题,随之产生的就是FastCGI。
FastCGI是一个可伸缩、高速和HTTP服务器和动态脚本语言之间通信的接口(在Linux环境下,FastCGI接口即为socket,这个socket可以是文件socket,也可以是ip socket),主要优点是把动态语言和HTTP服务器分离开来。FastCGI采用的是C/S架构,可以将HTTP服务器和脚本解析服务器分开,同时还能在脚本解析服务器上启动一个或多个脚本解析守护进程,而后将得到的结果返回给浏览器。这种方式可以使HTTP服务器专一处理静态请求,或者是将动态请求的结果返回客户端,在这一点上大大提升了应用系统的性能。
2、Nginx FastCGI的运行原理
Nginx不支持对外部动态程序的直接调用或者解析,所有的外部程序(如PHP)必须通过FastCGI接口来调用。FastCGI在Linux下是socket,为了调用CGI程序,还需要一个FastCGI的wrapper(可以理解为用于启动线程的工具),这个wrapper绑定在某个固定的socket上,如端口或文件socket,比如127.0.0.1:9000。当Nginx将CGI请求发送到这个socket的时候,通过FastCGI接口,wrapper接口到请求,然后派生一个新的线程,这个线程再去调用解释器或者外部程序处理脚本来读取返回的数据;接着wrapper再将返回的数据通过FastCGI接口,沿着原来的socket传递个Nginx;最后Nginx将返回的数据发送给客户端。
3、PHP的编译安装步骤
(1)准备PHP依赖的库环境
[root@localhost ~]# yum install -y gcc gcc-c++ autoconf libjpeg libjpeg-devel libpng libpng-devel freetype freetype-devel libpng libpng-devel libxml2 libxml2-devel zlib zlib-devel glibc glibc-devel glib2 glib2-devel bzip2 bzip2-devel ncurses curl openssl-devel gdbm-devel db4-devel libXpm-devel libX11-devel gd-devel gmp-devel readline-devel libxslt-devel expat-devel xmlrpc-c xmlrpc-c-devel
[root@localhost ~]# cd /tools

(2)下载php 7.2.5并解压
[root@localhost ~]# wget http://cn.php.net/distributions/php-7.2.5.tar.gz
[root@localhost tools]# tar -zxf php-7.2.5.tar.gz
[root@localhost tools]# cd php-7.2.5

(3)编译安装
[root@localhost php-7.2.5]# ./configure \
--prefix=/usr/local/php7.2.5 \                                    //指定 php 安装目录
--with-config-file-path=/usr/local/php7.2.5/etc \                //指定php.ini位置
--with-config-file-scan-dir=/usr/local/php7.2.5/etc/conf.d \    //指定扩展php.ini位置
--enable-inline-optimization \        //优化线程
--disable-debug \            //关闭调试模式
--disable-rpath \            //关闭额外的运行库文件
--enable-shared \
--enable-opcache \            //启用操作码缓存
--enable-fpm \                //表示激活PHP-FPM方式服务,即FactCGI方式运行PHP服务。
--with-mysql=mysqlnd \        //增加mysql支持
--with-mysqli=mysqlnd \
--with-pdo-mysql=mysqlnd \
--with-gettext \            //打开gnu 的gettext 支持,编码库用到
--enable-mbstring \            //多字节,字符串的支持
--with-iconv \                //打开iconv函数,多种字符集间的转换
--with-mcrypt \                //启用mcrypt加密算法
--with-mhash \                //启用mhash加密算法
--with-openssl \            //openssl的支持,加密传输时用到的
--enable-bcmath \            //打开图片大小调整,用到zabbix监控的时候用到了这个模块
--enable-soap \
--with-libxml-dir \            //打开libxml2库的支持
--enable-pcntl \            //freeTDS需要用到,可能是链接mssql
--enable-shmop \
--enable-sysvmsg \
--enable-sysvsem \            //使用sysv信号机制
--enable-sysvshm \
--enable-sockets \            //打开sockets支持
--enable-exif \
--enable-zend-signals \
--enable-gd-native-ttf \    //支持TrueType字符串函数库
--enable-ftp \                //打开ftp的支持
--with-curl \                //打开curl浏览工具的支持
--with-zlib \                //打开zlib库的支持
--enable-zip \                //打开对zip的支持
--with-bz2 \                //打开对bz2文件的支持
--with-readline \
--with-jpeg-dir \            //打开对jpeg图片的支持
--with-png-dir \            //打开对png图片的支持
--with-gd \                    //打开gd库的支持
--with-freetype-dir \        //打开对freetype字体库的支持
--with-pear \                //打开pear命令的支持,PHP扩展用的
[root@localhost php-7.2.5]# make && make install

(4)修改php服务的相关配置文件
[root@localhost php-7.2.5]# cp php.ini-production /usr/local/php7.2.5/etc/php.ini
[root@localhost php-7.2.5]# cd /usr/local/php7.2.5/etc/
[root@localhost etc]# cp php-fpm.conf.default php-fpm.conf
[root@localhost etc]# cp php-fpm.d/www.conf.default php-fpm.d/www.conf

(5)拷贝启动脚本,并添加到开机启动
[root@localhost etc]# cp /tools/php-7.2.5/sapi/fpm/php-fpm.service /usr/lib/systemd/system/
[root@localhost etc]# /usr/local/php7.2.5/sbin/php-fpm -t
[17-Jul-2018 16:56:41] NOTICE: configuration file /usr/local/php7.2.5/etc/php-fpm.conf test is successful
[root@localhost etc]# export PATH=/usr/local/php7.2.5/bin/:/usr/local/php7.2.5/sbin/:$PATH
[root@localhost etc]# systemctl enable php-fpm
Created symlink from /etc/systemd/system/multi-user.target.wants/php-fpm.service to /usr/lib/systemd/system/php-fpm.service.

(6)启动php-fpm,并检查端口
[root@localhost etc]# systemctl start php-fpm
[root@localhost etc]# netstat -tulnp |grep 9000
tcp        0      0 127.0.0.1:9000          0.0.0.0:*               LISTEN      14853/php-fpm: mast
[root@localhost php7.2.5]# ln -sv /usr/local/php7.2.5 /usr/local/php
‘/usr/local/php’ -> ‘/usr/local/php7.2.5’
四、Nginx的编译安装
(1)安装pcre、openssl依赖
pcre为正则依赖的库包文件,openssl在使用https时会用到
[root@localhost tools]# yum install -y pcre pcre-devel openssl openssl-devel
[root@localhost tools]# rpm -qa pcre pcre-devel
pcre-devel-8.32-17.el7.x86_64
pcre-8.32-17.el7.x86_64
[root@localhost tools]# rpm -qa openssl openssl-devel
openssl-devel-1.0.2k-12.el7.x86_64
openssl-1.0.2k-12.el7.x86_64

(2)下载nginx,并解压
[root@localhost tools]# wget http://nginx.org/download/nginx-1.15.1.tar.gz
[root@localhost tools]# tar -zxf nginx-1.15.1.tar.gz

(3)编译安装
[root@localhost tools]# useradd -s /sbin/nologin -M nginx
[root@localhost tools]# cd nginx-1.15.1
[root@localhost nginx-1.15.1]# ./configure --help
[root@localhost nginx-1.15.1]# ./configure \
--user=nginx \    #配置进程用户权限
--gourp=nginx \    #配置进程用户组权限
--prefix=/usr/local/nginx1.15.1 \    #指定安装路径
--with-http_stub_status_module \    #使用激活状态信息模块
--with-http_ssl_module                #使用ssl功能模块
[root@localhost nginx-1.15.1]# make && make install
[root@localhost nginx-1.15.1]# ln -sv /usr/local/nginx1.15.1 /usr/local/nginx
‘/usr/local/nginx’ -> ‘/usr/local/nginx1.15.1’

(5)启动
[root@localhost ~]# /usr/local/nginx/sbin/nginx -t    #检查配置文件语法
nginx: the configuration file /usr/local/nginx1.15.1/conf/nginx.conf syntax is ok
nginx: configuration file /usr/local/nginx1.15.1/conf/nginx.conf test is successful
[root@localhost ~]# /usr/local/nginx/sbin/nginx     #启动nginx
[root@localhost ~]# netstat -tunlp |grep 80  #检查监听端口
tcp        0      0 0.0.0.0:80              0.0.0.0:*               LISTEN      58713/nginx: master
五、YUM安装Nginx
(1)增加Nginx仓库源
[root@localhost ~]# vim /etc/yum.repos.d/nginx.repo
[nginx]
name=nginx repo
baseurl=http://nginx.org/packages/OS/OSRELEASE/$basearch/
gpgcheck=0
enabled=1

(2)安装Nginx
[root@localhost ~]# yum install -y nginx

(3)启动nginx
[root@localhost ~]# nginx -t
nginx: the configuration file /usr/local/nginx/conf/nginx.conf syntax is ok
nginx: configuration file /usr/local/nginx/conf/nginx.conf test is successful
[root@localhost ~]# systemctl start nginx
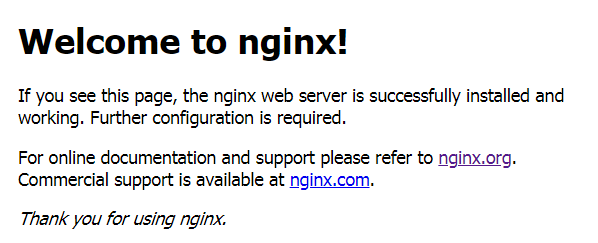
浏览器访问:http://192.168.56.11,会出现nginx的欢迎页

 浙公网安备 33010602011771号