
Allure2
一、testNG与allure
1、pom文件引入包
在项目中导入testng和allure2对应设置
<properties>
    <maven.compiler.target>1.8</maven.compiler.target>
    <maven.compiler.source>1.8</maven.compiler.source>
    <!-- 文件拷贝时的编码 -->
    <project.build.sourceEncoding>UTF-8</project.build.sourceEncoding>
    <project.reporting.outputEncoding>UTF-8</project.reporting.outputEncoding>
    <!-- 编译时的编码 -->
    <maven.compiler.encoding>UTF-8</maven.compiler.encoding>
    <aspectj.version>1.9.2</aspectj.version>
</properties>

<!-- testng maven坐标 -->
<dependency>
    <groupId>org.testng</groupId>
    <artifactId>testng</artifactId>
    <version>6.8.8</version>
</dependency>

<!-- allure2 maven坐标 -->
<dependency>
    <groupId>io.qameta.allure</groupId>
    <artifactId>allure-testng</artifactId>
    <version>2.6.0</version>
    <scope>test</scope>
</dependency>
加入maven-surefire-plugin插件并进行配置
<build>
    <plugins>
        <plugin>
            <!-- maven-surefire-plugin 配合testng/junit执行测试用例的maven插件 -->
            <groupId>org.apache.maven.plugins</groupId>
            <artifactId>maven-surefire-plugin</artifactId>
            <version>2.22.1</version>
            <configuration>
                <!-- 测试失败后,是否忽略并继续测试 -->
                <testFailureIgnore>true</testFailureIgnore>
                <suiteXmlFiles>
                    <!-- testng配置文件名称  -->
                    <suiteXmlFile>testng.xml</suiteXmlFile>
                </suiteXmlFiles>
                <!--设置参数命令行 -->
                <argLine>
                    <!-- UTF-8编码 -->
                    -Dfile.encoding=UTF-8
                    <!-- 配置拦截器 -->
                    -javaagent:"${settings.localRepository}/org/aspectj/aspectjweaver/${aspectj.version}/aspectjweaver-${aspectj.version}.jar"
                </argLine>
                <systemProperties>
                    <property>
                        <!-- 配置 allure 结果存储路径  -->
                        <name>allure.results.directory</name>
                        <value>${project.build.directory}/allure-results</value>
                    </property>
                </systemProperties>
            </configuration>
            <dependencies>
                <!-- aspectjweaver maven坐标 -->
                <dependency>
                    <groupId>org.aspectj</groupId>
                    <artifactId>aspectjweaver</artifactId>
                    <version>${aspectj.version}</version>
                </dependency>
            </dependencies>
        </plugin>
        <plugin>
            <groupId>io.qameta.allure</groupId>
            <artifactId>allure-maven</artifactId>
            <version>2.8</version>
        </plugin>
    </plugins>
</build>
2、生成allure报告
1)第一步插件装完后,会有下图入口:
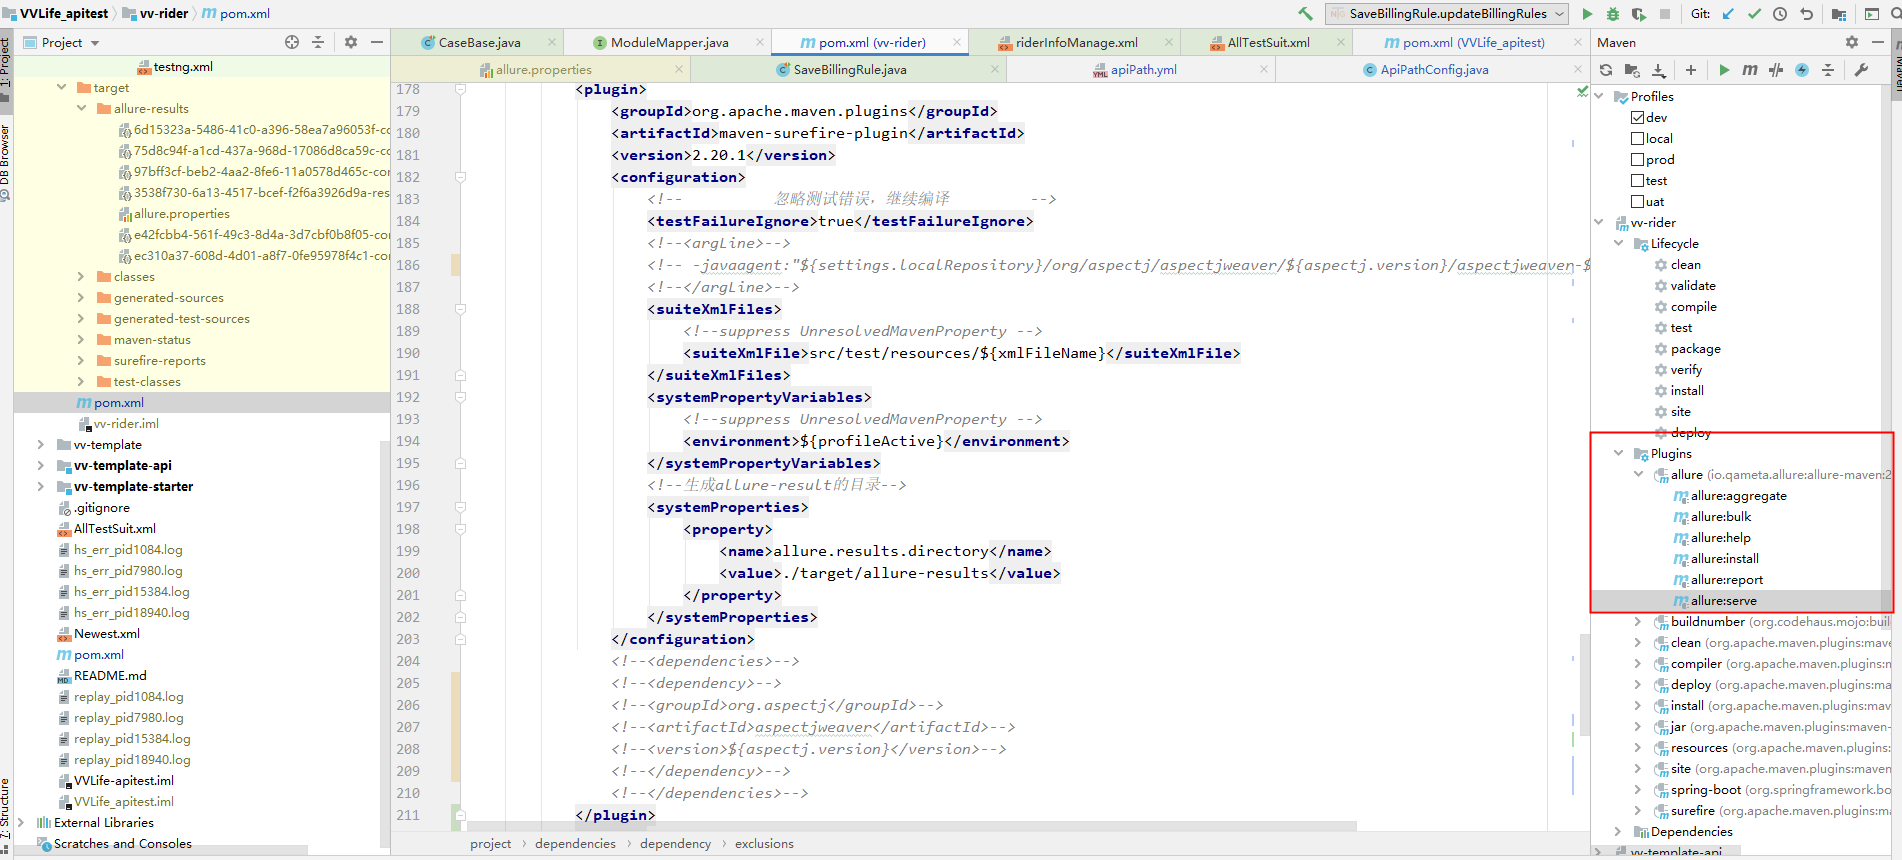
2)先跑一遍自动化,会在pom里配置的allure结果路径下生成文件
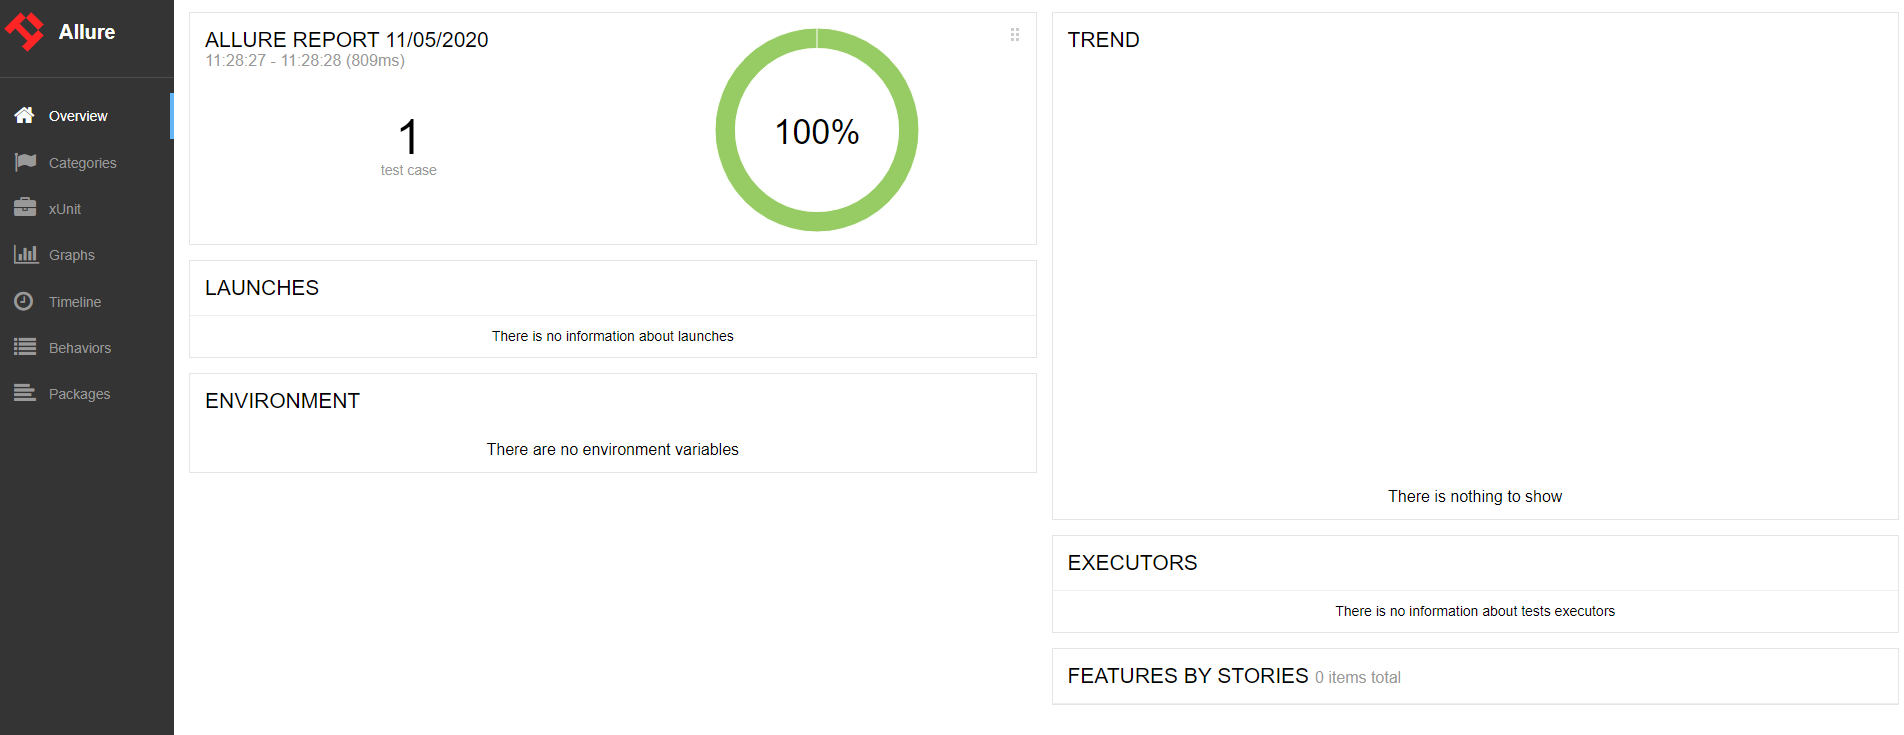
3)双击上图里的allure:serve或者命令“mvn io.qameta.allure:allure-maven:serve”运行,运行完自动打开报告地址
二、Jenkins集成allure报告
1、pom配置同上
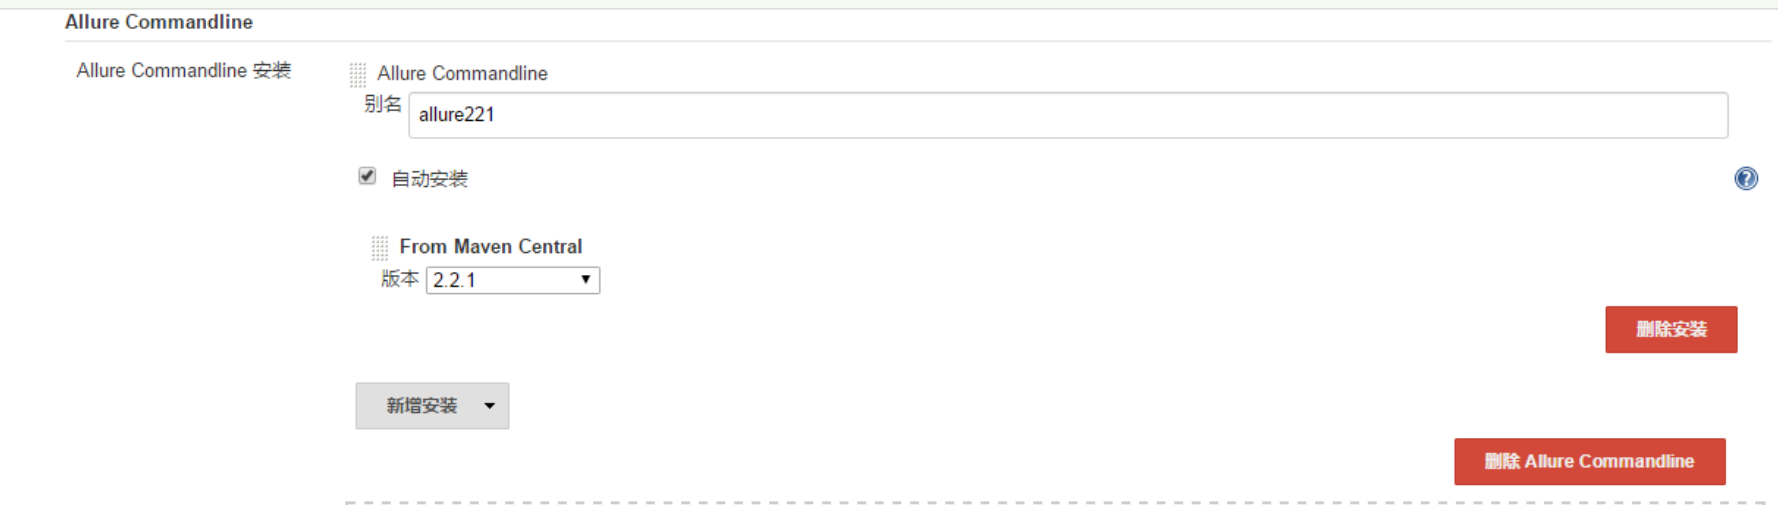
2、安装Allure 插件,配置Allure 插件到最新2.2.1版本
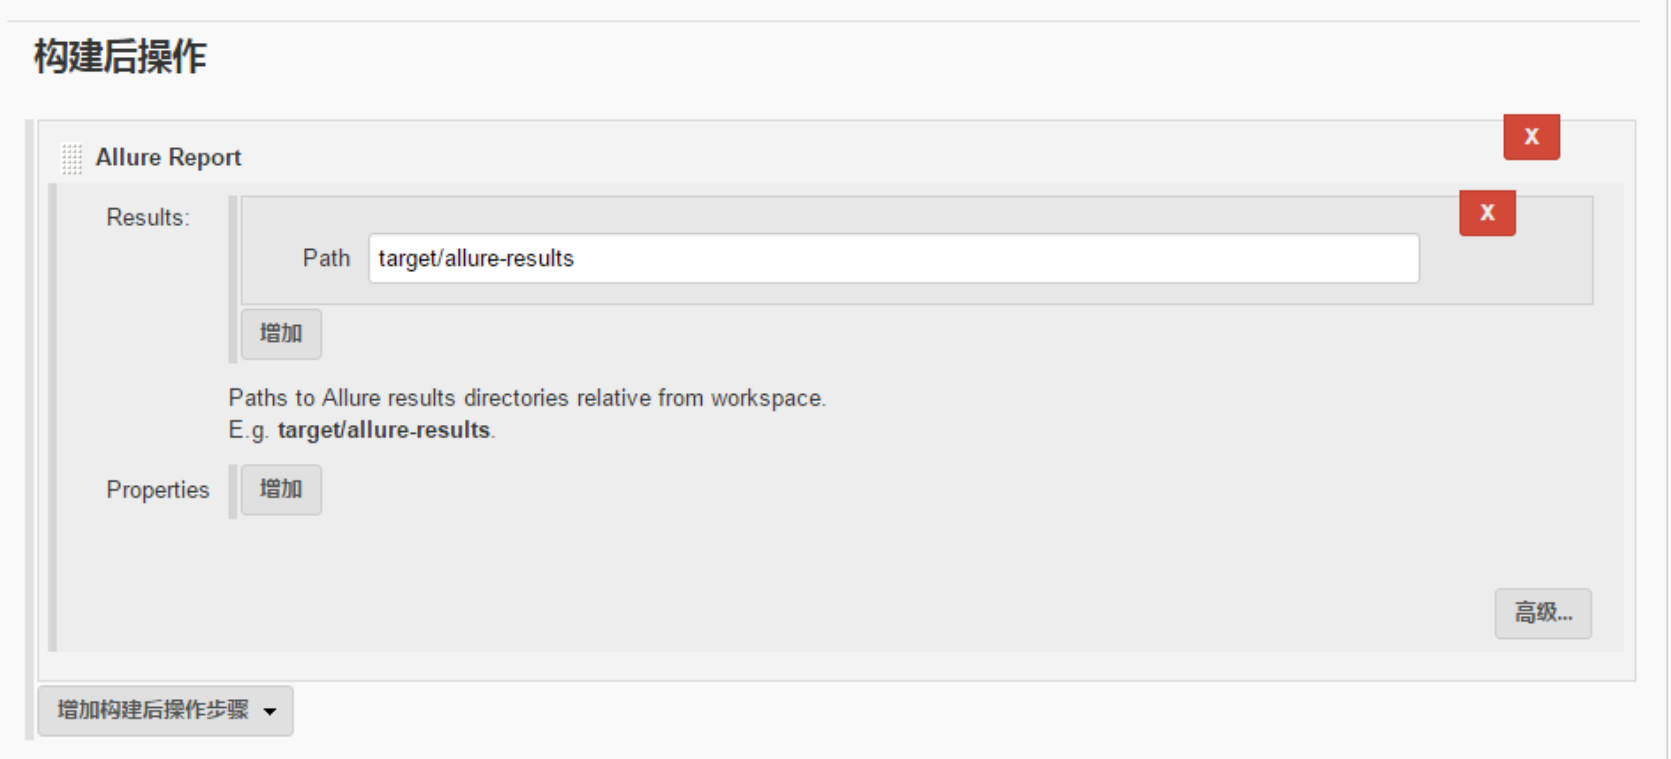
3、Jenkins job 中配置
资料:
allure git
allure官方文档

 浙公网安备 33010602011771号