Alibaba Cloud Linux 3/CentOS 7.x部署极狐GitLab代码托管平台
很久没写博客,久违了~
记录一下Alibaba Cloud Linux 3部署极狐GitLab代码托管平台的操作吧
首先,安装前准备
1、服务器配置低于4 vCPU、8 GiB会因规格过小,导致长时间处于Installing状态或安装失败

2、服务器安全组开启80、443、22端口对外访问
其次,本文重点:安装
1、安装GitLab所需的依赖包。
sudo yum install -y curl python3-policycoreutils openssh-server
2、添加GitLab软件包仓库。
curl -fsSL https://get.gitlab.cn | sudo /bin/bash
当出现类似如下回显信息,表示GitLab软件包仓库已安装。
[root@jajsdajlflswewioeruwjn8923 gitlab]# curl -fsSL https://get.gitlab.cn | sudo /bin/bash
==> Detected OS alinux

==> Add yum repo file to /etc/yum.repos.d/gitlab-jh.repo

[gitlab-jh]
name=JiHu GitLab
baseurl=https://packages.gitlab.cn/repository/el/$releasever/
gpgcheck=1
gpgkey=https://packages.gitlab.cn/repository/raw/gpg/public.gpg.key
priority=1
enabled=1

==> Generate yum cache for gitlab-jh

==> Successfully added gitlab-jh repo. To install JiHu GitLab, run "sudo yum/dnf install gitlab-jh".
3、安装GitLab。
sudo EXTERNAL_URL=<GitLab服务器的公网IP地址> yum install -y gitlab-jh
<GitLab服务器的公网IP地址>请替换成安装GitLab的实例公网IP地址。
当出现类似如下回显信息,表示GitLab已经安装成功。
gitlab Reconfigured!

                  *.                  *.
                 ***                 ***
                *****               *****
               .******             *******
               ********            ********
              ,,,,,,,,,***********,,,,,,,,,
             ,,,,,,,,,,,*********,,,,,,,,,,,
             .,,,,,,,,,,,*******,,,,,,,,,,,,
                 ,,,,,,,,,*****,,,,,,,,,.
                    ,,,,,,,****,,,,,,
                       .,,,***,,,,
                           ,*,.


         ___ __  __         _______ __  __          __
        / (_) / / /_  __   / ____(_) /_/ /   ____ _/ /_
   __  / / / /_/ / / / /  / / __/ / __/ /   / __ `/ __ \
  / /_/ / / __  / /_/ /  / /_/ / / /_/ /___/ /_/ / /_/ /
  \____/_/_/ /_/\__,_/   \____/_/\__/_____/\__,_/_.___/


Thank you for installing JiHu GitLab!
最后,初步使用
1、获取默认密码
sudo cat /etc/gitlab/initial_root_password
Password部分即为初始密码,注意24h后失效,用完重置
[root@iZwz9fnjnde1vdsuwggu3qZ gitlab]# sudo cat /etc/gitlab/initial_root_password
# WARNING: This value is valid only in the following conditions
#          1. If provided manually (either via `GITLAB_ROOT_PASSWORD` environment variable or via `gitlab_rails['initial_root_password']` setting in `gitlab.rb`, it was provided before database was seeded for the first time (usually, the first reconfigure run).
#          2. Password hasn't been changed manually, either via UI or via command line.
#
#          If the password shown here doesn't work, you must reset the admin password following https://docs.gitlab.com/ee/security/reset_user_password.html#reset-your-root-password.

Password: FuJodlwJ6VGwn+y/81twqCCPFiV/zaQrDJ02jz5byNpgE=

# NOTE: This file will be automatically deleted in the first reconfigure run after 24 hours.
2、登录
在浏览器输入网址。访问网址:http://${ECS的公网IP}。
默认用户名:root
初始密码:如上获取的默认密码
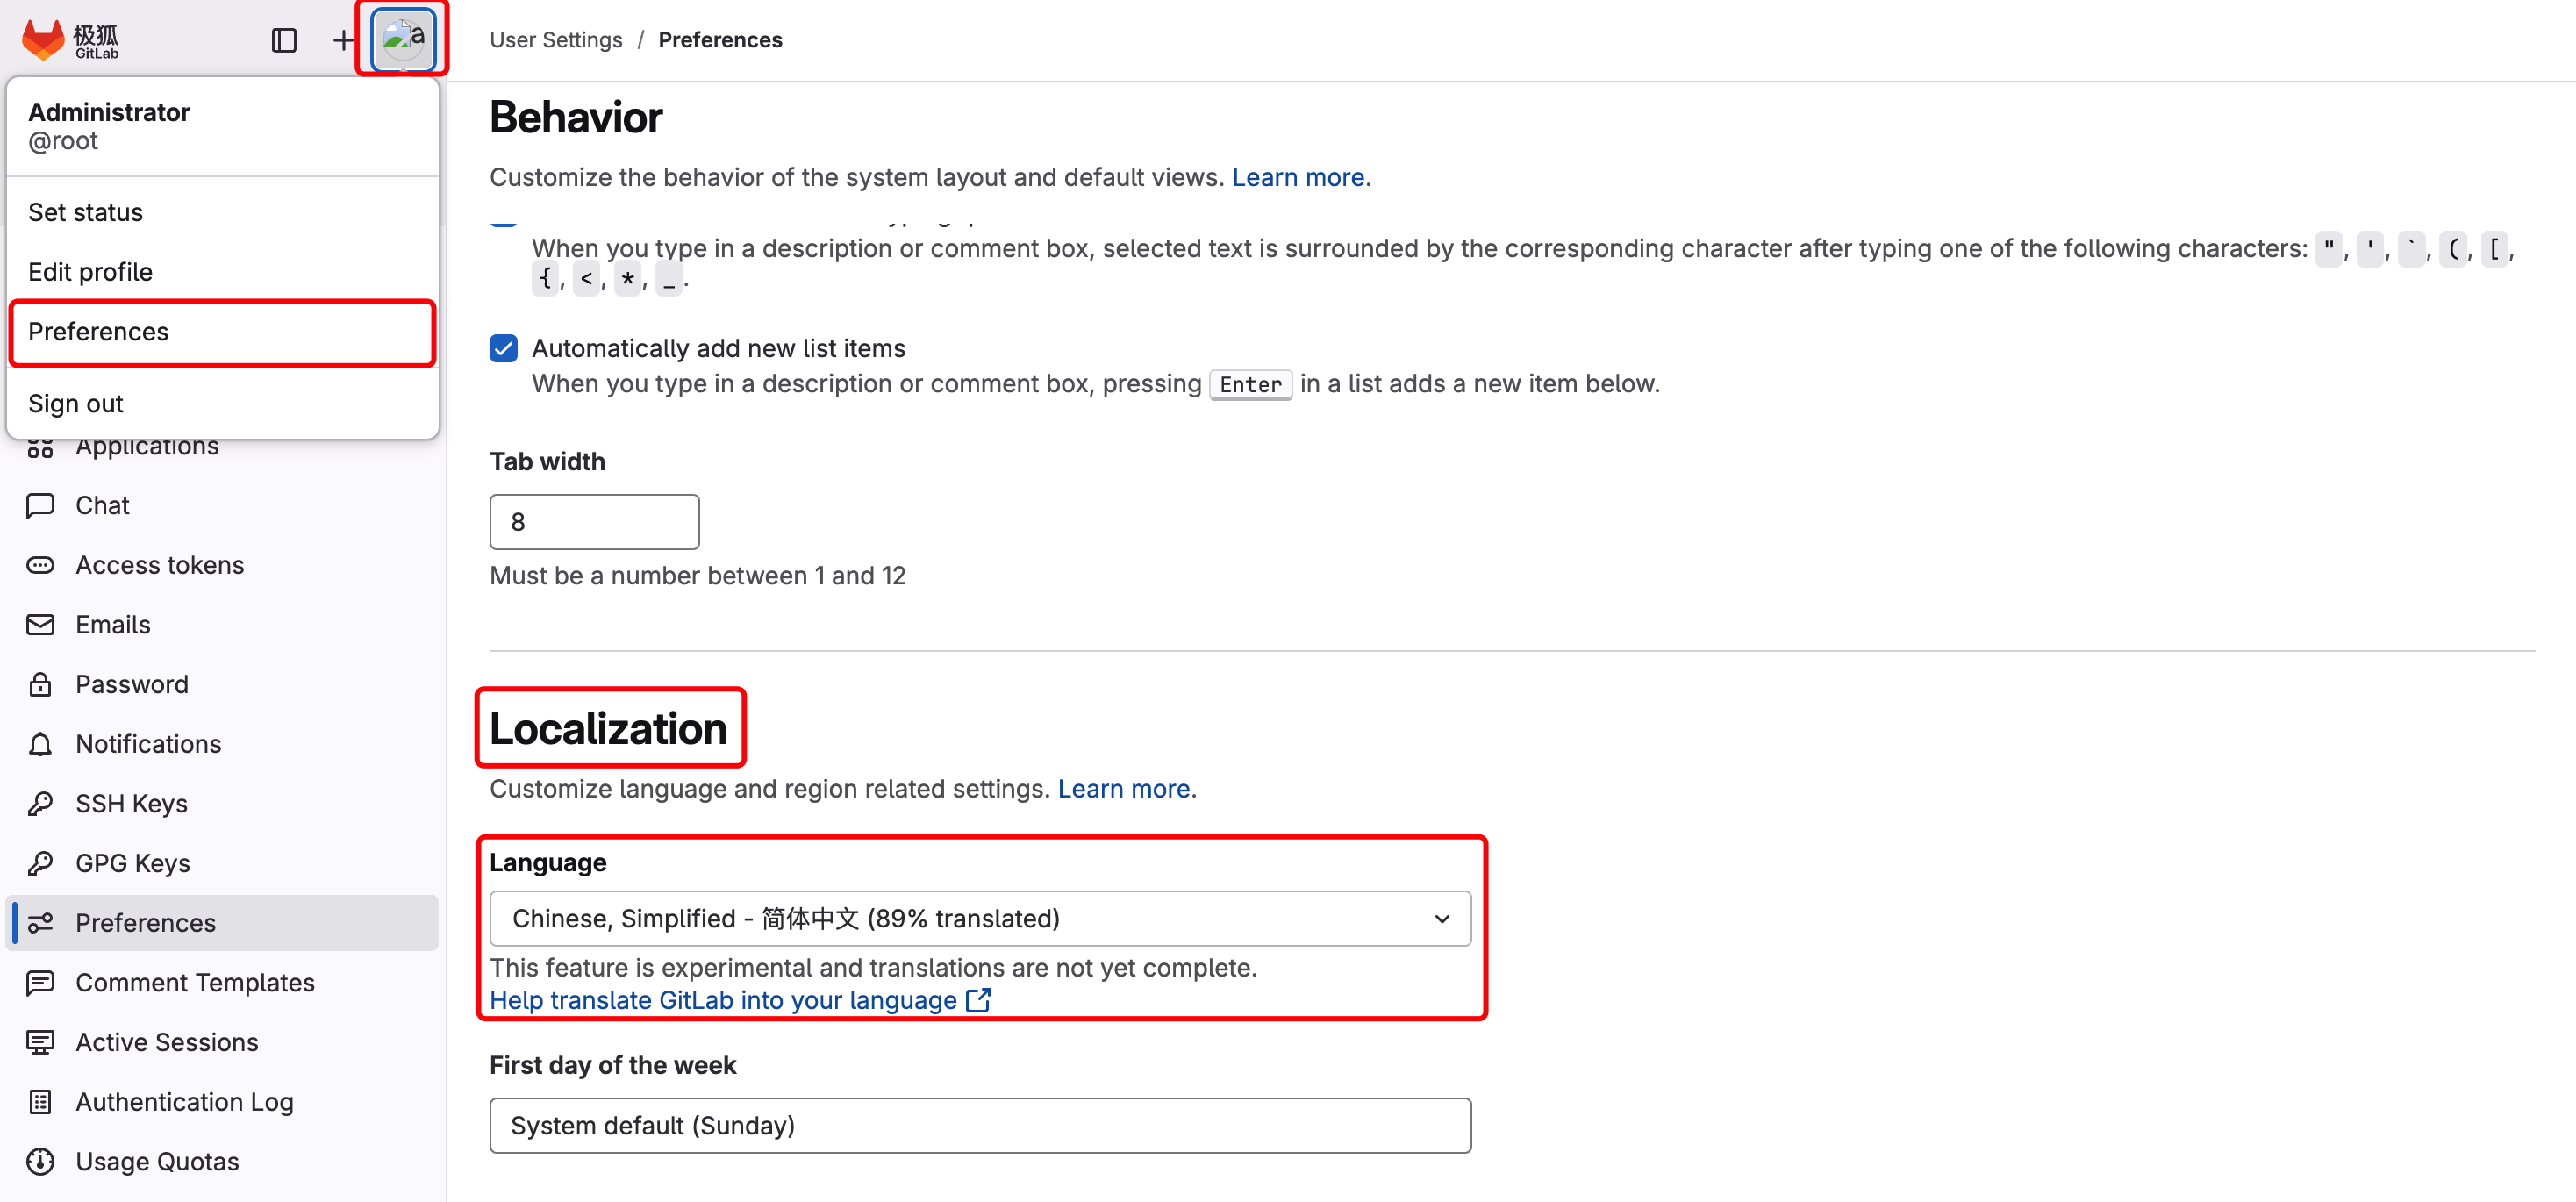
3、设置语言
点击头像-Preferences-Localization-Language,选择保存即可
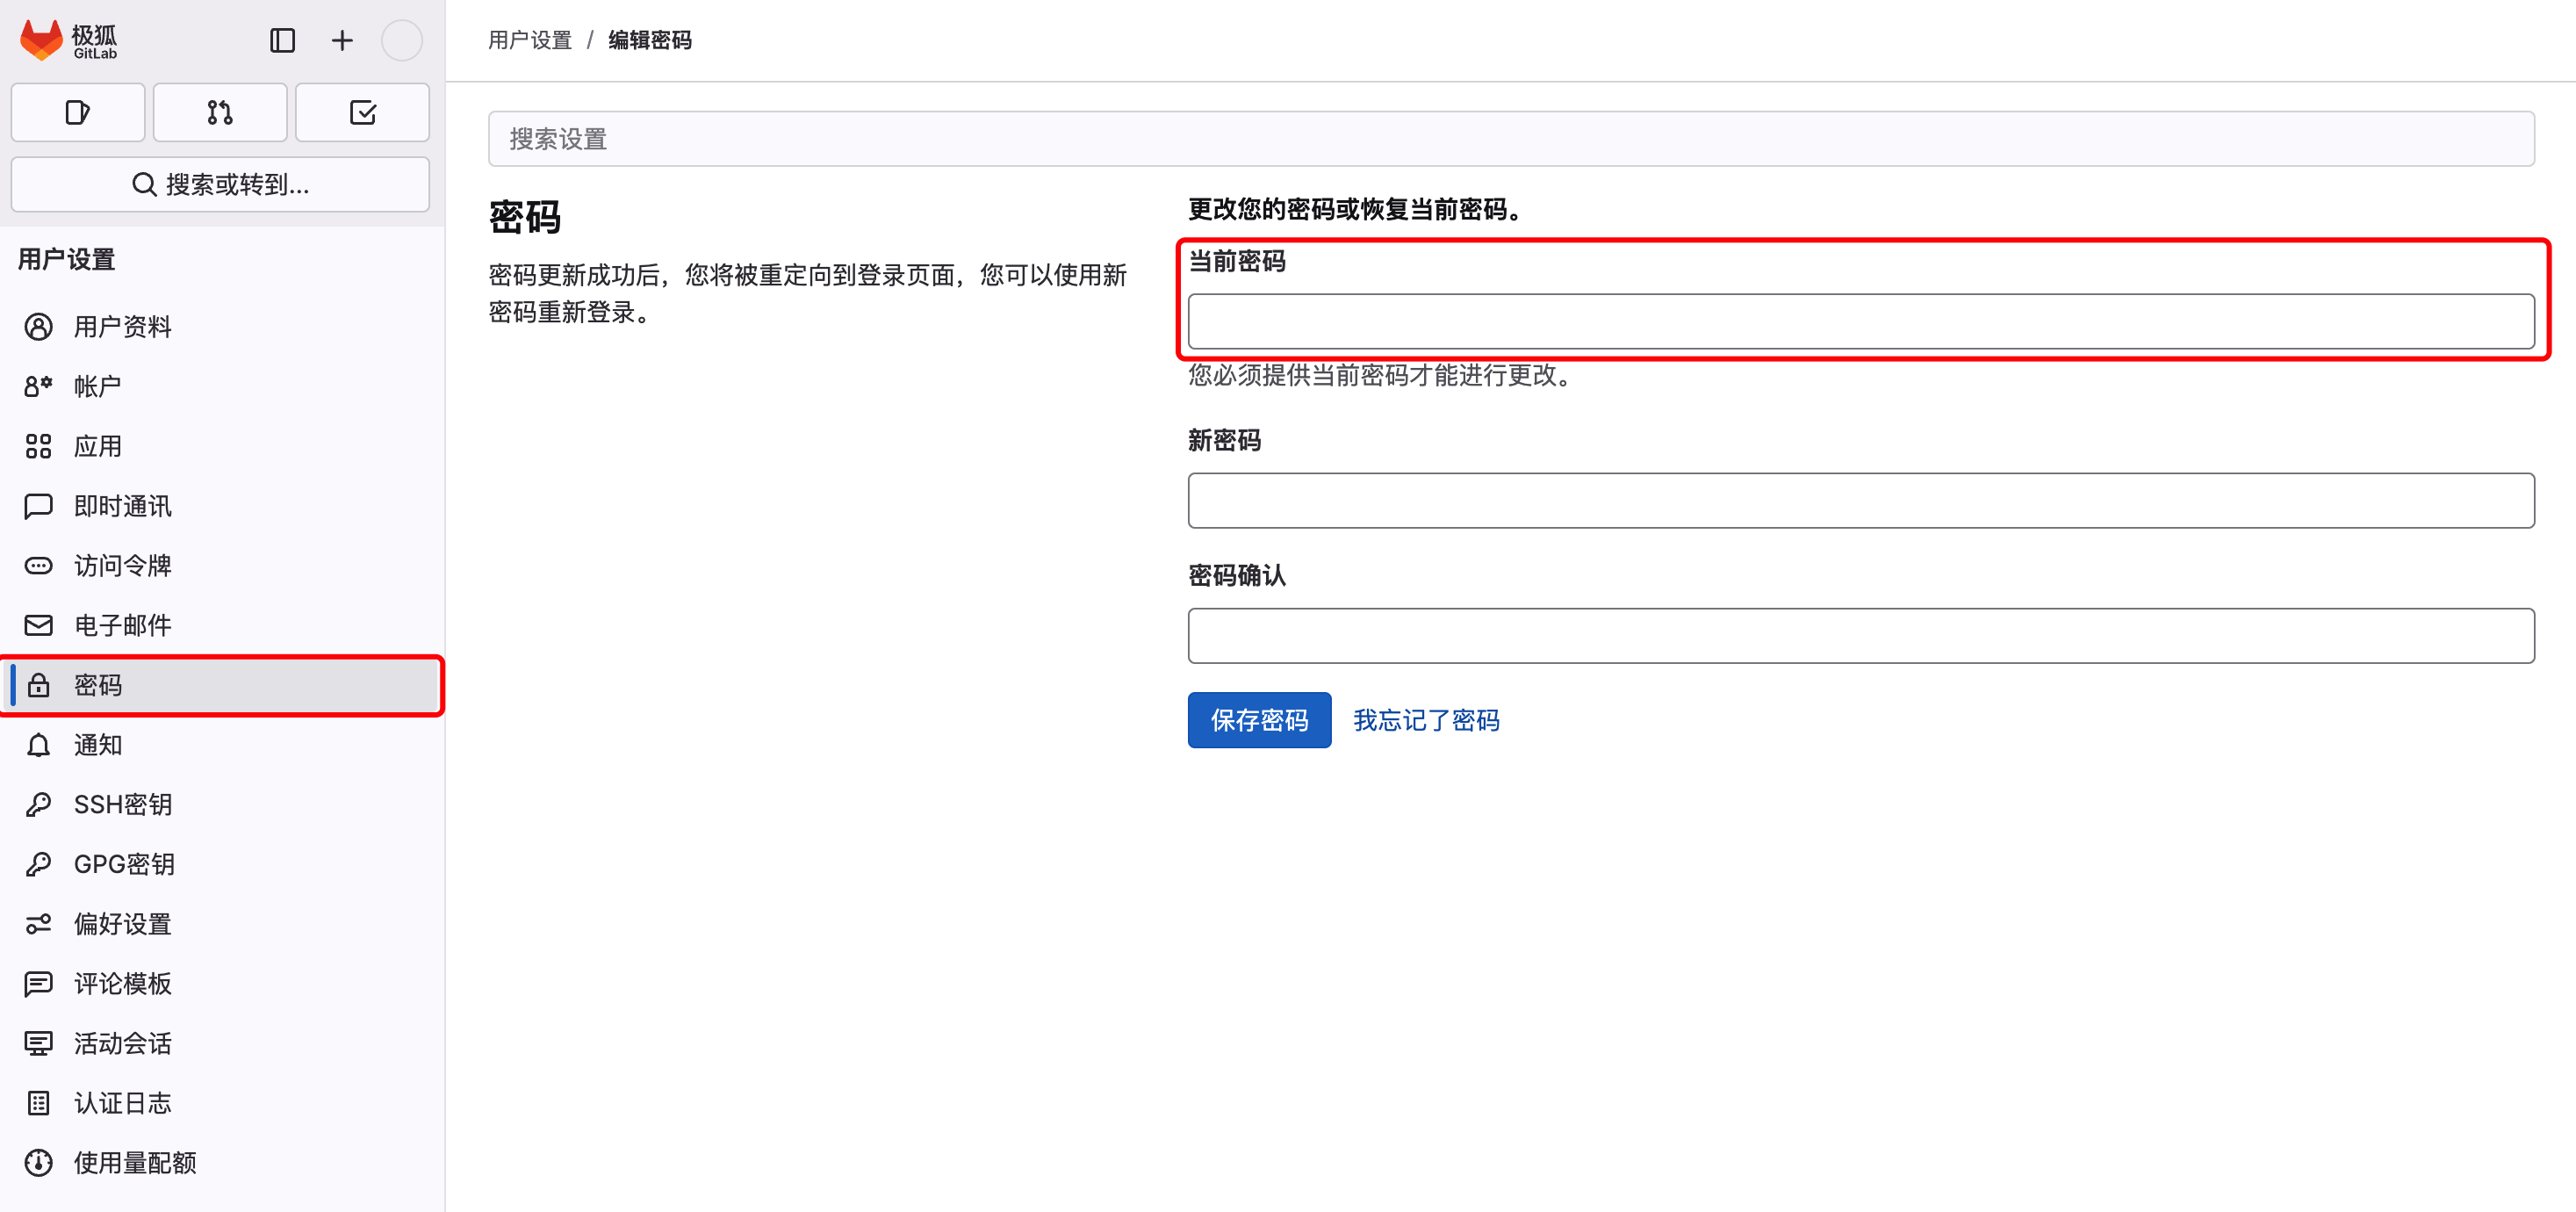
4、重置root密码
输入初始密码和新密码即可
5、修改端口、域名
vim /etc/gitlab/gitlab.rb
修改这部分即可:
external_url 'http://127.0.0.1:7902'
使其生效:
sudo systemctl restart gitlab-runsvdir
ok~ 搞定

 浙公网安备 33010602011771号