

Docker上运行MySQL服务
1.搜索MySQL镜像
$ docker search mysql
INDEX       NAME                              DESCRIPTION                                     STARS     OFFICIAL   AUTOMATED
docker.io   docker.io/mysql                   MySQL is a widely used, open-source relati...   6008      [OK]
docker.io   docker.io/mariadb                 MariaDB is a community-developed fork of M...   1891      [OK]
docker.io   docker.io/mysql/mysql-server      Optimized MySQL Server Docker images. Crea...   427                  [OK]
docker.io   docker.io/percona                  Percona Server is a fork of the MySQL rela...   335       [OK]
备注:STARS数最多,OFFICIAL是[OK]的这个就是官方的centos镜像。
2.下载MySQL镜像
$ docker pull docker.io/mysql
$ docker images
REPOSITORY                       TAG                 IMAGE ID            CREATED             SIZE
docker.io/mysql                  latest              5195076672a7        4 weeks ago         371.4 MB
3.运行容器
$ docker run -d --name liying-mysql -e MYSQL_ROOT_PASSWORD=attack docker.io/mysql
$ docker exec -it liying-mysql /bin/bash ##进入容器
4.进入mysql
root@3d21d8918d31:/# mysql -u root -pattack
mysql: [Warning] Using a password on the command line interface can be insecure.
Welcome to the MySQL monitor.  Commands end with ; or \g.
Your MySQL connection id is 2
Server version: 5.7.21 MySQL Community Server (GPL)

Copyright (c) 2000, 2018, Oracle and/or its affiliates. All rights reserved.

Oracle is a registered trademark of Oracle Corporation and/or its
affiliates. Other names may be trademarks of their respective
owners.

Type 'help;' or '\h' for help. Type '\c' to clear the current input statement.

mysql> show databases;
+--------------------+
| Database           |
+--------------------+
| information_schema |
| mysql              |
| performance_schema |
| sys                |
+--------------------+
4 rows in set (0.00 sec)
以上就创建了一个mysql的docker容器,可以看到版本为5.7.21。但是这样创建的容器有两个问题,一是容器删除后,数据就丢失了,二是要访问数据库,必须进入到容器里面才可以。
5.持久化数据,映射开放mysql端口
a、创建宿主机数据存放目录
$ mkdir -p /opt/data/mysql
b、启动容器
$ docker run -d -v /opt/data/mysql/:/var/lib/mysql -p 3306:3306 --name liying-mysql -e MYSQL_ROOT_PASSWORD=attack docker.io/mysql
$ docker logs liying-mysql ##查看日志
$ docker ps #查看容器
c、查看端口
$ lsof -i:3306
d、查看宿主机上的mysql数据
$ cd /opt/data/mysql
$ ll
总用量 188484
-rw-r-----. 1 systemd-bus-proxy input       56 4月  17 11:53 auto.cnf
-rw-------. 1 systemd-bus-proxy input     1679 4月  17 11:53 ca-key.pem
-rw-r--r--. 1 systemd-bus-proxy input     1107 4月  17 11:53 ca.pem
-rw-r--r--. 1 systemd-bus-proxy input     1107 4月  17 11:53 client-cert.pem
-rw-------. 1 systemd-bus-proxy input     1679 4月  17 11:53 client-key.pem
-rw-r-----. 1 systemd-bus-proxy input     1335 4月  17 11:54 ib_buffer_pool
-rw-r-----. 1 systemd-bus-proxy input 79691776 4月  17 11:54 ibdata1
-rw-r-----. 1 systemd-bus-proxy input 50331648 4月  17 11:54 ib_logfile0
-rw-r-----. 1 systemd-bus-proxy input 50331648 4月  17 11:53 ib_logfile1
-rw-r-----. 1 systemd-bus-proxy input 12582912 4月  17 11:54 ibtmp1
drwxr-x---. 2 systemd-bus-proxy input     4096 4月  17 11:53 mysql
drwxr-x---. 2 systemd-bus-proxy input     8192 4月  17 11:53 performance_schema
-rw-------. 1 systemd-bus-proxy input     1679 4月  17 11:53 private_key.pem
-rw-r--r--. 1 systemd-bus-proxy input      451 4月  17 11:53 public_key.pem
-rw-r--r--. 1 systemd-bus-proxy input     1107 4月  17 11:53 server-cert.pem
-rw-------. 1 systemd-bus-proxy input     1679 4月  17 11:53 server-key.pem
drwxr-x---. 2 systemd-bus-proxy input     8192 4月  17 11:53 sys
-p 3306:3306->把容器的mysql端口3306映射到宿主机的3306端口,这样想访问mysql就可以直接访问宿主机的3306端口。
-v /opt/data/mysql:/var/lib/mysql->把宿主机/opt/data/mysql/目录映射到容器的/var/lib/mysql目录
注意事项:
在使用-v选项映射目录时,宿主机需关闭SElinux:
$ setenforce 0
6、Navicat for MySQL客户端访问mysql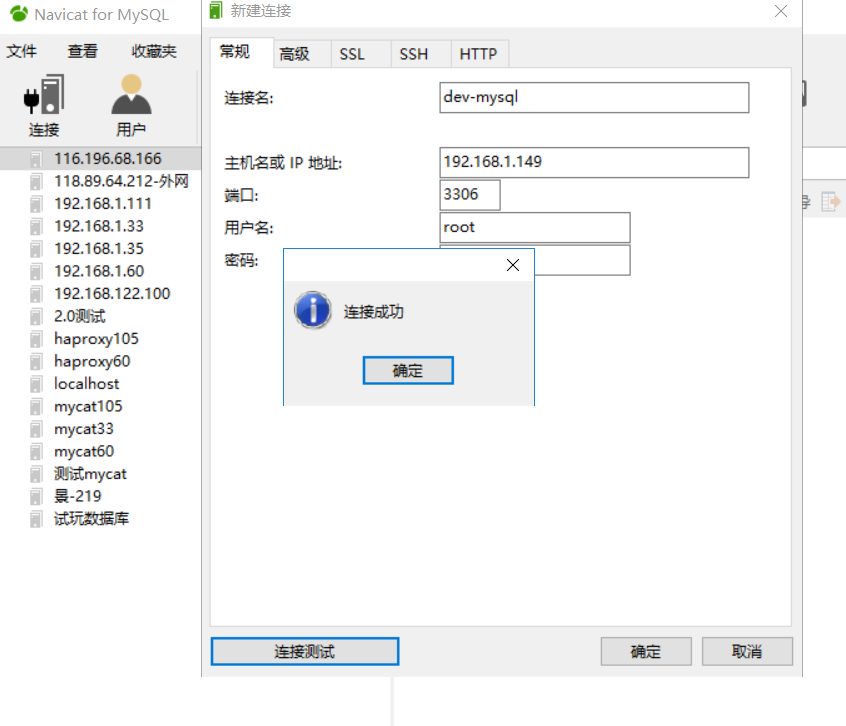

 浙公网安备 33010602011771号