


spring boot入门小案例
spring boot 入门小案例搭建
(1) 在Eclipse中新建一个maven project项目,目录结构如下所示:
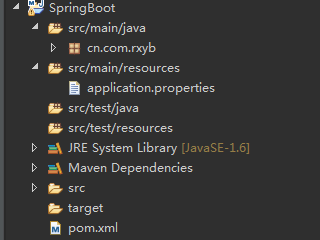
cn.com.rxyb中存放spring boot的启动类,application.properties中放spring boot相关配置
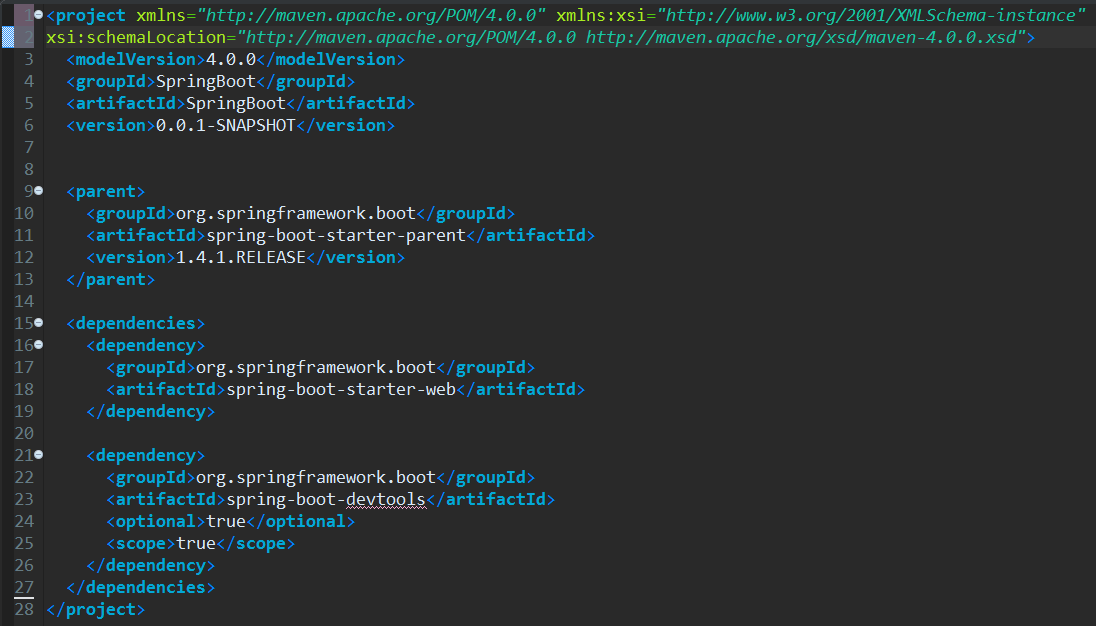
(2) 在pom.xml中加入spring boot 依赖包
(3)在cn.com.rxyb中新建启动类APP


 1 package cn.com.rxyb;
 2 import org.springframework.boot.SpringApplication;
 3 import org.springframework.boot.autoconfigure.EnableAutoConfiguration;
 4 import org.springframework.boot.autoconfigure.SpringBootApplication;
 5 import org.springframework.boot.autoconfigure.jdbc.DataSourceAutoConfiguration;
 6
 7 @SpringBootApplication
 8 @EnableAutoConfiguration(exclude= {DataSourceAutoConfiguration.class})
 9 public class App {
10
11     public static void main(String[] args) {
12         SpringApplication.run(App.class, args);
13     }
14 }
继续在包中创建测试Controller控制器
 1 package cn.com.rxyb;
 2 import org.springframework.web.bind.annotation.GetMapping;
 3 import org.springframework.web.bind.annotation.RestController;
 4
 5 @RestController
 6 public class TestController {
 7
 8     @GetMapping("hello")
 9     public String helloword() {
10         return "hello";
11     }
12
13     @GetMapping("hello2")
14     public String helloworkd2() {
15         return "hello2";
16     }
17 }
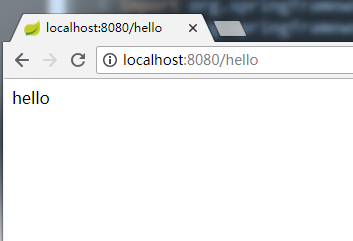
(4)接下来可以在启动类APP中右键--->run as---->java Application来启动spring boot。之后打开浏览器输入http://localhost:8080/hello直接访问。
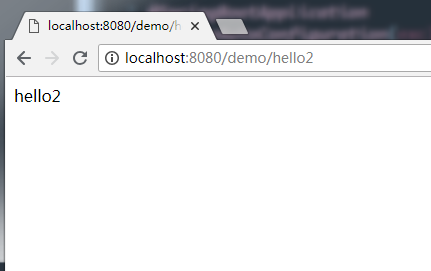
如果想在hello前面加名字空间的话,可以在application.properties中做如下配置:
server.context-path=/demo
这样我们就在hello之前加入了/demo名字空间,在访问hello的时候,hello之前必须加/demo名字空间才可以访问
今天的spring boot入门小案例学习就到这里,明天继续。

 浙公网安备 33010602011771号