Centos7 使用nginx部署vue项目
一、安装nginx
#设置源
sudo rpm -Uvh http://nginx.org/packages/centos/7/noarch/RPMS/nginx-release-centos-7-0.el7.ngx.noarch.rpm

#安装
yum install -y nginx

#启动服务
systemctl start nginx.service

#关闭服务
systemctl stop nginx.service

#开机自启
systemctl enable nginx.service
二、部署时可能会发现资源路径不对 ,只需修改文件资源路径
更改config文件夹下index.js(config -> index.js -> build对象)资源发布路径
# change code like this
assetsPublicPath: './',
# An highlighted block
build: {
   // Template for index.html
   index: path.resolve(__dirname, '../dist/index.html'),

   // Paths
   assetsRoot: path.resolve(__dirname, '../dist'),
   assetsSubDirectory: 'static',
   assetsPublicPath: './',
     /**
    * Source Maps
    */

   productionSourceMap: true,
   // https://webpack.js.org/configuration/devtool/#production
   devtool: '#source-map',
更改build文件夹下的utils.js代码
# add code block
publicPath:'../../'
# An highlighted block
if (options.extract) {
     return ExtractTextPlugin.extract({
       use: loaders,
       fallback: 'vue-style-loader',
       publicPath:'../../'
     })
   } else {
     return ['vue-style-loader'].concat(loaders)
   }
三、Vue项目打包
# 打包正式环境
npm run build:prod

# 打包预发布环境
npm run build:stage
四、将打包后的dist文件夹上传至服务器
# 远程上传 或 通过ftps工具上传
本次上传项目路径为 /usr/local/webapp/
五、配置Nginx的conf文件
vim /etc/nginx/nginx.conf

#在http{}修改如下
server {
 listen 80;
 server_name ip; #服务器ip或者域名

 # 注意设定 root路径是有dist的
 location / {
   root /usr/local/webapp/dist;
   index /index.html;
 }

 #跨域 ip和port自行替换
 location /adminApi {
   proxy_pass http://ip:port;
 }

}
六、使配置生效
nginx -s reload
nginx -s stop
nginx
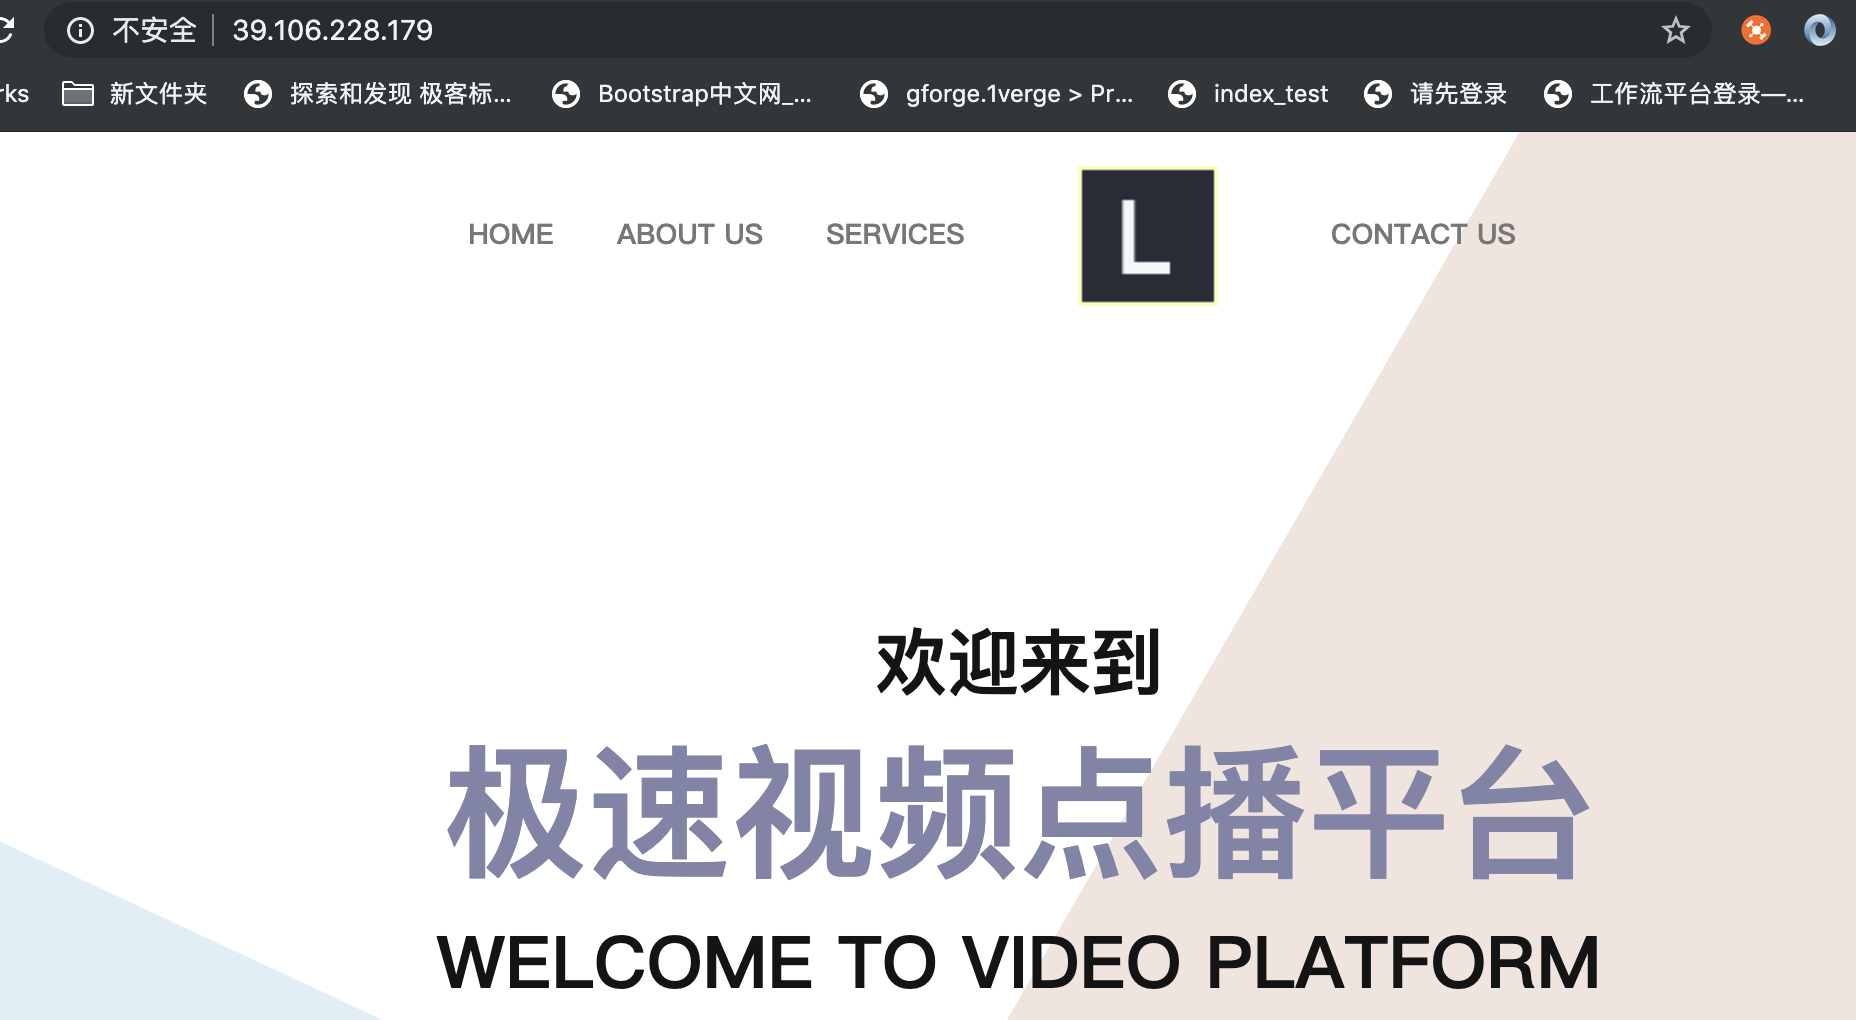
七、访问ip地址查看效果
http://ip #此处ip是你的服务器ip地址,例如:0.0.0.0
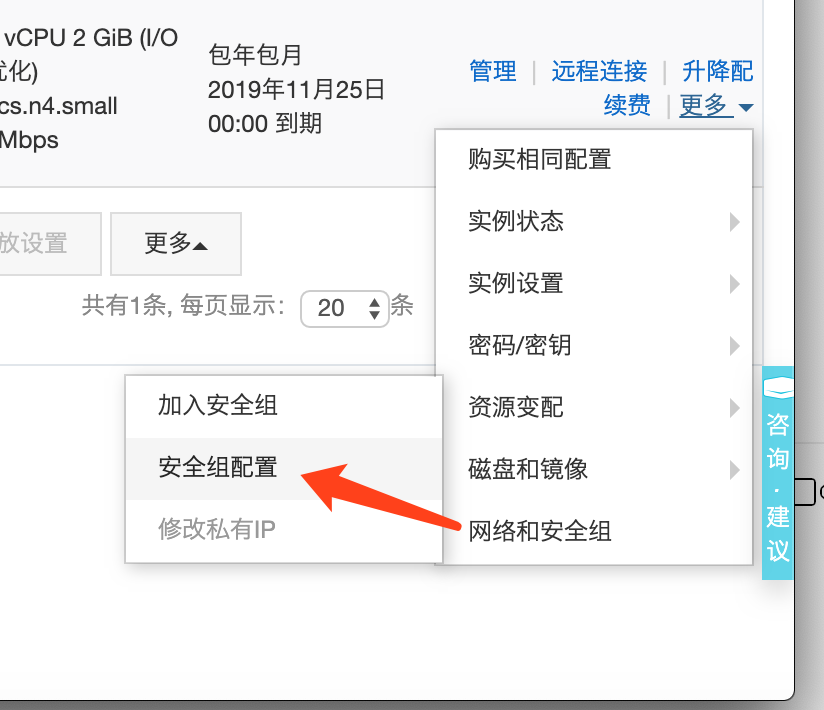
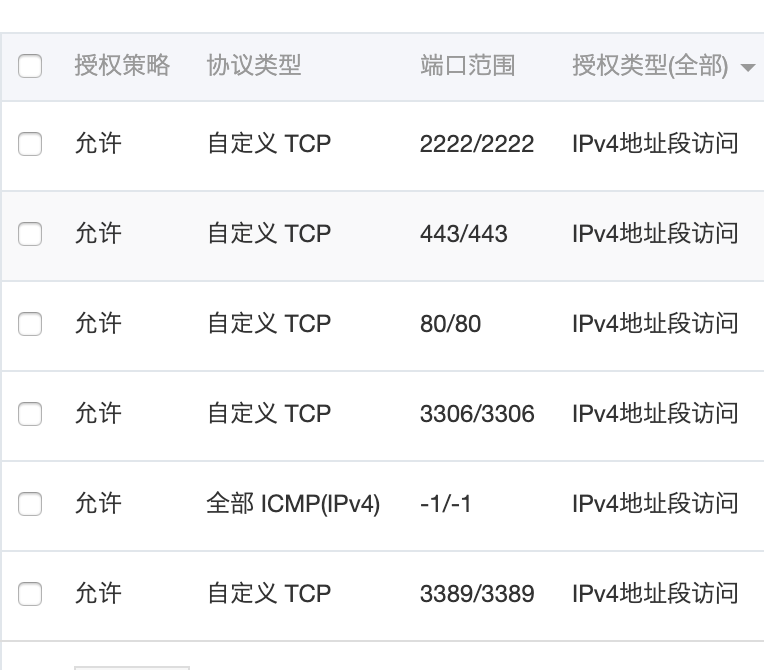
八、注意:需要开启你服务器所有的安全组权限
九、查看页面

 浙公网安备 33010602011771号