
好记性不如烂笔头-nginx安装环境与Linux安装ftp组件
Nginx安装环境
1. Nginx安装环境
Nginx是C语言开发,建议在linux上运行,我参加工作这些年来一直使用Linux发行版之一的 Centos作为安装环境。
1.1 gcc
安装Nginx需要先将官网下载的源码进行编译,编译依赖gcc环境,如果没有gcc环境,需要安装gcc:yum install gcc-c++
1.2 PCRE
PCRE(Perl Compatible Regular Expressions)是一个Perl库,包括 perl 兼容的正则表达式库。nginx的http模块使用pcre来解析正则表达式,所以需要在linux
上安装pcre库:yum install -y pcre pcre-devel
注:pcre-devel是使用pcre开发的一个二次开发库。Nginx也需要此库。
1.3 zlib
zlib库提供了很多种压缩和解压缩的方式,Nginx使用zlib对http包的内容进行gzip,所以需要在linux上安装zlib库:yum install -y zlib zlib-devel
1.4 openssl
OpenSSL 是一个强大的安全套接字层密码库,囊括主要的密码算法、常用的密钥和证书封装管理功能及SSL协议,并提供丰富的应用程序供测试或其它目的使用。
Nginx不仅支持http协议,还支持https(即在ssl协议上传输http),所以需要在Linux安装openssl库 :yum install -y openssl openssl-devel
2. 编译安装
将nginx-1.8.0.tar.gz拷贝至linux服务器。
解压:
tar -zxvf nginx-1.8.0.tar.gz
cd nginx-1.8.0
2.1 configure
./configure --help查询详细参数


Nginx编译参数:
./configure --help
--help 显示本提示信息
--prefix=PATH 设定安装目录
--sbin-path=PATH 设定程序文件目录
--conf-path=PATH 设定配置文件(nginx.conf)目录
--error-log-path=PATH 设定错误日志目录
--pid-path=PATH 设定pid文件(nginx.pid)目录
--lock-path=PATH 设定lock文件(nginx.lock)目录
--user=USER 设定程序运行的用户环境(www)
--group=GROUP 设定程序运行的组环境(www)
--builddir=DIR 设定程序编译目录
--with-rtsig_module 允许rtsig模块
--with-select_module 允许select模块(一种轮询模式,不推荐用在高载环境)
--without-select_module 不使用select模块
--with-poll_module 允许poll模块(一种轮询模式,不推荐用在高载环境)
--without-poll_module 不使用poll模块
--with-http_ssl_module 允许ngx_http_ssl_module模块(Apache对应:mod_ssl)
--with-http_realip_module 允许ngx_http_realip_module模块(mod_rpaf)
--with-http_addition_module 允许ngx_http_addition_module模块(mod_layout)
--with-http_xslt_module 允许ngx_http_xslt_module模块
--with-http_sub_module 允许ngx_http_sub_module模块
--with-http_dav_module 允许ngx_http_dav_module模块(mod_dav)
--with-http_flv_module 允许ngx_http_flv_module模块(mod_flvx)
--with-http_gzip_static_module 允许ngx_http_gzip_static_module模块(mod_dflate)
--with-http_random_index_module 允许ngx_http_random_index_module模块(mod_autoindex)
--with-http_stub_status_module 允许ngx_http_stub_status_module模块(mod_status)
--without-http_charset_module 不使用ngx_http_charset_module模块
--without-http_gzip_module 不使用ngx_http_gzip_module模块
--without-http_ssi_module 不使用ngx_http_ssi_module模块
--without-http_userid_module 不使用ngx_http_userid_module模块
--without-http_access_module 不使用ngx_http_access_module模块
--without-http_auth_basic_module 不使用ngx_http_auth_basic_module模块
--without-http_autoindex_module 不使用ngx_http_autoindex_module模块
--without-http_geo_module 不使用ngx_http_geo_module模块
--without-http_map_module 不使用ngx_http_map_module模块
--without-http_referer_module 不使用ngx_http_referer_module模块
--without-http_rewrite_module 不使用ngx_http_rewrite_module模块
--without-http_proxy_module 不使用ngx_http_proxy_module模块
--without-http_fastcgi_module 不使用ngx_http_fastcgi_module模块
--without-http_memcached_module 不使用ngx_http_memcached_module模块
--without-http_limit_zone_module 不使用ngx_http_limit_zone_module模块
--without-http_empty_gif_module 不使用ngx_http_empty_gif_module模块
--without-http_browser_module 不使用ngx_http_browser_module模块
--without-http_upstream_ip_hash_module 不使用ngx_http_upstream_ip_hash_module模块
--with-http_perl_module 允许ngx_http_perl_module模块
--with-perl_modules_path=PATH 设置perl模块路径
--with-perl=PATH 设置perl库文件路径
--http-log-path=PATH 设置access log文件路径
--http-client-body-temp-path=PATH 设置客户端请求临时文件路径
--http-proxy-temp-path=PATH 设置http proxy临时文件路径
--http-fastcgi-temp-path=PATH 设置http fastcgi临时文件路径
--without-http 不使用HTTP server功能
--with-mail 允许POP3/IMAP4/SMTP代理模块
--with-mail_ssl_module 允许ngx_mail_ssl_module模块
--without-mail_pop3_module 不允许ngx_mail_pop3_module模块
--without-mail_imap_module 不允许ngx_mail_imap_module模块
--without-mail_smtp_module 不允许ngx_mail_smtp_module模块
--with-google_perftools_module 允许ngx_google_perftools_module模块(调试用)
--with-cpp_test_module 允许ngx_cpp_test_module模块
--add-module=PATH 允许使用外部模块,以及路径
--with-cc=PATH 设置C编译器路径
--with-cpp=PATH 设置C预处理路径
--with-cc-opt=OPTIONS 设置C编译器参数
--with-ld-opt=OPTIONS 设置连接文件参数
--with-cpu-opt=CPU 为指定CPU优化,可选参数有:
          pentium, pentiumpro, pentium3, pentium4,
          athlon, opteron, sparc32, sparc64, ppc64
--without-pcre 不使用pcre库文件
--with-pcre=DIR 设定PCRE库路径
--with-pcre-opt=OPTIONS 设置PCRE运行参数
--with-md5=DIR 设定md5库文件路径
--with-md5-opt=OPTIONS 设置md5运行参数
--with-md5-asm 使用md5源文件编译
--with-sha1=DIR 设定sha1库文件路径
--with-sha1-opt=OPTIONS 设置sha1运行参数
--with-sha1-asm 使用sha1源文件编译
--with-zlib=DIR 设定zlib库文件路径
--with-zlib-opt=OPTIONS 设置zlib运行参数
--with-zlib-asm=CPU 使zlib对特定的CPU进行优化,可选参数:
          pentium, pentiumpro
--with-openssl=DIR 设定OpenSSL库文件路径
--with-openssl-opt=OPTIONS 设置OpenSSL运行参数
--with-debug 允许调试日志
nginx编译时不是功能加的越多越好,应该尽可能少编译模块,不用的最好不要加入。
编译好的nginx可通过 /usr/local/nginx/sbin/nginx -V 查看编译时的参数(具体路径更具实际情况而定)
参数设置如下:
./configure \
--prefix=/usr/local/nginx \
--pid-path=/var/run/nginx/nginx.pid \
--lock-path=/var/lock/nginx.lock \
--error-log-path=/var/log/nginx/error.log \
--http-log-path=/var/log/nginx/access.log \
--with-http_gzip_static_module \
--http-client-body-temp-path=/var/temp/nginx/client \
--http-proxy-temp-path=/var/temp/nginx/proxy \
--http-fastcgi-temp-path=/var/temp/nginx/fastcgi \
--http-uwsgi-temp-path=/var/temp/nginx/uwsgi \
--http-scgi-temp-path=/var/temp/nginx/scgi
注意:上边将临时文件目录指定为/var/temp/nginx,需要在/var下创建temp及nginx目录
2.2 编译安装
make
make install
3. 启动Nginx
cd /usr/local/nginx/sbin/
./nginx
查询nginx进程(ps aux|grep nginx):

15098是nginx主进程的进程id,15099是nginx工作进程的进程id
注意:执行./nginx启动nginx,这里可以-c指定加载的nginx配置文件,如下:
./nginx -c /usr/local/nginx/conf/nginx.conf
如果不指定-c,nginx在启动时默认加载conf/nginx.conf文件,此文件的地址也可以在编译安装nginx时指定./configure的参数(--conf-path= 指向配置
文件(nginx.conf))
4. 停止nginx
方式1,快速停止:
cd /usr/local/nginx/sbin
./nginx -s stop
此方式相当于先查出nginx进程id再使用kill命令强制杀掉进程。
方式2,完整停止(建议使用):
cd /usr/local/nginx/sbin
./nginx -s quit
此方式停止步骤是待nginx进程处理任务完毕进行停止。
5. 重启nginx
方式1,先停止再启动(建议使用):
对nginx进行重启相当于先停止nginx再启动nginx,即先执行停止命令再执行启动命令。
如下:
./nginx -s quit
./nginx
方式2,重新加载配置文件:
当nginx的配置文件nginx.conf修改后,要想让配置生效需要重启nginx,使用-s reload不用先停止nginx再启动nginx即可将配置信息在nginx中生效,如下:
./nginx -s reload
6. 测试
nginx安装成功,启动nginx,即可访问虚拟机上的nginx:
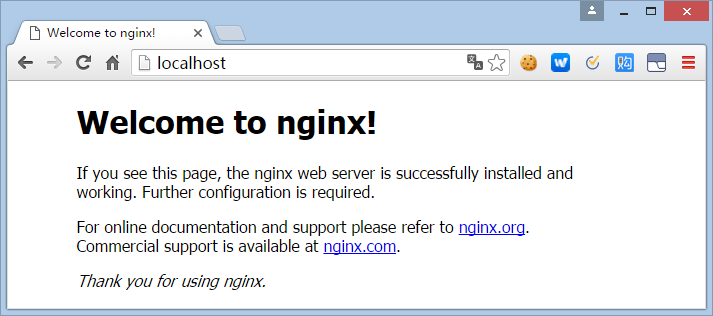
到这说明nginx上安装成功。
7. 开机自启动nginx
7.1 编写shell脚本
这里使用的是编写shell脚本的方式来处理
vim /etc/init.d/nginx (输入下面的代码)
#!/bin/bash
# nginx Startup script for the Nginx HTTP Server
# it is v.0.0.2 version.
# chkconfig: - 85 15
# description: Nginx is a high-performance web and proxy server.
#              It has a lot of features, but it's not for everyone.
# processname: nginx
# pidfile: /var/run/nginx.pid
# config: /usr/local/nginx/conf/nginx.conf
nginxd=/usr/local/nginx/sbin/nginx
nginx_config=/usr/local/nginx/conf/nginx.conf
nginx_pid=/var/run/nginx.pid
RETVAL=0
prog="nginx"
# Source function library.
. /etc/rc.d/init.d/functions
# Source networking configuration.
. /etc/sysconfig/network
# Check that networking is up.
[ ${NETWORKING} = "no" ] && exit 0
[ -x $nginxd ] || exit 0
# Start nginx daemons functions.
start() {
if [ -e $nginx_pid ];then
   echo "nginx already running...."
   exit 1
fi
   echo -n $"Starting $prog: "
   daemon $nginxd -c ${nginx_config}
   RETVAL=$?
   echo
   [ $RETVAL = 0 ] && touch /var/lock/subsys/nginx
   return $RETVAL
}
# Stop nginx daemons functions.
stop() {
        echo -n $"Stopping $prog: "
        killproc $nginxd
        RETVAL=$?
        echo
        [ $RETVAL = 0 ] && rm -f /var/lock/subsys/nginx /var/run/nginx.pid
}
# reload nginx service functions.
reload() {
    echo -n $"Reloading $prog: "
    #kill -HUP `cat ${nginx_pid}`
    killproc $nginxd -HUP
    RETVAL=$?
    echo
}
# See how we were called.
case "$1" in
start)
        start
        ;;
stop)
        stop
        ;;
reload)
        reload
        ;;
restart)
        stop
        start
        ;;
status)
        status $prog
        RETVAL=$?
        ;;
*)
        echo $"Usage: $prog {start|stop|restart|reload|status|help}"
        exit 1
esac
exit $RETVAL
:wq 保存并退出
7.2 设置文件的访问权限
chmod a+x /etc/init.d/nginx (a+x ==> all user can execute 所有用户可执行)
这样在控制台就很容易的操作nginx了:查看Nginx当前状态、启动Nginx、停止Nginx、重启Nginx…

如果修改了nginx的配置文件nginx.conf,也可以使用上面的命令重新加载新的配置文件并运行,可以将此命令加入到rc.local文件中,这样开机的时候nginx就默认启动了
7.3 加入到rc.local文件中
vim /etc/rc.local
加入一行 /etc/init.d/nginx start 保存并退出,下次重启会生效。
Linux安装ftp组件
1. 安装vsftpd组件
安装完后,有/etc/vsftpd/vsftpd.conf 文件,是vsftp的配置文件 :yum -y install vsftpd
2. 添加一个ftp用户
此用户就是用来登录ftp服务器用的。
[root@bing ~]# useradd ftpuser
这样一个用户建完,可以用这个登录,记得用普通登录不要用匿名了。登录后默认的路径为 /home/ftpuser.
3. 给ftp用户添加密码
[root@bing ~]# passwd ftpuser
输入两次密码后修改密码。
4. 防火墙开启21端口
因为ftp默认的端口为21,而centos默认是没有开启的,所以要修改iptables文件
[root@bing ~]# vim /etc/sysconfig/iptables
在行上面有22 -j ACCEPT 下面另起一行输入跟那行差不多的,只是把22换成21,然后:wq保存。
还要运行下,重启iptables
[root@bing ~]# service iptables restart
5. 修改selinux
外网是可以访问上去了,可是发现没法返回目录(使用ftp的主动模式,被动模式还是无法访问),也上传不了,因为selinux作怪了。
修改selinux:
执行以下命令查看状态:
[root@bing ~]# getsebool -a | grep ftp
allow_ftpd_anon_write --> off
allow_ftpd_full_access --> off
allow_ftpd_use_cifs --> off
allow_ftpd_use_nfs --> off
ftp_home_dir --> off
ftpd_connect_db --> off
ftpd_use_passive_mode --> off
httpd_enable_ftp_server --> off
tftp_anon_write --> off
[root@bing ~]#
执行上面命令,再返回的结果看到两行都是off,代表,没有开启外网的访问
[root@bing ~]# setsebool -P allow_ftpd_full_access on
[root@bing ~]# setsebool -P ftp_home_dir on
这样应该没问题了(如果,还是不行,看看是不是用了ftp客户端工具用了passive模式访问了,如提示Entering Passive mode,就代表是passive模式,默认是不行的,因为ftp passive模式被iptables挡住了,下面会讲怎么开启,如果懒得开的话,就看看你客户端ftp是否有port模式的选项,或者把passive模式的选项去掉。如果客户端还是不行,看看客户端上的主机的电脑是否开了防火墙,关吧)
FileZilla的主动、被动模式修改:
菜单:编辑→设置

6. 关闭匿名访问
修改/etc/vsftpd/vsftpd.conf文件:

重启ftp服务:
[root@bing ~]# service vsftpd restart
7. 开启被动模式
默认是开启的,但是要指定一个端口范围,打开vsftpd.conf文件,在后面加上
pasv_min_port=30000
pasv_max_port=30999
表示端口范围为30000~30999,这个可以随意改。改完重启一下vsftpd
由于指定这段端口范围,iptables也要相应的开启这个范围,所以像上面那样打开iptables文件。
也是在21上下面另起一行,更那行差不多,只是把21 改为30000:30999,然后:wq保存,重启下iptables。这样就搞定了。
8. 设置开机启动vsftpd ftp服务
[root@bing ~]# chkconfig vsftpd on
<!-- Start -->
获知及时信息,请关注我的个人微信订阅号:0与1的那点事

<!-- End -->
本文为博主原创文章,转载请注明出处!
http://www.cnblogs.com/libingbin/
感谢您的阅读。

 浙公网安备 33010602011771号