20.kubesphere部署redis
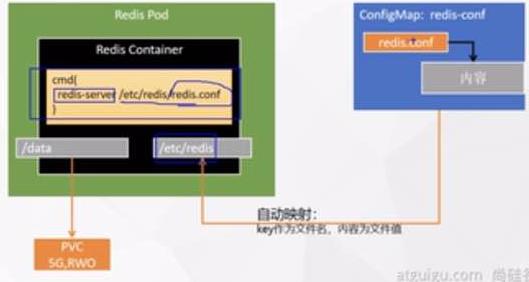
1.redis部署分析
2.官网找到redis相关镜像及启动方式
https://hub.docker.com/_/redis
How to use this image
start a redis instance

$ docker run --name some-redis -d redis
start with persistent storage

$ docker run --name some-redis -d redis redis-server --save 60 1 --loglevel warning
There are several different persistence strategies to choose from.
This one will save a snapshot of the DB every 60 seconds if at least 1 write operation was performed (it will also lead to more logs, so the loglevel option may be desirable).
If persistence is enabled, data is stored in the VOLUME /data, which can be used with --volumes-from some-volume-container or -v /docker/host/dir:/data (see docs.docker volumes).

For more about Redis Persistence, see http://redis.io/topics/persistence.

connecting via redis-cli

$ docker run -it --network some-network --rm redis redis-cli -h some-redis
Additionally, If you want to use your own redis.conf ...

You can create your own Dockerfile that adds a redis.conf from the context into /data/, like so.

FROM redis
COPY redis.conf /usr/local/etc/redis/redis.conf
CMD [ "redis-server", "/usr/local/etc/redis/redis.conf" ]
Alternatively, you can specify something along the same lines with docker run options.

$ docker run -v /myredis/conf:/usr/local/etc/redis --name myredis redis redis-server /usr/local/etc/redis/redis.conf
Where /myredis/conf/ is a local directory containing your redis.conf file. Using this method means that there is no need for you to have a Dockerfile for your redis container.

The mapped directory should be writable, as depending on the configuration and mode of operation, Redis may need to create additional configuration files or rewrite existing ones.
可以先不准备存储卷,让它部署时自动生成。
3.redis容器启动
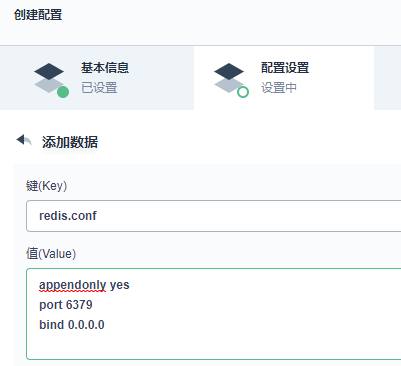
创建配置文件
##1.准备redis配置文件内容
mkdir -p /mydata/redis/conf && vim /mydata/redis/redis.conf

##配置示例
appendonly yes   ###开启append only 模式之后,redis 会把所接收到的每一次写操作请求都追加到appendonly.aof 文件中,当redis 重新启动时,会从该文件恢复出之前的状态。
port 6379
bind 0.0.0.0

##docker启动redis
docker run -d -p 6379:6379 --restart=always \
-v /mydata/redis/conf/redis.conf:/etc/redis/redis.conf
-v /mydata/redis-01/data:/data \
--name redis-01 redis:6.2.5 \
redis-server /etc/redis/redis.conf
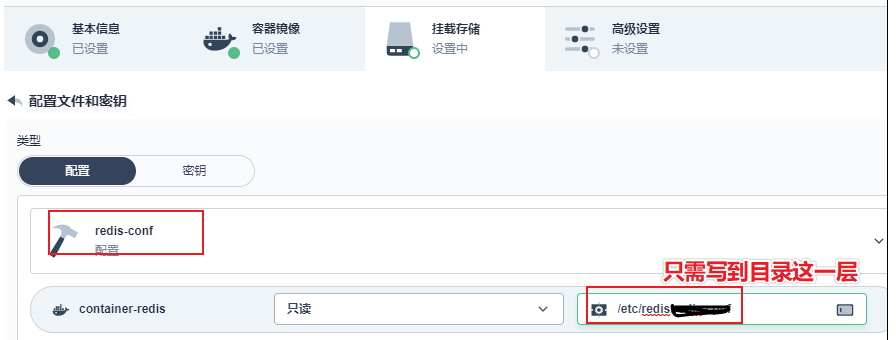
4.创建configMap
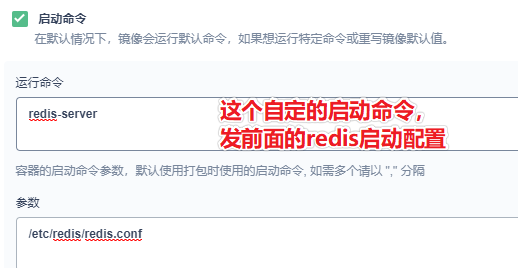
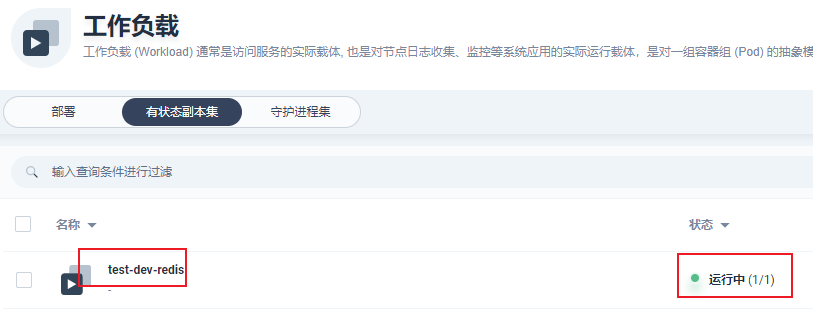
5.创建负载
负载(pod)创建完成
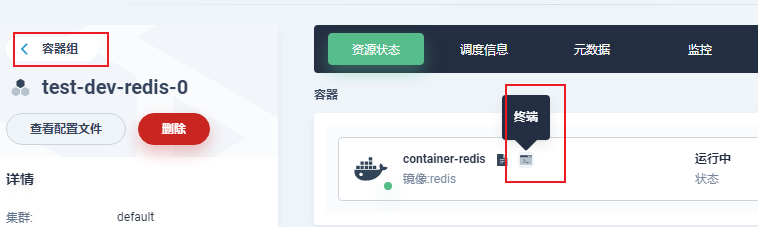
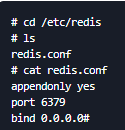
进入容器查看
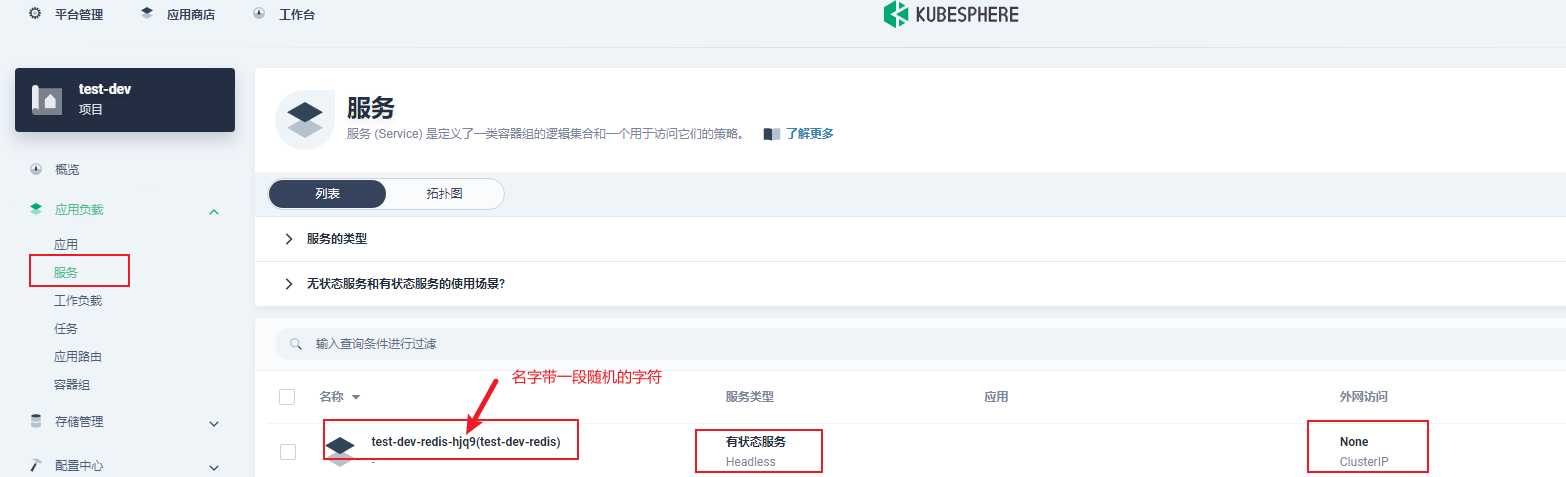
默认会创建一个service,仅可以集群内访问
6.创建服务
6.1.创建一个集群内访问的服务
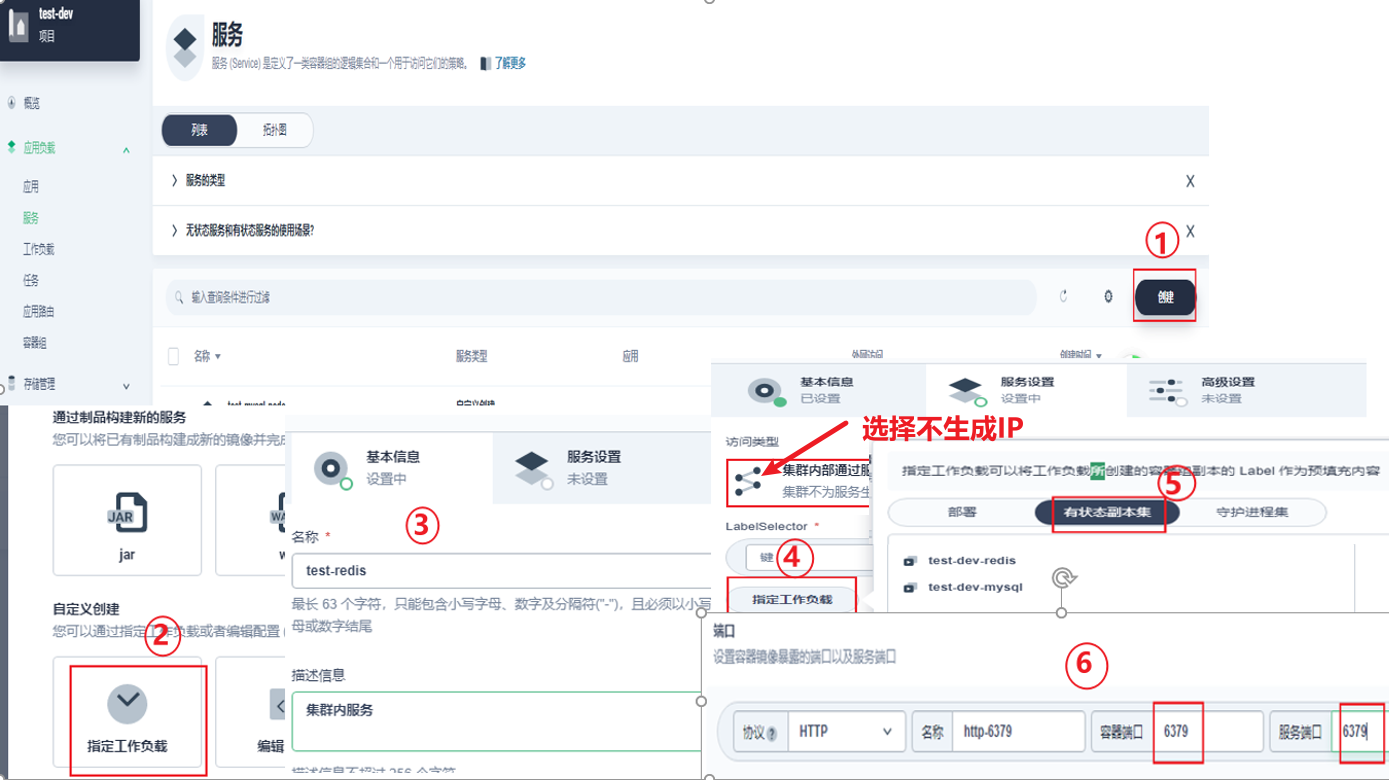
完成后即查以在服务中看到新建的此服务

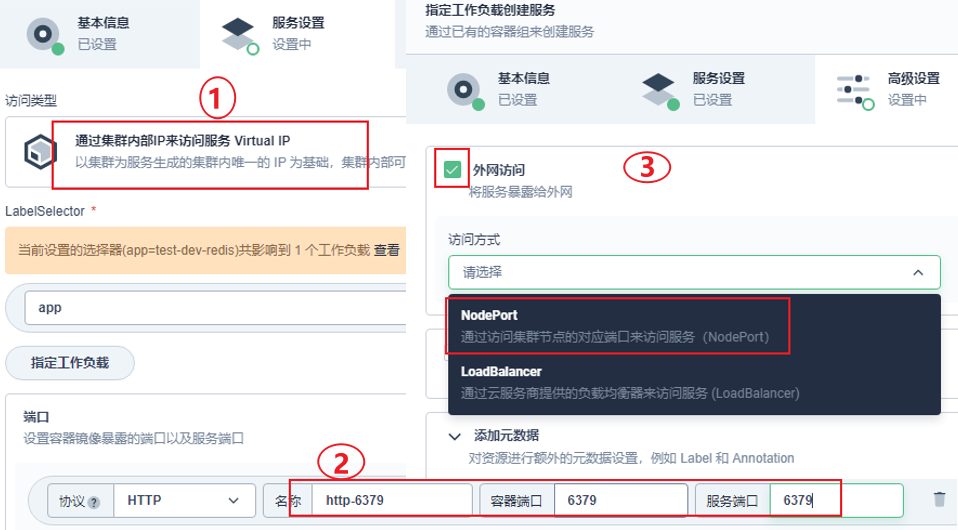
6.2.创建一个集群外访问的服务
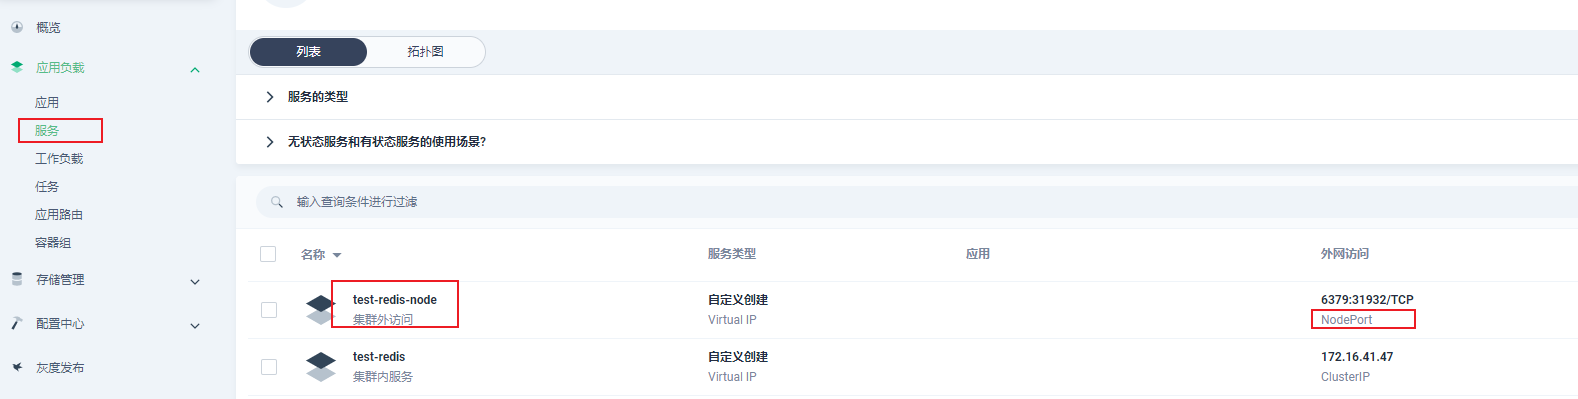
7.连接验证
用Redis Desktop Manager工具
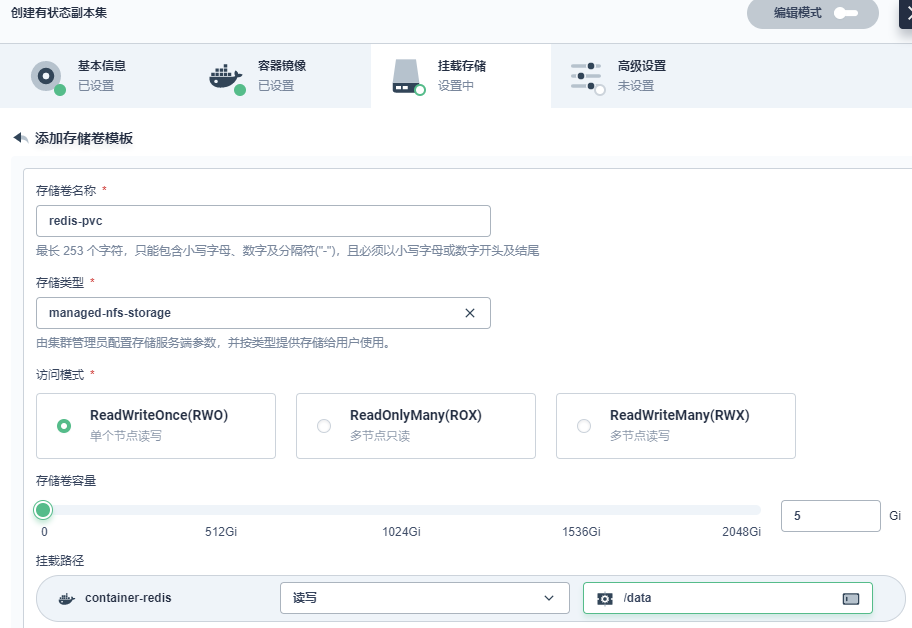
8.存储卷
在前面部署redis时没有提前创建存储卷。
建议有状态副本集不要提前创建存储卷,这样的优点:增加副本时,每个副本都可以使用自已的存储卷。

 浙公网安备 33010602011771号