使用json-server实现增删改查
起步
一个在前端本地运行,可以存储json数据的server。我们在前端开发时,可以模拟服务端接口数据,在本地搭建一个JSON服务,自己产生测试数据。
- 使用npm全局安装json-server :
npm install -g json-server - 可以通过查看版本号,来测试是否安装成功:
json-server -v - 创建json数据——db.json
在任意一个文件夹下(此处假设我创建了一个server文件夹),进入到该文件夹里面,执行代码
json-server --watch db.json
- 此时文件夹下多出一个db.json文件
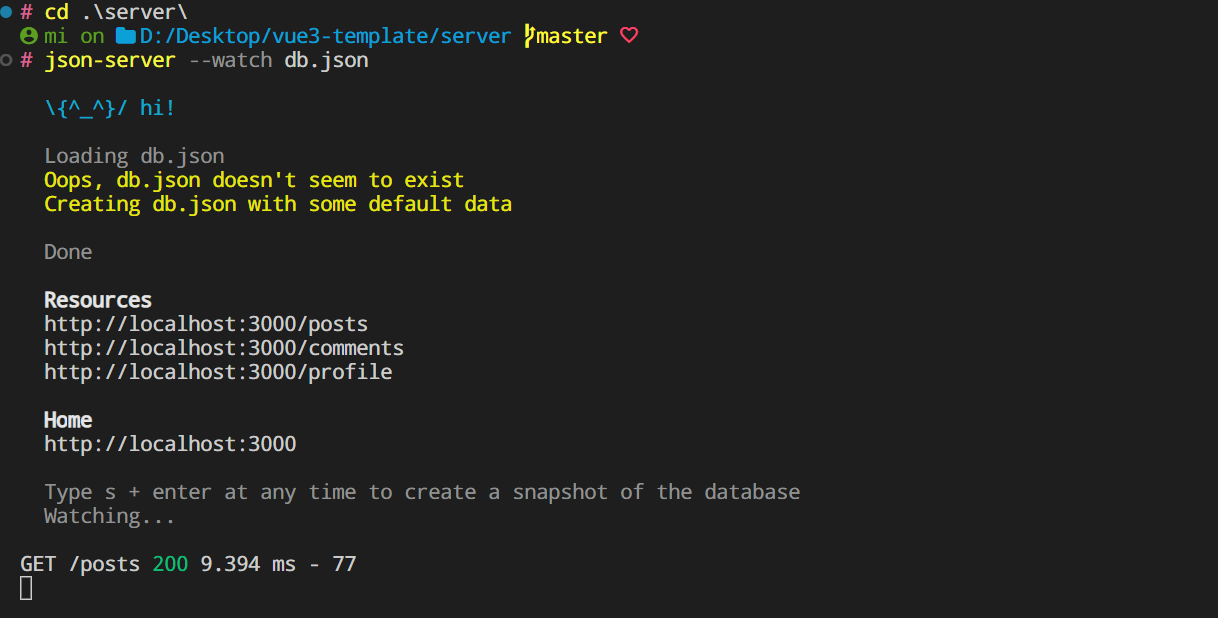

分别点击/posts /comments /profile /db链接,我们可以看到访问不同地址时不同的json数据。其中 /db返回的是整个json文件的数据。

修改端口号
json-server 默认是 3000 端口,我们也可以自己指定端口,指令如下:
json-server --watch db.json --port 3004
如果不想每次用这么长的指令,可以在db.json同级文件夹新建一个package.json,在script配置添加运行命令:
{
    "scripts": {
        "mock": "json-server db.json --port 3004"
    }
}
运行的时候, 直接在当前文件夹下执行 npm run mock
操作数据
json-server 支持 restful 风格的api,可以通过不同的请求方式,对数据进行增删改查等不同的操作。
先修改db.json文件:
{
  "users": [
    {
      "id": 1,
      "name": "liaoyi",
      "phone": "13246566776",
      "age": 22,
      "classId": "1002"
    },
    {
      "name": "林更新",
      "age": "44",
      "id": 4,
      "classId": "1003"
    },
    {
      "name": "李响",
      "phone": "18779756778",
      "age": "26",
      "id": 5,
      "classId": "1003"
    },
    {
      "name": "陈温柔",
      "phone": "18779756000",
      "age": "22",
      "id": 6,
      "sex": "0",
      "classId": "1004"
    },
    {
      "name": "夏琪",
      "phone": "13246579999",
      "age": "22",
      "id": 7,
      "classId": "1004"
    }
  ],
  "class": [
    {
      "id": "1",
      "title": "前端",
      "staff": [
        "1002",
        "1004"
      ]
    },
    {
      "id": "2",
      "title": "后端",
      "staff": [
        "1003"
      ]
    }
  ],
  "fruits": [
    {
      "id": 1,
      "name": "苹果",
      "price": 1.28
    },
    {
      "id": 2,
      "name": "橘子",
      "price": 3.88
    },
    {
      "id": 3,
      "name": "宁夏西瓜",
      "price": 1.98
    },
    {
      "id": 4,
      "name": "麒麟西瓜",
      "price": 3.98
    },
    {
      "id": 5,
      "name": "红蛇果",
      "price": 2.5
    },
    {
      "id": 6,
      "name": "黑皮西瓜",
      "price": 0.98
    },
    {
      "id": 7,
      "name": "红心火龙果",
      "price": 2.69
    },
    {
      "id": 8,
      "name": "国产火龙果",
      "price": 1.69
    },
    {
      "id": 9,
      "name": "海南荔枝",
      "price": 9.9
    },
    {
      "id": 10,
      "name": "陕西冬枣",
      "price": 5.39
    },
    {
      "id": 11,
      "name": "软籽石榴",
      "price": 2.39
    },
    {
      "id": 12,
      "name": "蜜橘",
      "price": 1.99
    },
    {
      "id": 13,
      "name": "海南香蕉",
      "price": 1.45
    }
  ],
  "person": [
    {
      "name": {
        "firstname": "liao",
        "lastname": "yi"
      },
      "pwd": "qwerst54"
    },
    {
      "name": {
        "firstname": "wang",
        "lastname": "wu"
      },
      "pwd": "adasff11"
    }
  ]
}
get 获取数据
浏览器可以直接访问GET请求,我们可以直接在浏览器访问就能看到返回的json数据。
获取所有用户数据(对象数组): [http://localhost:3004/users](http://localhost:3004/users)
获取所有水果数据:http://localhost:3004/fruits
获取数据
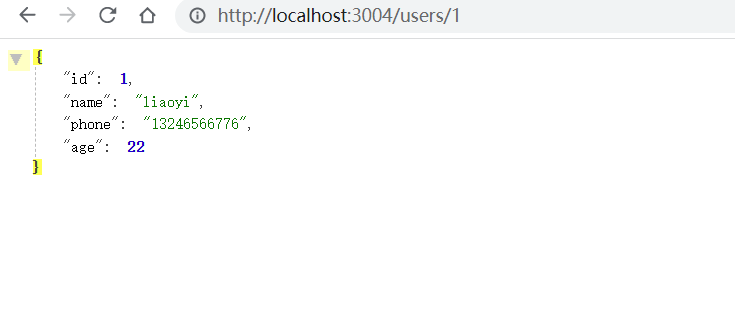
根据 id 获取 users 数据:http://localhost:3004/users/1
上面的请求写法还可以通过get请求的query参数通过?方式来写:
http://localhost:3004/users?id=1
以此类推,我们可以传入不同的条件:
// 查找名字为 'liaoyi' 的用户

http://localhost:3004/users?name=liaoyi
多个条件
也可以指定多个条件,用&符号连接:
http://localhost:3004/fruits?name=橘子&price=3.88
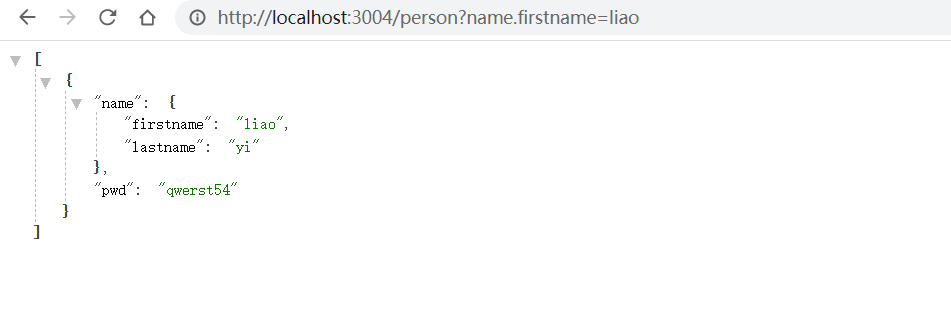
甚至还可以使用对象取属性值 obj.key 的方式:
http://localhost:3004/person?name.firstname=liao
分页
分页采用
_page来设置页码,_limit来控制每页显示条数。如果没有指定 _limit ,默认每页显示10条。
我们可以依次输入地址查看下面接口中返回不同的结果:
http://localhost:3004/fruits?_page=1&_limit=5
http://localhost:3004/fruits?_page=1&_limit=10
http://localhost:3004/fruits?_page=2&_limit=5
排序
排序采用
_sort来指定要排序的字段,_order来指定排序是正排序还是逆排序(asc | desc ,默认是asc)。
http://localhost:3004/fruits?_sort=price
http://localhost:3004/fruits?_sort=price&_order=desc
获取局部数据
采用
_start来指定开始位置,_end来指定结束位置、或者是用_limit来指定从开始位置起往后取几个数据。和 Array.slice() 方法类似。
# 使用 _end
http://localhost:3004/fruits?_start=2&_end=4

# 使用 _limit
http://localhost:3004/fruits?_start=2&_limit=4
获取符合某个范围的数据
- 使用
_gte和_lte来设置一个取值范围 :
http://localhost:3004/fruits?id_gte=4&id_lte=6
- 使用
_ne来获取不包含某个值的数据
http://localhost:3004/fruits?id_ne=1&id_ne=10
- 采用
_like来设置匹配某个字符串(或正则表达式)
http://localhost:3004/fruits?name_like=果
搜索功能
采用q来设置搜索内容:
http://localhost:3004/fruits?q=瓜
除get请求外,其他请求方式需要我们通过 api 调试工具或者代码的方式来使用。
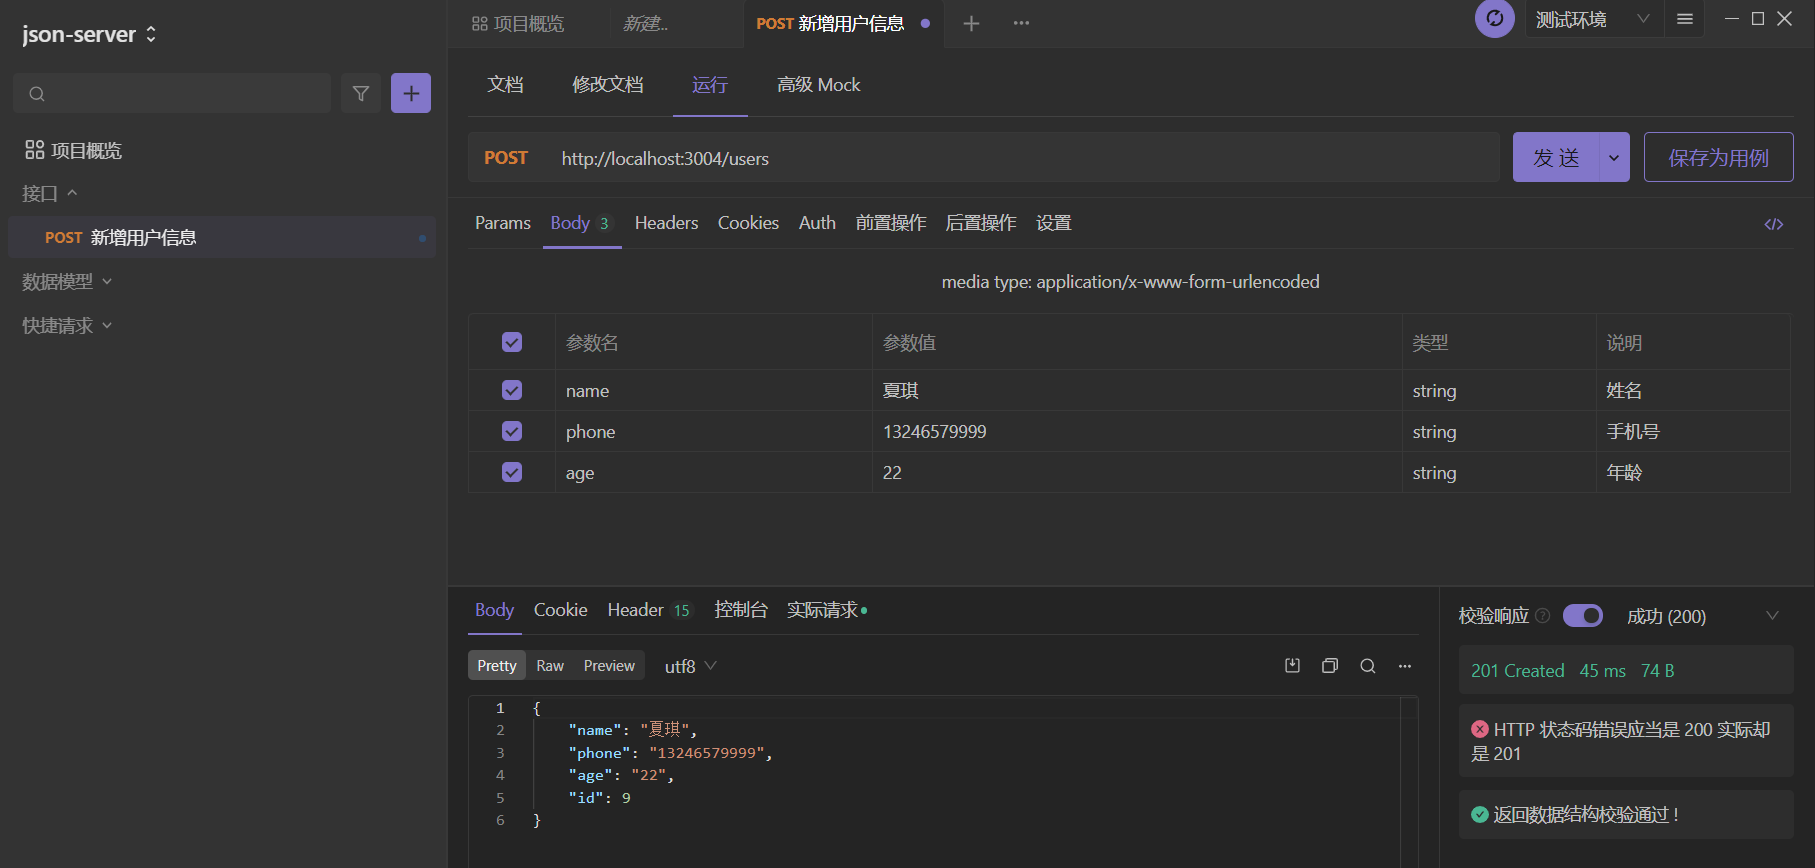
post 新增数据
<template>
  <el-button @click="add"> 发送请求 </el-button>
</template>

<script setup>
  import axios from 'axios'
  const url = 'http://localhost:3004/users'
  const add = async () => {
    const data = {
      name: '林更新',
      phone: '18779756000',
      age: '22'
    }
    const { data: res } = await axios({ method: 'post', url, data })
    console.log('res', res)
  }
</script>
当然你也可以使用 api 调试工具来测试接口,这里我使用 apifox:
delete 删除数据
通过id删除users里id为3的用户数据:
<template>
  <el-button @click="deleteUser"> 删除用户 </el-button>
</template>

<script setup>
import axios from 'axios'

const userId = 3
const url = `http://localhost:3004/users/${userId}`
const deleteUser = async () => {
  const res = await axios({ method: 'delete', url })
  console.log('res', res)
}
</script>
put 修改数据 (替换)
PUT方法会更新整个资源对象,前端没有给出的字段,会自动清空。
<template>
  <el-button @click="reviseUser"> put 修改用户 </el-button>
</template>

<script setup>
import axios from 'axios'

const userId = 4
const url = `http://localhost:3004/users/${userId}`
const reviseUser = async () => {
  const data = {
    "name": "林更新",
    "age": "44"
  }
  const res = await axios({ method: 'put', url, data })
  console.log('res', res)
}
</script>
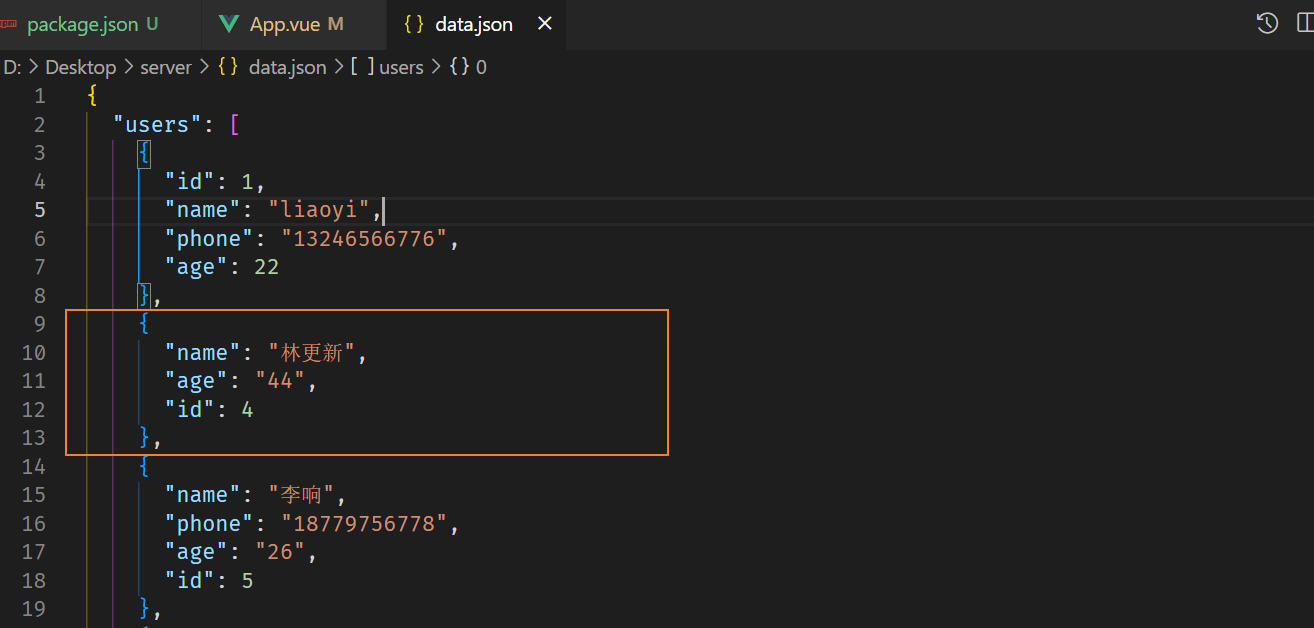
但是使用put修改后会有一个问题,只会保留提交的字段,没有提交的字段在json中将会被删除,如下图,我们更改了id为4的用户,只提交了name和age,原来的json文件中,phone字段被删除了:
这时候我们就要用到 patch 请求了:
patch 修改数据
只修改请求的字段,没有请求的字段将会被保留。
<template>
  <el-button @click="reviseUser"> patch修改用户 </el-button>
</template>

<script setup>
import axios from 'axios'

const userId = 8
const url = `http://localhost:3004/users/${userId}`
const reviseUser = async () => {
  const data = {
    name: "陈温柔",
    age: "22",
    sex: "0"
}
  const res = await axios({ method: 'patch', url, data })
  console.log('res', res)
}
</script>
关联检索
通过 _expand 方式检索关联父级数据:
这里的 _expand=class 匹配的其实是为了和 users 对象中的 classId做关联,但是已经存在classId字段了,我们需要写出 class, 比如检索的是 repaId 我们旧写成 repa:
# class 是一个别名
http://localhost:3004/users?_expand=class
得到的数据:
[
    {
        "id": 1,
        "name": "liaoyi",
        "phone": "13246566776",
        "age": 22,
        "classId": "1",
        "class": {
            "id": "1",
            "title": "前端",
            "staff": [
                "7",
                "6",
                "1"
            ]
        }
    },
    {
        "name": "林更新",
        "age": "44",
        "id": 4,
        "classId": "2",
        "class": {
            "id": "2",
            "title": "后端",
            "staff": [
                "4",
                "5"
            ]
        }
    },
    {
        "name": "李响",
        "phone": "18779756778",
        "age": "26",
        "id": 5,
        "classId": "2",
        "class": {
            "id": "2",
            "title": "后端",
            "staff": [
                "4",
                "5"
            ]
        }
    },
    {
        "name": "陈温柔",
        "phone": "18779756000",
        "age": "22",
        "id": 6,
        "sex": "0",
        "classId": "1",
        "class": {
            "id": "1",
            "title": "前端",
            "staff": [
                "7",
                "6",
                "1"
            ]
        }
    },
    {
        "name": "夏琪",
        "phone": "13246579999",
        "age": "22",
        "id": 7,
        "classId": "1",
        "class": {
            "id": "1",
            "title": "前端",
            "staff": [
                "7",
                "6",
                "1"
            ]
        }
    }
]
通过 _embed 方式检索关联子级数据:
注意: 这里_embed 需要和子表名 (要关联的子集属性名) 匹配。
http://localhost:3004/classes?_embed=users
得到的数据:
[
  {
    "id": "1",
    "title": "前端",
    "staffIds": [
      "1001",
      "1004",
      "1005"
    ],
    "users": [
      {
        "id": "1001",
        "name": "liaoyi",
        "phone": "13246566776",
        "age": 22,
        "classId": "1"
      },
      {
        "name": "陈温柔",
        "phone": "18779756000",
        "age": "22",
        "id": "1004",
        "sex": "0",
        "classId": "1"
      },
      {
        "name": "夏琪",
        "phone": "13246579999",
        "age": "22",
        "id": "1005",
        "classId": "1"
      }
    ]
  },
  {
    "id": "2",
    "title": "后端",
    "staffIds": [
      "1002",
      "1003"
    ],
    "users": [
      {
        "name": "林更新",
        "age": "44",
        "id": "1002",
        "classId": "2"
      },
      {
        "name": "李响",
        "phone": "18779756778",
        "age": "26",
        "id": "1003",
        "classId": "2"
      }
    ]
  }
]

 浙公网安备 33010602011771号