windows、linux mysql部署
阅读目录:
1、Windows下安装MySQL
2、Linux下安装MySQL
序章:
MySQL是个小型的数据库,用来自己做小项目,做学习练习什么的再适合不过了,不过新手总会被一些莫名奇妙的问题难住,想要学习什么的,连环境都搭不好,简直是受罪,我也是个饱受这种痛苦的新手,所以想把遇到的问题都总结下来,以后再碰到,不用到处去找资料。
新手在Windows环境下,建议下载Installer MSI版本的,安装简单直接Next…直到Finish…完成安装,虽然只有32位的,但是作为学习练习,还是够用了(比如学习Java、Python、C#、SQL等语言),可不能输在搭建环境上,对吧!
但是还是有很多像我这样的强迫症患者,用了64位的操作系统,非要下64位的zip版本的MySQL心里才舒服。
MySQL下载地址:http://dev.mysql.com/downloads/mysql/
1、Windows下安装MySQL
我下的是最新版的MySQL,解压后,目录如下:
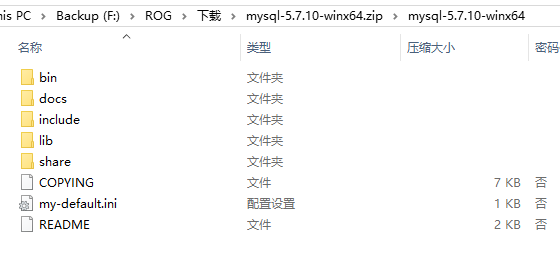
可以看到上图,MySQL5.7它没有data目录,如果没有data目录,安装后启动的时候就会报这个错:
D:\Service\mysql57\bin>net start mysqlMySQL 服务正在启动 .MySQL 服务无法启动。服务没有报告任何错误。请键入 NET HELPMSG 3534 以获得更多的帮助。
为了避免这个错误,需要使用命令生成data文件夹,按如下步骤安装
- 进入dos的命令行,一定要用administrator进入。

- 进入MySQL的bin目录,输入mysqld –install可以安装MySQL
D:\>cd D:\Service\mysql57\binD:\Service\mysql57\bin>mysqld -installService successfully installed.
- 输入以下命令,可以初始化MySQL数据库,初始化了之后,会打印出MySQL的默认生成的密码,下面标红了的就是默认生成的密码。
D:\Service\mysql57\bin>mysqld --initialize --user=root --console
2015-12-20T08:13:45.264865Z 0 [Warning] TIMESTAMP with implicit DEFAULT value is deprecated. Please use --explicit_defaults_for_timestamp server option (see documentation for more details).2015-12-20T08:13:45.854579Z 0 [Warning] InnoDB: New log files created, LSN=457902015-12-20T08:13:45.998772Z 0 [Warning] InnoDB: Creating foreign key constraint system tables.2015-12-20T08:13:46.098118Z 0 [Warning] No existing UUID has been found, so we assume that thisis the first time that this server has been started. Generating a new UUID: 9755c3ea-a6f1-11e5-81a3-74d02b122fb3.2015-12-20T08:13:46.121617Z 0 [Warning] Gtid table is not ready to be used. Table 'mysql.gtid_executed' cannot be opened.2015-12-20T08:13:46.135153Z 1 [Note] A temporary password is generated for root@localhost: g!gRw!d%M0Sj
初始化了以后,可以看到MySQL目录下,多了data目录

4. 启动MySQL服务
D:\Service\mysql57\bin>net start mysqlMySQL 服务正在启动 .MySQL 服务已经启动成功。
- 使用默认生成的密码,进入mysql
D:\Service\mysql57\bin>mysql -u root -pEnter password: ************Welcome to the MySQL monitor. Commands end with ; or \g.Your MySQL connection id is4Server version: 5.7.10Copyright (c) 2000, 2015, Oracle and/or its affiliates. All rights reserved.Oracle is a registered trademark of Oracle Corporation and/or itsaffiliates. Other names may be trademarks of their respectiveowners.Type 'help;' or '\h'for help. Type '\c' to clear the current input statement.mysql>
- 进入了mysql就可以修改默认密码了(我把默认密码修改成了root)
mysql> set password = password('root') ;
这个时候,Windows下的MySQL环境就已经安装好了。
2、Linux下安装MySQL
如果有网络的话,Linux下安装就简单多了,我这用的CentOS安装的
- 安装MySQL服务,下面用yum安装,它会自动安装需要的依赖包,很方便,但是要用root用户来安装
[root@bogon ~]# yum install mysql-server
- 启动MySQL服务,第一次启动服务会有点慢
[root@bogon ~]# /etc/init.d/mysqld restart
- 启动了MySQL服务,就可以使用ps命令,可以查看到MySQL这个服务,说明服务已经启动了
[root@bogon ~]# ps -ef | grep mysqlroot 34741022:29 pts/000:00:00 /bin/sh /usr/bin/mysqld_safe --datadir=/var/lib/mysql --socket=/var/lib/mysql/mysql.sock --pid-file=/var/run/mysqld/mysqld.pid --basedir=/usr --user=mysqlmysql 35763474022:29 pts/000:00:00 /usr/libexec/mysqld --basedir=/usr --datadir=/var/lib/mysql --user=mysql --log-error=/var/log/mysqld.log --pid-file=/var/run/mysqld/mysqld.pid --socket=/var/lib/mysql/mysql.sockroot 36143334022:34 pts/000:00:00 grep mysql
- 直接输入mysql就可以进入MySQL了
[root@bogon ~]# mysqlWelcome to the MySQL monitor. Commands end with ; or \g.Your MySQL connection id is3Server version: 5.1.73 Source distributionCopyright (c) 2000, 2013, Oracle and/or its affiliates. All rights reserved.Oracle is a registered trademark of Oracle Corporation and/or itsaffiliates. Other names may be trademarks of their respectiveowners.Type 'help;' or '\h'for help. Type '\c' to clear the current input statement.mysql>
- 设置MySQL的密码,我这边设置密码为root,以后就可以用这个密码来登录MySQL了
mysql> set password = password('root');Query OK, 0 rows affected (0.00 sec)

 浙公网安备 33010602011771号