uni-app开发手机App时使用vant
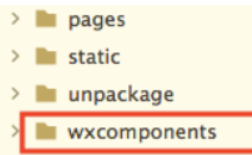
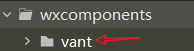
1、使用uni-app创建项目,然后,在项目根目录创建 wxcomponents 文件夹(名称不可更改),,注意该目录和pages目录平级,然后在该目录下,再新建vant目录。
2、到https://github.com/youzan/vant-weapp下载最新的压缩包,然后将压缩包内的dist文件夹直接拷入vant文件中,格式如下图(不是必须这样做,只是为了文件目录结构清晰。后面改为去掉dist层目录,直接将weapp包内dist下的内容复制到vant目录,这样,就少了一层dist目录,更简洁)

3、在 App.vue 导入全局样式:


<style>
    /*每个页面公共css */
    @import "/wxcomponents/vant/common/index.wxss";
</style>
4、在 pages.json 的globalStyle中增加对应的组件:
"usingComponents": {
      "van-button": "/wxcomponents/vant/button/index"
}
可以选择在一个页面的配置文件里面配置,但是只能在这个页面内使用,你也可以选择在globalStyle里面配置,是的所有页面都可以直接使用。
但是,即便配置在globalStyle中,仍然比较麻烦,需要每个组件都注册,可以借助easycom:
    "easycom": {
      "autoscan": true,
      "custom": {
        //"^uni-(.*)": "@/components/uni-$1.vue", // 匹配components目录内的vue文件
        //"^vue-file-(.*)": "packageName/path/to/vue-file-$1.vue" // 匹配node_modules内的vue文件
        "^van-(.*)":"@/wxcomponents/vant/$1/index.vue"            //匹配van-开头的
      }
    }
将globalStyle中的usingscomponents注释掉,可以看到,借助easycom也可以正常运行。
5、index.vue代码(增加van-button)
<template>
    <view class="content">
        <image class="logo" src="/static/logo.png"></image>
        <view class="text-area">
            <text class="title">{{title}}</text>
        </view>
        <van-button type='primary'>vant按钮</van-button>
    </view>
</template>
结果出现:

这里的错误可能各有不同,但多是因字体引起的,因为后面有许多icon,到wxcomponents/icon/index.wxss下,原来的代码是压缩的,选格式化代码,然后保存,重新运行即可。
6、如果不下载安卓模拟器,而选运行到浏览器,会出现如下错误:

在Hbuilderx-运行中下载真机插件,然后重新运行,选第1个,运行成功。
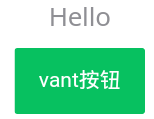 这说明,已经可以在uni-app项目开发手机APP时,使用vant-ui组件库了。

 浙公网安备 33010602011771号