
SpringBoot解决跨域请求拦截
前言
同源策略:判断是否是同源的,主要看这三点,协议,ip,端口。
同源策略就是浏览器出于网站安全性的考虑,限制不同源之间的资源相互访问的一种政策。
比如在域名https://www.baidu.com下,脚本不能够访问https://www.sina.com源下的资源,否则将会被浏览器拦截。
注意两点:
1.必须是脚本请求,比如AJAX请求。
但是如下情况不会产生跨域拦截
<img src="xxx"/>
<a href='xxx"> </a>
2.跨域拦截是前端请求已经发出,并且在后端返回响应时检查相关参数,是否允许接收后端请求。
在微服务开发中,一个系统包含多个微服务,会存在跨域请求的场景。
本文主要讲解SpringBoot解决跨域请求拦截的问题。
搭建项目
这里创建两个web项目,web1 和 web2.
web2项目请求web1项目的资源。
这里只贴关键代码,完整代码参考GitHub
WEB2
创建一个Controller返回html页面
@Slf4j
@Controller
public class HomeController {

    @RequestMapping("/index")
    public String home(){
        log.info("/index");

        return "/home";
    }
}
html页面 home.html
这里创建了一个按钮,按钮按下则请求资源:"http://localhost:8301/hello"
<!DOCTYPE html>
<html lang="en">
<head>
    <meta charset="UTF-8">
    <title>web2</title>

    <script src="https://cdn.staticfile.org/jquery/1.10.2/jquery.min.js">
    </script>

    <script>
        $(function () {

            $("#testBtn").click(function () {
                console.log("testbtn ...");
                $.get("http://localhost:8301/hello",function(data,status){
                    alert("数据: " + data + "\n状态: " + status);
                });
            })

        })

    </script>
</head>
<body>
    web2
    <button id="testBtn">测试</button>
</body>
</html>
WEB1
@Slf4j
@RestController
public class Web1Controller {

    @RequestMapping("/hello")
    public String hello(){
        log.info("hello ");
        return "hello," + new Date().toString();
    }
}
这里配置两个项目为不同的端口。
WEB1为8301
WEB2为8302
因此是不同源的。
测试
在web1还没有配置允许跨域访问的情况下
按下按钮,将会出现错误。显示Header中没有Access-Control-Allow-Origin
Access to XMLHttpRequest at 'http://localhost:8301/hello' from origin 'http://localhost:8300' has been blocked by CORS policy: No 'Access-Control-Allow-Origin' header is present on the requested resource.
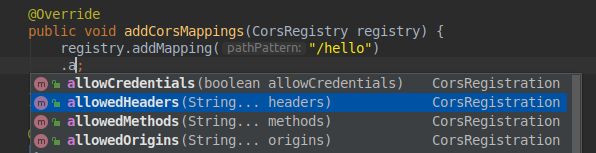
WEB1添加允许跨域请求,通过实现WebMvcConfigurer
@Configuration
public class WebMvcConfig implements WebMvcConfigurer {

    @Override
    public void addCorsMappings(CorsRegistry registry) {
        registry.addMapping("/hello");
    }
}
再次访问将会返回正常数据。

除了以上的配置外,还可以做更细致的限制
比如对请求的headers,请求的方法POST/GET...。请求的源进行限制。
同时还可以使用注解 @CrossOrigin来替换上面的配置。
@Slf4j
@RestController
public class Web1Controller {

    @CrossOrigin
    @RequestMapping("/hello")
    public String hello(){
        log.info("hello ");
        return "hello," + new Date().toString();
    }
}
注解可以用在类上,也可以用在方法上,但必须是控制器类
配置和上面一样,也是可以对方法,header,源进行个性化限制。
@Target({ElementType.METHOD, ElementType.TYPE})
@Retention(RetentionPolicy.RUNTIME)
@Documented
public @interface CrossOrigin {
    /** @deprecated */
    @Deprecated
    String[] DEFAULT_ORIGINS = new String[]{"*"};
    /** @deprecated */
    @Deprecated
    String[] DEFAULT_ALLOWED_HEADERS = new String[]{"*"};
    /** @deprecated */
    @Deprecated
    boolean DEFAULT_ALLOW_CREDENTIALS = false;
    /** @deprecated */
    @Deprecated
    long DEFAULT_MAX_AGE = 1800L;

    @AliasFor("origins")
    String[] value() default {};

    @AliasFor("value")
    String[] origins() default {};

    String[] allowedHeaders() default {};

    String[] exposedHeaders() default {};

    RequestMethod[] methods() default {};

    String allowCredentials() default "";

    long maxAge() default -1L;
}
推荐:《Java常用技术和书籍推荐》
如果,您认为阅读这篇博客让您有些收获,不妨点击一下右下角的推荐按钮。
如果,您希望更容易地发现我的新博客,不妨关注一下。因为,我的写作热情也离不开您的肯定支持。
感谢您的阅读,如果您对我的博客所讲述的内容有兴趣,请继续关注我的后续博客。
本文版权归博客园-冬眠的山谷(https://www.cnblogs.com/lgjlife/)所有,欢迎转载,但未经作者同意必须保留此段声明,且在文章页面明显位置给出。

 浙公网安备 33010602011771号