使用postfix进行收发邮件
背景:首次使用postfix测试收邮件,发邮件
环境:CentOS Linux release 7.8.2003 (Core),基于VMware Workstations Pro 15
标签:Postfix,Dovecot,多实例
1,配置2个固定IP,多实例,1个IP对应1个实例。192.168.101.8 和 192.168.101.9
vim /etc/sysconfig/network-scripts/ifcfg-ens33
TYPE="Ethernet"
PROXY_METHOD="none"
BROWSER_ONLY="no"
BOOTPROTO="static"
DEFROUTE="yes"
IPV4_FAILURE_FATAL="no"
IPV6INIT="yes"
IPV6_AUTOCONF="yes"
IPV6_DEFROUTE="yes"
IPV6_FAILURE_FATAL="no"
IPV6_ADDR_GEN_MODE="stable-privacy"
NAME="ens33"
UUID="f6d40cce-367a-4349-9351-511a6235b342"
DEVICE="ens33"
ONBOOT="yes"
IPADDR="192.168.101.8"
IPADDR1="192.168.101.9"
GATEWAY="192.168.101.1"
NETMASK="255.255.255.0"
DNS1="8.8.8.8"
2. 安装Postfix,现在大部分的Linux系统都自带Postfix,无需安装,这里直接进行配置
vim /etc/postfix/main.cf
#接受外部邮件需要更改为
inet_interfaces = all
#加上自己的邮箱域名
mydestination = $myhostname, localhost.$mydomain, localhost, bytedance.shop
#邮件存放目录
home_mailbox = Maildir/
multi_instance_wrapper = ${command_directory}/postmulti -p --
multi_instance_enable = yes
multi_instance_name = postfix-rzhang
multi_instance_group = rzhang
multi_instance_directories = /etc/postfix-2
master_service_disable =
authorized_submit_users = root
myhostname = postfix.bytedance.shop
mydomain = bytedance.shop
myorigin = $mydomain
mynetworks = 192.168.101.8/32,127.0.0.0/8
relay_domains = $mydestination
smtp_bind_address = 192.168.101.8
smtpd_sasl_auth_enable = yes
broken_sasl_auth_clients = yes
smtpd_sasl_type = dovecot
smtpd_sasl_path = /var/spool/postfix/private/auth
smtpd_sasl_security_options = noanonymous
smtpd_recipient_restrictions = permit_mynetworks,permit_sasl_authenticated,reject_unauth_destination
transport_maps = hash:/etc/postfix/transport
配置master.cf
vim /etc/postfix/master.cf
#设置第一个实例的端口,发信端口可以自定义,但是收信端口是25
192.168.101.8:25 inet n - n - - smtpd
#smtp      inet  n       -       n       -       -       smtpd
配置第二个Postfix实例
cp main.cf master.cf /etc/postfix-2/
以下为第二个postfix与第1个不同的地方
vim /etc/postfix-2/main.cf
queue_directory = /var/spool/postfix-2

data_directory = /var/lib/postfix-2

multi_instance_wrapper = ${command_directory}/postmulti -p --
multi_instance_enable = yes
multi_instance_name = postfix-2
multi_instance_group = rzhang
#multi_instance_directories = /etc/postfix-2
master_service_disable =
authorized_submit_users = root
myhostname = postfix2.bytedance.shop
mydomain = bytedance.shop
myorigin = $mydomain
mynetworks = 192.168.101.9/32,127.0.0.0/8
relay_domains = $mydestination
smtp_bind_address = 192.168.101.9
smtpd_sasl_auth_enable = yes
broken_sasl_auth_clients = yes
smtpd_sasl_type = dovecot
smtpd_sasl_path = /var/spool/postfix/private/auth
smtpd_sasl_security_options = noanonymous
smtpd_recipient_restrictions = permit_mynetworks,permit_sasl_authenticated,reject_unauth_destination
#transport_maps = hash:/etc/postfix/transport
配置master
vim /etc/postfix-2/master.cf
192.168.101.9:8025 inet n - n - - smtpd
#smtp      inet  n       -       n       -       -       smtpd
3. 安装和配置dovecot
vim /etc/dovecot/dovecot.conf
auth_mechanisms = plain login
mbox_write_locks = fcntl
passdb {
    driver = pam
}
service auth {
    unix_listener /var/spool/postfix/private/auth {
        group = postfix
        mode = 0660
        user = postfix
    }
    user = root
}
#ssl_cert = </etc/pki/dovecot/certs/dovecot.pem
#ssl_key = </ect/pki/dovecot/private/dovecot.pem
userdb {
    driver = passwd
}

ssl = required
vim /etc/dovecot/conf.d/10-mail.conf
mail_location = maildir:~/Maildir
4,启动postfix和dovecot,具体报错根据日志检查
tail -100 /var/log/maillog
其中在发邮件的时候遇到过以下报错
loops back to myself
网上资料说的方法有,在postfix的mydestination加上自己的域名,更改hostname。
我的解决方法是使用多一个postfix实例,更改不同的hostname;然后发往自己的域名的时候设置转发,使用第二个postfix来发送。
vim /etc/postfix/transport
bytedance.shop smtp:[192.168.101.9]:8025
然后hash
postmap /etc/postfix/transport
5,更改DNS
vim /etc/hosts
192.168.101.8   bytedance.shop
192.168.101.8   postfix.bytedance.shop
192.168.101.9   postfix2.bytedance.shop
firewall-cmd --permanent --zone=public --add-port=25/tcp
firewall-cmd --permanent --zone=public --add-port=110/tcp
firewall-cmd --permanent --zone=public --add-port=995/tcp
firewall-cmd --reload
firewall-cmd --list-all
6,检查postfix是否启动成功
一般显示如下代表成功
[root@rayhung test]# telnet 192.168.101.8 25
Trying 192.168.101.8...
Connected to 192.168.101.8.
Escape character is '^]'.
220 postfix.bytedance.shop ESMTP Postfix
[root@rayhung test]# telnet 192.168.101.9 8025
Trying 192.168.101.9...
Connected to 192.168.101.9.
Escape character is '^]'.
220 postfix2.bytedance.shop ESMTP Postfix
7,开设邮箱
useradd test
passwd test
[root@rzhang]# cd /home/test/;ll
total 0
激活邮箱
[root@rayhung test]# telnet 192.168.101.8 110
Trying 192.168.101.8...
Connected to 192.168.101.8.
Escape character is '^]'.
+OK Dovecot ready.
user test
+OK
pass yourpassword
+OK Logged in.
quit
+OK Logging out.
Connection closed by foreign host.
检查邮箱
[root@rayhung test]# cd /home/test/Maildir/;ll
total 12
drwx------. 2 test test   6 Sep 20 13:36 cur
-rw-------. 1 test test 400 Sep 20 13:36 dovecot.index.log
-rw-------. 1 test test  51 Sep 20 13:36 dovecot-uidlist
-rw-------. 1 test test   8 Sep 20 13:36 dovecot-uidvalidity
-r--r--r--. 1 test test   0 Sep 20 13:36 dovecot-uidvalidity.5f66ea55
drwx------. 2 test test   6 Sep 20 13:36 new
drwx------. 2 test test   6 Sep 20 13:36 tmp
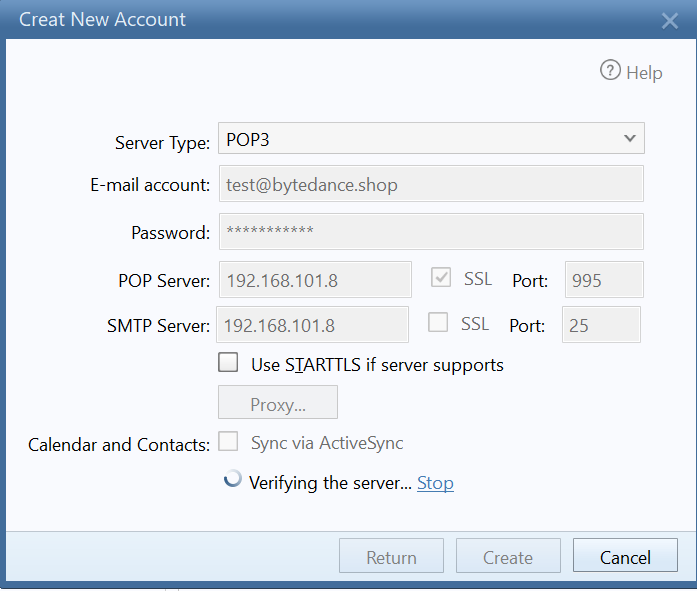
8,安装foxmail进行收发测试
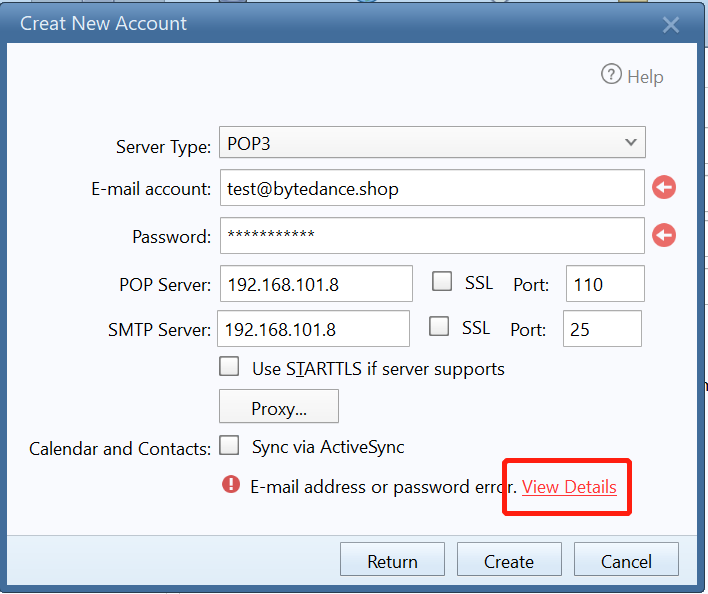
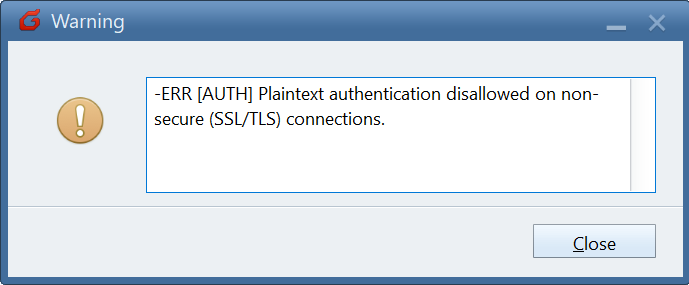
这里使用110端口遇到问题,所以所以使用995
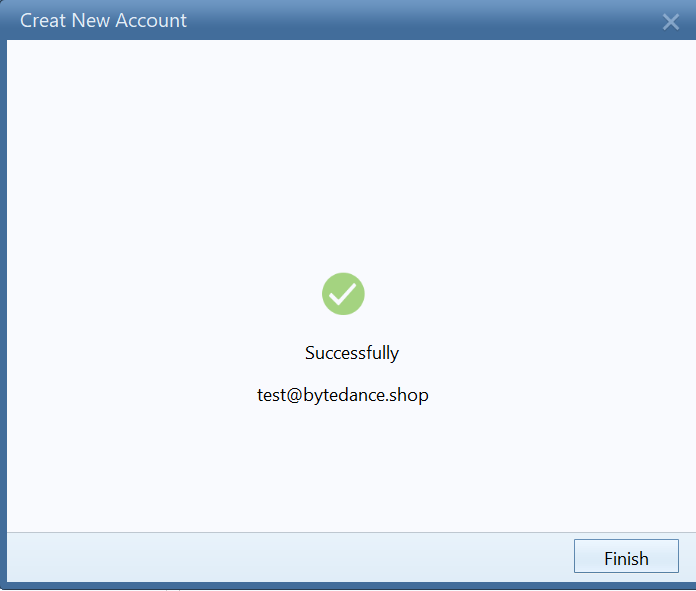
rcheung@bytedance.shop发邮件给test@bytedance.shop
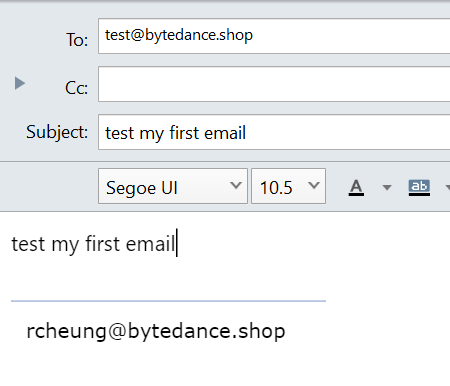
收到邮件
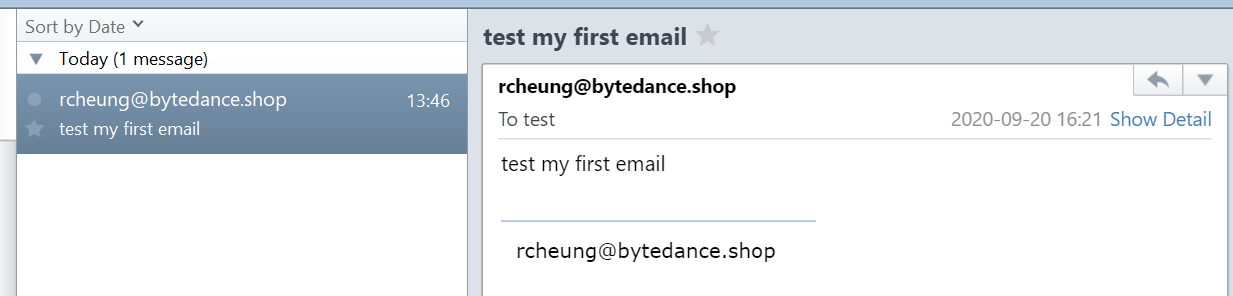
检查日志也是发送成功
grep "test@bytedance.shop" /var/log/maillog
Sep 20 13:46:39 rayhung postfix-rzhang/smtp[2285]: 879228CD7C: to=<test@bytedance.shop>, relay=192.168.101.9[192.168.101.9]:8025, delay=0.14, delays=0.06/0.02/0.04/0.02, dsn=2.0.0, status=sent (250 2.0.0 Ok: queued as A58671061B1E)
Sep 20 13:46:39 rayhung postfix-2/local[2291]: A58671061B1E: to=<test@bytedance.shop>, relay=local, delay=0.02, delays=0.01/0.01/0/0, dsn=2.0.0, status=sent (delivered to maildir)

 浙公网安备 33010602011771号