asp.net结合uploadify实现多附件上传
1、说明
uploadify是一款优秀jQuery插件,主要功能是批量上传文件。大多数同学对多附件上传感到棘手,现将asp.net结合uploadfiy如何实现批量上传附件给大家讲解一下,有什么不对的地方还请大家多多交流沟通,下面把代码贴出来大家一起交流。
2、组成
首先说明一下代码实现所用到的技术,仅供参考:
开发工具:vs2010
目标框架:.NET Framework3.5
Uploadify:uploadify-v3.1
Jquery:jquery-1.8.1.js
最后我会将整个Demo上传,如果同学们的电脑上有开发环境可直接打开项目解决方案运行。
3、代码
Default.aspx(测试页面)
<%@ Page Language="C#" AutoEventWireup="true" CodeBehind="Default.aspx.cs" Inherits="FileUpload._Default" %>

<!DOCTYPE html PUBLIC "-//W3C//DTD XHTML 1.0 Transitional//EN" "http://www.w3.org/TR/xhtml1/DTD/xhtml1-transitional.dtd">
<html xmlns="http://www.w3.org/1999/xhtml">
<head runat="server">
    <title>附件上传</title>
    <script src="Scripts/jquery-1.8.1.js" type="text/javascript"></script>
    <script src="Scripts/uploadify-v3.1/jquery.uploadify-3.1.js" type="text/javascript"></script>
    <link href="Scripts/uploadify-v3.1/uploadify.css" rel="stylesheet" type="text/css" />
    <script type="text/javascript">
        $(function () {
            $("#file_upload").uploadify({
                "auto": false,
                "swf": "Scripts/uploadify-v3.1/uploadify.swf",
                "uploader": "App_Handler/Uploadify.ashx?action=upload",
                "removeCompleted": false,
                "onUploadSuccess": function (file, data, response) {
                    alert('文件 ' + file.name + ' 已经上传成功,并返回 ' + response + ' 服务器状态 ' + data);
                }
            });
        });
    </script>
</head>
<body>
    <form id="form1" runat="server">
    <div>
        <input type="file" id="file_upload" name="file_upload" />
    </div>
    <div>
        <a href="javascript:$('#file_upload').uploadify('upload');">上传第一个</a>
        <a href="javascript:$('#file_upload').uploadify('upload','*');">上传队列</a>
        <a href="javascript:$('#file_upload').uploadify('cancel');">取消第一个</a>
        <a href="javascript:$('#file_upload').uploadify('cancel', '*');">取消队列</a>
    </div>
    </form>
</body>
</html>

Uploadify.ashx(一般处理程序)
<%@ WebHandler Language="C#" Class="UploadifyUpload" %>

using System;
using System.Collections;
using System.Data;
using System.Web;
using System.Web.Services;
using System.Web.Services.Protocols;
using System.Web.SessionState;
using System.IO;
using System.Collections.Generic;
using System.Web.UI.WebControls;
using System.Text;

public class UploadifyUpload : IHttpHandler, IRequiresSessionState
{

    public void ProcessRequest(HttpContext context)
    {
        context.Response.ContentType = "text/plain";
        context.Response.Charset = "utf-8";

        string action = context.Request["action"];
        switch (action)
        {
            case "upload":
                //上传附件
                upload(context);
                break;
        }
        context.Response.End();
    }

    /// <summary>
    /// 上传附件
    /// </summary>
    /// <param name="context"></param>
    private void upload(HttpContext context)
    {
        HttpPostedFile postedFile = context.Request.Files["Filedata"];
        if (postedFile != null)
        {
            string fileName, fileExtension;
            int fileSize;
            fileName = postedFile.FileName;
            fileSize = postedFile.ContentLength;
            if (fileName != "")
            {

                fileExtension = postedFile.FileName.Substring(postedFile.FileName.LastIndexOf('.'));
                string path =context.Server.MapPath("/")+ "\\App_Attachments\\";//设置文件的路径
                string fileUrl = path + DateTime.Now.ToString("yyyyMMddHHmmss") + fileExtension;//保存文件路径
                if (!Directory.Exists(path)) {
                    Directory.CreateDirectory(path);
                }
                postedFile.SaveAs(fileUrl);//先保存源文件


                context.Response.Write("上传成功!");

            }
            else
            {
                context.Response.Write("上传失败!");
            }
        }
        else
        {
            context.Response.Write("上传失败!");
        }
    }

    public bool IsReusable
    {
        get
        {
            return false;
        }
    }

}
4、补充
给大家贴出一些uploadfiy参数的讲解,使用方法就是在Default.aspx测试页面里面$("#file_upload").uploadify({});方法中配置,不论参数或事件配置要以英文状态下的逗号结束,最后一个不需要逗号结束。类似于下图 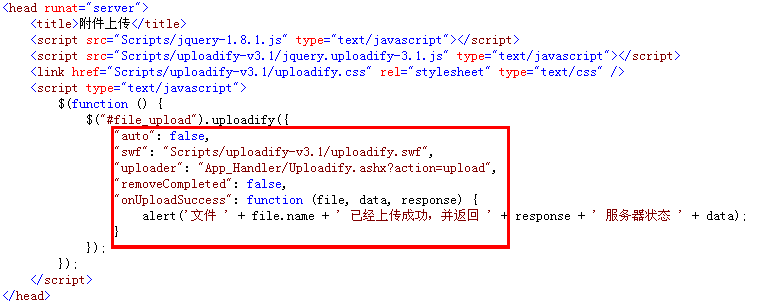
详细参数如下:
// 所需的参数
id: $this.attr('id'), // DOM对象的ID

swf: 'Scripts/jquery-uploadify/uploadify.swf', // uploadify.swf 文件的路径

uploader: 'App_Handler/Uploadify.ashx', // 后台处理程序的相对路径

auto: false, // 设置为true当选择文件后就直接上传了,为false需要点击上传按钮才上传,这里执行doUpload()方法

buttonClass: '', // 按钮样式

buttonCursor: 'hand', // 鼠标指针悬停在按钮上的样子

buttonImage: null, // 浏览按钮的图片的路径

buttonText: '选择文件', // 浏览按钮的文本

checkExisting: false, // 文件上传重复性检查程序,检查即将上传的文件在服务器端是否已存在,存在返回1,不存在返回0

debug: false, // 如果设置为true则表示启用SWFUpload的调试模式

fileObjName: 'Filedata', // 文件上传对象的名称,如果命名为’the_files’,PHP程序可以用$_FILES['the_files']来处理上传的文件对象

fileSizeLimit: '5MB', // 上传文件的大小限制 ,如果为整数型则表示以KB为单位的大小,如果是字符串,则可以使用(B, KB, MB, or GB)为单位,比如’2MB’;如果设置为0则表示无限制

fileTypeDesc: '支持的格式:', // 这个属性值必须设置fileTypeExts属性后才有效,用来设置选择文件对话框中的提示文本,如设置fileTypeDesc为“请选择rar doc pdf文件”

fileTypeExts: '*.*', // 设置可以选择的文件的类型,格式如:’*.doc;*.pdf;*.rar’

height: 24, // 设置浏览按钮的高度 ,默认值

itemTemplate: false, // 用于设置上传队列的HTML模版,可以使用以下标签:instanceID – Uploadify实例的ID fileID – 列队中此文件的ID,或者理解为此任务的ID fileName – 文件的名称 fileSize – 当前上传文件的大小 插入模版标签时使用格式如:${fileName}

method: 'post', // 提交方式Post或Get

multi: true, // 设置为true时可以上传多个文件

formData: { 'action': 'upload' }, // AnJSON格式上传每个文件的同时提交到服务器的额外数据,可在’onUploadStart’事件中使用’settings’方法动态设置

preventCaching: true, // 如果为true,则每次上传文件时自动加上一串随机字符串参数,防止URL缓存影响上传结果

progressData: 'percentage', // 设置上传进度显示方式,percentage显示上传百分比,speed显示上传速度

listID: false, // 设置附件列表容器DOM元素的ID

queueID: false, // 设置上传队列容器DOM元素的ID,如果为false则自动生成一个队列容器

queueSizeLimit: 999, // 队列最多显示的任务数量,如果选择的文件数量超出此限制,将会出发onSelectError事件。注意此项并非最大文件上传数量,如果要限制最大上传文件数量,应设置uploadLimit

removeCompleted: false, // 是否自动将已完成任务从队列中删除,如果设置为ture则会从队列中移除

removeTimeout: 3, // 如果设置了任务完成后自动从队列中移除,则可以规定从完成到被移除的时间间隔

requeueErrors: false, // 如果设置为true,则单个任务上传失败后将返回错误,并重新加入任务队列上传

successTimeout: 30, // 文件上传成功后服务端应返回成功标志,此项设置返回结果的超时时间

uploadLimit: 0, // 最大上传文件数量,如果达到或超出此限制将会触发onUploadError事件

width: 75, // 设置文件浏览按钮的宽度

设置的事件:

onDialogClose : function(swfuploadifyQueue) {//当文件选择对话框关闭时触发
  if( swfuploadifyQueue.filesErrored > 0 ){
  alert( '添加至队列时有'
  +swfuploadifyQueue.filesErrored
  +'个文件发生错误n'
  +'错误信息:'
  +swfuploadifyQueue.errorMsg
  +'n选定的文件数:'
  +swfuploadifyQueue.filesSelected
  +'n成功添加至队列的文件数:'
  +swfuploadifyQueue.filesQueued
  +'n队列中的总文件数量:'
  +swfuploadifyQueue.queueLength);
  }
}

onDialogOpen : function() {//当选择文件对话框打开时触发
  alert( 'Open!');
}

onSelect : function(file) {//当每个文件添加至队列后触发
  alert( 'id: ' + file.id
  + ' - 索引: ' + file.index
  + ' - 文件名: ' + file.name
  + ' - 文件大小: ' + file.size
  + ' - 类型: ' + file.type
  + ' - 创建日期: ' + file.creationdate
  + ' - 修改日期: ' + file.modificationdate
  + ' - 文件状态: ' + file.filestatus);
}

onSelectError : function(file,errorCode,errorMsg) {//当文件选定发生错误时触发
  alert( 'id: ' + file.id
  + ' - 索引: ' + file.index
  + ' - 文件名: ' + file.name
  + ' - 文件大小: ' + file.size
  + ' - 类型: ' + file.type
  + ' - 创建日期: ' + file.creationdate
  + ' - 修改日期: ' + file.modificationdate
  + ' - 文件状态: ' + file.filestatus
  + ' - 错误代码: ' + errorCode
  + ' - 错误信息: ' + errorMsg);
}

onQueueComplete : function(stats) {//当队列中的所有文件全部完成上传时触发
  alert( '成功上传的文件数: ' + stats.successful_uploads
  + ' - 上传出错的文件数: ' + stats.upload_errors
  + ' - 取消上传的文件数: ' + stats.upload_cancelled
  + ' - 出错的文件数' + stats.queue_errors);
}

onUploadComplete : function(file,swfuploadifyQueue) {//队列中的每个文件上传完成时触发一次
  alert( 'id: ' + file.id
  + ' - 索引: ' + file.index
  + ' - 文件名: ' + file.name
  + ' - 文件大小: ' + file.size
  + ' - 类型: ' + file.type
  + ' - 创建日期: ' + file.creationdate
  + ' - 修改日期: ' + file.modificationdate
  + ' - 文件状态: ' + file.filestatus
  + ' - 出错的文件数: ' + swfuploadifyQueue.filesErrored
  + ' - 错误信息: ' + swfuploadifyQueue.errorMsg
  + ' - 要添加至队列的数量: ' + swfuploadifyQueue.filesSelected
  + ' - 添加至对立的数量: ' + swfuploadifyQueue.filesQueued
  + ' - 队列长度: ' + swfuploadifyQueue.queueLength);
}

onUploadError : function(file,errorCode,errorMsg,errorString,swfuploadifyQueue) {//上传文件出错是触发(每个出错文件触发一次)
  alert( 'id: ' + file.id
  + ' - 索引: ' + file.index
  + ' - 文件名: ' + file.name
  + ' - 文件大小: ' + file.size
  + ' - 类型: ' + file.type
  + ' - 创建日期: ' + file.creationdate
  + ' - 修改日期: ' + file.modificationdate
  + ' - 文件状态: ' + file.filestatus
  + ' - 错误代码: ' + errorCode
  + ' - 错误描述: ' + errorMsg
  + ' - 简要错误描述: ' + errorString
  + ' - 出错的文件数: ' + swfuploadifyQueue.filesErrored
  + ' - 错误信息: ' + swfuploadifyQueue.errorMsg
  + ' - 要添加至队列的数量: ' + swfuploadifyQueue.filesSelected
  + ' - 添加至对立的数量: ' + swfuploadifyQueue.filesQueued
  + ' - 队列长度: ' + swfuploadifyQueue.queueLength);
}

onUploadProgress : function(file,fileBytesLoaded,fileTotalBytes,
queueBytesLoaded,swfuploadifyQueueUploadSize) {//上传进度发生变更时触发
alert( 'id: ' + file.id
  + ' - 索引: ' + file.index
  + ' - 文件名: ' + file.name
  + ' - 文件大小: ' + file.size
  + ' - 类型: ' + file.type
  + ' - 创建日期: ' + file.creationdate
  + ' - 修改日期: ' + file.modificationdate
  + ' - 文件状态: ' + file.filestatus
  + ' - 当前文件已上传: ' + fileBytesLoaded
  + ' - 当前文件大小: ' + fileTotalBytes
  + ' - 队列已上传: ' + queueBytesLoaded
  + ' - 队列大小: ' + swfuploadifyQueueUploadSize);
}

onUploadStart: function(file) {//上传开始时触发(每个文件触发一次)
  alert( 'id: ' + file.id
  + ' - 索引: ' + file.index
  + ' - 文件名: ' + file.name
  + ' - 文件大小: ' + file.size
  + ' - 类型: ' + file.type
  + ' - 创建日期: ' + file.creationdate
  + ' - 修改日期: ' + file.modificationdate
  + ' - 文件状态: ' + file.filestatus );
}

onUploadSuccess : function(file,data,response) {//上传完成时触发(每个文件触发一次)
  alert( 'id: ' + file.id
  + ' - 索引: ' + file.index
  + ' - 文件名: ' + file.name
  + ' - 文件大小: ' + file.size
  + ' - 类型: ' + file.type
  + ' - 创建日期: ' + file.creationdate
  + ' - 修改日期: ' + file.modificationdate
  + ' - 文件状态: ' + file.filestatus
  + ' - 服务器端消息: ' + data
  + ' - 是否上传成功: ' + response);

}
5、最后奉上Demo
作者:小路 QQ:2490024434
出处:http://www.cnblogs.com/lengzhan/
本文版权归【冷战】和博客园所有,欢迎转载收藏,未经作者同意须保留此段声明,否则保留追究法律责任的权利。

 浙公网安备 33010602011771号