spring boot
环境:Eclipse
生成网址:https://start.spring.io/
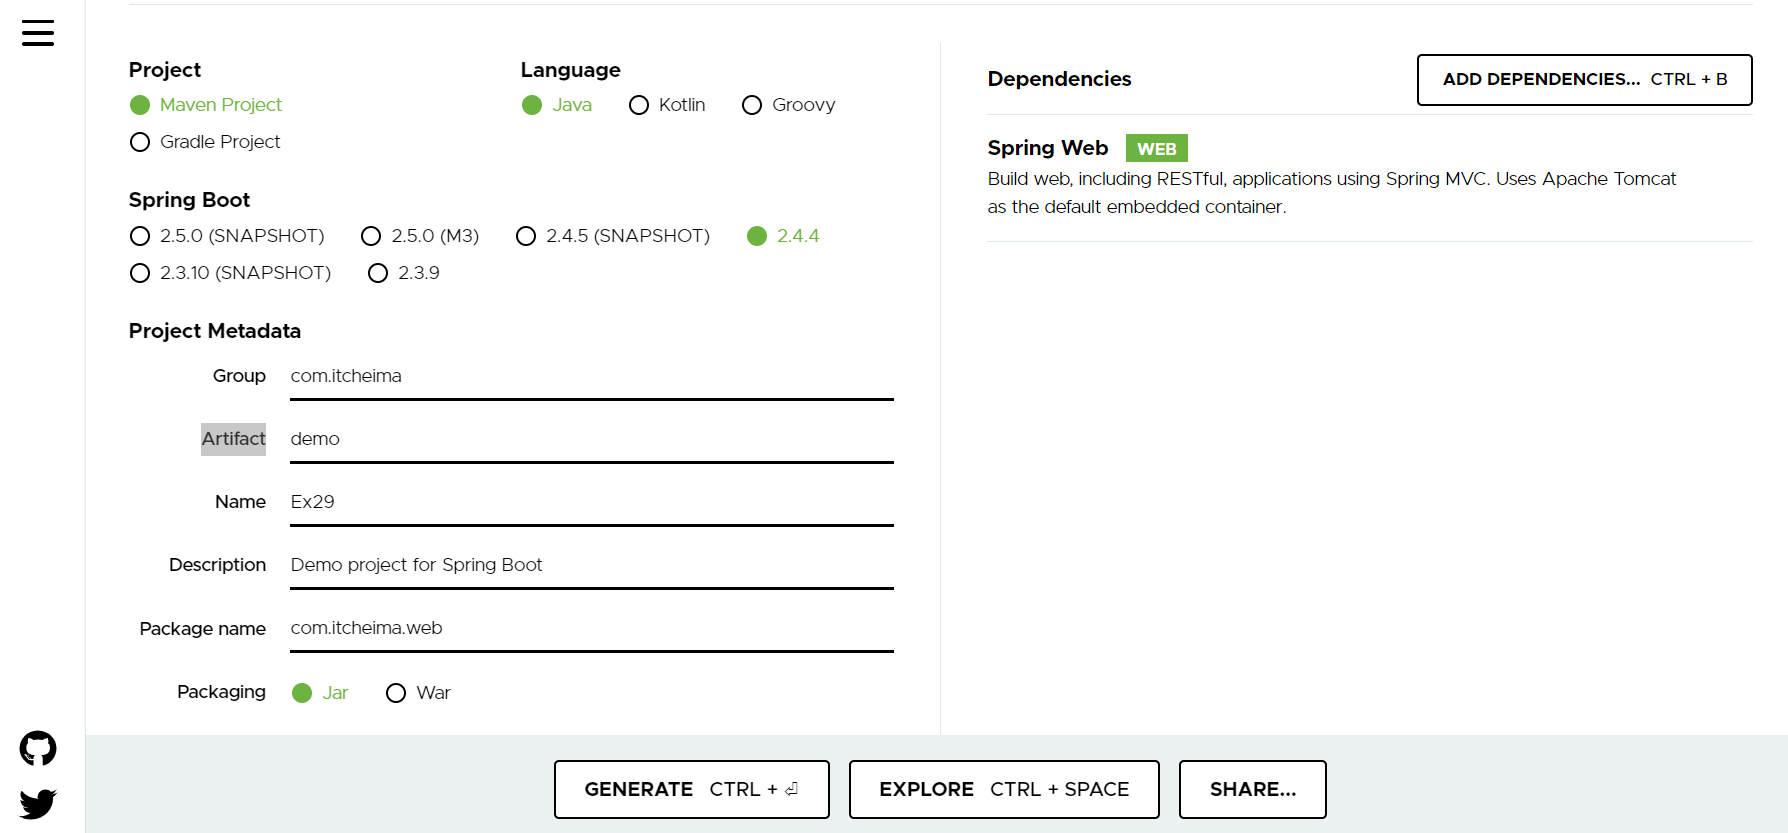
选好选项后点击Generate
保存到本地
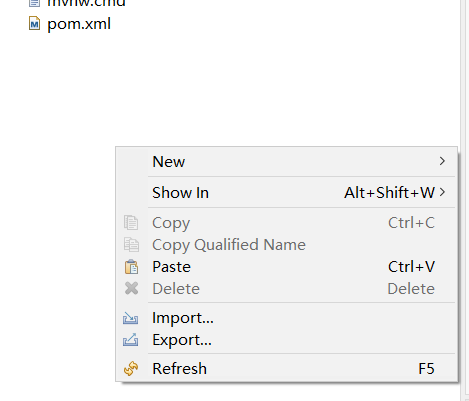
点击import->Maven->Existing Maven Projects->Browse刚刚生成的项目文件夹
生成项目以后,项目结构如下:
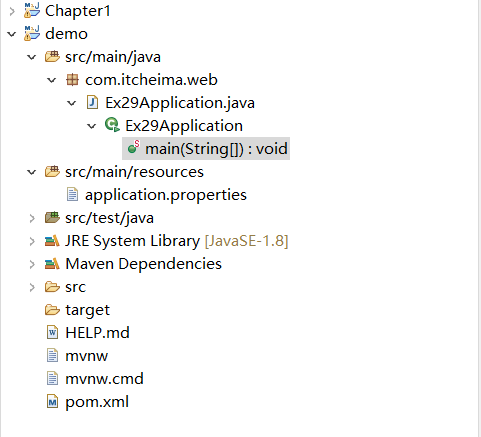
main(String[]):void是springboot程序的入口
application.properties配置文件
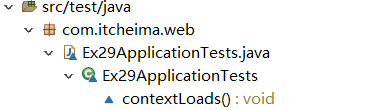
contextLoads():可以通过运行这个方法判断程序有无错误
正确的结果:

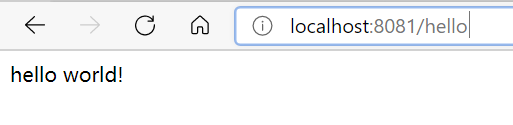
1.第一个Springboot程序:
package com.itcheima.web;

import org.springframework.web.bind.annotation.RequestMapping;
import org.springframework.web.bind.annotation.RestController;

@RestController//复合注解:@Controller+@ResponseBody
public class HelloController {
    @RequestMapping("/hello")
    public String hello()
    {
        return "hello world!";
    }

}
页面效果:
2.Springboot+Mybatis增删改查(MVC模式)
在pom.xml文件下添加Mybatis,MySql的依赖:
     <!-- MyBatis启动器 -->
        <dependency>
            <groupId>org.mybatis.spring.boot</groupId>
            <artifactId>mybatis-spring-boot-starter</artifactId>
            <version>1.1.1</version>
        </dependency>
        <!-- MySQL驱动 -->
        <dependency>
            <groupId>mysql</groupId>
            <artifactId>mysql-connector-java</artifactId>
       <version>8.0.23</version>
        </dependency>
或者右键pom.xml->maven->Add Dependency
搜索mybatis MySQL加入依赖即可
在Maven Dependencies目录下可以找到MySQL和mybatis的依赖
在application.properties中添加数据库配置信息
#DB Configuration
spring.datasource.driverClassName=com.mysql.cj.jdbc.Driver
spring.datasource.url=jdbc:mysql://localhost:3306/microservice
spring.datasource.username=root
spring.datasource.password=123456
在com.itheima.springboot包下创建一个新的包po
这时候po包可能会隐藏,点击三个点->package presentation->Hierachical之后就能单独显示po包了
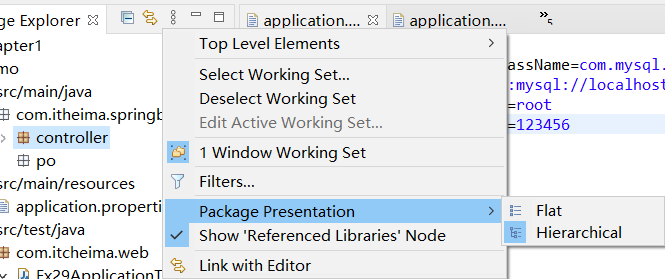
po下编写一个类User.java
package com.itheima.springboot.po;
import java.io.Serializable;
public class User implements Serializable{
private static final long serialVersionUID = 1L;
private Integer id;
private String username;
private String address;
public Integer getId() {
return id;
}
public void setId(Integer id) {
this.id = id;
}
public String getUsername() {
return username;
}
public void setUsername(String username) {
this.username = username;
}
public String getAddress() {
return address;
}
public void setAddress(String address) {
this.address = address;
}
public User() {
super();
}
public User(Integer id, String username, String address) {
super();
this.id = id;
this.username = username;
this.address = address;
}
}
接着编写一个接口Mapper(包下创建一个Java Interface,包名后添加.mapper,Name:UserMapper)
UserMapper.java
package com.itheima.springboot.mapper;
import java.util.List;
import org.apache.ibatis.annotations.Delete;
import org.apache.ibatis.annotations.Insert;
import org.apache.ibatis.annotations.Mapper;
import org.apache.ibatis.annotations.Select;
import org.apache.ibatis.annotations.Update;
import com.itheima.springboot.po.User;
@Mapper
public interface UserMapper {
// 查询所有用户
@Select("select * from tb_user")
public List<User> queryUsers();
// 根据id删除用户
@Delete("DELETE FROM tb_user WHERE id =#{id}")
void delete(Integer id);
@Insert("INSERT INTO tb_user(username,address) VALUES(#{0},#{1})")
void insertUser(String _username,String _address);
@Update("UPDATE tb_user SET username=#{0} WHERE id=#{1}")
void updateUser(String _username,Integer _id);
}
在添加一个service接口
UserService.java
package com.itheima.springboot.service;
import java.util.List;
import com.itheima.springboot.po.User;
public interface UserService {
//查询数据
public List<User> queryUsers();
// 删除数据
void deleteUser(Integer id);
//增加数据
void insertUser(String _username,String _address);
//修改数据
void updateUser(String _username,Integer _id);
}
service包下新加一个class(Package尾部加.impl,name:UserServiceimpl,Add Interfaces添加UserService)
妈的这里出了个错误找了半天
The method addUser(User) of type UserServiceImpl must override or implement a supertype method
原来是没保存
controller包下创建UserController类
package com.itheima.springboot.controller;
import java.util.List;
import org.springframework.beans.factory.annotation.Autowired;
import org.springframework.web.bind.annotation.PathVariable;
import org.springframework.web.bind.annotation.RequestMapping;
import org.springframework.web.bind.annotation.RestController;
import com.itheima.springboot.po.User;
import com.itheima.springboot.service.UserService;
@RestController
@RequestMapping("/user")
public class UserController {
@Autowired
private UserService userService;
@RequestMapping("/userList")
//查询所有用户信息
public List<User> userList()
{
List<User> list=userService.queryUsers();
return list;
}
// 删除用户
@RequestMapping("/delete/{id}")
public void delete(@PathVariable Integer id)
{
this.userService.deleteUser(id);
}
//更新数据
@RequestMapping("/insert/{_username},{_address}")
public void insert(@PathVariable String _username,@PathVariable String _address)
{
this.userService.insertUser(_username,_address);
}
@RequestMapping("/update/{_username},{_id}")
public void update(@PathVariable String _username,@PathVariable Integer _id)
{
this.userService.updateUser(_username, _id);
}
}
添加视图层
static下新建user.html
<!DOCTYPE html>
<html>
<head>
<meta charset="UTF-8">
<title>用户信息</title>
<link rel="stylesheet" type="text/css" href="ui/themes/default/easyui.css">
<link rel="stylesheet" type="text/css" href="ui/themes/icon.css">
<script type="text/javascript" src="ui/jquery.min.js"></script>
<script type="text/javascript" src="ui/jquery.easyui.min.js"></script>
<script type="text/javascript" src="ui/locale/easyui-lang-zh_CN.js"></script>
<script type="text/javascript">
$(function(){
$('#grid').datagrid({
url:'user/userList',
fit:true,
columns:[[
{field:'id',title:'编号',width:50},
{field:'username',title:'姓名',width:200},
{field:'address',title:'地址',width:200}
]]
});
});
</script>
</head>
<body>
<table id="grid"></table>
</body>
</html>
注意:
由于升级了MySQL8.0版本,所以需要修改pom.xml文件下的MySQL版本号

除此之外还需要修改classname(新增cj,mysql版本高的都需要修改为com.mysql.cj.jdbc.Driver)
spring.datasource.driverClassName=com.mysql.cj.jdbc.Driver
Spring Boot的打包和部署
pom.xml右键-->Run As-->Maven build
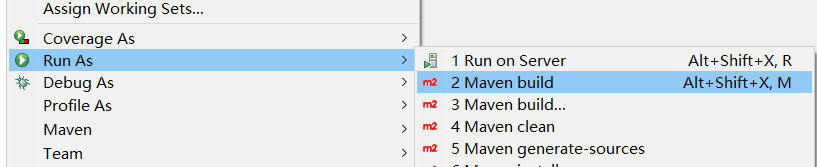
执行命令package,勾选Skip Tests--》Run

看到BUILD SUCCESS就成功打好包了。
可以看到target目录下,多出了一个jar包
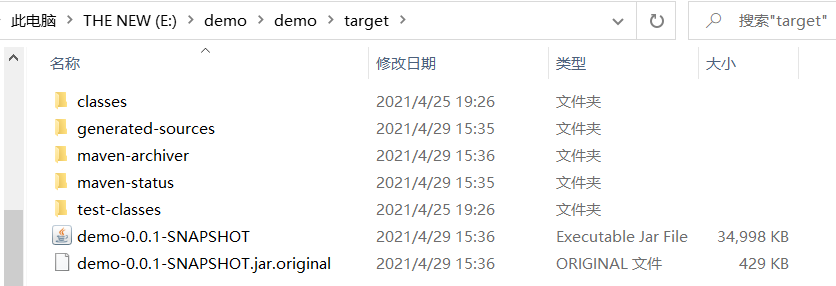
如何去运行jar包:
1.首先将jar包拷贝到d盘下,方便我接下来操作
2.启动虚拟机的redis
3.进入Windows cmd命令界面,进入d盘:d:
4.输入java -jar 文件名.jar 然后回车启动成功
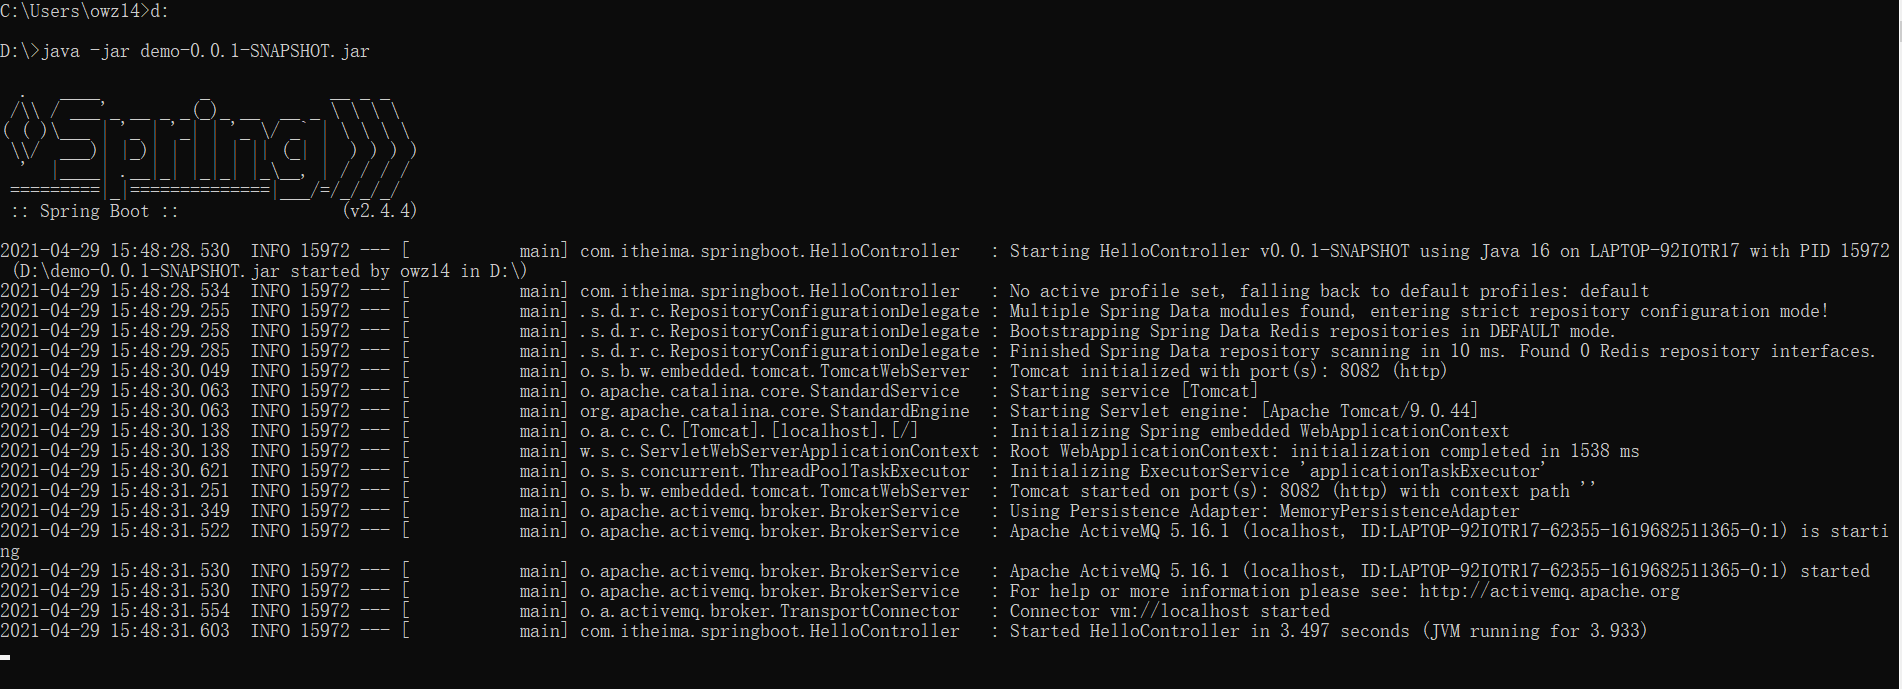
5.网页中尝试进入页面

6.在虚拟机环境下的redis中查看是否有缓存

queryUsers类的信息在redis中证明有效。
通过Spring Boot内嵌的Tomcat可以运行我们的JAR包,但是有时也需要使用外部的Tomcat运行项目。jar包是无法在Tomcat中运行的,因此我们将项目打成WAR包的形式。
1.修改打包方式,添加Tomcat依赖
在pom.xml文件中添加一行
<packaging>war</packaging>
如果已经有默认packaging为jar,修改成war即可
2.添加tomcat依赖
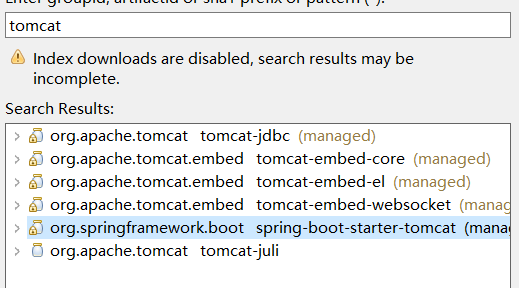
3.maven build

部署在电脑上的tomcat即可

 浙公网安备 33010602011771号