LAMP环境搭建详细流程
## LAMP环境搭建(Linux+Apache+Mariadb+PHP)
- 实验环境
- lamp server:Centos7.6 192.168.10.121
- client:windows 10 192.168.10.1
环境配置
-
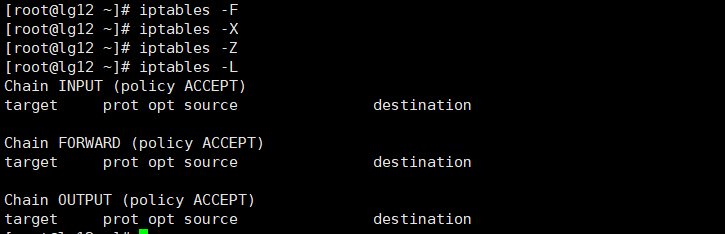
关闭防火墙
![image-20191101133900580]()
![image-20191101133932844]()
-
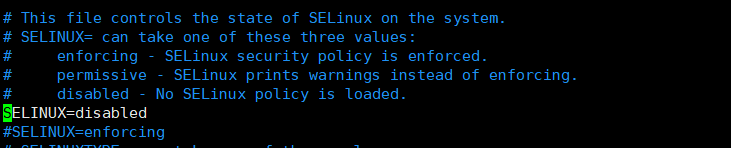
关闭selinux
![image-20191101134018806]()
![image-20191101134005282]()
-
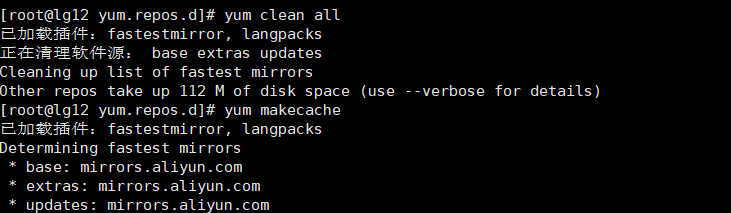
配置yum源(需要能够确保连接外网)
![image-20191101134720484]()
![image-20191101134903849]()
![image-20191101135606484]()


cd /etc/yum.repos.d/
mv CentOS-Base.repo CentOS-Base.repo.bak
wget -O CentOS-Base.repo http://mirrors.aliyun.com/repo/Centos-7.repo
yum clean all
yum makecache
-
安装epel源
![image-20191101135952891]()

wget -O epel.repo http://mirrors.aliyun.com/repo/epel-7.repo
yum clean all
yum makecache
安装所需服务
-
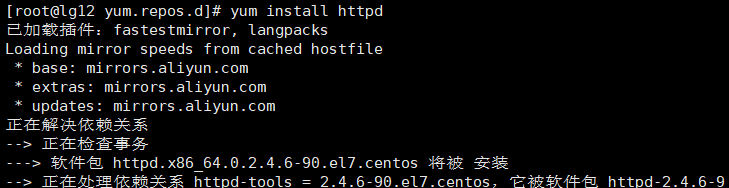
安装httpd 2.4(Apache)
![image-20191101140125787]()
-
安装php与Mariadb
![image-20191101140424663]()
-
安装所需的库及服务
![image-20191101141048006]()


yum install -y php-gd libjpeg* php-imap php-ldap php-odbc php-pear php-xml php-xmlrpc php-mbstring php-mcrypt php-bcmath php-mhash libmcrypt
- 检查是httpd中否存在php模块libphp5.so
![image-20191101141234638]()

修改相关配置文件
-
修改httpd主配置文件/etc/httpd/conf/httpd.conf中的NameServer与DirectoryIndex
![image-20191101141455409]()
![image-20191101141554424]()
-
在/var/www/html/下创建php测试页
![image-20191101141828461]()
![image-20191101141755967]()


<?php
    phpinfo();
?>
- 重启httpd服务
![image-20191101141907539]()
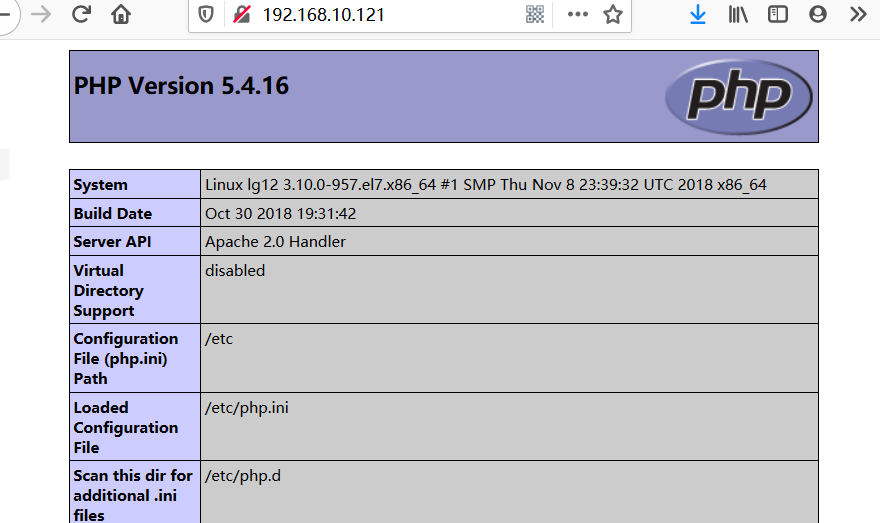
- 测试
![image-20191101150111599]()
- 使用mariadb的模板创建配置文件
![image-20191101142210051]()


cat /usr/share/mysql/my-medium.cnf > /etc/my.cnf
#注:提供的配置模板有my-small.cnf, my-medium.cnf, my-large.cnf, my-huge.cnf
#my-small.ini是为了小型数据库而设计的,内存 <= 64M
#my-medium.ini是为中等规模的数据库而设计的,内存 128M
#my-large.ini是为专用于一个SQL数据库的计算机而设计的,内存 512M
#my-huge.ini是为企业中的数据库而设计的,内存 1G-2G
#my-innodb-heavy-4G.cnf针对4G内存系统(主要运行只有InnoDB表的数据库)而设计,内存 4GB
- 启动Mariadb
![image-20191101143017850]()
- 检查监听端口是否开启
![image-20191101143110006]()
- 登录mysql并删除空账号,添加管理账号和密码
![image-20191101144041633]()
![image-20191101144055365]()
![image-20191101145902045]()
![image-20191101162530008]()
![image-20191101144131094]()
![image-20191101144347050]()


delete from mysql.user where user='';
update mysql.user set password=password('12345') where user='root';
grant all on *.* to 'root'@'%' identified by '12345';
flush privileges;
quit
- 重启mariadb服务
![image-20191101144534324]()
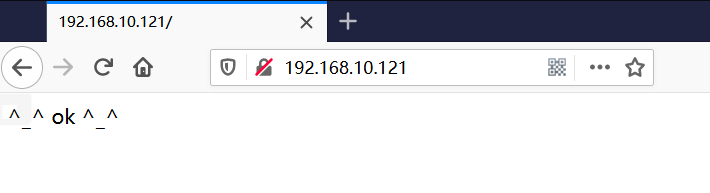
- 修改测试页,测试php与mariadb的连接
![image-20191101144837563]()
![image-20191101150301982]()


<?php
	$link=mysqli_connect('192.168.10.121','root','12345');
	if($link)
		echo "^_^ ok ^_^";
	else
		echo "T_T not ok T_T";
?>
- 客户端测试
![image-20191101145943575]()
使用LAMP部署 discuz
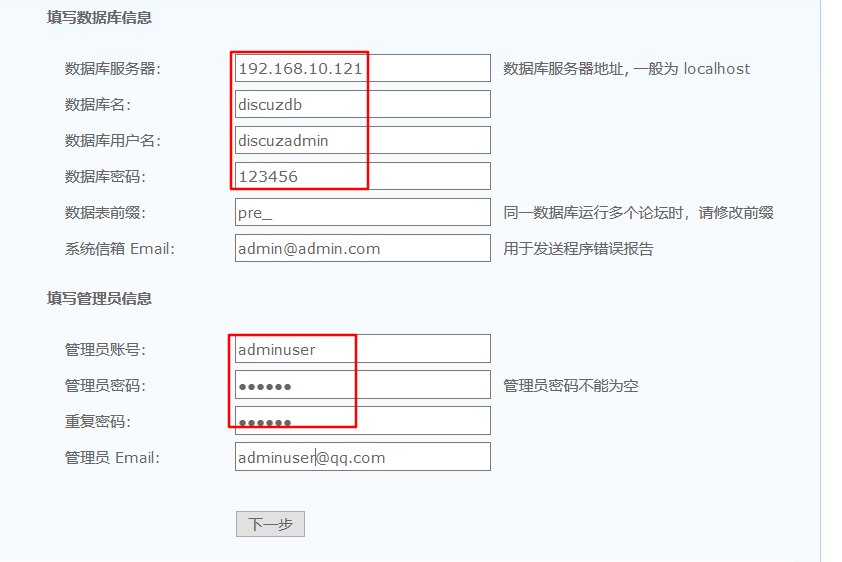
- 创建discuz所使用的数据库并创建管理员,设置密码
![image-20191101150614305]()
![image-20191101150557725]()
![image-20191101150922171]()


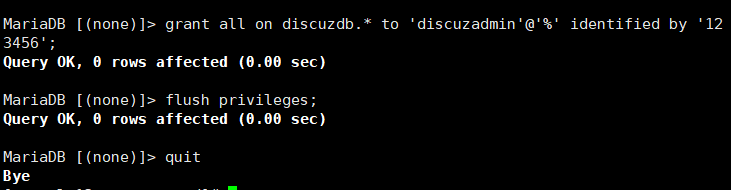
mysql -u root -p
create database discuzdb;
grant all on discuzdb.* to 'discuzadmin'@'%' identified by '123456';
flush privileges;
quit
-
修改php主配置文件开启短格式支持
![image-20191101151142868]()
![image-20191101151246873]()
-
重启htpd服务
![image-20191101151323679]()
-
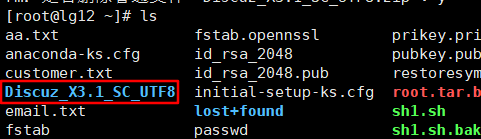
上传至服务器
![image-20191101152357285]()
-
将文件中的upload/复制到/var/www/html/目录下,重命名为discuz
![image-20191101153529077]()
-
修改目录权限
![image-20191101153740600]()
-
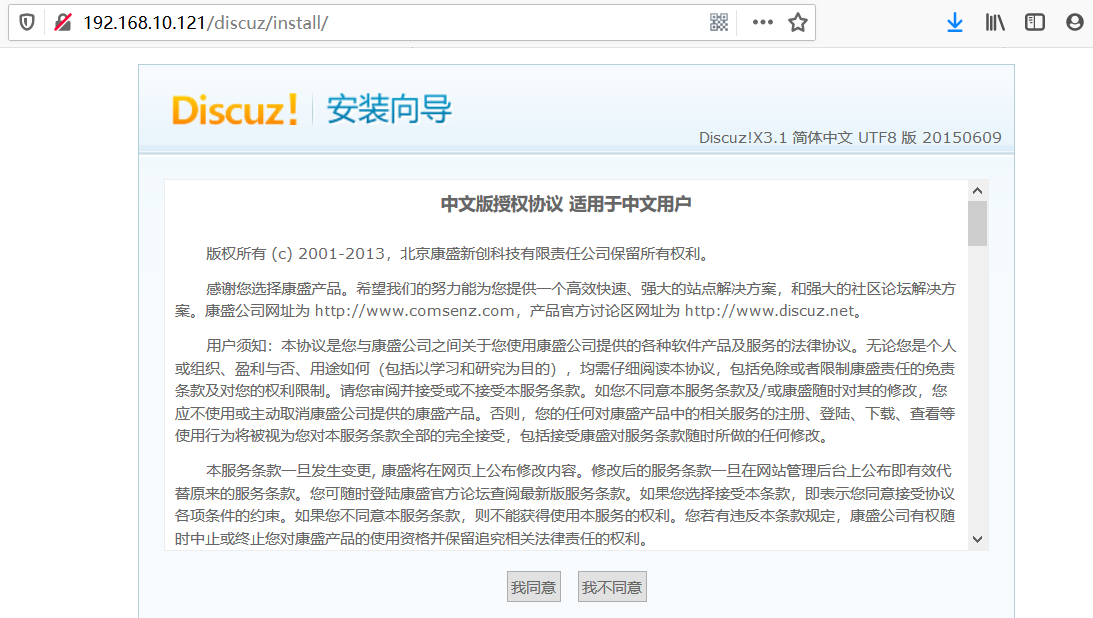
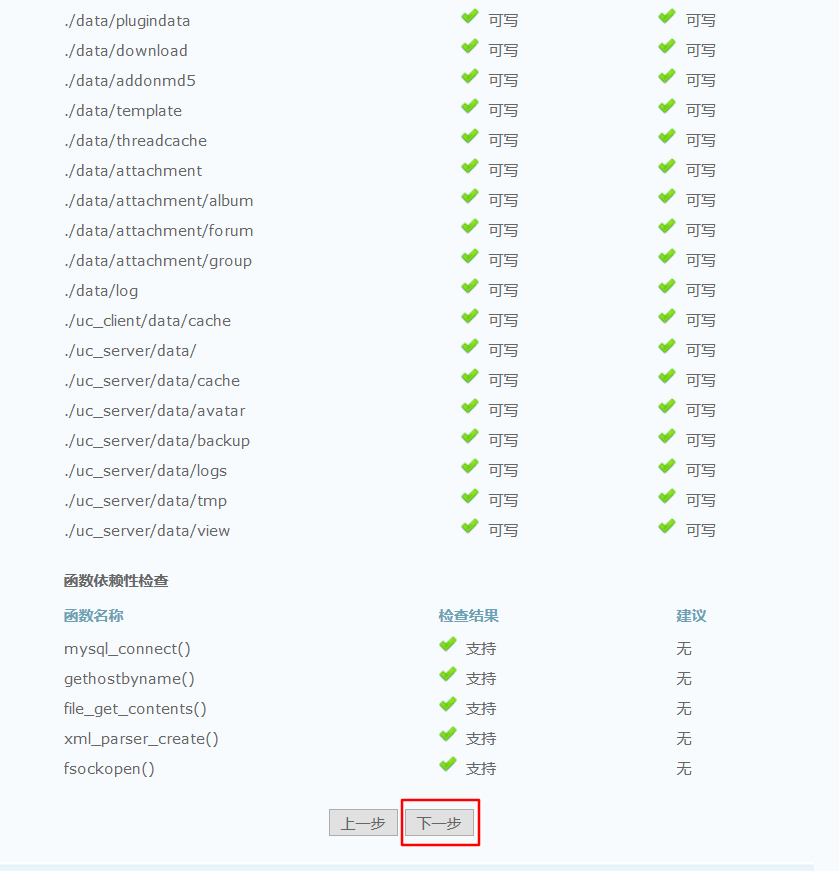
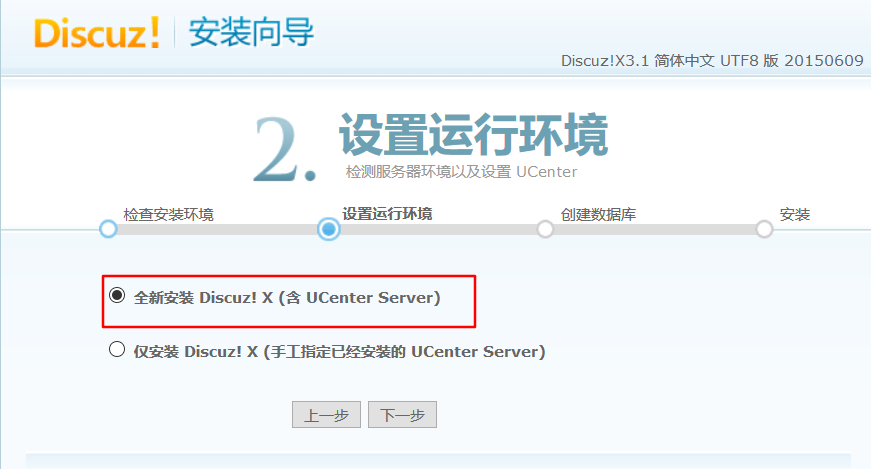
部署
![image-20191101153614797]()
![image-20191101153811072]()
![image-20191101153831391]()
![image-20191101154106169]()
![image-20191101154155469]()
![image-20191101154216359]()
![image-20191101154301704]()
-
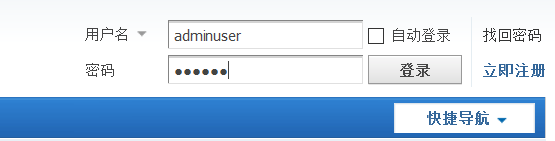
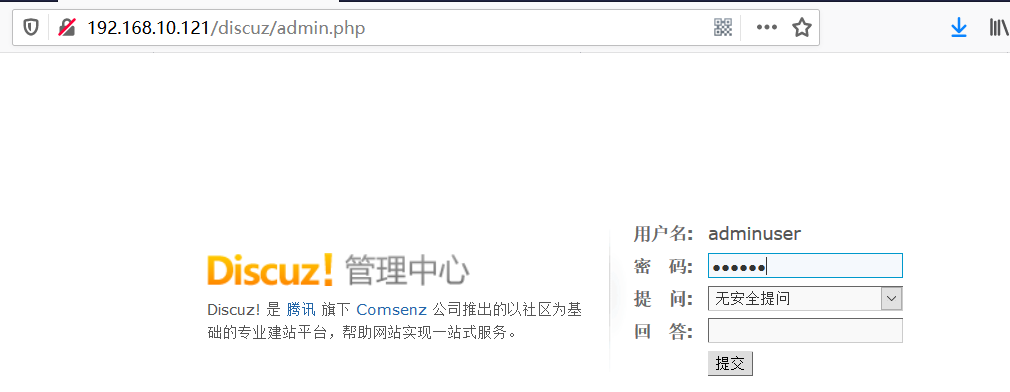
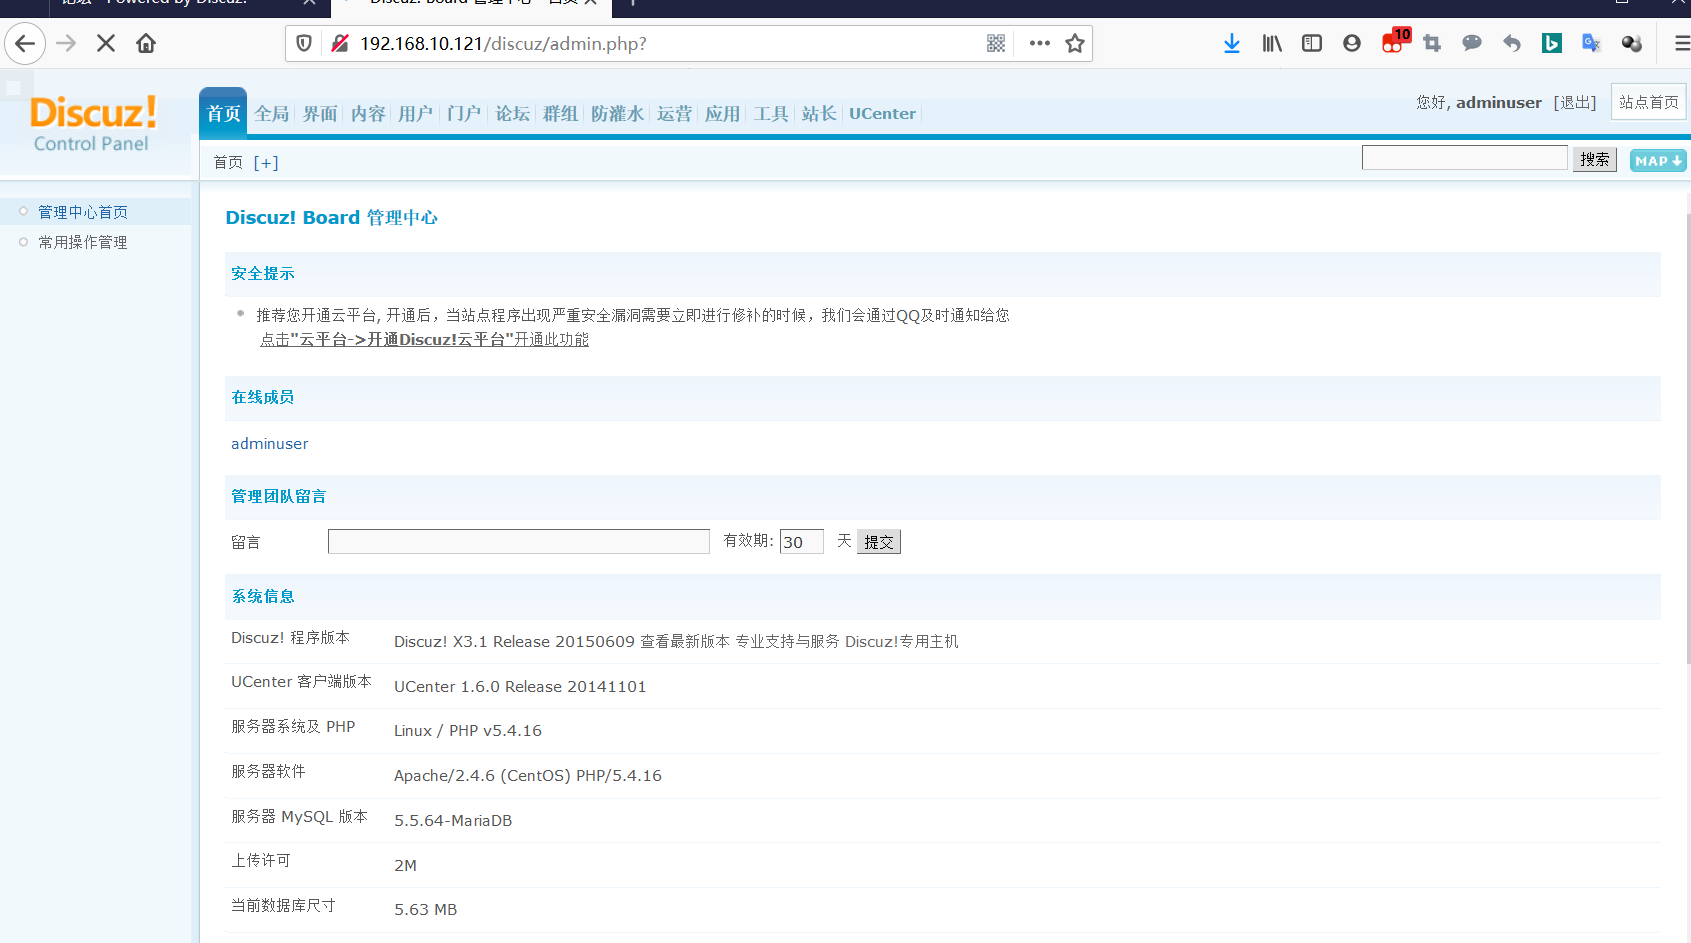
后台管理登录界面
![image-20191101154337837]()
![image-20191101154501943]()
-
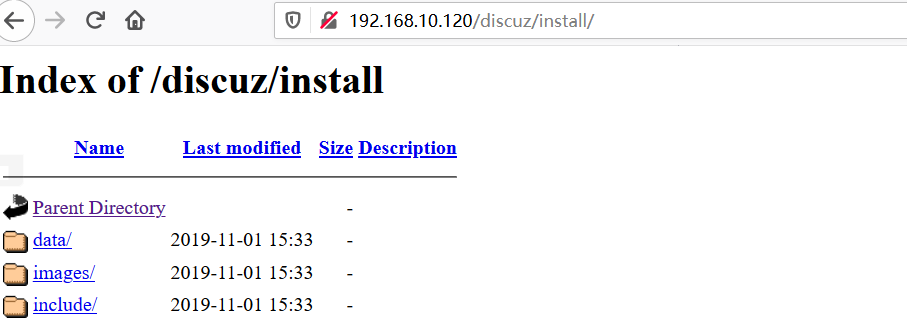
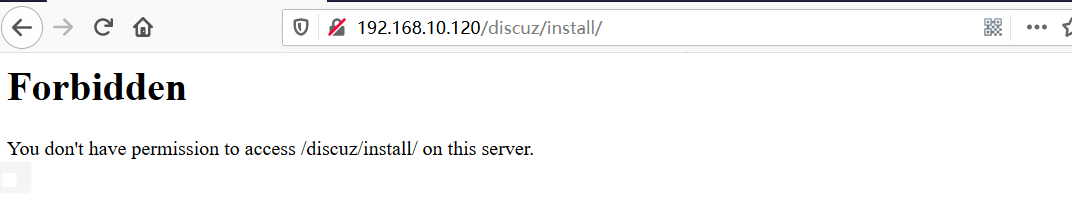
默认下访问/discuz/install能够直接进入该目录下
![image-20191101155107434]()
-
注意修改该目录的权限
![image-20191101155159701]()
![image-20191101155219812]()


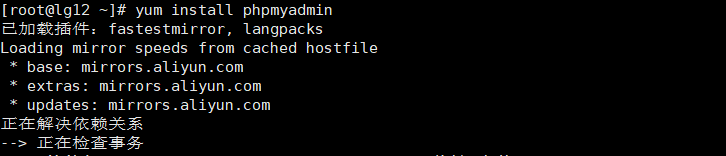
安装phpMyadmin
- 安装软件
![image-20191101154809279]()
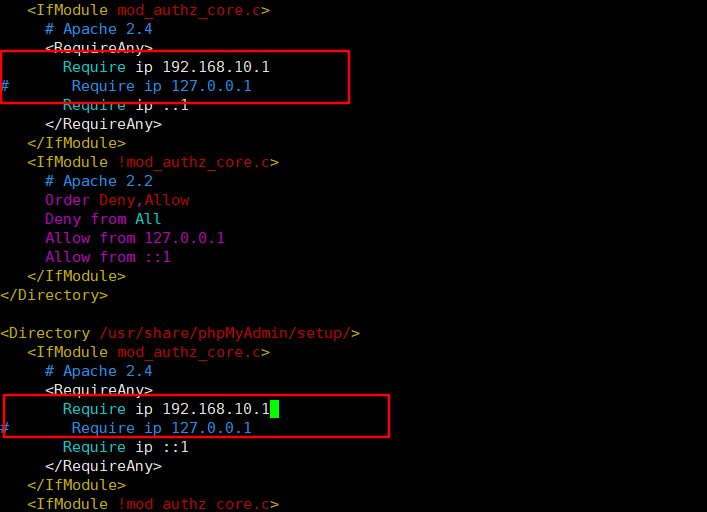
- 修改httpd下phpMyadmin相关配置,允许远端主机访问
![image-20191101155311465]()
![image-20191101155440546]()
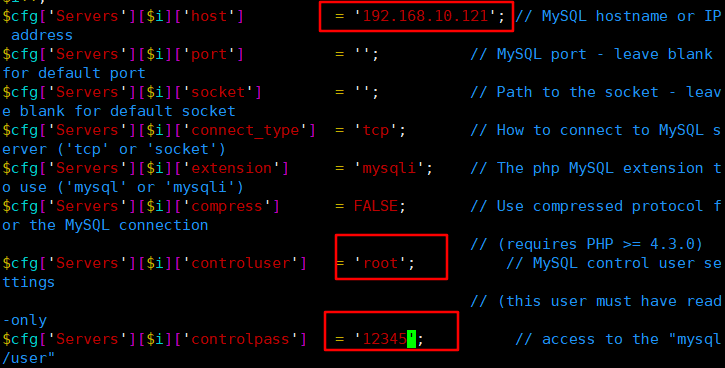
注:apache2.4只需要修改两处Require 即可 apache2.2及以前的版本修改Allow form - 修改phpMyadmin配置
![image-20191101155745881]()
![image-20191101155939903]()
- 重启http服务,使配置生效
![image-20191101160136023]()
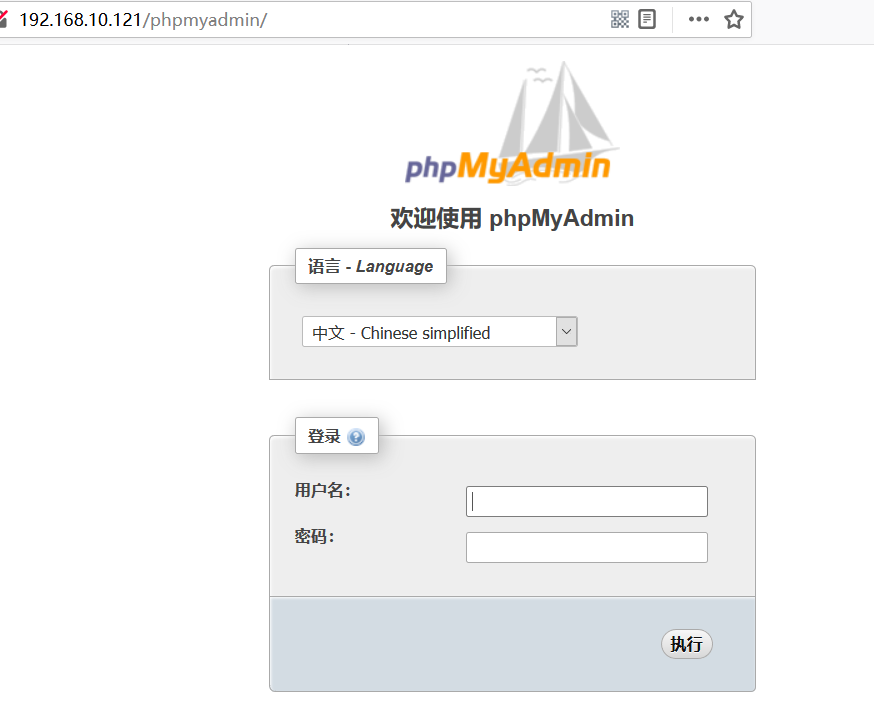
- 访问测试
![image-20191101160259350]()
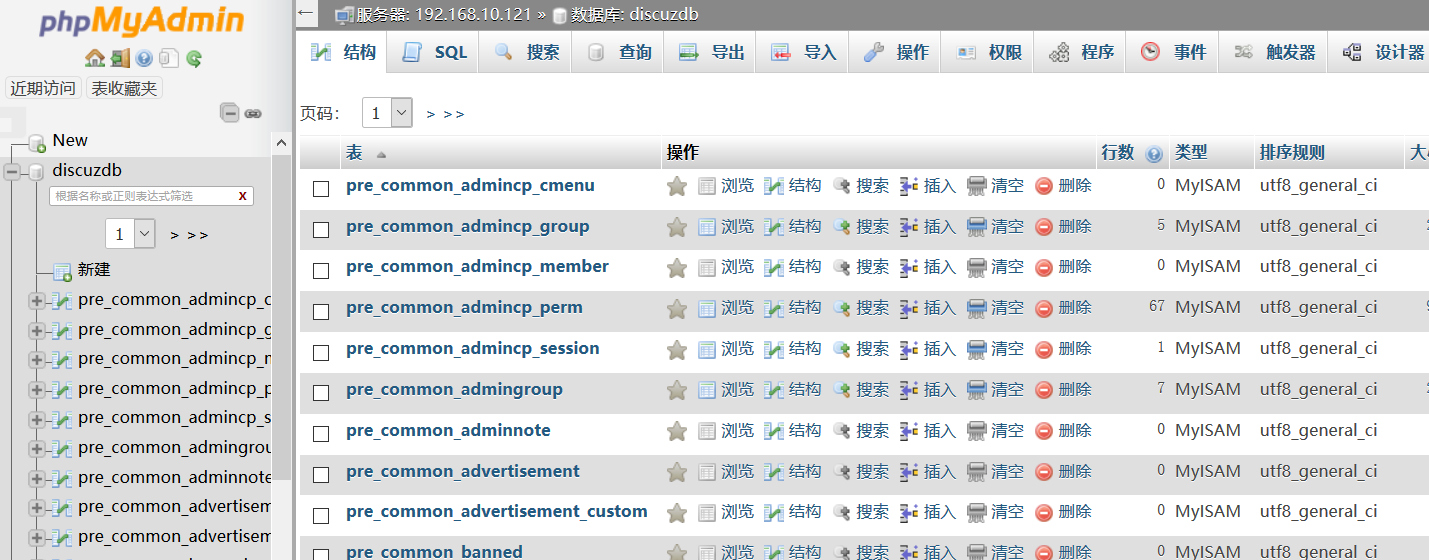
- 输入Mariadb用户名密码登录就可以对数据库进行增删改操作
![image-20191101160414655]()


数据库密码重置
- 修改配置文件跳过密码验证
![image-20191101161440634]()
![image-20191101161427866]()
- 重启服务
![image-20191101161526733]()
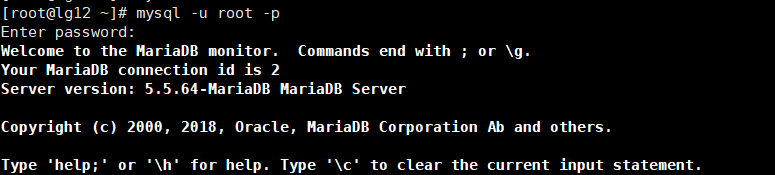
- 以管理员身份进入数据库(密码空或输入任意字符)
![image-20191101161610283]()
- 设置密码
![image-20191101162214500]()


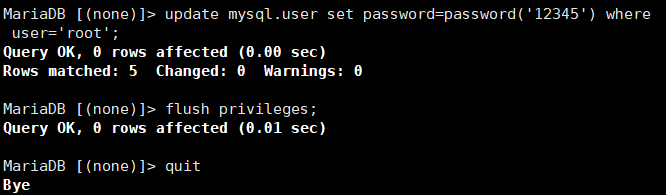
mysql -u root -p
update mysql.user set password=password('12345') where user='root';
flush privileges;
quit
#注:更改密码后记得将配置文件改回并重启

 浙公网安备 33010602011771号