JAVA实用案例之验证码开发
验证码在很多地方都会遇到,实现的方法和形式也有很多,主要的目的就是为了安全,防止一些恶意的攻击等。说实话那么多年竟然没注意过这东西,原理很简单,贴出来给大家做个参考。
1、简单介绍
一般稍微有些经验的程序员都不会再自己写原生验证码生成了,因为各种强大的开源组件,足以解决我们大部分的需求。但是,毕竟也是刚接触这东西,还需要从原理入手的。
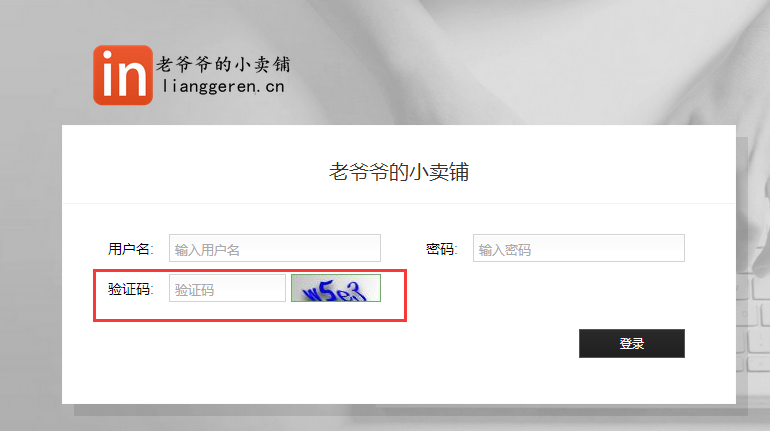
项目效果图:
下面我就简单介绍下原生和使用开源项目kaptcha生成验证码的两种形式。
2、jdk原生生成验证码
效果:

2.1 验证码生成的流程
1、定义BufferedImage(图像数据缓冲区)对象
2、获得Graphics对象
3、随机生成验证码字母或者数字
4、使用Graphics绘制图片
5、记录验证码信息到session或数据库,以便校验
5、ImageIO输出图片到客户端
2.2 代码讲解
这里我就不整合框架了,简单用servlet讲下步骤,框架中也是这样做
public void doGet(HttpServletRequest request, HttpServletResponse response) throws IOException{
        //定义BufferedImage(图像数据缓冲区)对象
        BufferedImage bi = new BufferedImage(68,22,BufferedImage.TYPE_INT_RGB);
        //绘制图片
        Graphics g = bi.getGraphics();
        //背景色
        Color c = new Color(200,150,255);
        g.setColor(c);
        //图片坐标
        g.fillRect(0, 0, 68, 22);
        //验证码选取
        char[] ch = "ABCDEFGHIJKLMNOPQRSTUVWXYZ0123456789".toCharArray();
        Random r = new Random();
        int len=ch.length,index;
        StringBuffer sb = new StringBuffer();
        for(int i=0; i<4; i++){
            index = r.nextInt(len);
            g.setColor(new Color(r.nextInt(88),r.nextInt(188),r.nextInt(255)));
            Font ft = new Font(Font.SANS_SERIF, Font.BOLD, 16);
            g.setFont(ft);
            g.drawString(ch[index]+"", (i*15)+3, 18);
            sb.append(ch[index]);
        }
        //打印验证码,项目中用日志
        System.out.println(sb.toString());
     //验证码写到session
        request.getSession().setAttribute("checkCode", sb.toString());
        //ImageIO写出图片
        ImageIO.write(bi, "JPG", response.getOutputStream());
    }
jsp:
 <form action="XX" method="get">
    验证码:<input type="text" name="checkcode"/>
    <img alt="点击更换验证码" id="imagecode" onclick="this.src='/servlet/ImageServlet?random='+Math.random();" src="/servlet/ImageServlet"/>
    <input type="submit" value="提交">
  </form>
相信稍微有些经验的同学看过上面的代码都能理解其中的原理吧。至于后面的校验相信大家都会的。
下面我重点讲下使用kaptcha开源组件生成验证码的流程,这里我会用servlet和springboot+springmvc的方式分别进行下介绍。
3、使用kaptcha组件生成验证码
既然说到开源组件,必然功能是强大的,还是先看效果图!
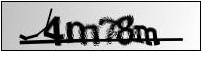
数字字母组合
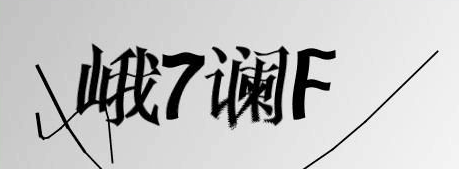
数字字母汉字组合
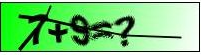
算数计算
3.1 kaptcha的参数详解
| Constant | 描述 | 默认值 |
| kaptcha.border | 图片边框,合法值:yes , no | yes |
| kaptcha.border.color | 边框颜色,合法值: r,g,b (and optional alpha) 或者 white,black,blue. | black |
| kaptcha.border.thickness | 边框厚度,合法值:>0 | 1 |
| kaptcha.image.width | 图片宽 | 200 |
| kaptcha.image.height | 图片高 | 50 |
| kaptcha.producer.impl | 图片实现类 | com.google.code.kaptcha.impl.DefaultKaptcha |
| kaptcha.textproducer.impl | 文本实现类 | com.google.code.kaptcha.text.impl.DefaultTextCreator |
| kaptcha.textproducer.char.string | 文本集合,验证码值从此集合中获取 | abcde2345678gfynmnpwx |
| kaptcha.textproducer.char.length | 验证码长度 | 5 |
| kaptcha.textproducer.font.names | 字体 | Arial, Courier |
| kaptcha.textproducer.font.size | 字体大小 | 40px |
| kaptcha.textproducer.font.color | 字体颜色,合法值: r,g,b 或者 white,black,blue. | black |
| kaptcha.textproducer.char.space | 文字间隔 | 2 |
| kaptcha.noise.impl | 干扰实现类 | com.google.code.kaptcha.impl.DefaultNoise |
| kaptcha.noise.color | 干扰颜色,合法值: r,g,b 或者 white,black,blue. | black |
| kaptcha.obscurificator.impl | 图片样式: 水纹com.google.code.kaptcha.impl.WaterRipple 鱼眼com.google.code.kaptcha.impl.FishEyeGimpy 阴影com.google.code.kaptcha.impl.ShadowGimpy |
com.google.code.kaptcha.impl.WaterRipple |
| kaptcha.background.impl | 背景实现类 | com.google.code.kaptcha.impl.DefaultBackground |
| kaptcha.background.clear.from | 背景颜色渐变,开始颜色 | light grey |
| kaptcha.background.clear.to | 背景颜色渐变,结束颜色 | white |
| kaptcha.word.impl | 文字渲染器 | com.google.code.kaptcha.text.impl.DefaultWordRenderer |
| kaptcha.session.key | session key | KAPTCHA_SESSION_KEY |
| kaptcha.session.date | session date | KAPTCHA_SESSION_DATE |
3.2 代码讲解
1、servlet方式

上图可以看到,kaptcha处理验证码的类是KaptchaServlet。这里我们就可以像原生的方式一样直接请求这个servlet,这里主要讲下使用servlet和使用框架的时候参数配置是不用的,servlet的是配置在web.xml中的,形式如下:
<?xml version="1.0" encoding="UTF-8"?>
<web-app version="2.4" xmlns="http://java.sun.com/xml/ns/j2ee"
    xmlns:xsi="http://www.w3.org/2001/XMLSchema-instance"
    xsi:schemaLocation="http://java.sun.com/xml/ns/j2ee
    http://java.sun.com/xml/ns/j2ee/web-app_2_4.xsd">


    <!-- 登陆验证码Kaptcha 2-->
    <servlet>
        <servlet-name>Kaptcha</servlet-name>
        <servlet-class>
            com.google.code.kaptcha.servlet.KaptchaServlet
        </servlet-class>
        <init-param>
            <description>图片边框,合法值:yes , no</description>
            <param-name>kaptcha.border</param-name>
            <param-value>yes</param-value>
        </init-param>
        <init-param>
            <description>
                边框颜色,合法值: r,g,b (and optional alpha) 或者
                white,black,blue.
            </description>
            <param-name>kaptcha.border.color</param-name>
            <param-value>black</param-value>
        </init-param>
        <init-param>
            <description>边框厚度,合法值:>0</description>
            <param-name>kaptcha.border.thickness</param-name>
            <param-value>1</param-value>
        </init-param>
        <init-param>
            <description>图片宽 200</description>
            <param-name>kaptcha.image.width</param-name>
            <param-value>200</param-value>
        </init-param>
        <init-param>
            <description>图片高 50</description>
            <param-name>kaptcha.image.height</param-name>
            <param-value>50</param-value>
        </init-param>
        <init-param>
            <description>图片实现类</description>
            <param-name>kaptcha.producer.impl</param-name>
            <param-value>
                com.google.code.kaptcha.impl.DefaultKaptcha
            </param-value>
        </init-param>
        <init-param>
            <description>文本实现类</description>
            <param-name>kaptcha.textproducer.impl</param-name>
            <param-value>
                com.google.code.kaptcha.text.impl.DefaultTextCreator
            </param-value>
        </init-param>
        <init-param>
            <description>验证码长度 5</description>
            <param-name>kaptcha.textproducer.char.length</param-name>
            <param-value>5</param-value>
        </init-param>
        <init-param>
            <description>字体 Arial, Courier</description>
            <param-name>kaptcha.textproducer.font.names</param-name>
            <param-value>Arial, Courier</param-value>
        </init-param>
        <init-param>
            <description>字体大小 40px.</description>
            <param-name>kaptcha.textproducer.font.size</param-name>
            <param-value>40</param-value>
        </init-param>
        <init-param>
            <description>
                字体颜色,合法值: r,g,b 或者 white,black,blue.
            </description>
            <param-name>kaptcha.textproducer.font.color</param-name>
            <param-value>black</param-value>
        </init-param>
        <init-param>
            <description>文字间隔 2</description>
            <param-name>kaptcha.textproducer.char.space</param-name>
            <param-value>2</param-value>
        </init-param>
        <init-param>
            <description>干扰实现类</description>
            <param-name>kaptcha.noise.impl</param-name>
            <param-value>
                com.google.code.kaptcha.impl.DefaultNoise
            </param-value>
        </init-param>
        <init-param>
            <description>
                干扰颜色,合法值: r,g,b 或者 white,black,blue.
            </description>
            <param-name>kaptcha.noise.color</param-name>
            <param-value>black</param-value>
        </init-param>
        <init-param>
            <description>
                图片样式: 水纹com.google.code.kaptcha.impl.WaterRipple
                鱼眼com.google.code.kaptcha.impl.FishEyeGimpy
                阴影com.google.code.kaptcha.impl.ShadowGimpy
            </description>
            <param-name>kaptcha.obscurificator.impl</param-name>
            <param-value>
                com.google.code.kaptcha.impl.WaterRipple
            </param-value>
        </init-param>
        <init-param>
            <description>背景实现类</description>
            <param-name>kaptcha.background.impl</param-name>
            <param-value>
                com.google.code.kaptcha.impl.DefaultBackground
            </param-value>
        </init-param>
        <init-param>
            <description>背景颜色渐变,开始颜色</description>
            <param-name>kaptcha.background.clear.from</param-name>
            <param-value>green</param-value>
        </init-param>
        <init-param>
            <description>背景颜色渐变,结束颜色</description>
            <param-name>kaptcha.background.clear.to</param-name>
            <param-value>white</param-value>
        </init-param>
        <init-param>
            <description>文字渲染器</description>
            <param-name>kaptcha.word.impl</param-name>
            <param-value>
                com.google.code.kaptcha.text.impl.DefaultWordRenderer
            </param-value>
        </init-param>
        <init-param>
            <description>
                session中存放验证码的key键
            </description>
            <param-name>kaptcha.session.key</param-name>
            <param-value>KAPTCHA_SESSION_KEY</param-value>
        </init-param>
        <init-param>
            <description>
                The date the kaptcha is generated is put into the
                HttpSession. This is the key value for that item in the
                session.
            </description>
            <param-name>kaptcha.session.date</param-name>
            <param-value>KAPTCHA_SESSION_DATE</param-value>
        </init-param>
    </servlet>
    <servlet-mapping>
        <servlet-name>Kaptcha</servlet-name>
        <url-pattern>/randomcode.jpg</url-pattern>
    </servlet-mapping>

    <welcome-file-list>
        <welcome-file>index.jsp</welcome-file>
    </welcome-file-list>
</web-app>
2、使用springboot+springmvc框架
这里新建一个maven项目,添加依赖
<dependency>
    <groupId>com.github.penggle</groupId>
    <artifactId>kaptcha</artifactId>
    <version>2.3.2</version>
</dependency>
controller:
@Controller
public class UserController {
    @Autowired
    private Producer captchaProducer;

    @RequestMapping("/ran/random")
    public void checkCode(HttpServletRequest request,HttpServletResponse response) throws IOException{
        byte[] captchaChallengeAsJpeg = null;
        ByteArrayOutputStream jpegOutputStream = new ByteArrayOutputStream();
        try {
            //生产验证码字符串并保存到session中
            String createText = captchaProducer.createText();
            request.getSession().setAttribute("checkCode", createText);
            //使用生产的验证码字符串返回一个BufferedImage对象并转为byte写入到byte数组中
            BufferedImage challenge = captchaProducer.createImage(createText);
            ImageIO.write(challenge, "jpg", jpegOutputStream);
        } catch (IllegalArgumentException e) {
            response.sendError(response.SC_NOT_FOUND);
            return;
        }

        //定义response输出类型为image/jpeg类型,使用response输出流输出图片的byte数组
        captchaChallengeAsJpeg = jpegOutputStream.toByteArray();
        response.setHeader("Cache-Control", "no-store");
        response.setHeader("Pragma", "no-cache");
        response.setDateHeader("Expires", 0);
        response.setContentType("image/jpeg");
        ServletOutputStream responseOutputStream =
                response.getOutputStream();
        responseOutputStream.write(captchaChallengeAsJpeg);
        responseOutputStream.flush();
        responseOutputStream.close();
    }
}
配置类CaptchaConfig:
这里@value是为了将相关属性写进application.properties,避免硬编码,为了方便测试我先注掉
package com.allan.base;

import java.util.Properties;

import org.springframework.beans.factory.annotation.Value;
import org.springframework.context.annotation.Bean;
import org.springframework.context.annotation.Configuration;

import com.google.code.kaptcha.impl.DefaultKaptcha;
import com.google.code.kaptcha.util.Config;
/**
 * 验证码配置类
 * @author zhangzhuo
 *
 */
@Configuration
public class CaptchaConfig {
    @Value("${kaptcha.border}")
    private  String  border;
    @Value("${kaptcha.border.color}")
    private  String  borderColor;
    @Value("${kaptcha.textproducer.font.color}")
    private  String  fontColor;
    @Value("${kaptcha.image.width}")
    private  String  imageWidth;
    @Value("${kaptcha.image.height}")
    private  String  imageHeight;
    @Value("${kaptcha.session.key}")
    private  String  sessionKey;
    @Value("${kaptcha.textproducer.char.length}")
    private  String  charLength;
    @Value("${kaptcha.textproducer.font.names}")
    private  String  fontNames;

    @Bean(name="captchaProducer")
    public DefaultKaptcha getKaptchaBean(){
        DefaultKaptcha defaultKaptcha=new DefaultKaptcha();
        Properties properties=new Properties();
      /*  properties.setProperty("kaptcha.border", border);
        properties.setProperty("kaptcha.border.color", borderColor);
        properties.setProperty("kaptcha.textproducer.font.color", fontColor);
        properties.setProperty("kaptcha.image.width", imageWidth);
        properties.setProperty("kaptcha.image.height", imageHeight);
        properties.setProperty("kaptcha.session.key", sessionKey);
        properties.setProperty("kaptcha.textproducer.char.length", charLength);
        properties.setProperty("kaptcha.textproducer.font.names", fontNames);
        properties.setProperty("kaptcha.textproducer.font.size", "30"); */
        properties.setProperty("kaptcha.border", "yes");
        properties.setProperty("kaptcha.border.color", "105,179,90");
        properties.setProperty("kaptcha.textproducer.font.color", "blue");
        properties.setProperty("kaptcha.image.width", "90");
        properties.setProperty("kaptcha.image.height", "28");
        properties.setProperty("kaptcha.textproducer.font.size", "28");
        properties.setProperty("kaptcha.session.key", "code");
        properties.setProperty("kaptcha.textproducer.char.length", "4");
        properties.setProperty("kaptcha.textproducer.char.space", "2");
        properties.setProperty("kaptcha.obscurificator.impl", "com.google.code.kaptcha.impl.ShadowGimpy");
        properties.setProperty("kaptcha.noise.impl", "com.google.code.kaptcha.impl.NoNoise");
        properties.setProperty("kaptcha.textproducer.font.names", "宋体,楷体,微软雅黑");
        Config config=new Config(properties);
        defaultKaptcha.setConfig(config);
        return defaultKaptcha;
    }
}
启动类:
package com.allan.server;

import org.mybatis.spring.annotation.MapperScan;
import org.springframework.boot.SpringApplication;
import org.springframework.boot.autoconfigure.EnableAutoConfiguration;
import org.springframework.context.annotation.ComponentScan;
@EnableAutoConfiguration
@ComponentScan(basePackages = {"com.allan.controller","com.allan.service","com.allan.base"})
@MapperScan(basePackages = "com.allan.mapper")
public class StartApp {
    public static void main(String[] args) {
        SpringApplication.run(StartApp.class, args);
    }
}
jsp:
<p class="main">
      <label>验证码: </label> <input name="randomCode"
               onkeyup="enterSubmit(event)" placeholder="验证码"
                style="width: 105px;" maxlength="4" /> <span class="yzm-pic">
      <img src="/ran/random" alt="验证码,点击图片更换"
                            onclick="this.src='/ran/random?random='+Math.random();" />
                        </span>
</p>
最终的效果图:
最后说下springboot除了上面写代码的形式还可以写成下面的配置文件:
可以定义applicationcontext-check.xml
<?xml version="1.0" encoding="UTF-8"?>
<beans xmlns="http://www.springframework.org/schema/beans"
    xmlns:xsi="http://www.w3.org/2001/XMLSchema-instance"
    xsi:schemaLocation="http://www.springframework.org/schema/beans http://www.springframework.org/schema/beans/spring-beans.xsd">
    <bean id="captchaProducer" class="com.google.code.kaptcha.impl.DefaultKaptcha">
        <property name="config">
            <bean class="com.google.code.kaptcha.util.Config">
                <constructor-arg type="java.util.Properties">
                    <props>
                        <prop key = "kaptcha.border ">yes</prop>
                            <prop key="kaptcha.border.color">105,179,90</prop>
                            <prop key="kaptcha.textproducer.font.color">blue</prop>
                            <prop key="kaptcha.image.width">100</prop>
                            <prop key="kaptcha.image.height">50</prop>
                            <prop key="kaptcha.textproducer.font.size">27</prop>
                            <prop key="kaptcha.session.key">code</prop>
                            <prop key="kaptcha.textproducer.char.length">4</prop>
                            <prop key="kaptcha.textproducer.font.names">宋体,楷体,微软雅黑</prop>
                            <prop key="kaptcha.textproducer.char.string">0123456789ABCEFGHIJKLMNOPQRSTUVWXYZ</prop>
                            <prop key="kaptcha.obscurificator.impl">com.google.code.kaptcha.impl.WaterRipple</prop>
                            <prop key="kaptcha.noise.color">black</prop>
                            <prop key="kaptcha.noise.impl">com.google.code.kaptcha.impl.DefaultNoise</prop>
                            <prop key="kaptcha.background.clear.from">185,56,213</prop>
                            <prop key="kaptcha.background.clear.to">white</prop>
                            <prop key="kaptcha.textproducer.char.space">3</prop>
                    </props>
                </constructor-arg>
            </bean>
        </property>
    </bean>

</beans>
如果写配置文件,这边在启动的时候需要引入配置文件
@ImportResource(locations={"classpath:applicationcontext-check.xml"})
基本上就是这些,至于汉字组合或者计算形式的验证码,这边我们只要实现kaptcha.textproducer.impl和com.google.code.kaptcha.servlet.KaptchaServlet这两个类就行了,大家可以看下源码,很简单的。
最后的最后,如果有对于springboot不熟悉的同学可以看下我整理的这些文章,相信会有些帮助的http://www.cnblogs.com/allanzhang/category/1000281.html
jdk版源码:https://git.oschina.net/allanzhang/checkcode.git
❤本博客只适用于研究学习为目的,大多为学习笔记,如有错误欢迎指正,如有误导敬请谅解(本人尽力保证90%的验证和10%的猜想)。
❤如果这篇文章对你有一点点的帮助请给一份推荐! 谢谢!你们的鼓励是我继续前进的动力。

 浙公网安备 33010602011771号