

JProfiler远程监控
1、 服务端安装JProfiler(与客户端版本一致)
2、 客户端配置连接:
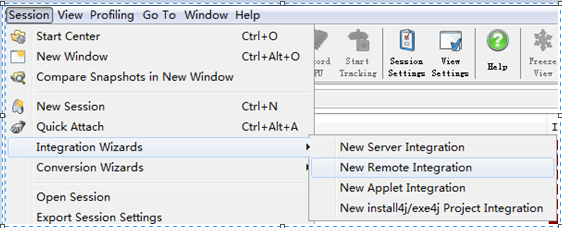
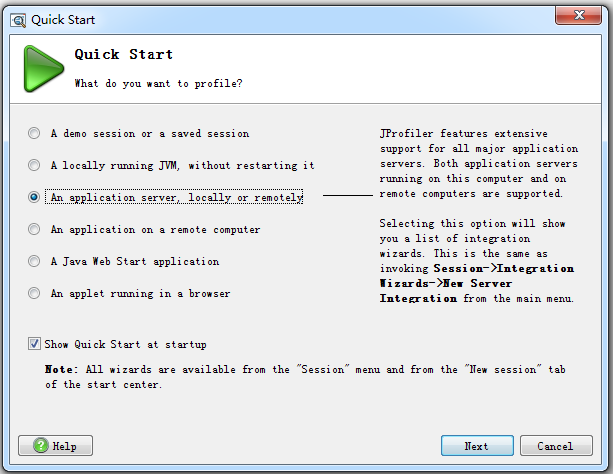
A)、session——integration wizards——New remote integration
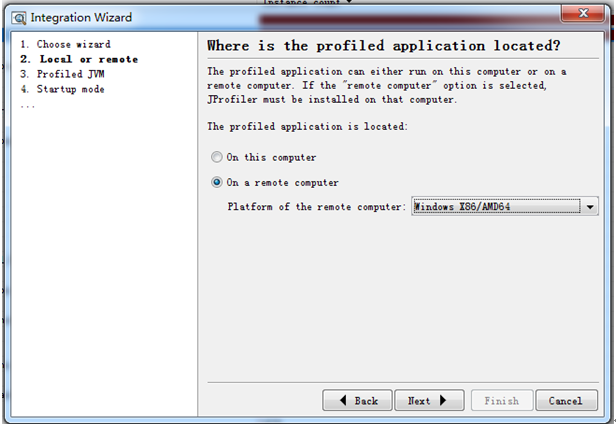
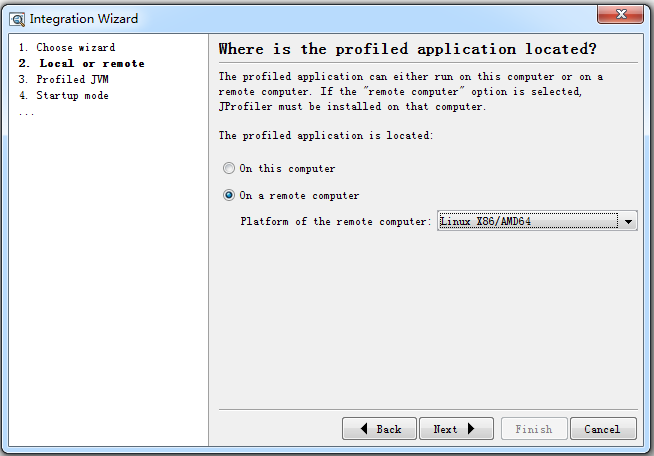
B)、选择远程监控的平台windows,点击next
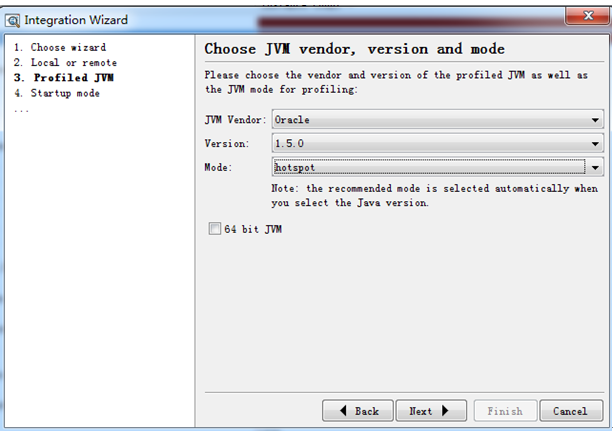
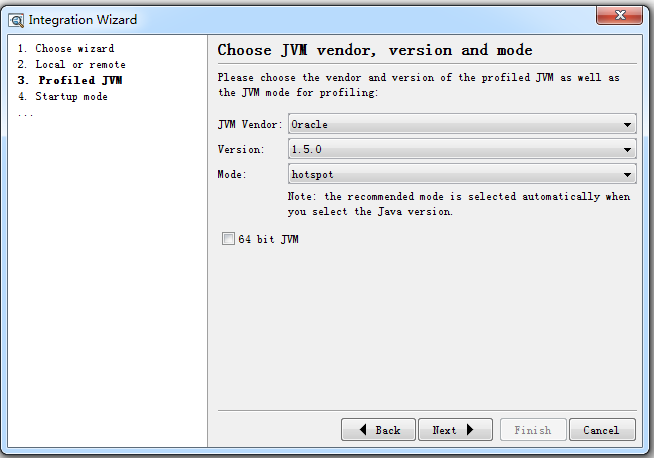
C)、选择jdk版本,如果服务器是64位的jdk则勾上64 bit jvm,点击next
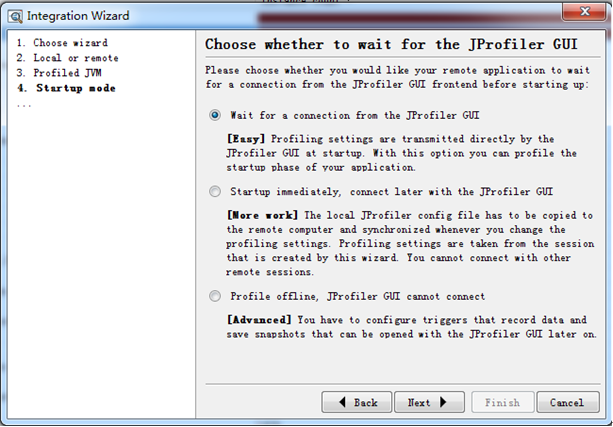
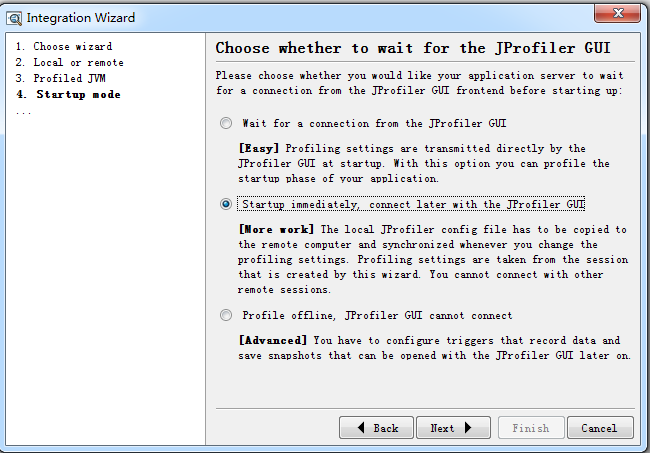
D)、选择等待连接,点击next
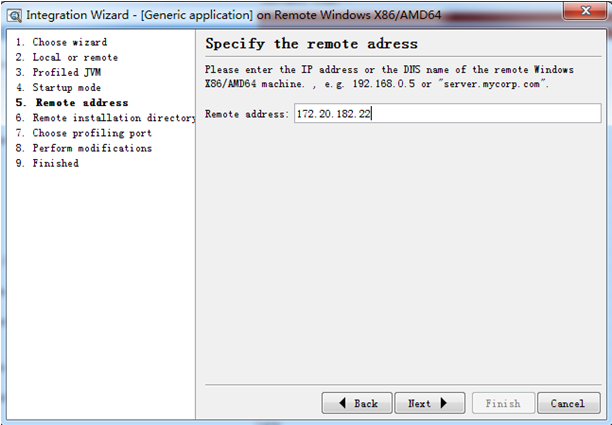
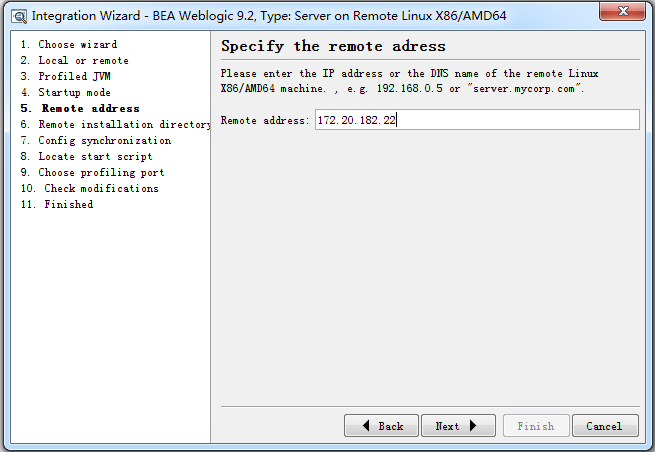
E)、输入服务端ip地址,点击next
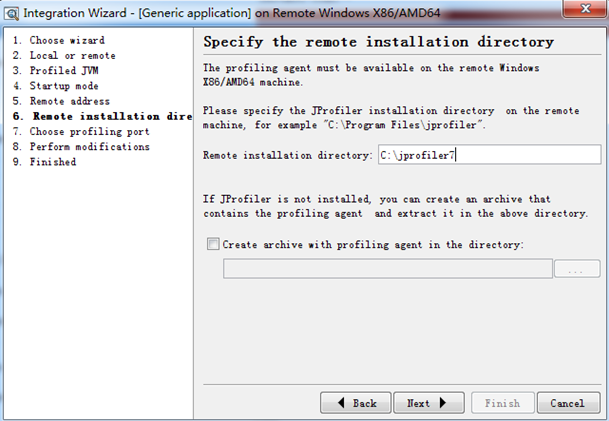
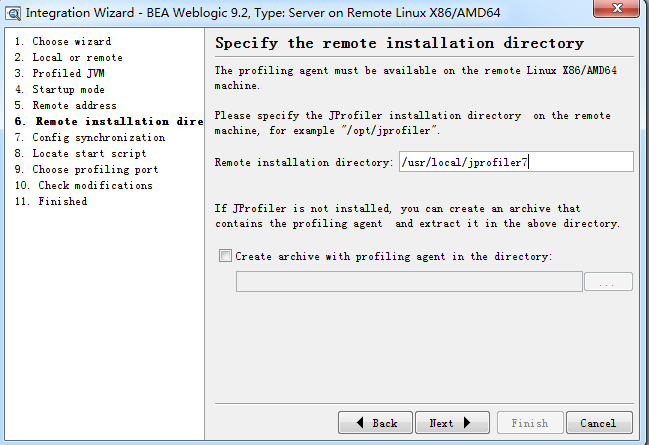
F)、输入服务端机器上的jprofiler的安装路径,点击next
G)、端口默认8849,点击next
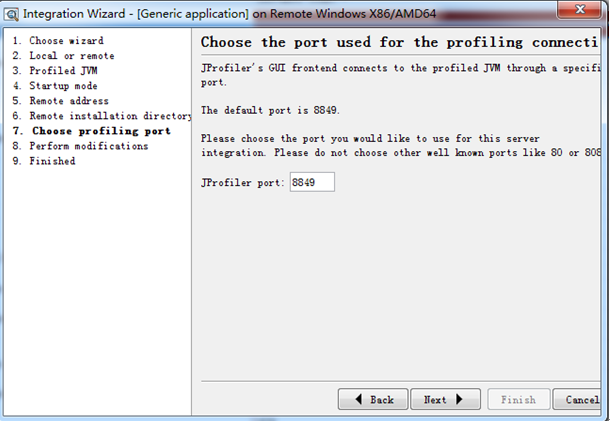
H)、提示需要在服务端插入下面的启动命令:-agentpath:C:\jprofiler7\bin\windows\jprofilerti.dll=port=8849
客户端配置完成

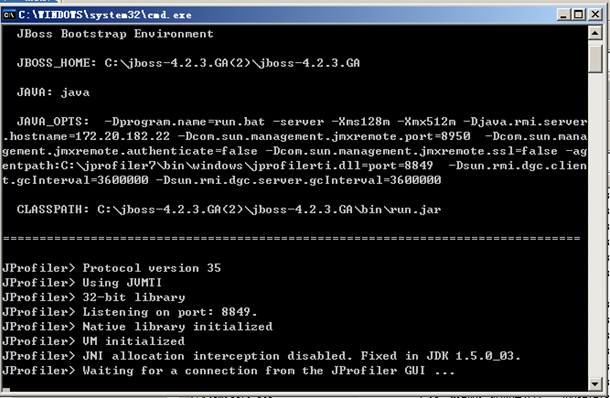
3、 服务端,在C:\jboss-4.2.3.GA(2)\jboss-4.2.3.GA\bin下面编辑run.bat
加入下面的启动项-agentpath:C:\jprofiler7\bin\windows\jprofilerti.dll=port=8849
如set JAVA_OPTS=%JAVA_OPTS% -Xms128m -Xmx512m -agentpath:C:\jprofiler7\bin\windows\jprofilerti.dll=port=8849
启动jboss,看到waiting for a connection from the JProfiler GUI… 就可以了
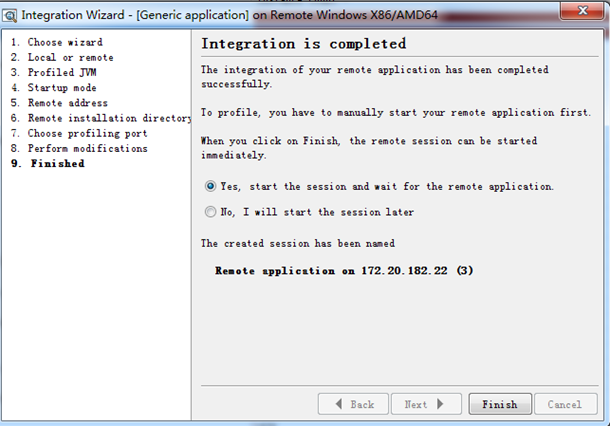
4、 配置好服务端后,继续点击客户端的next,然后再点击finish,连接即可
注:
A)、如果是tomcat则在编辑C:\my\apache-tomcat-6.0.14\apache-tomcat-6.0.14\bin下面catalina.bat
如set JAVA_OPTS=%JAVA_OPTS% -Djava.util.logging.manager=org.apache.juli.ClassLoaderLogManager -Djava.util.logging.config.file="%CATALINA_BASE%\conf\logging.properties" -agentpath:C:\my\jprofiler_windows_7_1_2\jprofiler7\bin\windows\jprofilerti.dll=port=8849
B)、如果是weblogic则编辑C:\bea\weblogic92\samples\domains\workshop\bin下面的setDomainEnv.cmd
如:
set JAVA_OPTIONS=%JAVA_OPTIONS% %JAVA_PROPERTIES% -Dwlw.iterativeDev=%iterativeDevFlag% -Dwlw.testConsole=%testConsoleFlag% -Dwlw.logErrorsToConsole=%logErrorsToConsoleFlag% -agentpath:C:\jprofiler7\bin\windows\jprofilerti.dll=port=8849
C)、如果是Linux中的tomcat,则编辑/usr/local/apache-tomcat-6.0.35/bin下面的catalina.sh文件,在java_opts后面加上
-agentpath:/usr/local/jprofiler7/bin/linux-x86/libjprofilerti.so=port=8849"
(注意-agent参数要加载“之内)
如:
if [ -z "$LOGGING_MANAGER" ]; then
JAVA_OPTS="$JAVA_OPTS -Djava.util.logging.manager=org.apache.juli.ClassLoaderLogManager -agentpath:/usr/local/jprofiler7/bin/linux-x86/libjprofilerti.so=port=8849"
else
JAVA_OPTS="$JAVA_OPTS $LOGGING_MANAGER -agentpath:/usr/local/jprofiler7/bin/linux-x86/libjprofilerti.so=port=8849"
D)、如果是linux中的jboss,则编辑/usr/local/jboss-4.2.3.GA/bin下面的run.sh文件,在java_opts后面加上
-agentpath:/usr/local/jprofiler7/bin/linux-x86/libjprofilerti.so=port=8849
(注意-agent参数要加载“之内)
如:
if [ "$linux" = "true" ]; then
JAVA_OPTS="$JAVA_OPTS -Djava.NET.preferIPv4Stack=true -agentpath:/usr/local/jprofiler7/bin/linux-x86/libjprofilerti.so=port=8849"
Fi
E)、如果是linux中的weblogic,则编辑/home/weblogic/user_projects/domains/Test/bin下面的setDomainEnv.sh
如:
JAVA_OPTIONS="${JAVA_OPTIONS} ${JAVA_PROPERTIES} -Dwlw.iterativeDev=${iterativeDevFlag} -Dwlw.testConsole=${testConsoleFlag} -Dwlw.logErrorsToConsole=${logErrorsToConsoleFlag} -agentpath:/usr/local/jprofiler7/bin/linux-x86/libjprofilerti.so=port=8849"
export JAVA_OPTIONS
----------------------------------------------------------------------------------------------------------------------------------------------------------------------------------------------------------------------------------
另一种方式(方便的操作linux+weblogic)
1、 客户端连接配置:
A)、session——new window,选择an application server,locally or remotely,点击next
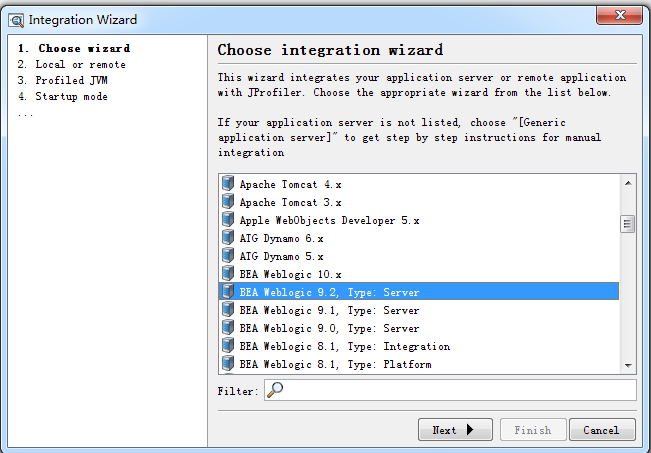
B)、选择监控的服务器(weblogic9.2),点击next
C)、选择远程监控机器平台
D)、选择jdk版本
E)、选择立即启动,随时可以连接jprofiler,(即手动启动服务后,随时jprofiler可以连接)
F)、输入远程ip地址
G)、输入远程机器上的jprofiler的路径
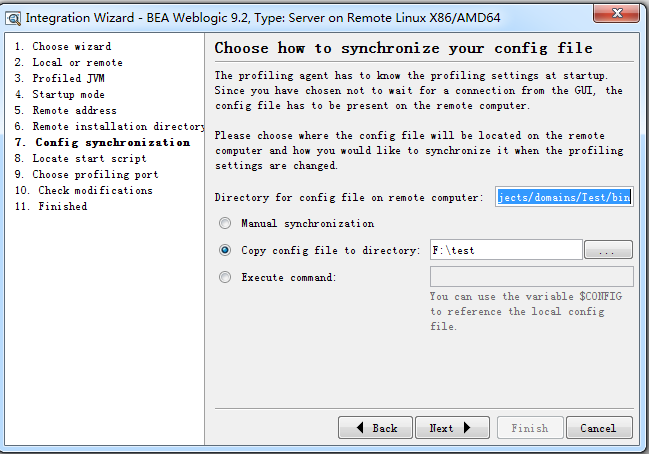
H)、选择远程配置文件的路径(完成后要把本地生成的config.xml拷贝到这)
选择拷贝配置文件到这个路径
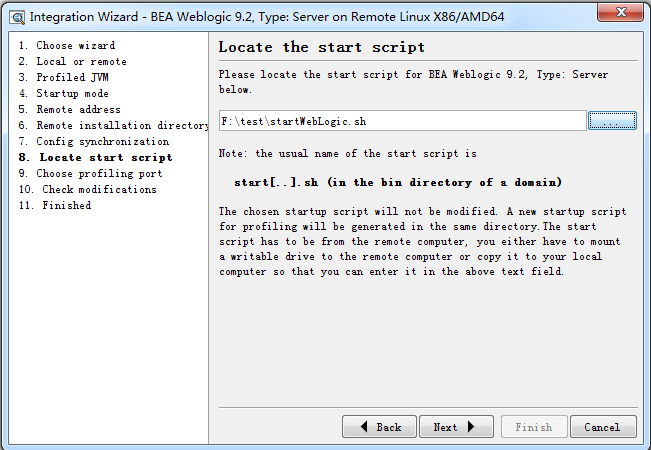
I)、这里选择提前在服务器上拷贝下来的startWebLogic.sh文件
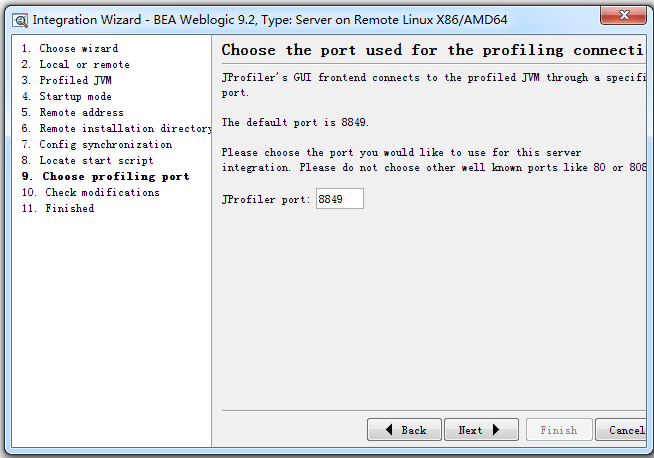
J)、显示端口,点击next
K)、提示要在服务端操作的内容,点击next
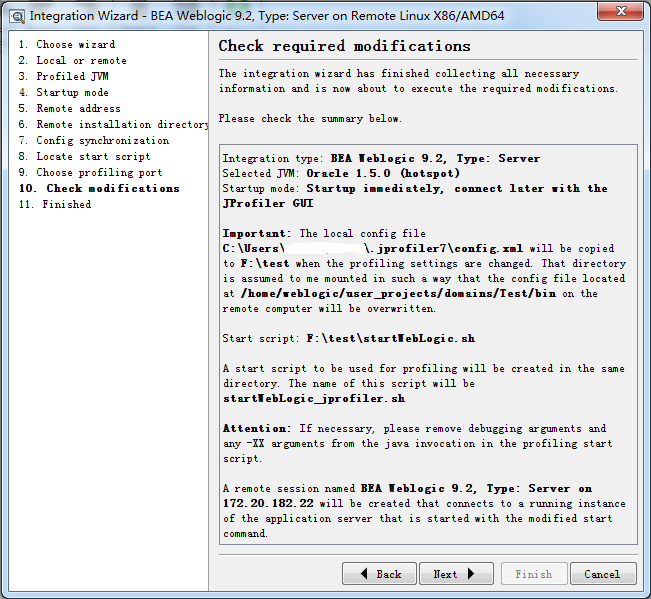
2、 服务端
A)、把C:\Users\xxxxxxx\.jprofiler7\config.xml拷贝到服务器的/home/weblogic/user_projects/domains/Test/bin路径下(要设置下这个文件的可操作权限chmod a+x /home/weblogic/user_projects/domains/Test/bin/config.xml)
B)、把F:\test\startWebLogic_jprofiler.sh拷贝到/home/weblogic/user_projects/domains/Test/bin路径下并授于可操作权
C)、./startWebLogic_jprofiler.sh启动weblogic即可

第一行是连接成功
第二行和第三行是断开
第四行是重新连接

 浙公网安备 33010602011771号