
浅谈水体的实现
温故知新,水面很早就实现了,但没有在这里写过,今天总结一下。
水的模拟要达到以下效果:水面的折射与反射,水的波动。
要达到这种效果,需要以下四张纹理:折射纹理(RenderTarget),反射纹理(RenderTarget),Bumpmap,水自己的纹理。
折射与反射的原理就不具体说了,下面只说实现步骤。
一、渲染到纹理
RenderTarget的创建我不多述了,网上查查,我创建的是256X256的纹理,格式为X8R8G8B8。折射纹理比较简单,直接把当前的地形或在水面以下的物体渲染多次,注意,为提高性能,在这次pass中,可以选择带clip的shader(假如用到shader)或者直接使用水面的平面作为一个clipplane(不使用Shader)。
然后是反射的实现,首先生成一个以水面为反射面的反射矩阵,摄像机的坐标乘与反射矩阵求得新的坐标。然后按渲染流程再走一次,(即计算裁剪空间,加入渲染对列,到最后渲染)。渲染到纹理后,注意,此时的纹理U坐标应该做一个反转操作。如果在shader中修改,必须比较简单就是u = 1.0 - uvCoord.x。
二、水的波动
需要利用一个Bumpmap做作纹理UV值的偏移,下面是HLSL的代码:
float2 BumpUVCoords = input.uvCoords;
BumpUVCoords.x += time;
BumpUVCoords.y -= time;
float4 dudv_offset = tex2D(BumpMap, BumpUVCoords);//primary_motion + secondary_motion); //, 0.0001, 0.9999)); // + secondary_motion);
float2 offsets = (2 * dudv_offset.xy - 1) * 0.1;
//这里的clamp是多余的,明天试试去掉
float2 lastCoords = input.uvCoords + offsets; //clamp(input.uvCoords + offsets, 0.00, 4.00);//offsets; //, 0.00, 1.00);
float2 waterUV = input.uvCoords;
waterUV.x += time;
waterUV.y -= time;
float4 colorWater = tex2D(Samp0, waterUV);
output.Color = colorWater;
clamp(input.outTexProj, 0.0, 1.0);
float2 texProj = input.outTexProj.xy / input.outTexProj.w;
texProj.x = 1.0 - texProj.x;
lastCoords = clamp(texProj + offsets, 0.0, 1.0);
截图: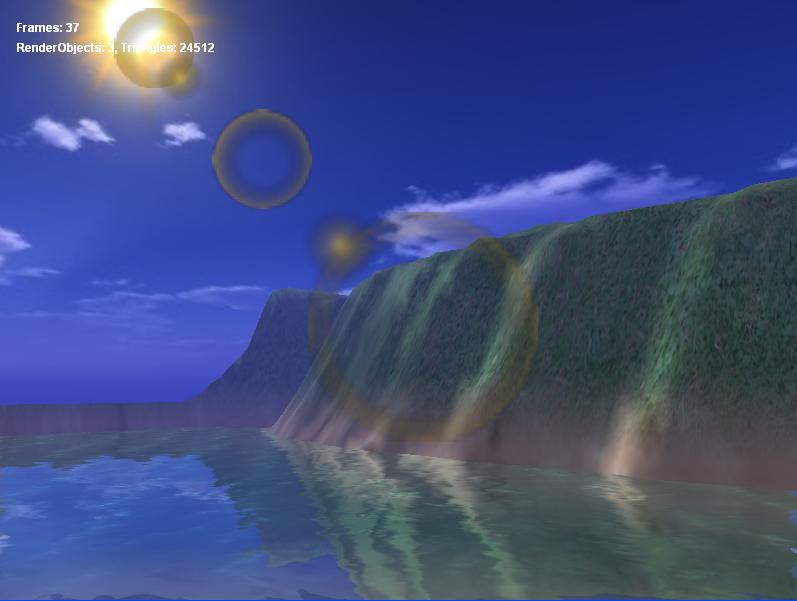

 浙公网安备 33010602011771号