
UniApp + SpringBoot 实现微信支付和退款
开发准备
- 一台用于支付的测试机,必须得是一个安卓机因为需要打支付基座才能使用。
- 用于编写的后端框架接口的 IDE (IDEA 或者 Eclipse 都可以)
- HBuilder X 用来编辑 UniApp 项目的编辑器和编译器
- 基本的 SpringBoot 的脚手架,可以去 https://start.spring.io/ 或者 IDEA 自带的快速生成脚手架插件。
- Jdk 11
微信支付开发
我这里省略了申请等步骤。如果没有申请过企业支付的可以去官网申请 https://pay.weixin.qq.com/static/applyment_guide/applyment_detail_app.shtml 。安卓测试必须要打成基座,或者是正式APP应用。
后端部分
-
在 SpringBoot 中添加以下坐标
<dependency> <groupId>org.springframework.boot</groupId> <artifactId>spring-boot-starter-web</artifactId> </dependency> <!-- 微信支付坐标 start--> <dependency> <groupId>com.github.binarywang</groupId> <artifactId>weixin-java-pay</artifactId> <version>4.2.5.B</version> </dependency> <!-- 退款用 --> <dependency> <groupId>org.jodd</groupId> <artifactId>jodd-http</artifactId> <version>6.0.8</version> </dependency> <!-- 微信支付坐标 end--> <dependency> <groupId>org.springframework.boot</groupId> <artifactId>spring-boot-configuration-processor</artifactId> <optional>true</optional> </dependency> <dependency> <groupId>org.projectlombok</groupId> <artifactId>lombok</artifactId> <optional>true</optional> </dependency> -
在 resources 目录下添加 application.yml 我们不去用默认的 application.properties 文件,毕竟 yml 更好看点。并在 yml 中添加以下内容
# 服务启动端口 server: port: 8080 # 微信支付 wxpay: appId: 开放平台的AppID mchId: 商户号 mchKey: 商户密钥 # p12证书文件的绝对路径或者以classpath:开头的类路径. keyPath: classpath:/wxpay_cert/apiclient_cert.p12 # apiclient_key.pem证书文件的绝对路径或者以classpath:开头的类路径. privateKeyPath: classpath:/wxpay_cert/apiclient_key.pem privateCertPath: classpath:/wxpay_cert/apiclient_cert.pem notifyUrl: https://4789j06630.wocp.fun/wechat/pay/notify refundNotifyUrl: https://4789j06630.wocp.fun/wechat/pay/refund_notify -
创建一个 WechatPayConfig.java 使用上面的 ****
wxpay@Data @ConfigurationProperties(prefix = "wxpay") public class WechatPayConfig { private String appId; private String mchId; private String mchKey; private String keyPath; private String privateKeyPath; private String privateCertPath; private String notifyUrl; private String refundNotifyUrl; } -
创建一个 BizWechatPayService.java
package com.runbrick.paytest.util.wxpay; import com.github.binarywang.wxpay.bean.request.WxPayRefundRequest; import com.github.binarywang.wxpay.bean.request.WxPayUnifiedOrderRequest; import com.github.binarywang.wxpay.bean.result.WxPayRefundResult; import com.github.binarywang.wxpay.config.WxPayConfig; import com.github.binarywang.wxpay.constant.WxPayConstants; import com.github.binarywang.wxpay.exception.WxPayException; import com.github.binarywang.wxpay.service.WxPayService; import com.github.binarywang.wxpay.service.impl.WxPayServiceImpl; import lombok.AllArgsConstructor; import org.springframework.boot.autoconfigure.condition.ConditionalOnClass; import org.springframework.boot.context.properties.EnableConfigurationProperties; import org.springframework.stereotype.Service; import java.net.InetAddress; /** * 微信支付 */ @Service @ConditionalOnClass(WxPayService.class) @EnableConfigurationProperties(WechatPayConfig.class) @AllArgsConstructor public class BizWechatPayService { private WechatPayConfig wechatPayConfig; public WxPayService wxPayService() { WxPayConfig payConfig = new WxPayConfig(); payConfig.setAppId(wechatPayConfig.getAppId()); payConfig.setMchId(wechatPayConfig.getMchId()); payConfig.setMchKey(wechatPayConfig.getMchKey()); payConfig.setKeyPath(wechatPayConfig.getKeyPath()); payConfig.setPrivateKeyPath(wechatPayConfig.getPrivateKeyPath()); payConfig.setPrivateCertPath(wechatPayConfig.getPrivateCertPath()); // 可以指定是否使用沙箱环境 payConfig.setUseSandboxEnv(false); payConfig.setSignType("MD5"); WxPayService wxPayService = new WxPayServiceImpl(); wxPayService.setConfig(payConfig); return wxPayService; } /** * 创建微信订单给APP * * @param productTitle 商品标题 * @param outTradeNo 订单号 * @param totalFee 总价 * @return */ public Object createOrder(String productTitle, String outTradeNo, Integer totalFee) { try { WxPayUnifiedOrderRequest request = new WxPayUnifiedOrderRequest(); // 支付描述 request.setBody(productTitle); // 订单号 request.setOutTradeNo(outTradeNo); // 请按照分填写 request.setTotalFee(totalFee); // 回调链接 request.setNotifyUrl(wechatPayConfig.getNotifyUrl()); // 终端IP. request.setSpbillCreateIp(InetAddress.getLocalHost().getHostAddress()); // 设置类型为APP request.setTradeType(WxPayConstants.TradeType.APP); // 一定要用 createOrder 不然得自己做二次校验 Object order = wxPayService().createOrder(request); return order; } catch (Exception e) { return null; } } /** * 退款 * * @param tradeNo * @param totalFee * @return */ public WxPayRefundResult refund(String tradeNo, Integer totalFee) { WxPayRefundRequest wxPayRefundRequest = new WxPayRefundRequest(); wxPayRefundRequest.setTransactionId(tradeNo); wxPayRefundRequest.setOutRefundNo(String.valueOf(System.currentTimeMillis())); wxPayRefundRequest.setTotalFee(totalFee); wxPayRefundRequest.setRefundFee(totalFee); wxPayRefundRequest.setNotifyUrl(wechatPayConfig.getRefundNotifyUrl()); try { WxPayRefundResult refund = wxPayService().refundV2(wxPayRefundRequest); if (refund.getReturnCode().equals("SUCCESS") && refund.getResultCode().equals("SUCCESS")) { return refund; } } catch (WxPayException e) { e.printStackTrace(); } return null; } } -
创建一个 WechatController.java 来实现接口给前端调用时使用
package com.runbrick.paytest.controller;

import com.github.binarywang.wxpay.bean.notify.WxPayNotifyResponse;
import com.github.binarywang.wxpay.bean.notify.WxPayOrderNotifyResult;
import com.github.binarywang.wxpay.bean.result.WxPayRefundResult;
import com.github.binarywang.wxpay.exception.WxPayException;
import com.runbrick.paytest.util.wxpay.BizWechatPayService;
import lombok.AllArgsConstructor;
import org.slf4j.Logger;
import org.slf4j.LoggerFactory;
import org.springframework.web.bind.annotation.RequestBody;
import org.springframework.web.bind.annotation.RequestMapping;
import org.springframework.web.bind.annotation.RequestMethod;
import org.springframework.web.bind.annotation.RestController;

@RestController
@RequestMapping("/wechat/pay")
@AllArgsConstructor
public class WechatController {

    BizWechatPayService wechatPayService;

    private static Logger logger = LoggerFactory.getLogger(WechatController.class);

    /**
     * 创建微信订单给APP
     *
     * @return
     */
    @RequestMapping(value = "/unified/request", method = RequestMethod.GET)
    public Object appPayUnifiedRequest() {
        // totalFee 必须要以分为单位
        Object createOrderResult = wechatPayService.createOrder("测试支付", String.valueOf(System.currentTimeMillis()), 1);
        logger.info("统一下单的生成的参数:{}", createOrderResult);
        return createOrderResult;
    }

    @RequestMapping(method = RequestMethod.POST, value = "notify")
    public String notify(@RequestBody String xmlData) {
        try {
            WxPayOrderNotifyResult result = wechatPayService.wxPayService().parseOrderNotifyResult(xmlData);
            // 支付返回信息
            if ("SUCCESS".equals(result.getReturnCode())) {
                // 可以实现自己的逻辑
                logger.info("来自微信支付的回调:{}", result);
            }

            return WxPayNotifyResponse.success("成功");
        } catch (WxPayException e) {
            logger.error(e.getMessage());
            return WxPayNotifyResponse.fail("失败");
        }
    }

    /**
     * 退款
     *
     * @param transaction_id
     */
    @RequestMapping(method = RequestMethod.POST, value = "refund")
    public void refund(String transaction_id) {
        // totalFee 必须要以分为单位,退款的价格可以这里只做的全部退款
        WxPayRefundResult refund = wechatPayService.refund(transaction_id, 1);
        // 实现自己的逻辑
        logger.info("退款本地回调:{}", refund);
    }

    /**
     * 退款回调
     *
     * @param xmlData
     * @return
     */
    @RequestMapping(method = RequestMethod.POST, value = "refund_notify")
    public String refundNotify(@RequestBody String xmlData) {
        // 实现自己的逻辑
        logger.info("退款远程回调:{}", xmlData);
        // 必须要返回 SUCCESS 不过有 WxPayNotifyResponse 给整合成了 xml了
        return WxPayNotifyResponse.success("成功");
    }

}
上面的 controller 写了两个接口一个用来 app端的调用,一个给支付用来回调。回调接口的地址要放到刚才配置中的
notifyUrl属性里。还有一个是微信的退款接口。 -
由于支付宝回调要使用线上的地址作为回调地址,这里我推荐两个解决办法
- 使用一台服务器+备案的域名搭建上面的后台地址
- 使用 花生壳 来实现本地内网穿透
我使用的是 花生壳 作为本次的开发环境,启动 springboot 的服务,配置好花生壳。后台部分到目前为止已经结束了。
前端部分
创建部分和我写的支付宝那个一样,如果不知道可以去看一下。所以跳过创建部分了,直接来到了代码实现。要在 manifest.json 勾选微信支付支持
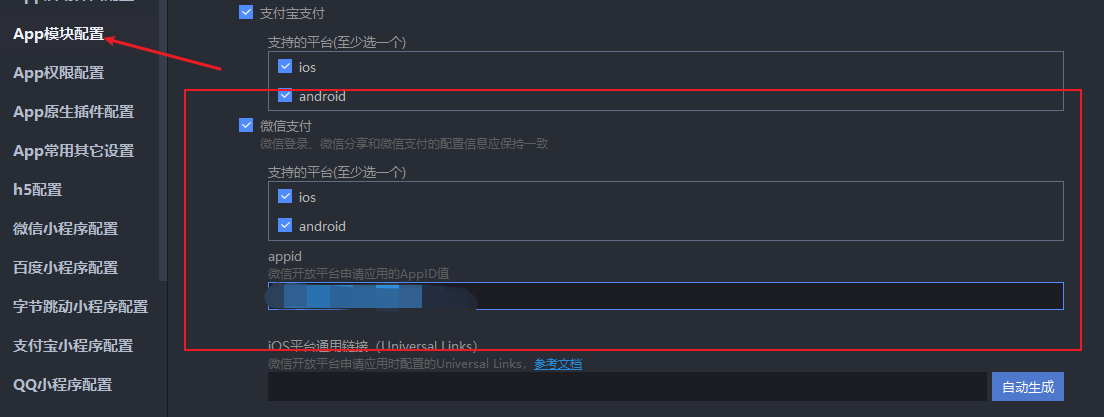
-
创建前端支付代码 index.vue
<template>
    <view class="content">
        <view class="text-area">
            <text class="title">{{title}}</text>
        </view>
        <button type="default" @click="goPay()">点我前去支付</button>
    </view>
</template>

<script>
    export default {
        data() {
            return {
                title: '跟我去支付'
            }
        },
        onLoad() {

        },
        methods: {
            goPay() {
                uni.request({
                    url: "https://4789j06630.wocp.fun/wechat/pay/unified/request",
                    success(res) {
                        let obj = {
                            appid: res.data.appId,
                            noncestr: res.data.nonceStr,
                            package: res.data.packageValue,
                            partnerid: res.data.partnerId,
                            prepayid: res.data.prepayId,
                            timestamp: parseInt(res.data.timeStamp),
                            sign: res.data.sign,
                        };

                        uni.requestPayment({
                            provider: "wxpay",
                            orderInfo: obj,
                            success(res) {
                                uni.showModal({
                                    content: "支付成功",
                                    showCancel: false
                                })
                            },
                            fail(e) {
                                uni.showModal({
                                    content: "支付失败,原因为: " + e.errMsg,
                                    showCancel: false
                                })
                            },
                            complete() {
                                console.log("啥也没干");
                            }
                        });

                    }
                })

            }
        }
    }
</script>

<style>
    page {
        background-color: #ff5500;
    }

    .content {
        display: flex;
        flex-direction: column;
        align-items: center;
        justify-content: center;
    }

    .text-area {
        display: flex;
        justify-content: center;
    }

    .title {
        font-size: 36rpx;
        color: #8f8f94;
    }
</style>
点击按钮就可以前往微信支付看下后台的生成的组合参数

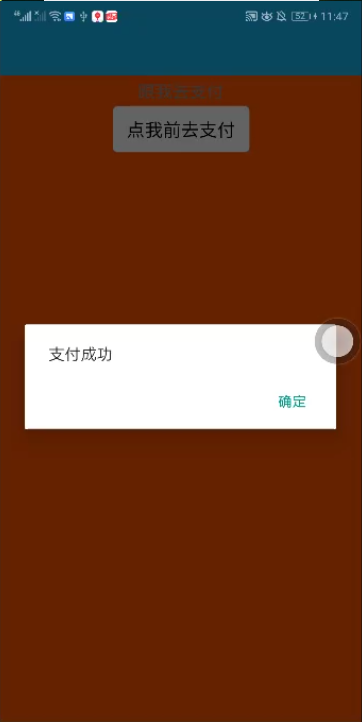
跳转微信支付之后会跳回这里,提示支付成功。查看一下后台回调

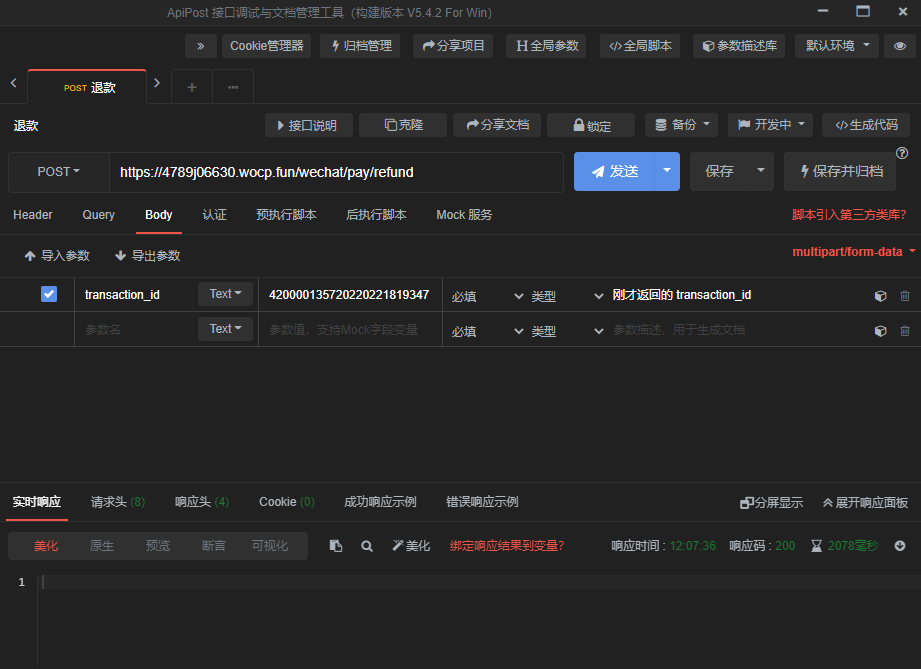
之后的业务按照支付逻辑开发就可以,简单的支付已经完成。在按照刚才给的回调参数做个退款操作
-
我们使用 apipost 一个很强大的工具,被同事安利的。那就正好拿他测测退款借口,就不写代码了。
此时如果没有任何错误,后台控制台会返回退款本地和远程回调信息
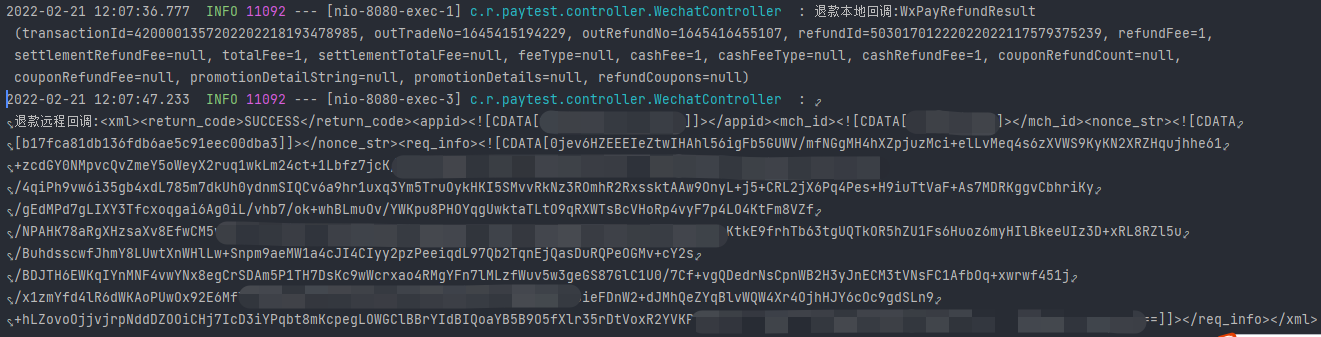
此时微信也收到退款信息了。
整套支付流程都上传到 github 了可以查看 github的源码 https://github.com/runbrick/pay_spring

 浙公网安备 33010602011771号