

湖大创新课程结对编程项目总结
1. 简介
这次的博客针对的是在国庆期间我和姑丽加娜提同学的结对编程项目的总结,包括对结对项目的分析总结、结对项目对个人项目的代码复用情况和对结对项目的感想,并且分享自己在结对项目的过程中学到的东西。
2. 项目要求
点击查看
结对编程项目:带UI的小初高数学学习软件
用户:
小学、初中和高中学生。
功能:
1、所有功能通过图形化界面操作,可以是桌面应用,可以是网站(编程语言和技术不限);
2、用户注册功能。用户提供手机号码,点击注册将收到一个注册码,用户可使用该注册码完成注册;
3、用户完成注册后,界面提示设置密码,用户输入两次密码匹配后设置密码成功。密码6-10位,必须含大小写字母和数字。用户在登录状态下可修改密码,输入正确的原密码,再输入两次相同的新密码后修改密码成功;
4、密码设置成功后,跳转到选择界面,界面显示小学、初中和高中三个选项,用户点击其中之一后,提示用户输入需要生成的题目数量;
5、用户输入题目数量后,生成一张试卷(同一张卷子不能有相同题目,题目全部为选择题),界面显示第一题的题干和四个选项,用户选择四个选项中的一个后提交,界面显示第二题,...,直至最后一题;
6、最后一题提交后,界面显示分数,分数根据答对的百分比计算;
7、用户在分数界面可选择退出或继续做题;
8、小初高数学题目要求见个人项目。
3. 项目实现
该项目使用python3 + flask框架构建,请在运行前确认运行环境。项目布局如下:
点击查看代码
project_question/
├── flaskr/
│   ├── __init__.py
│   ├── db.py
│   ├── schema.sql
│   ├── auth.py
│   ├── calculation.py
│   ├── generate_question.py
│   ├── index.py
│   ├── send_verify_code.py
│   ├── templates/
│   │   ├── base.html
│   │   ├── exam.html
│   │   ├── index.html
│   │   ├── owari.html
│   │   ├── auth/
│   │   │   ├── captcha.html
│   │   │   ├── change.html
│   │   │   ├── login.html
│   │   │   └── register.html
│   └── static/
│       └── style.css
├── setup.py
├── requirements.txt
├── MANIFEST.in
├── init.cmd
├── start.cmd
└── README.md
创建 flaskr 文件夹并且文件夹内添加 __init__.py 文件。 __init__.py 有两个作用:一是包含应用工厂;二 是告诉 Python flaskr 文件夹应当视作为一个包。
flaskr/__init__.py
点击查看代码
import os

from flask import Flask


def create_app(test_config=None):
    # create and configure the app
    app = Flask(__name__, instance_relative_config=True)
    app.config.from_mapping(
        SECRET_KEY='dev',
        DATABASE=os.path.join(app.instance_path, 'flaskr.sqlite'),
    )

    if test_config is None:
        # load the instance config, if it exists, when not testing
        app.config.from_pyfile('config.py', silent=True)
    else:
        # load the test config if passed in
        app.config.from_mapping(test_config)

    # ensure the instance folder exists
    try:
        os.makedirs(app.instance_path)
    except OSError:
        pass

    from . import db
    db.init_app(app)

    from . import auth
    app.register_blueprint(auth.bp)

    from . import index
    app.register_blueprint(index.bp)

    return app
之后的蓝图均要在__init__.py中注册
3.1 验证码
验证码的发送这里选择的是腾讯云的短信服务。因为之前租用域名和服务器时进行过网站备案,所以在这一步上没有遇到什么大的困难,pip安装腾讯云提供的python包后便可直接使用。
pip install tencentcloud-sdk-python具体实现如下,需要注意这里secretId和secretKey需要填入腾讯云提供的账户密钥:
flaskr/send_verify_code.py
点击查看代码
def send_a_message(phone_number, verify_code):
    try:
        # 必要步骤:
        # 实例化一个认证对象,入参需要传入腾讯云账户密钥对secretId,secretKey。
        # 这里采用的是从环境变量读取的方式,需要在环境变量中先设置这两个值。
        # 你也可以直接在代码中写死密钥对,但是小心不要将代码复制、上传或者分享给他人,
        # 以免泄露密钥对危及你的财产安全。
        # CAM密匙查询: https://console.cloud.tencent.com/cam/capi
        cred = credential.Credential("secretId", "secretKey")
        '''cred = credential.Credential(
            os.environ.get("secretId"),
            os.environ.get("secretKey")
        )'''
        # 实例化要请求产品(以sms为例)的client对象
        # 第二个参数是地域信息,可以直接填写字符串ap-guangzhou,或者引用预设的常量
        client = sms_client.SmsClient(cred, "ap-guangzhou", )

        # 实例化一个请求对象,根据调用的接口和实际情况,可以进一步设置请求参数
        # 你可以直接查询SDK源码确定SendSmsRequest有哪些属性可以设置
        # 属性可能是基本类型,也可能引用了另一个数据结构
        # 推荐使用IDE进行开发,可以方便的跳转查阅各个接口和数据结构的文档说明
        req = models.SendSmsRequest()

        # 基本类型的设置:
        # SDK采用的是指针风格指定参数,即使对于基本类型你也需要用指针来对参数赋值。
        # SDK提供对基本类型的指针引用封装函数
        # 帮助链接:
        # 短信控制台: https://console.cloud.tencent.com/sms/smslist
        # sms helper: https://cloud.tencent.com/document/product/382/3773

        # 短信应用ID: 短信SdkAppid在 [短信控制台] 添加应用后生成的实际SdkAppid,示例如1400006666
        req.SmsSdkAppid = "1400580569"
        # 短信签名内容: 使用 UTF-8 编码,必须填写已审核通过的签名,签名信息可登录 [短信控制台] 查看
        req.Sign = "kyoshiki"
        # # 短信码号扩展号: 默认未开通,如需开通请联系 [sms helper]
        # req.ExtendCode = ""
        # # 用户的 session 内容: 可以携带用户侧 ID 等上下文信息,server 会原样返回
        # req.SessionContext = "xxx"
        # 国际/港澳台短信 senderid: 国内短信填空,默认未开通,如需开通请联系 [sms helper]
        # req.SenderId = ""
        # 下发手机号码,采用 e.164 标准,+[国家或地区码][手机号]
        # 示例如:+8613711112222, 其中前面有一个+号 ,86为国家码,13711112222为手机号,最多不要超过200个手机号
        req.PhoneNumberSet = ["+86"+str(phone_number)]
        # 模板 ID: 必须填写已审核通过的模板 ID。模板ID可登录 [短信控制台] 查看
        req.TemplateID = "1146916"
        # 模板参数: 若无模板参数,则设置为空
        req.TemplateParamSet = [verify_code, '2']

        # 通过client对象调用DescribeInstances方法发起请求。注意请求方法名与请求对象是对应的。
        # 返回的resp是一个DescribeInstancesResponse类的实例,与请求对象对应。
        resp = client.SendSms(req)

        # 输出json格式的字符串回包
        print(resp.to_json_string(indent=2))

    except TencentCloudSDKException as err:
        print(err)
3.2 用户管理系统
用户注册完成后,需要记录用户的id和密码,这里采用的是python内置的轻量级数据库模块sqlite3和flask框架提供的全局对象g实现,数据库的创建和定义如下:
flaskr/db.py
点击查看代码
import sqlite3

import click
from flask import current_app, g
from flask.cli import with_appcontext


def get_db():
    if 'db' not in g:
        g.db = sqlite3.connect(
            current_app.config['DATABASE'],
            detect_types=sqlite3.PARSE_DECLTYPES
        )
        g.db.row_factory = sqlite3.Row

    return g.db


def close_db(e=None):
    db = g.pop('db', None)

    if db is not None:
        db.close()


def init_db():
    db = get_db()

    with current_app.open_resource('schema.sql') as f:
        db.executescript(f.read().decode('utf8'))


@click.command('init-db')
@with_appcontext
def init_db_command():
    """Clear the existing data and create new tables."""
    init_db()
    click.echo('Initialized the database.')


def init_app(app):
    app.teardown_appcontext(close_db)
    app.cli.add_command(init_db_command)
g 是一个特殊对象,独立于每一个请求。在处理请求过程中,它可以用于储存可能多个函数都会用到的数据。把连接储存于其中可以多次使用,而不用在同一个请求中每次调用 get_db 时都创建一个新的连接。
current_app 是另一个特殊对象,该对象指向处理请求的 Flask 应用。这里使用了应用工厂,那么在其余的代码中就不会出现应用对象。当应用创建后,在处理 一个请求时, get_db 会被调用。这样就需要使用 current_app 。
sqlite3.connect() 建立一个数据库连接,该连接指向配置中的 DATABASE 指定的文件。这个文件现在还没有建立,后面会在初始化数据库的时候建立该文件。
sqlite3.Row 告诉连接返回类似于字典的行,这样可以通过列名称来操作数据。
close_db 通过检查 g.db 来确定连接是否已经建立。如果连接已建立,那么就关闭连接。以后会在应用工厂中告诉应用 close_db 函数,这样每次请求后就会调用它。
接着创建表,在 SQLite 中,数据储存在 表 和 列 中。在储存和调取数据之前需要先创建它们。 Flaskr 会把用户数据储存在 user 表中。下面创建一个文件储存用于创建空表的 SQL 命令:
flaskr/schema.sql
点击查看代码
DROP TABLE IF EXISTS user;

CREATE TABLE user (
  id INTEGER PRIMARY KEY AUTOINCREMENT,
  username TEXT UNIQUE NOT NULL,
  password TEXT NOT NULL
);
在 db.py 文件中添加 Python 函数,用于运行这个 SQL 命令:
flaskr/db.py
点击查看代码
def init_db():
    db = get_db()

    with current_app.open_resource('schema.sql') as f:
        db.executescript(f.read().decode('utf8'))


@click.command('init-db')
@with_appcontext
def init_db_command():
    """Clear the existing data and create new tables."""
    init_db()
    click.echo('Initialized the database.')
close_db 和 init_db_command 函数需要在应用实例中注册,否则无法使用。 然而,既然我们使用了工厂函数,那么在写函数的时候应用实例还无法使用。代替地, 我们写一个函数,把应用作为参数,在函数中进行注册。
点击查看代码
def init_app(app):
    app.teardown_appcontext(close_db)
app.cli.add_command(init_db_command)Blueprint 是一种组织一组相关视图及其他代码的方式。与把视图及其他 代码直接注册到应用的方式不同,蓝图方式是把它们注册到蓝图,然后在工厂函数中把蓝图注册到应用。
Flaskr 有两个蓝图,一个用于认证功能,另一个用于题目生成和答题。每个蓝图的代码都在一个单独的模块中。使用博客首先需要认证,因此我们先写认证蓝图。
flaskr/auth.py
点击查看代码
import functools

from flask import (
    Blueprint, flash, g, redirect, render_template, request, session, url_for
)
from werkzeug.security import check_password_hash, generate_password_hash

from flaskr.db import get_db

bp = Blueprint('auth', __name__, url_prefix='/auth')
使用 app.register_blueprint() 导入并注册 蓝图。新的代码放在工厂函数的尾部返回应用之前。
flaskr/__init__.py
点击查看代码
def create_app():
    app = ...
    # existing code omitted

    from . import auth
    app.register_blueprint(auth.bp)

    return app
认证蓝图将包括注册新用户、登录和注销等视图。
第一个视图:注册
当用访问 /auth/register URL 时, register 视图会返回用于填写注册 内容的表单的 HTML 。当用户提交表单时,视图会验证表单内容,然后要么再次显示表单并显示一个出错信息,要么创建新用户并显示登录页面。
这里是视图代码,和生成 HTML 表单的模板。
flaskr/auth.py
点击查看代码
@bp.route('/register', methods=('GET', 'POST'))
def register():
    if request.method == 'POST':
        username = phone_number
        password = request.form['password']
        password2 = request.form['password2']
        verify_code = request.form['verify_code']
        db = get_db()
        error = is_illegal(password)

        if not password:
            error = 'Password is required.'
        elif password != password2:
            error = '两次密码输入不同'
        elif verify_code != Captcha:
            error = 'uncorrect verify_code'
        elif db.execute(
                'SELECT id FROM user WHERE username = ?', (username,)
        ).fetchone() is not None:
            error = f"User {username} is already registered."

        if error is None:
            db.execute(
                'INSERT INTO user (username, password) VALUES (?, ?)',
                (username, generate_password_hash(password))
            )
            db.commit()
            return redirect(url_for('auth.login'))

        flash(error)

    return render_template('auth/register.html')
由于注册登录等功能都有部分可以公用,所以我们创建一个base.html作为网站的基础模板
flaskr/templates/base.html
点击查看代码
<!doctype html>
<title>{% block title %}{% endblock %} - 带UI的小初高数学学习软件</title>
<link rel="stylesheet" href="{{ url_for('static', filename='style.css') }}">
<nav>
  <h1>带UI的小初高数学学习软件</h1>
  <ul>
    {% if g.user %}
      <li><span>{{ g.user['username'] }}</span>
      <li><a href="{{ url_for('auth.logout') }}">Log Out</a>
      <li><a href="{{ url_for('auth.change_password') }}">Change Password</a>
    {% else %}
      <li><a href="{{ url_for('auth.captcha') }}">Register</a>
      <li><a href="{{ url_for('auth.login') }}">Log In</a>
    {% endif %}
  </ul>
</nav>
<section class="content">
  <header>
    {% block header %}{% endblock %}
  </header>
  {% for message in get_flashed_messages() %}
    <div class="flash">{{ message }}</div>
  {% endfor %}
  {% block content %}{% endblock %}
</section>
接着是
flaskr/templates/auth/register.html
点击查看代码
{% extends 'base.html' %}

{% block header %}
  <h1>{% block title %}Register{% endblock %}</h1>
{% endblock %}

{% block content %}
  <form method="post">
    <label for="password">Password(6-10位,包含大小写英文和数字)</label>
    <input type="password" name="password" id="password" required><br/>
    <label for="password2">Password again</label>
    <input type="password" name="password2" id="password2" required><br/>
    <label for="verify_code">Verify_code</label>
    <input type="text" name="verify_code" id="verify_code" required>
    <input type="submit" value="Register">
  </form>
{% endblock %}
但是注册需要使用验证码,所以我们再创建一个验证码视图,发送验证码后重定向到/auth/register
点击查看代码
@bp.route('/captcha', methods=('GET', 'POST'))
def captcha():
    if request.method == 'POST':
        global phone_number
        phone_number = request.form['phone_number']
        db = get_db()
        error = None
        if phone_number == '':
            error = 'phone_number is required.'
        elif db.execute(
                'SELECT id FROM user WHERE username = ?', (phone_number,)
        ).fetchone() is not None:
            error = f"User {phone_number} is already registered."
        if error is None:
            global Captcha
            Captcha = str(random.randint(100000, 999999))
            sd.send_a_message(phone_number, Captcha)
            return redirect(url_for('auth.register'))
        flash(error)
    return render_template('auth/captcha.html')
之后的登录等网页模板与注册相似,故只给出代码实现
登录
点击查看代码
@bp.route('/login', methods=('GET', 'POST'))
def login():
    if request.method == 'POST':
        username = request.form['username']
        password = request.form['password']
        db = get_db()
        error = None
        user = db.execute(
            'SELECT * FROM user WHERE username = ?', (username,)
        ).fetchone()

        if user is None:
            error = 'Incorrect username.'
        elif not check_password_hash(user['password'], password):
            error = 'Incorrect password.'

        if error is None:
            session.clear()
            session['user_id'] = user['id']
            global phone_number
            phone_number = username
            return redirect('/')

        flash(error)

    return render_template('auth/login.html')
其中添加了session以检测用户是否已经登录
点击查看代码
@bp.before_app_request
def load_logged_in_user():
    user_id = session.get('user_id')

    if user_id is None:
        g.user = None
    else:
        g.user = get_db().execute(
            'SELECT * FROM user WHERE id = ?', (user_id,)
        ).fetchone()
注销
点击查看代码
@bp.route('/logout')
def logout():
    session.clear()
    return redirect(url_for('index'))
验证视图和模板已经可用了,但是看上去很朴素。可以使用一些 CSS 给 HTML 添加点样式。样式不会改变,所以应当使用 静态文件 ,而不是模板。
/flaskr/static/style.css
点击查看代码
html { font-family: sans-serif; background: #eee; padding: 1rem; }
body { max-width: 960px; margin: 0 auto; background: white; }
h1 { font-family: serif; color: #377ba8; margin: 1rem 0; }
a { color: #377ba8; }
hr { border: none; border-top: 1px solid lightgray; }
nav { background: lightgray; display: flex; align-items: center; padding: 0 0.5rem; }
nav h1 { flex: auto; margin: 0; }
nav h1 a { text-decoration: none; padding: 0.25rem 0.5rem; }
nav ul  { display: flex; list-style: none; margin: 0; padding: 0; }
nav ul li a, nav ul li span, header .action { display: block; padding: 0.5rem; }
.content { padding: 0 1rem 1rem; }
.content > header { border-bottom: 1px solid lightgray; display: flex; align-items: flex-end; }
.content > header h1 { flex: auto; margin: 1rem 0 0.25rem 0; }
.flash { margin: 1em 0; padding: 1em; background: #cae6f6; border: 1px solid #377ba8; }
.post > header { display: flex; align-items: flex-end; font-size: 0.85em; }
.post > header > div:first-of-type { flex: auto; }
.post > header h1 { font-size: 1.5em; margin-bottom: 0; }
.post .about { color: slategray; font-style: italic; }
.post .body { white-space: pre-line; }
.content:last-child { margin-bottom: 0; }
.content form { margin: 1em 0; display: flex; flex-direction: column; }
.content label { font-weight: bold; margin-bottom: 0.5em; }
.content input, .content textarea { margin-bottom: 1em; }
.content textarea { min-height: 12em; resize: vertical; }
input.danger { color: #cc2f2e; }
input[type=submit] { align-self: start; min-width: 10em; }
3.3 出题与解答
/flaskr/index.py
点击查看代码
from .calculation import calculation, random_choice
from .auth import logout
from . import generate_question as gq
from flask import (
    Blueprint, redirect, render_template, request, session, url_for
)

bp = Blueprint('index', __name__, url_prefix='')
question_list = []
i = 0
count = 0
selection = []
locate = []


@bp.route('/', methods=('GET', 'POST'))
def select_difficulty():
    user_id = session.get('user_id')
    if user_id is None:
        return redirect('auth/login')
    global i, count, selection, locate
    i = 0
    count = 0
    selection = []
    locate = []
    if request.method == 'POST':
        question_number = request.form['number']
        difficulty = request.form.get('difficulty')
        global question_list
        question_list = gq.set_question(difficulty, int(question_number))
        return redirect(url_for('.index', difficulty=difficulty, number=question_number))
    return render_template('index.html')


@bp.route('/index?<string:difficulty>?<int:number>', methods=('GET', 'POST'))
def index(difficulty, number):
    global i, count, locate, selection
    user_id = session.get('user_id')
    if user_id is None:
        return redirect('auth/login')
    else:
        if request.method == 'POST':
            selection.append(int(request.form['choice']))
            i += 1
            if i >= number:
                for j in range(number):
                    if selection[j] == locate[j]:
                        count += 1
                return redirect(url_for('.owari', point=str(round(count/number, 4)*100)+'%'))
        answer = str(calculation(question_list[i][3:])) if i < 10 else str(calculation(question_list[i][4:]))
        choices, tmp = random_choice(float(answer))
        locate.append(tmp)
        context = {
            'diffculty': difficulty,
            'question': question_list[i],
            # 'answer': answer,
            'choices': choices
        }
        print(selection, locate)
        return render_template('exam.html', **context)


@bp.route('/owari?<string:point>', methods=('GET', 'POST'))
def owari(point):
    if request.method == 'POST':
        choice = request.form['choice']
        if choice == '0':
            return redirect('/')
        else:
            logout()
            return redirect(url_for('auth.login'))
    return render_template('owari.html', point=point)
其中使用了计算模块和之前个人项目写的的出题模块
/flaskr/calculation.py
点击查看代码
from numpy import sqrt
from numpy import sin, cos, tan
from numpy import pi
import random


def cal(string):
    """
    计算只包含+-*/的式子
    :param string:
    :return:
    """
    num = []
    res = 0.0
    d = 0.0
    sign = '+'
    length = len(string)
    i = 0
    while i < length:
        if string[i].isdigit():
            d = d * 10 + float(string[i])
        elif string[i] == '.':
            if string[i - 1] != '0':
                if string[i + 2].isdigit():
                    d = float(string[i - 1]) + float(string[i + 1]) / 10 + float(string[i + 2]) / 100
                    i += 2
                else:
                    d = float(string[i - 1]) + float(string[i + 1]) / 10
                    i += 1
            elif string[i + 2].isdigit():
                d = float(string[i + 1]) / 10 + float(string[i + 2]) / 100
                i += 2
            else:
                d = float(string[i + 1]) / 10
                i += 1
        elif string[i] != ' ' or i == length - 1:
            if sign == '+':
                num.append(d)
            elif sign == '-':
                num.append(-d)
            elif sign == '*' or sign == '/':
                tmp = num[-1] * d if sign == '*' else num[-1] / d
                num.pop()
                num.append(tmp)
            sign = string[i]
            d = 0.0
        i += 1
    while num:
        res += num[-1]
        num.pop()
    return res


def pre_cal(string):
    """
    预先处理√ ² sin 等
    :param string:
    :return:
    """
    length = len(string)
    for i in range(length):
        if string[i] == '√':
            left_string = string[:i]
            if string[i + 2].isdigit():
                if string[i + 3].isdigit():
                    right_string = string[i + 4:]
                    middle_string = string[i + 1] + string[i + 2] + string[i + 3]
                else:
                    right_string = string[i + 3:]
                    middle_string = string[i + 1] + string[i + 2]
            else:
                right_string = string[i + 2:]
                middle_string = string[i + 1]
            middle_string = str(int(sqrt(int(middle_string))))
            new_string = left_string + middle_string + right_string
            return pre_cal(new_string)
        if string[i] == '²':
            right_string = string[i + 1:]
            if string[i - 2].isdigit():
                if string[i - 3].isdigit():
                    middle_string = string[i - 3] + string[i - 2] + string[i - 1]
                    left_string = string[:i - 3]
                else:
                    middle_string = string[i - 2] + string[i - 1]
                    left_string = string[:i - 2]
            else:
                middle_string = string[i - 1]
                left_string = string[:i - 1]
            middle_string = str(pow(int(middle_string), 2))
            new_string = left_string + middle_string + right_string
            return pre_cal(new_string)
        if string[i] == 's':
            left_string = string[:i]
            right_string = string[i + 8:]
            middle_string = str(round(sin(int(string[i + 4] + string[i + 5]) * pi / 180), 2))
            new_string = left_string + middle_string + right_string
            return pre_cal(new_string)
        if string[i] == 'c':
            left_string = string[:i]
            right_string = string[i + 8:]
            middle_string = str(round(cos(int(string[i + 4] + string[i + 5]) * pi / 180), 2))
            new_string = left_string + middle_string + right_string
            return pre_cal(new_string)
        if string[i] == 't':
            left_string = string[:i]
            right_string = string[i + 8:]
            middle_string = str(round(tan(int(string[i + 4] + string[i + 5]) * pi / 180), 2))
            new_string = left_string + middle_string + right_string
            return pre_cal(new_string)
    return string


def calculation(string):
    # print(pre_cal(string))
    return round(cal(pre_cal(string)), 1)


def random_choice(num):
    choices = [0, 0, 0, 0]
    locate = random.randint(0, 3)
    while len(choices) != len(set(choices)):
        for i in range(4):
            if i == locate:
                choices[i] = str(num)
            else:
                choices[i] = str(num + random.randint(-100, 100))
    return choices, locate


# print(calculation('20/√4/72²+89*tan(60º)='))
/flaskr/generate_question.py
点击查看代码
import random


def random_question(level):
    # TODO 解决 tan(90⁰) 和 /cos(90⁰)
    """
    使用随机数生成部分题目(以一个操作数和一个运算符拼接的形式)
    :param level: 需要生成题目的难度级别
    :return: 拼接形成的字符串
    """
    symbol = ['√', '²', 'sin', 'cos', 'tan']
    angel = [30, 45, 60, 90]
    if level == 1:
        a = random.randint(1, 100)
        b = random.sample('+-*/', 1)
        return str(a) + ''.join(b)
    if level == 2:
        sqrt_num = [1, 4, 9, 16, 25, 36, 49, 64, 81, 100]
        b = random.randint(0, 1)
        if b == 0:
            a = sqrt_num[random.randint(0, 9)]
            b = symbol[b]
            c = random.sample('+-*/', 1)
            return ''.join(b) + str(a) + ''.join(c)
        else:
            a = random.randint(1, 100)
            b = symbol[b]
            c = random.sample('+-*/', 1)
            return str(a) + ''.join(b) + ''.join(c)
    if level == 3:
        a = angel[random.randint(0, 3)]
        b = random.randint(2, 4)
        b = symbol[b]
        while a == 90 and b != 'sin':
            a = angel[random.randint(0, 3)]
            b = random.randint(2, 4)
            b = symbol[b]
        c = random.sample('+-*/', 1)
        return '%s(%sº)%s' % (''.join(b), str(a), ''.join(c))


def set_question_number(account_type):
    """
    根据输入选择切换账号类型或设置生成题目的数量
    :param account_type: 当前账号的类型
    :return: 变更后账号的类型和题目数量
    """
    switch_type = input()
    if switch_type.isdigit() == 0 and switch_type != '-1':
        if switch_type == '切换为小学':
            account_type = '小学'
            question_number = 'switch'
        elif switch_type == '切换为初中':
            account_type = '初中'
            question_number = 'switch'
        elif switch_type == '切换为高中':
            account_type = '高中'
            question_number = 'switch'
        else:
            print('请输入小学、初中和高中三个选项中的一个')
            question_number = 'fail'
    else:
        question_number = int(switch_type)
    return account_type, question_number


def set_question(account_type, question_number):
    """
    生成完整的题目
    :param account_type: 当前账号类型
    :param question_number:
    :return:
    """
    questions_list = []
    if account_type == '小学':
        question_type = 1
    elif account_type == '初中':
        question_type = 2
    elif account_type == '高中':
        question_type = 3
    else:
        question_type = 0
    for k in range(question_number):
        j = random.randint(2, 5)
        flag = 0
        tmp_str = str()
        for i in range(j):
            if i == j - 1 and flag == 0:
                random_level = question_type
            else:
                random_level = random.randint(1, question_type)
            if random_level == question_type:
                flag = 1
            tmp_str += random_question(random_level)
        tmp_str = tmp_str[:-1] + '='
        questions_list.append('%s. %s\n' % (k + 1, tmp_str))
    return questions_list
exam.html
点击查看代码
{% extends 'base.html' %}

{% block header %}
  <h1>{% block title %}examination{% endblock %}</h1>
{% endblock %}

{% block content %}
  <form method="get">
    <p>当前难度为{{diffculty}}</p>
  </form>
  <form method="post">
    <label>{{question}}(保留1位小数)</label>
    <div class="row">
    <div class="col-sm-2 col-sm-offset-2">
        <input name="choice" value=0 type="radio"  checked="checked"> {{choices[0]}}
    </div>
     <div class="col-sm-2 ">
            <input name="choice" value=1 type="radio"> {{choices[1]}}
        </div>
      <div class="col-sm-2 ">
            <input name="choice" value=2 type="radio"> {{choices[2]}}
        </div>
      <div class="col-sm-2 ">
            <input name="choice" value=3 type="radio"> {{choices[3]}}
        </div>
   </div>
      <!--
     <label>答案为{{answer}}</label>
     -->
    <input type="submit" value="下一题"><br/>
  </form>
{% endblock %}
index.html
点击查看代码
{% extends 'base.html' %}

{% block header %}
  <h1>{% block title %}index{% endblock %}</h1>
{% endblock %}

{% block content %}
  <form method="get">
    <label>请选择难度</label>
  </form>
  <form method="post">
    <select name='difficulty'>
        <option value="小学">小学</option>
        <option value="初中">初中</option>
        <option value="高中">高中</option>
    </select>
    <label for="number">题目数量</label>
    <input name="number" id="number" required>
    <input type="submit" value="确认"><br/>
  </form>
{% endblock %}
owari.html
点击查看代码
{% extends 'base.html' %}

{% block header %}
<h1>{% block title %}終わり{% endblock %}</h1>
{% endblock %}

{% block content %}
  <label>您的得分为{{point}}</label>
  <form method="post">
    <div class="redirect">
        <input name="choice" value=0 type="radio"  checked="checked"> 继续
    </div>
     <div class="col-sm-2 ">
            <input name="choice" value=1 type="radio"> 退出
     </div>
    <input type="submit" value="确认"><br/>
  </form>
{% endblock %}
3.4 运行
在windows powershell输入以下代码,现在还是应当在最顶层的 project_question 目录下,不是在 flaskr 包里面
点击查看代码
> $env:FLASK_APP = "flaskr"
> $env:FLASK_ENV = "development"
> flask db-init  # 初始化数据库,仅第一次输入
> flask run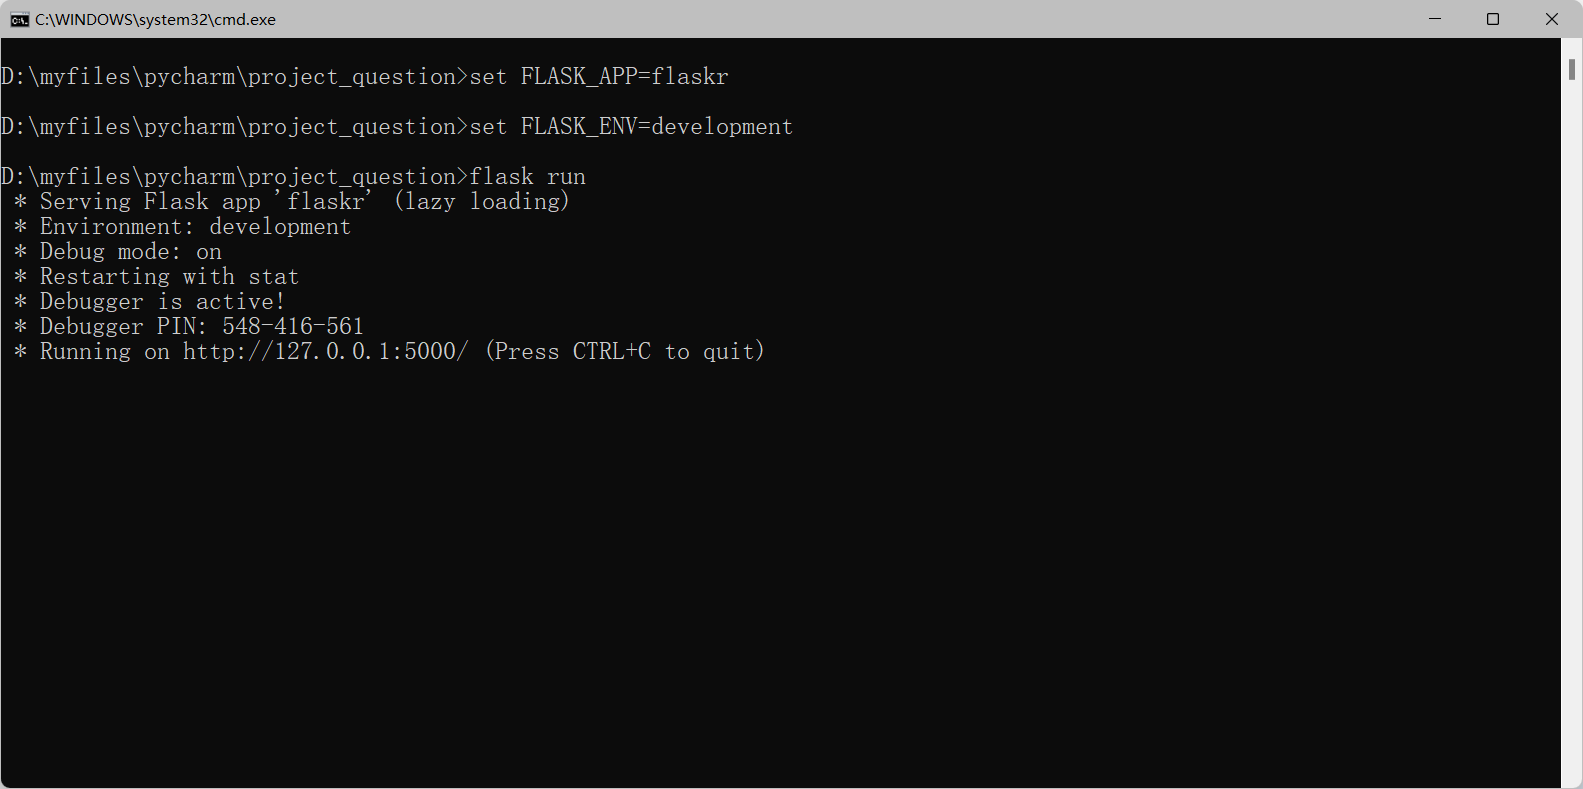
浏览器访问这个地址显示以下界面即运行成功
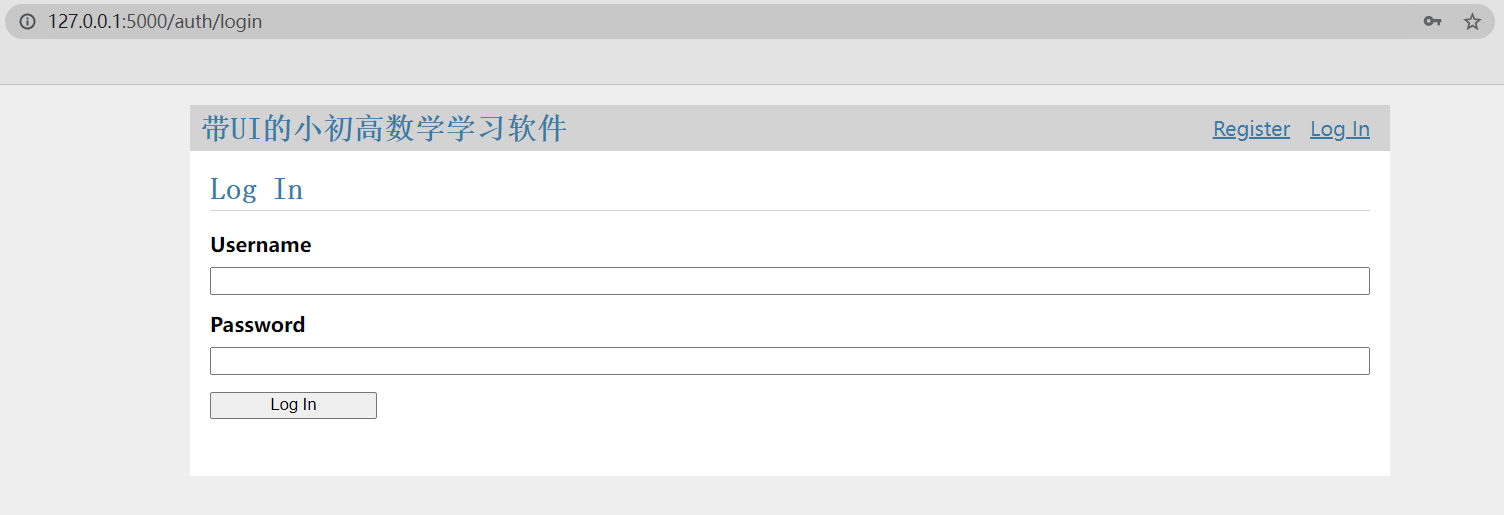
3.5 项目可安装化
setup.py
点击查看代码
from setuptools import find_packages, setup

setup(
    name='flaskr',
    version='1.0.0',
    packages=find_packages(),
    include_package_data=True,
    zip_safe=False,
    install_requires=[
        'flask',
    ],
)
packages 告诉 Python 包所包括的文件夹(及其所包含的 Python 文件)。 find_packages() 自动找到这些文件夹,这样就不用手动写出来。 为了包含其他文件夹,如静态文件和模板文件所在的文件夹,需要设置 include_package_data 。 Python 还需要一个名为 MANIFEST.in 文件来说明这些文件有哪些。
MANIFEST.in
include flaskr/schema.sql
graft flaskr/static
graft flaskr/templates
global-exclude *.pyc
这告诉 Python 复制所有 static 和 templates 文件夹中的文件, schema.sql 文件,但是排除所有字节文件。
安装项目
$ pip install -e .这个命令告诉 pip 在当前文件夹中寻找 setup.py 并在 编辑 或 开发 模式下安装。
至此,没有改变项目运行的方式, FLASK_APP 还是被设置为 flaskr , 还是使用 flask run 运行应用。不同的是可以在任何地方运行应用,而不仅仅 是在 project_question 目录下。
4、结对编程项目感想与收获
这次结对项目我们选择的是python+flask的网页开发,在开发途中也遇到了不少问题比如flask框架需要从头自学,html语言也并不算熟悉。好在flask开发者文档比较详细,也提供了一个个人博客的开发案例,我按照步骤实现案例的过程中也对flask框架有了一定的了解。现在回头看看这段时间的学习,虽然工作量比做个桌面界面要大,最终实现的功能也未必比桌面应用要好,但毕竟也让我积累了一定的前端开发经验,还是有不少的收获。
结对项目中大量运用到了之前个人项目的代码,如题目的生成和查重等,这也体现了代码复用性和python所推崇的模块化编程的重要性。
在本课程的个人项目和结对项目之前我是没有项目工程开发的经验的,对于框架和接口也几乎没有多少了解,但完成这个项目后,我对项目开发的过程有了更深的理解也对团队合作的重要性有了新的认识。

 浙公网安备 33010602011771号