生产环境源码编译安装部署LAMP搭建
基于 CentOS 7 源码编译搭建 LAMP 架构
生产环境-源码编译安装部署LAMP搭建
1.环境所需软件包:
| httpd-2.4.43.tar.gz | Apache 主程序包 | https://mirrors.tuna.tsinghua.edu.cn/apache/httpd/httpd-2.4.43.tar.gz |
| apr-1.7.0.tar.gz | Apache 依赖包 | https://mirror.bit.edu.cn/apache/apr/apr-1.7.0.tar.gz |
| apr-util-1.6.1.tar.gz | Apache 依赖包 | https://mirror.bit.edu.cn/apache/apr/apr-util-1.6.1.tar.gz |
| pcre-8.44.tar.gz | Apache 依赖包 | https://ftp.pcre.org/pub/pcre/pcre-8.44.tar.gz |
| php-7.2.31.tar.gz | php 主程序包 | https://www.php.net/distributions/php-7.2.31.tar.gz |
| mysql-5.7.30.tar.gz | mysql 主程序包 | https://downloads.mysql.com/archives/community/ |
2.安装编译工具和开发包
yum install -y epel-releaseyum -y install make gcc gcc-c++ openssl openssl-devel expa-tdevel
3.1.编译安装依赖包apr
tar xf apr-1.7.0.tar.gz -C /usr/local/src/cd /usr/local/src/apr-1.7.0/./configure --prefix=/usr/local/aprecho $?make -j 4 && make install && cd
3.2.编译安装依赖包 apr-util
tar xf apr-util-1.6.1.tar.gz -C /usr/local/src/cd /usr/local/src/apr-util-1.6.1/./configure --prefix=/usr/local/apr-util --with-apr=/usr/local/apr/bin/apr-1-configmake -j 4 && make install && cd
4. 编译安装依赖包 pcre
tar xf pcre-8.44.tar.gz -C /usr/local/src/cd /usr/local/src/pcre-8.44/./configure --prefix=/usr/local/pcremake -j 4 && make install && cd
5.编译安装 Apache
tar zxvf httpd-2.4.43.tar.gz -C /usr/local/src/cd /usr/local/src/httpd-2.4.43/./configure --prefix=/usr/local/apache --enable-so -enable-rewrite --enable-ssl --with-apr=/usr/local/apr --with-apr-util=/usr/local/apr-util -with-pcre=/usr/local/pcre --enable-modules=most --enable-mpms-shared=all --with-mpm=eventmake -j 4 && make install && cd/usr/local/apache/bin/apachectl -V
选项说明:
- –prefix=/usr/local/apache #安装路径
- –enable-so #支持动态加载模块
- –enable-rewrite #支持网站地址重写
- –enable-ssl #支持 SSL 加密
- –with-pcre=/usr/local/pcre #pcre 路径
- –with-apr=/usr/local/apr #apr 路径
- –with-apr-util=/usr/local/apr-util #apr-util 路径
网站根目录位置:/usr/local/apache/htdocs/ 下
5.1 生成启动脚本
cp /usr/local/apache/bin/apachectl /etc/init.d/chmod +x /etc/init.d/apachectl
5.2 生成apache启动脚本
vim /usr/lib/systemd/system/apache.service#插入以下内容[Unit]Description=apacheAfter=network.target[Service]Type=forkingExecStart=/etc/init.d/apachectl startExecReload=/etc/init.d/apachectl restartExecStop=/etc/init.d/apachectl stopPrivateTmp=true[Install]WantedBy=multi-user.target#保存退出chmod 754 /usr/lib/systemd/system/apache.servicesystemctl start apache.service启动脚本参考文章:https://www.cnblogs.com/q149072205/p/11541693.html
6.修改Apache默认运行用户
useradd -M -s /sbin/nologin apachevim /usr/local/apache/conf/httpd.conf166行默认用户和默认组改为apache
6.1 修改目录权限
chown -R apache:apache /usr/local/apache/systemctl restart apache
7.安装配置MySQL数据库
useradd -M -s /sbin/nologin mysqltar xf mysql-5.7.30-el7-x86_64.tar.gzmv mysql-5.7.30-el7-x86_64 /usr/local/mysqlmkdir -p /data/mysql #创建存放数据的文件夹touch /var/log/mysqld.logchown -R mysql:mysql /usr/local/mysql/chown -R mysql:mysql /data/mysql/chown -R mysql:mysql /var/log/mysqld.log
7.1创建 mysql 配置文件
vim /etc/my.cnf[client]port = 3306socket = /data/mysql/mysql.sock[mysqld]port = 3306user = mysqlsocket = /data/mysql/mysql.sockbasedir = /usr/local/mysqldatadir = /data/mysqllog-error=/var/log/mysqld.log
7.2 添加环境变量
vim /etc/profile.d/mysql.shMYSQL_HOME=/usr/local/mysql export PATH=$PATH:$MYSQL_HOME/bin
source /etc/profile #使环境变量生效
7.3 初始化数据库
cd /usr/local/mysql/./bin/mysqld --initialize --user=mysql --basedir=/usr/local/mysql --datadir=/data/mysql #生成临时密码cat /var/log/mysqld.log |grep password
7.3 开机启动MySQL
cp support-files/mysql.server /etc/init.d/mysqldchmod 755 /etc/init.d/mysqldchkconfig --add mysqldchkconfig --list mysqld/etc/init.d/mysqld start
7.4 修改mysql root密码
mysql -uroot -p'上面grep出来的'mysql> set password for root@localhost = password('123123');mysql> flush privileges; #刷新权限表mysql> exit
7.5 运行安全初始化脚本
mysql_secure_installation
8.编译安装 php7.2
8.1 安装依赖
yum -y install php-mcrypt libmcrypt libmcrypt-devel autoconf freetype gd libmcrypt libpng libpng-devel libjpeg libxml2 libxml2-devel zlib curl curl-devel re2c php-peartar xf php-7.2.31.tar.gz -C /usr/local/src/cd /usr/local/src/php-7.2.31/./configure --prefix=/usr/local/php/ --with-apxs2=/usr/local/apache/bin/apxs --enable-mbstring --with-curl --with-gd --enable-fpm --enable-mysqlnd --with-pdo-mysql=mysqlnd --with-config-file-path=/usr/local/php/etc/ --with-mysqli=mysqlnd --with-mysql-sock=/var/lib/mysql/mysql.sock --enable-maintainer-ztsmake -j 4 && make install && cd
参数注释:
| –with-apxs2 | #将 php 编译为 Apache 的一个模块进行使用 |
| –enable-mbstring | #多字节字符串的支持 |
| –with-curl | #支持 cURL |
| –with-gd | #支持 gd 库 |
| –enable-fpm | #支持构建 fpm |
| –enable-mysqlnd | #启用 mysqlnd |
| –with-pdo-mysql | #支持 pdo:MySQL 支持 |
| –with-config-file-path | #设置配置文件路径 |
| –with-mysqli | #支持 MySQLi |
| –with-mysql-sock | #关联 mysql 的 socket 文件 |
| –enable-maintainer-zts | #如果 Apache 是 event 模型,那需要指定 zts |
8.2 生成配置文件
cp /usr/local/src/php-7.2.31/php.ini-production /usr/local/php/etc/php.ini
8.3 使apache支持php文件
vim /usr/local/apache/conf/httpd.conf# 393 行下面添加:AddType application/x-httpd-php .phpAddType application/x-httpd-php-source .phps#保存退出systemctl restart apache.service
9. 测试php是否可用
cd /usr/local/apache/htdocs/vim index.php<?phpphpinfo();?>
systemctl restart apache
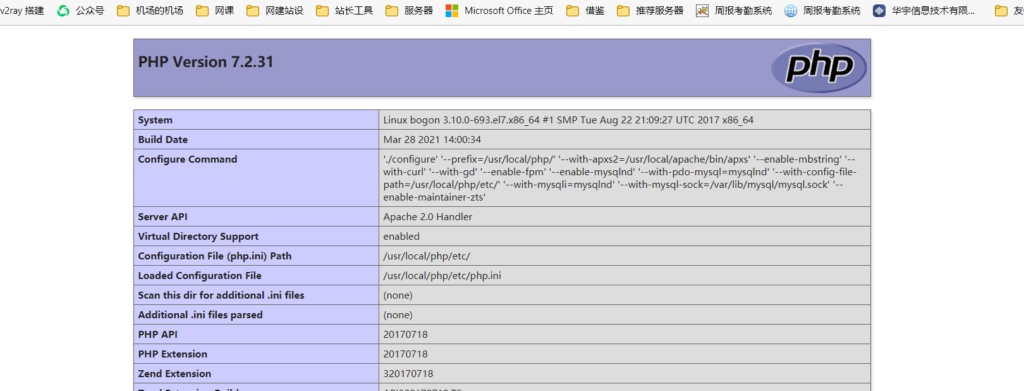
就此,整个LAMP环境部署成功!
生活是一种感受也是一种积累

 浙公网安备 33010602011771号