
SpringBoot-Nginx-tomcat-redis实现session共享
-
Mac下安装Nginx
nginx作用:反向代理
负载均衡
HTTP服务器(动静分离)
- 终端命令:
brew update
brew search nginx
brew info nginx
brew install nginx
启动命令:
nginx
关闭命令:
nginx -s stop
nginx配置文件路径:/usr/local/etc/nginx/nginx.conf
nginx位置目录:
/usr/local/Cellar/nginx
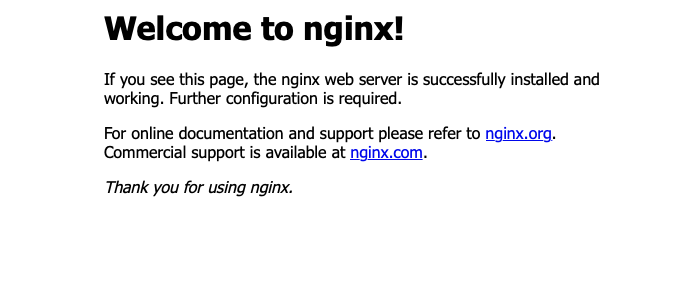
启动成功后访问:http://localhost:8080
![]()
-
Nginx+tomcat
- 配置tomcat
tomcat下载路径(https://tomcat.apache.org/download-80.cgi)
解压两份tomcat,tomcat1和tomcat2,模拟两个服务器。
分别设置两个tomcat的 server.xml
tomcat1: (/tomcat1/config/server.xml)
    <Connector port="8888" protocol="HTTP/1.1"
               connectionTimeout="20000"
               redirectPort="8443" />
    <!-- A "Connector" using the shared thread pool-->
    <!--
    <Connector executor="tomcatThreadPool"
               port="8080" protocol="HTTP/1.1"
               connectionTimeout="20000"
               redirectPort="8443" />
    -->
    <!-- Define a SSL HTTP/1.1 Connector on port 8443
         This connector uses the BIO implementation that requires the JSSE
         style configuration. When using the APR/native implementation, the
         OpenSSL style configuration is required as described in the APR/native
         documentation -->
    <!--
    <Connector port="8443" protocol="org.apache.coyote.http11.Http11Protocol"
               maxThreads="150" SSLEnabled="true" scheme="https" secure="true"
               clientAuth="false" sslProtocol="TLS" />
    -->

    <!-- Define an AJP 1.3 Connector on port 8009 -->
    <Connector port="8010" protocol="AJP/1.3" redirectPort="8443" />


    <!-- An Engine represents the entry point (within Catalina) that processes
         every request.  The Engine implementation for Tomcat stand alone
         analyzes the HTTP headers included with the request, and passes them
         on to the appropriate Host (virtual host).
         Documentation at /docs/config/engine.html -->

    <!-- You should set jvmRoute to support load-balancing via AJP ie :
    <Engine name="Catalina" defaultHost="localhost" jvmRoute="jvm1">
    -->
    <Engine name="Catalina" defaultHost="localhost" jvmRoute="tomcat1">
tomcat2:(/tomcat2/config/server.xml)
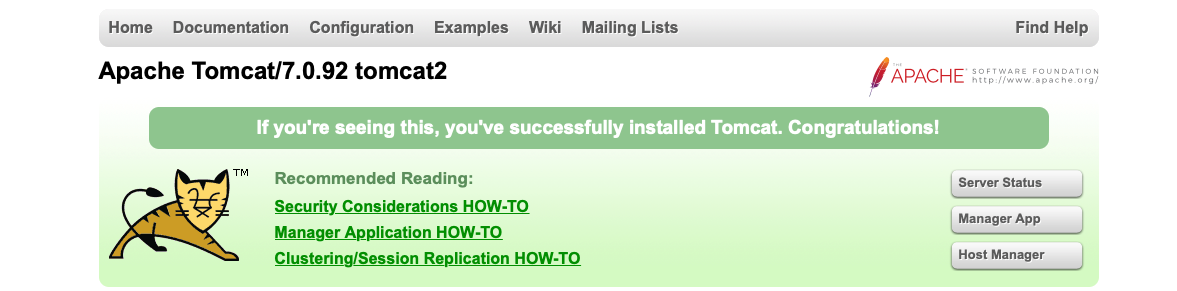
    <Connector port="9999" protocol="HTTP/1.1"
               connectionTimeout="20000"
               redirectPort="8443" />
    <!-- A "Connector" using the shared thread pool-->
    <!--
    <Connector executor="tomcatThreadPool"
               port="8080" protocol="HTTP/1.1"
               connectionTimeout="20000"
               redirectPort="8443" />
    -->
    <!-- Define a SSL HTTP/1.1 Connector on port 8443
         This connector uses the BIO implementation that requires the JSSE
         style configuration. When using the APR/native implementation, the
         OpenSSL style configuration is required as described in the APR/native
         documentation -->
    <!--
    <Connector port="8443" protocol="org.apache.coyote.http11.Http11Protocol"
               maxThreads="150" SSLEnabled="true" scheme="https" secure="true"
               clientAuth="false" sslProtocol="TLS" />
    -->

    <!-- Define an AJP 1.3 Connector on port 8009 -->
    <Connector port="8011" protocol="AJP/1.3" redirectPort="8443" />


    <!-- An Engine represents the entry point (within Catalina) that processes
         every request.  The Engine implementation for Tomcat stand alone
         analyzes the HTTP headers included with the request, and passes them
         on to the appropriate Host (virtual host).
         Documentation at /docs/config/engine.html -->

    <!-- You should set jvmRoute to support load-balancing via AJP ie :
    <Engine name="Catalina" defaultHost="localhost" jvmRoute="jvm1">
    -->
    <Engine name="Catalina" defaultHost="localhost" jvmRoute="tomcat2">
配置完成后,分别启动,查看是否启动成功。(可以分别修改/tomcat/webapp/ROOT/index.jsp,区分两个tomcat)
![]()
![]()
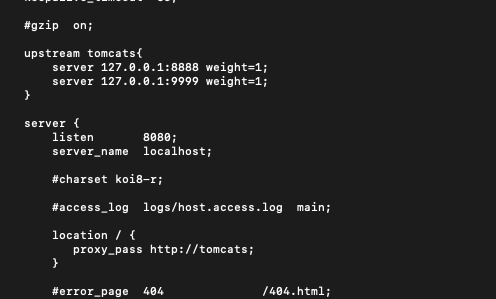
- 配置Nginx配置文件
![]()
重新启动nginx:nginx -s reload
请求:http://localhost:8080,可以看到nginx会根据权重,代理访问tomcat。
- 配置tomcat
-
SpringBoot + redis
- 安装redis
ioskaifadeMac-mini:~ ios$ brew install redis
Updating Homebrew...
==> Auto-updated Homebrew!
Updated 1 tap (homebrew/core).
==> Updated Formulae
ammonite-repl        direnv               etcd                 php@7.2              subversion           wireshark

==> Downloading https://homebrew.bintray.com/bottles/redis-5.0.3.mojave.bottle.tar.gz
######################################################################## 100.0%
==> Pouring redis-5.0.3.mojave.bottle.tar.gz
==> Caveats
To have launchd start redis now and restart at login:
  brew services start redis
Or, if you don't want/need a background service you can just run:
  redis-server /usr/local/etc/redis.conf
==> Summary
🍺  /usr/local/Cellar/redis/5.0.3: 13 files, 3.1MB
启动:
redis-server /usr/local/etc/redis.conf
- 创建springboot项目
- pom.xml添加依赖
<packaging>war</packaging>

	<name>redis</name>
	<description>Demo project for Spring Boot</description>

	<properties>
		<java.version>1.8</java.version>
	</properties>

	<dependencies>
		<dependency>
			<groupId>org.springframework.boot</groupId>
			<artifactId>spring-boot-starter-thymeleaf</artifactId>
		</dependency>
		<dependency>
			<groupId>org.springframework.boot</groupId>
			<artifactId>spring-boot-starter-web</artifactId>
			<!-- 移除嵌入式tomcat插件,使用外置tomcat -->
			<exclusions>
				<exclusion>
					<groupId>org.springframework.boot</groupId>
					<artifactId>spring-boot-starter-tomcat</artifactId>
				</exclusion>
			</exclusions>
		</dependency>
		<dependency>
			<groupId>javax.servlet</groupId>
			<artifactId>javax.servlet-api</artifactId>
			<version>3.1.0</version>
			<scope>provided</scope>
		</dependency>

		<!-- redis -->
		<dependency>
			<groupId>org.springframework.boot</groupId>
			<artifactId>spring-boot-starter-data-redis</artifactId>
		</dependency>
		<!-- redis session共享 -->
		<dependency>
			<groupId>org.springframework.session</groupId>
			<artifactId>spring-session-data-redis</artifactId>
		</dependency>
- application.properties中redis配置
spring.redis.database=0
spring.redis.host=127.0.0.1
spring.redis.port=6379
spring.redis.password=
spring.redis.timeout=3000ms
spring.redis.jedis.pool.max-wait=-1ms
spring.redis.jedis.pool.min-idle=0
spring.redis.jedis.pool.max-idle=8
spring.redis.jedis.pool.max-active=8
- 创建RedisConfig.java 文件
@Configuration public class RedisConfig { @Autowired private RedisConnectionFactory redisConnectionFactory; @Bean public RedisTemplate<String, Object> redisTemplate(RedisConnectionFactory factory) { RedisTemplate<String, Object> template = new RedisTemplate<String, Object>(); template.setConnectionFactory(redisConnectionFactory); template.setKeySerializer(new StringRedisSerializer()); template.setValueSerializer(new JdkSerializationRedisSerializer()); template.afterPropertiesSet(); return template; } } - 测试
@RunWith(SpringRunner.class)
@SpringBootTest
public class RedisTest {

    @Autowired
    private RedisTemplate redisTemplate;

    @Test
    public void test(){
        redisTemplate.opsForValue().set("a", "111");
        Object a = redisTemplate.opsForValue().get("a");
        System.out.println(a);
    }

    @Test
    public void objectTest(){
        User user = new User("zhangsan",21);
        user.setId(UUID.randomUUID().toString());
        redisTemplate.opsForValue().set("user",user);

        User rUser = (User) redisTemplate.opsForValue().get("user");
        System.out.println(rUser);
    }

}
- pom.xml添加依赖
- 安装redis
-
SpringBoot-Nginx-tomcat-redis实现session共享
- 在Application.java中添加注解,并设置session有效时间
@SpringBootApplication //maxInactiveIntervalInSeconds: 设置Session失效时间,使用Redis Session之后,原Boot的server.session.timeout属性不再生效 @EnableRedisHttpSession(maxInactiveIntervalInSeconds = 86400*30) public class RedisApplication extends SpringBootServletInitializer { // 使用外置tomcat,继承SpringBootServletInitializer,重写configure @Override protected SpringApplicationBuilder configure(SpringApplicationBuilder builder) { return builder.sources(RedisApplication.class); } public static void main(String[] args) { SpringApplication.run(RedisApplication.class, args); } } - 获取sesssion
@RestController public class UserController { @RequestMapping("/sessionId") public String index(HttpSession session){ return session.getId(); } } - 打包部署
在项目pom.xml所有文件下,执行命令
mvn clean package -Dmaven.test.skip=true
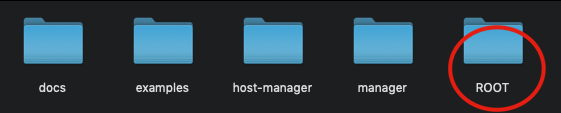
方式一:分别将target下的war包放在两个tomcat中的webapp中,解压。但是这样访问的话,访问路径为http://localhost:[端口]/包名。可以将包名改为ROOT,这样可以直接访问http://localhost:[端口]。
![]()
![]()
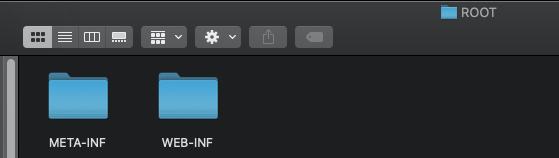
方式二:分别在tomcat/config/Catalina/localhost 中添加ROOT.xml,其中docBase是项目路径,包含META-INF和WEB-INF。<?xml version="1.0" encoding="UTF-8"?> <Context docBase="/Users/ios/Documents/GitHub/springboot-leaning/springboot-redis/target/redis-1.0"/>
第二种方式比较方便,修改了项目后,只需要修改docBase路径下的内容即可。
- 访问Nginx http://localhost:8080/sessionId,可以看到sessionId保持不变
![]()
Nginx相关介绍(转载):https://www.cnblogs.com/wcwnina/p/8728391.html
- 在Application.java中添加注解,并设置session有效时间


 浙公网安备 33010602011771号