使用 ansible 部署 TiDB 集群
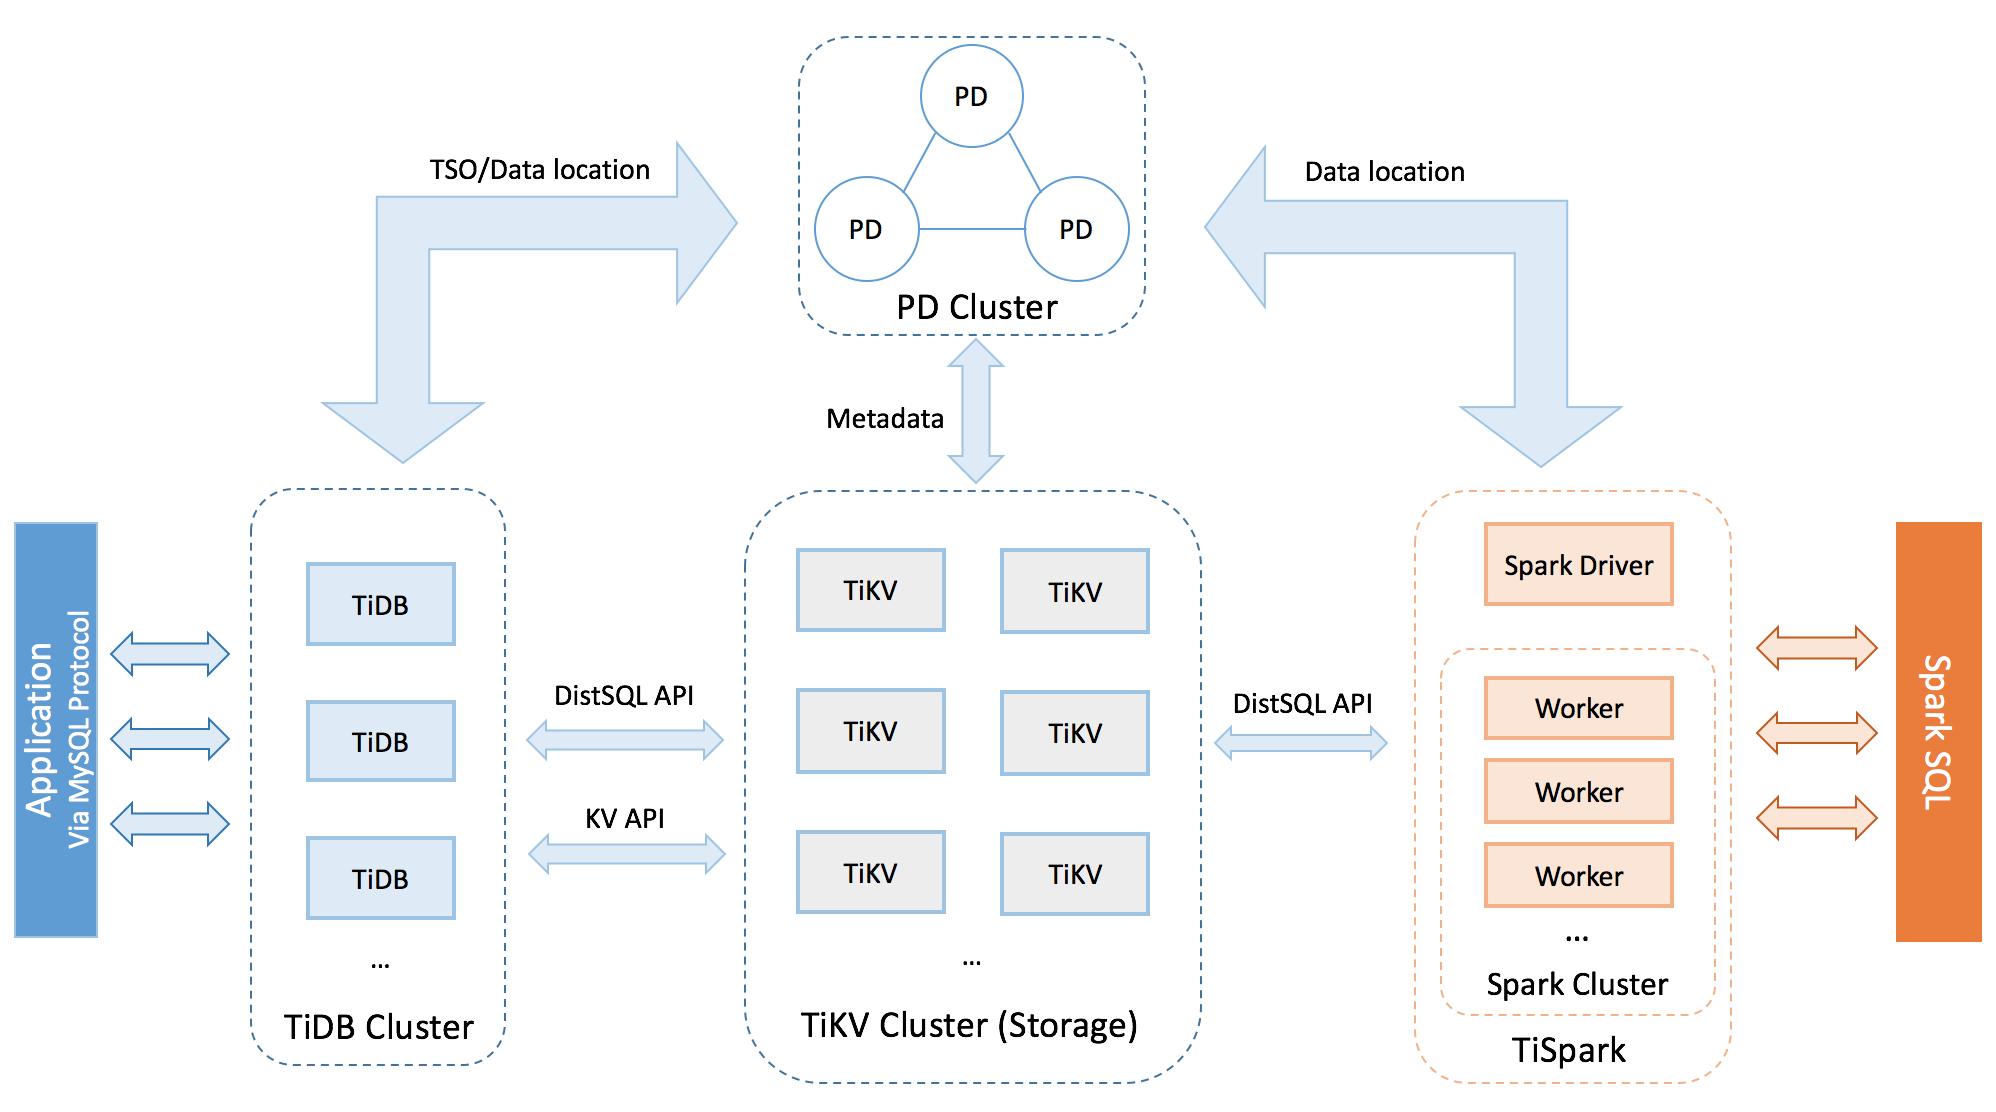
架构图
节点规划
120.52.146.213 Control Machine
120.52.146.214 PD1_TiDB1
120.52.146.215 PD2_TiDB2
120.52.146.216 PD3
120.52.146.217 TiKV1
120.52.146.218 TiKV2
120.52.146.219 TiKV3
软件要求
CentOS 7.3 (64 bit) or later with Python 2.7 installed
1、在控制节点上安装依赖软件
yum -y install epel-release git curl sshpass
yum -y install python-pip
2、创建 tidb 用户
useradd tidb
passwd tidb
3、配置sudo权限
visudo
tidb ALL=(ALL) NOPASSWD: ALL
4、切换用户,生成SSH-KEY
su - tidb
$ ssh-keygen -t rsa
5、下载 tidb ansible 项目代码
$ git clone -b v3.0.4 https://github.com/pingcap/tidb-ansible.git
6、安装ansible和相关依赖
$ cd /home/tidb/tidb-ansible
$ sudo pip install -r requirements.txt
$ ansible --version
7、配置SSH互信
$ cd /home/tidb/tidb-ansible
$ vi hosts.ini
[servers]
120.52.146.214
120.52.146.215
120.52.146.216
120.52.146.217
120.52.146.218
120.52.146.219
[all:vars]
username = tidb
ntp_server = pool.ntp.org
$ ansible-playbook -i hosts.ini create_users.yml -u root -k
8、安装NTP
$ cd /home/tidb/tidb-ansible
$ ansible-playbook -i hosts.ini deploy_ntp.yml -u tidb -b
9、挂载磁盘(这一步可以在装系统的时候就准备好)
fdisk -l
parted -s -a optimal /dev/sdb mklabel gpt -- mkpart primary ext4 1 -1
mkfs.ext4 /dev/sdb
lsblk -f
vim /etc/fstab
UUID=c51eb23b-195c-4061-92a9-3fad812cc12f /data1 ext4 defaults,nodelalloc,noatime 0 0
mkdir /data1
mount -a
mount -t ext4
/dev/sdb on /data1 type ext4 (rw,noatime,nodelalloc,data=ordered)
10、根据集群架构修改 inventory.ini
TiDB Cluster Part
[tidb_servers]
120.52.146.214
120.52.146.215
[tikv_servers]
120.52.146.217
120.52.146.218
120.52.146.219
[pd_servers]
120.52.146.214
120.52.146.215
120.52.146.216
[spark_master]
[spark_slaves]
[lightning_server]
[importer_server]
Monitoring Part
prometheus and pushgateway servers
[monitoring_servers]
120.52.146.214
[grafana_servers]
120.52.146.214
node_exporter and blackbox_exporter servers
[monitored_servers]
120.52.146.214
120.52.146.215
120.52.146.216
120.52.146.217
120.52.146.218
120.52.146.219
[alertmanager_servers]
120.52.146.214
11、下载部署包到本地
$ ansible-playbook local_prepare.yml
12、初始化系统环境修改内核参数
$ ansible-playbook bootstrap.yml
13、部署tidb集群
$ ansible-playbook deploy.yml
14、启动集群
$ ansible-playbook start.yml
15、访问集群,默认可以不验证直接连接
$ mysql -uroot -h 120.52.146.214 -P 4000
Welcome to the MariaDB monitor. Commands end with ; or \g.
Your MySQL connection id is 182
Server version: 5.7.25-TiDB-v3.0.4 MySQL Community Server (Apache License 2.0)
Copyright (c) 2000, 2018, Oracle, MariaDB Corporation Ab and others.
Type 'help;' or '\h' for help. Type '\c' to clear the current input statement.
MySQL [(none)]> show databases;
+--------------------+
| Database |
+--------------------+
| INFORMATION_SCHEMA |
| PERFORMANCE_SCHEMA |
| mysql |
| test |
+--------------------+
4 rows in set (0.00 sec)
16、设置密码
TiDB 在数据库初始化时会生成一个 'root'@'%' 的默认账户。
TiDB 将密码存在 mysql.user 系统数据库里面。只有拥有 CREATE USER 权限,或者拥有 mysql 数据库权限(INSERT 权限用于创建,UPDATE 权限用于更新)的用户才能够设置或修改密码。
> SET PASSWORD FOR 'root'@'%' = 'xxx';
> FLUSH PRIVILEGES;
或者
> ALTER USER 'test'@'localhost' IDENTIFIED BY 'mypass';
> FLUSH PRIVILEGES;
参考:

 浙公网安备 33010602011771号