本文基于QQ音乐最新版,系统讲解如何利用pywinauto与pytest框架实现桌面应用的自动化测试。你将学到:如何封装启动/关闭程序、配置日志、处理自绘控件的图像识别、以及播放模式与音量调节等核心功能的测试方案。无论你是Python新手还是自动化老手,都能从中获得实战灵感。
测试框架与启动关闭封装
首先,我们需要搭建基础框架。使用pytest作为测试运行器,配合pywinauto操作QQ音乐的UI界面。由于QQ音乐的启动程序并非主程序,无法直接通过Application().window()定位窗口。解决方案是:
- 使用
Desktop(backend="uia").window(class_name="...")从全局桌面搜索窗口 - ⚠️ 窗口标题会随歌曲名变化,因此采用稳定的类名进行定位
启动与关闭的封装代码如下:
qq_path = r"D:\QQMusicCache\QQMusicLyricNew\QQMusic\QQMusic.exe"
self.app=Application(backend='uia').start(qq_path)
# 3. 轮询等待主窗口出现(最多尝试30次,每次间隔1秒)
for i in range(30):
# 列表推导式:从所有桌面窗口里筛选出满足条件的窗口
# 条件1:类名为 "TXGuiFoundation"
# 条件2:窗口当前可见
qq_windows = [win for win in desktop.windows()
if win.class_name() == "TXGuiFoundation" and win.is_visible()]
if qq_windows:
# 如果有符合条件的窗口,取第一个(通常只有一个)
self.win = qq_windows[0]
print(f">>> 找到主窗口,当前标题:{self.win.window_text()}")
return # 成功,退出方法
else:
# 还没找到,等1秒再试
time.sleep(1)
# 如果30秒后仍未找到,抛出异常
raise Exception("错误:30秒内未找到 QQ 音乐主窗口") def close(self):
"""关闭主窗口"""
if self.win:
self.win.close()
print(">>> 窗口已关闭")
else:
print(">>> 没有可关闭的窗口")我们通过pytest的fixture实现自动化生命周期管理:
@pytest.fixture(scope="session")
def QQMusic_app():
# 准备工作 (Setup)
QQmusic = QQmusicApp() # 创建 QQMusicApp 类的实例
QQmusic.launch() # 启动 QQ 音乐应用
# 将准备好的对象返回给测试用例使用
yield QQmusic
# 清理工作 (Teardown),在测试会话结束后自动执行
QQmusic.close() # 关闭 QQ 音乐应用import pytest
import time
from pywinauto import Desktop
from pywinauto import Application
class QQMusicApp:
def __init__(self):
self.win = None # 用于保存找到的主窗口对象
self.app = None
def launch(self):
"""启动 QQ 音乐并定位主窗口"""
qq_path = r"D:\QQMusicCache\QQMusicLyricNew\QQMusic\QQMusic.exe"
self.app=Application(backend='uia').start(qq_path)
# 2. 创建桌面对象,用于搜索所有顶层窗口
desktop = Desktop(backend="uia")
# 3. 轮询等待主窗口出现(最多尝试30次,每次间隔1秒)
        for i in range(30):
            # 列表推导式:从所有桌面窗口里筛选出满足条件的窗口
            # 条件1:类名为 "TXGuiFoundation"
            # 条件2:窗口当前可见
            qq_windows = [win for win in desktop.windows()
                          if win.class_name() == "TXGuiFoundation" and win.is_visible()]
            if qq_windows:
                # 如果有符合条件的窗口,取第一个(通常只有一个)
                self.win = qq_windows[0]
                print(f">>> 找到主窗口,当前标题:{self.win.window_text()}")
                return  # 成功,退出方法
            else:
                # 还没找到,等1秒再试
                time.sleep(1)
        # 如果30秒后仍未找到,抛出异常
        raise Exception("错误:30秒内未找到 QQ 音乐主窗口")
    def close(self):
        """关闭主窗口"""
        if self.win:
            self.win.close()
            print(">>> 窗口已关闭")
        else:
            print(">>> 没有可关闭的窗口")
@pytest.fixture(scope="session")
def QQMusic_app():
# 准备工作 (Setup)
QQmusic = QQMusicApp() # 创建 QQMusicApp 类的实例
QQmusic.launch() # 启动 QQ 音乐应用
# 将准备好的对象返回给测试用例使用
yield QQmusic
# 在测试会话结束后自动执行
QQmusic.close() # 关闭 QQ 音乐应用测试文件只需继承fixture,无需额外导入:
def test01(QQMusic_app):
    print("test01")
def test02(QQMusic_app):
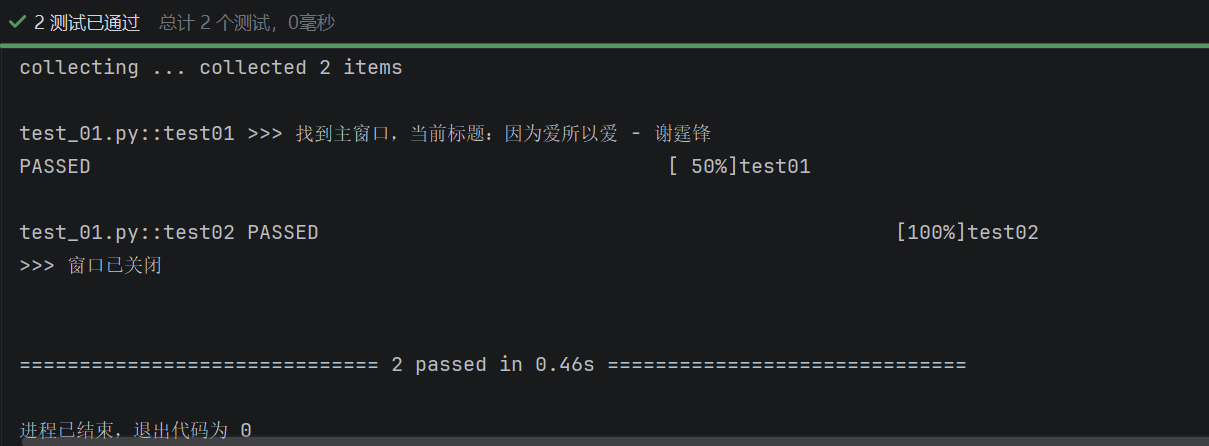
print("test02")运行结果验证了fixture的作用域——teardown在所有用例执行完毕后才会调用,而非每个用例结束后立即关闭。
日志系统:一次配置,全局共享
日志是自动化测试的眼睛。我们创建logUtils.py,实现日志的分流与格式化输出。关键要素如下:
| 需求 | 说明 |
|---|---|
| 1. 能记录不同严重程度的日志 | 调试信息、普通流程、警告、错误要分开,方便过滤查看。 |
| 2. 日志能自动按天切分 | 每天生成新文件,避免单个文件过大,也方便归档清理。 |
| 3. 错误日志能单独拎出来 | 测试跑完,直接看 就能快速定位失败点,不用大海捞针。 |
| 4. 同时保留完整流水 | 总日志文件保留所有记录,方便回溯完整操作路径。 |
| 5. 日志格式统一且信息丰富 | 时间、级别、模块、函数、行号都要有,出问题能马上定位代码位置。 |
| 6. 全局只配置一次 | 避免每个模块都重复打开文件、重复写配置,造成日志重复或错乱。 |
首先,创建日志文件夹(需注意路径问题):
import os
#首先确保存放日志文件的文件夹“logs”存在,否则创建
if not os.path.exists("../logs"):
os.mkdir("../logs")接着,配置日志输出到文件,并实现all(debug)、error、info三级分流:
import logging
import os
import time
#首先确保存放日志文件的文件夹“logs”存在,否则创建
if not os.path.exists("../logs"):
    os.mkdir("../logs")
#定义文件的日期
today = time.strftime("%Y-%m-%d")
#创建logger
logger = logging.getLogger(__name__)
logger.setLevel(logging.DEBUG)
#添加文件处理器
handler_all = logging.FileHandler(f"../logs/{today}.log",encoding='utf-8')
#把处理器添加到 Logger 上
logger.addHandler(handler_all)
logger.info("程序启动")
logger.error("程序启动")
import logging
import os
import time
#定义操作级过滤器,语法记住即可
class InfoFilter(logging.Filter):
def filter(self, record):
return record.levelno == logging.INFO
#定义错误级过滤器
class ErrFilter(logging.Filter):
def filter(self, record):
return record.levelno == logging.ERROR
#首先确保存放日志文件的文件夹“logs”存在,否则创建
if not os.path.exists("../logs"):
os.mkdir("../logs")
#定义文件的日期
today = time.strftime("%Y-%m-%d")
#创建logger
logger = logging.getLogger(__name__)
logger.setLevel(logging.DEBUG)
#添加文件处理器
handler_all = logging.FileHandler(f"../logs/{today}.log",encoding='utf-8')
handler_info=logging.FileHandler(f"../logs/{today}_info.log",encoding='utf-8')
handler_info.addFilter(InfoFilter())
handler_error=logging.FileHandler(f"../logs/{today}_err.log",encoding='utf-8')
handler_error.addFilter(ErrFilter())
#把处理器添加到 Logger 上
logger.addHandler(handler_all)
logger.addHandler(handler_info)
logger.addHandler(handler_error)
logger.info("程序启动")
logger.error("程序启动")定义日志格式,包含时间、等级、文件名与函数名:
import logging
import os
import time
#定义操作级过滤器,语法记住即可
class InfoFilter(logging.Filter):
    def filter(self, record):
        return record.levelno == logging.INFO
#定义错误级过滤器
class ErrFilter(logging.Filter):
    def filter(self, record):
        return record.levelno == logging.ERROR
#首先确保存放日志文件的文件夹“logs”存在,否则创建
if not os.path.exists("../logs"):
    os.mkdir("../logs")
#定义文件的日期
today = time.strftime("%Y-%m-%d")
#创建logger
logger = logging.getLogger(__name__)
logger.setLevel(logging.DEBUG)
#添加文件处理器
handler_all = logging.FileHandler(f"../logs/{today}.log",encoding='utf-8')
handler_info=logging.FileHandler(f"../logs/{today}_info.log",encoding='utf-8')
handler_info.addFilter(InfoFilter())
handler_error=logging.FileHandler(f"../logs/{today}_err.log",encoding='utf-8')
handler_error.addFilter(ErrFilter())
#定义日志文件的格式
fmt = logging.Formatter("%(asctime)s %(levelname)s [%(name)s] [%(filename)s (%(funcName)s:%(lineno)d)] - %(message)s")
handler_all.setFormatter(fmt)
handler_info.setFormatter(fmt)
handler_error.setFormatter(fmt)
#把处理器添加到 Logger 上
logger.addHandler(handler_all)
logger.addHandler(handler_info)
logger.addHandler(handler_error)
logger.info("程序启动")
logger.error("程序启动")| 占位符 | 含义 | 示例输出 |
|---|---|---|
| 日志被创建的时间(默认格式如 ) | ||
| 日志级别(DEBUG、INFO、WARNING、ERROR、CRITICAL) | ||
| Logger 的名称(通常是你传给 的模块名) | ||
| 产生日志的源文件名(不含路径) | ||
| 产生日志的函数名 | ||
| 产生日志的代码行号 | ||
| 日志正文,即你调用 时传入的字符串 |
封装日志类,采用类变量与@classmethod实现全局共享:
import logging
import os
import time
#定义操作级过滤器,语法记住即可
class InfoFilter(logging.Filter):
    def filter(self, record):
        return record.levelno == logging.INFO
#定义错误级过滤器
class ErrFilter(logging.Filter):
    def filter(self, record):
        return record.levelno == logging.ERROR
#定义QQ音乐日志类
class QQMusicLogger:
    logger=None
    @classmethod
    def getLogger(cls):
        #如果没有logger,创建logger
        if cls.logger is None:
            cls.logger = logging.getLogger(__name__)
            cls.logger.setLevel(logging.DEBUG)
            #首先确保存放日志文件的文件夹“logs”存在,否则创建
            if not os.path.exists("../logs"):
                os.mkdir("../logs")
            #定义文件的日期
            today = time.strftime("%Y-%m-%d")
            #添加文件处理器
            handler_all = logging.FileHandler(f"../logs/{today}.log",encoding='utf-8')
            handler_info=logging.FileHandler(f"../logs/{today}_info.log",encoding='utf-8')
            handler_info.addFilter(InfoFilter())
            handler_error=logging.FileHandler(f"../logs/{today}_err.log",encoding='utf-8')
            handler_error.addFilter(ErrFilter())
            #定义日志文件的格式
            fmt = logging.Formatter("%(asctime)s %(levelname)s [%(name)s] [%(filename)s (%(funcName)s:%(lineno)d)] - %(message)s")
            handler_all.setFormatter(fmt)
            handler_info.setFormatter(fmt)
            handler_error.setFormatter(fmt)
            #把处理器添加到 Logger 上
            cls.logger.addHandler(handler_all)
            cls.logger.addHandler(handler_info)
            cls.logger.addHandler(handler_error)
        return cls.logger
调用方式简洁:
# 导入 QQMusicLogger 类
from utils.logger import QQMusicLogger
def test_case_01():
    # 通过类名直接调用类方法,获取全局唯一的 logger
    log = QQMusicLogger.getLogger()
    log.info("测试用例1开始执行")
def test_case_02():
    log = QQMusicLogger.getLogger()   # 再次调用,返回的是同一个 logger,不会重复配置
log.error("测试用例2执行失败!")类变量_logger确保所有实例共享同一配置:
class Logger:
    logger = None   # 类变量,全项目唯一
# 即使这样用:
log1 = Logger.getlog()   # 内部访问 cls.logger
log2 = Logger.getlog()   # 内部访问同一个 cls.logger
print(log1 is log2)      # True,是同一个对象
调整启动/关闭模块,集成日志输出:
import pytest
import time
from pywinauto import Desktop
from pywinauto import Application
from Utils.logUtils import QQMusicLogger
class QQMusicApp:
    def __init__(self):
        self.win = None   # 用于保存找到的主窗口对象
        self.logger = QQMusicLogger.getLogger() #引入日志文件中的对象与方法
    def launch(self):
        """启动 QQ 音乐并定位主窗口"""
        qq_path = r"D:\QQMusicCache\QQMusicLyricNew\QQMusic\QQMusic.exe"
        Application(backend='uia').start(qq_path)
        # 2. 创建桌面对象,用于搜索所有顶层窗口
        desktop = Desktop(backend="uia")
        # 3. 轮询等待主窗口出现(最多尝试30次,每次间隔1秒)
        for i in range(30):
            # 列表推导式:从所有桌面窗口里筛选出满足条件的窗口
            # 条件1:类名为 "TXGuiFoundation"
            # 条件2:窗口当前可见
            qq_windows = [win for win in desktop.windows()
                          if win.class_name() == "TXGuiFoundation" and win.is_visible()]
            # 如果有符合条件的窗口:
            if qq_windows:
                #向日志输出info信息
                self.logger.info("成功打开QQ音乐")
                #取第一个(通常只有一个)
                self.win = qq_windows[0]
                self.logger.info(f">>> 找到主窗口,当前标题:{self.win.window_text()}")
                return  # 成功,退出方法
            else:
                # 还没找到,等1秒再试
                time.sleep(1)
        # 如果30秒后仍未找到,抛出异常
        self.logger.error("错误:30秒内未找到 QQ 音乐主窗口")
        raise Exception("错误:30秒内未找到 QQ 音乐主窗口")
    def close(self):
        """关闭主窗口"""
        if self.win:
            self.win.close()
            self.logger.info(">>> 窗口已关闭")
        else:
            self.logger.error(">>> 没有可关闭的窗口")
@pytest.fixture(scope="session")
def QQMusic_app():
    # 准备工作 (Setup)
    QQmusic = QQMusicApp()      # 创建 QQMusicApp 类的实例
    QQmusic.launch()            # 启动 QQ 音乐应用
    # 将准备好的对象返回给测试用例使用
    yield QQmusic
    # 在测试会话结束后自动执行
    QQmusic.close()             # 关闭 QQ 音乐应用
⚠️ 注意:相对路径可能引发错误,应使用绝对路径:
import logging
import os
import time
#定义操作级过滤器,语法记住即可
class InfoFilter(logging.Filter):
    def filter(self, record):
        return record.levelno == logging.INFO
#定义错误级过滤器
class ErrFilter(logging.Filter):
    def filter(self, record):
        return record.levelno == logging.ERROR
#定义QQ音乐日志类
class QQMusicLogger:
    logger=None
    @classmethod
    def getLogger(cls):
        #如果没有logger,创建logger
        if cls.logger is None:
            cls.logger = logging.getLogger(__name__)
            cls.logger.setLevel(logging.DEBUG)
            #首先确保存放日志文件的文件夹“logs”存在,否则创建
            if not os.path.exists(rf"C:\Users\lenovo\Desktop\QQMusicAuto\logs"):
                os.mkdir(rf"C:\Users\lenovo\Desktop\QQMusicAuto\logs")
            #定义文件的日期
            today = time.strftime("%Y-%m-%d")
            #添加文件处理器
            handler_all = logging.FileHandler(rf"C:\Users\lenovo\Desktop\QQMusicAuto\logs\{today}.log",encoding='utf-8')
            handler_info=logging.FileHandler(rf"C:\Users\lenovo\Desktop\QQMusicAuto\logs\{today}_info.log",encoding='utf-8')
            handler_info.addFilter(InfoFilter())
            handler_error=logging.FileHandler(rf"C:\Users\lenovo\Desktop\QQMusicAuto\logs\{today}_err.log",encoding='utf-8')
            handler_error.addFilter(ErrFilter())
            #定义日志文件的格式
            fmt = logging.Formatter("%(asctime)s %(levelname)s [%(name)s] [%(filename)s (%(funcName)s:%(lineno)d)] - %(message)s")
            handler_all.setFormatter(fmt)
            handler_info.setFormatter(fmt)
            handler_error.setFormatter(fmt)
            #把处理器添加到 Logger 上
            cls.logger.addHandler(handler_all)
            cls.logger.addHandler(handler_info)
            cls.logger.addHandler(handler_error)
        return cls.logger
⚙️ pytest.ini配置与COM错误处理
pytest.ini是项目的主配置文件,避免每次在命令行输入冗长参数。我们的配置如下:
[pytest]
addopts=-vs -p no:faulthandler| 配置片段 | 作用 | 通俗解释 |
|---|---|---|
| 详细输出 | 让你看清每个测试用例的名字和结果。 | |
| 不捕获输出 | 让 能实时打印到控制台,方便调试。 | |
| 禁用 插件 | 阻止底层崩溃时打印大量底层错误堆栈,保持控制台清爽。 |
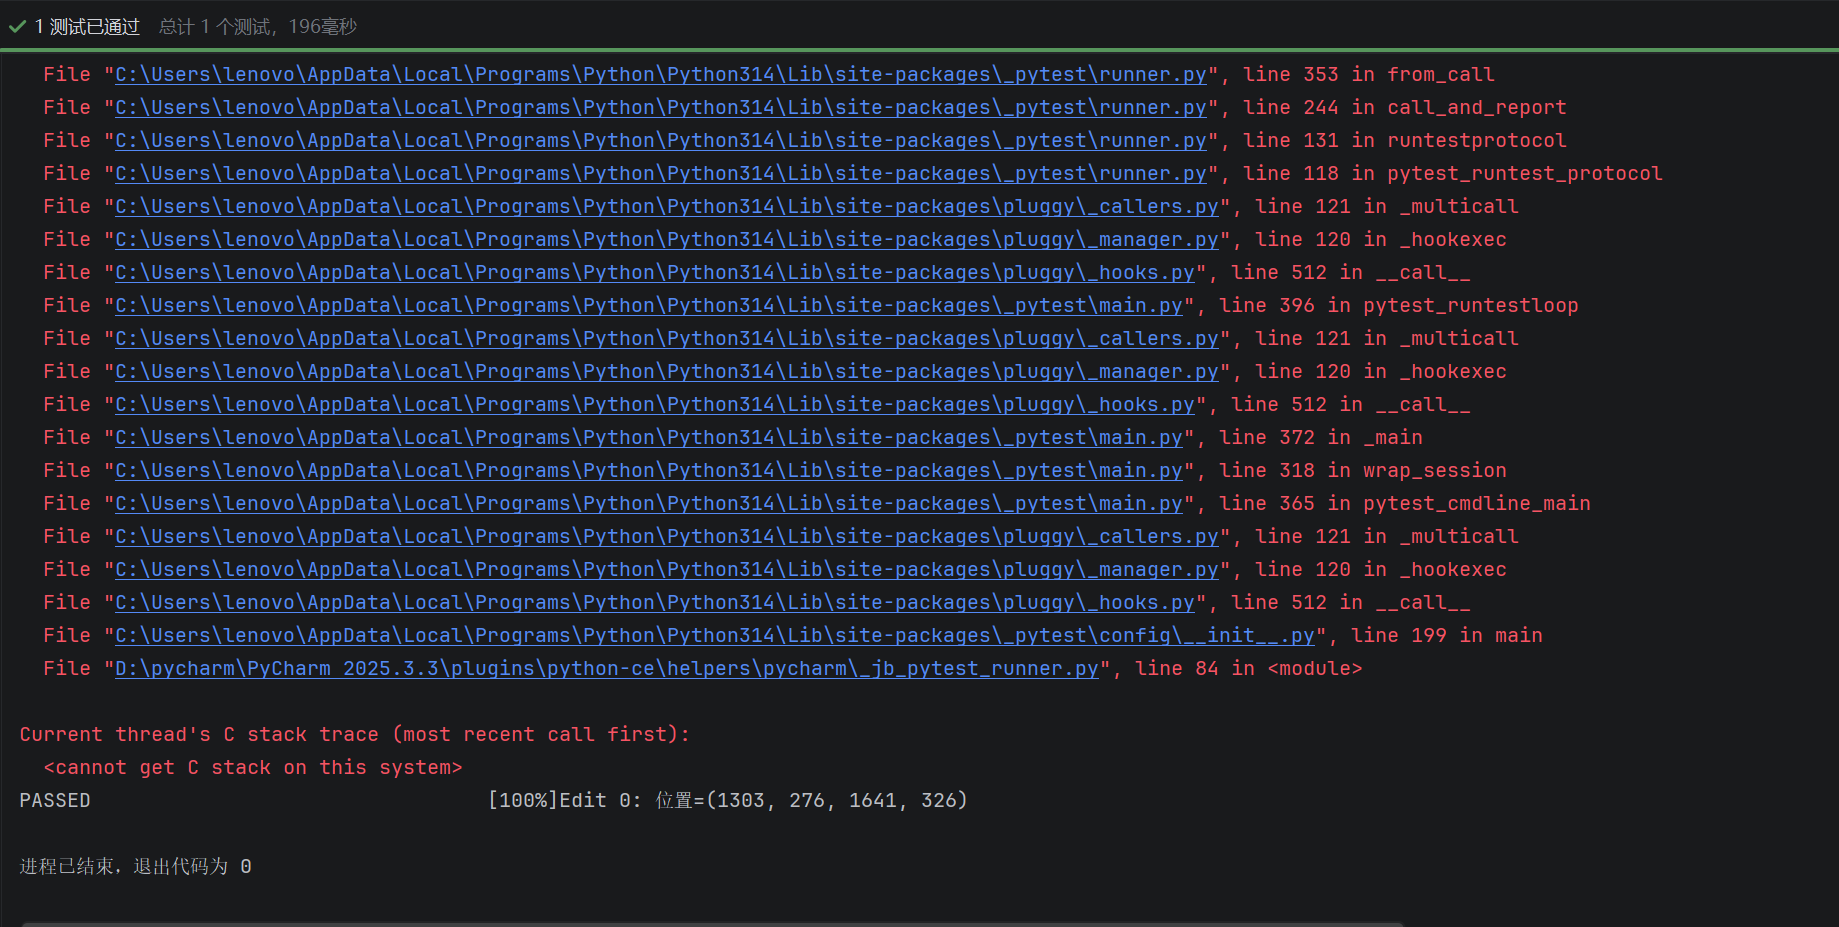
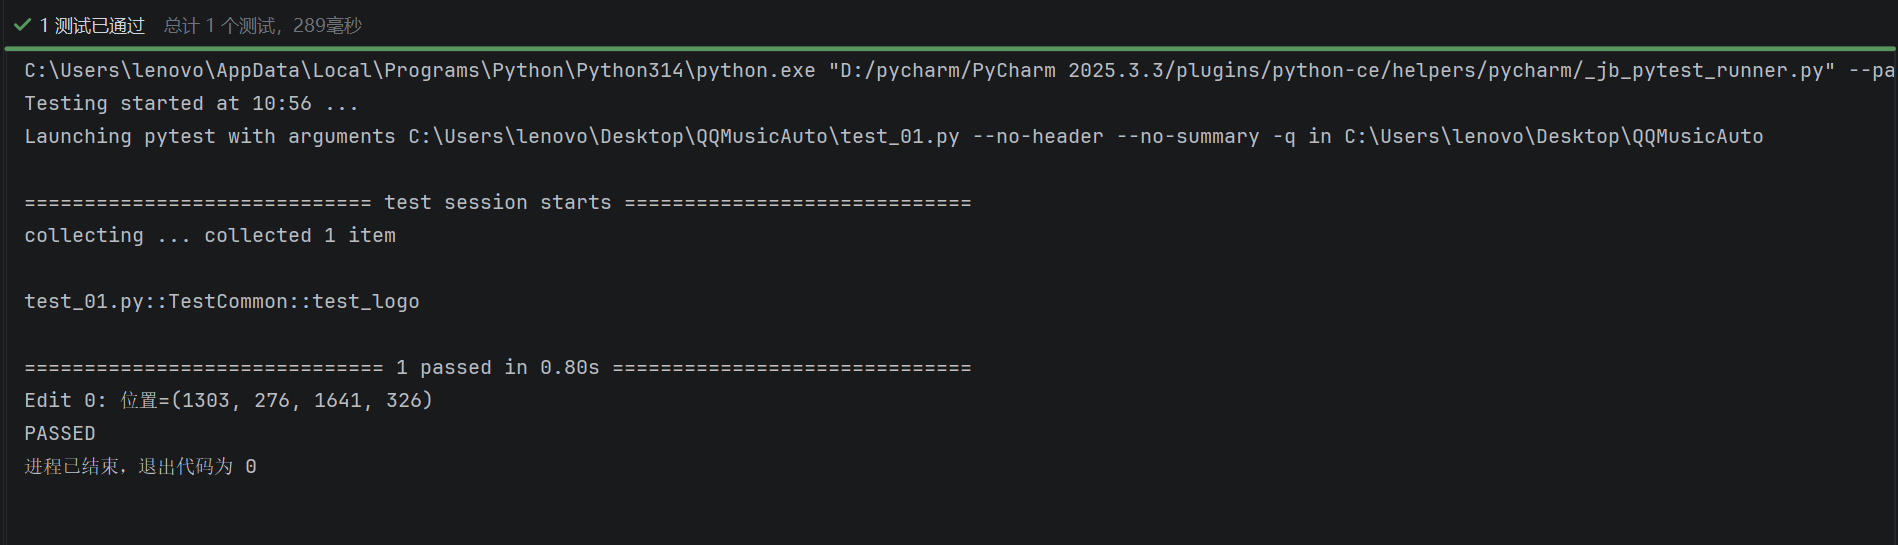
配置后,烦人的COM超时错误被屏蔽,日志更清晰:
搜索框与窗口状态测试
搜索框控件属性稀少(无名称、类名,仅控制类型为Edit),我们通过以下方式定位:
all_edits = QQMusic_app.win.descendants(control_type="Edit")查询当前窗口中的Edit控件数量:
all_edits = QQMusic_app.win.descendants(control_type="Edit")
        # 打印出来看看有几个,以及它们的位置
        for i, edit in enumerate(all_edits):
            rect = edit.rectangle()
            print(f"Edit {i}: 位置=({rect.left}, {rect.top}, {rect.right}, {rect.bottom})")
执行搜索操作并断言结果中是否包含目标歌手:
    def test_logo(self, QQMusic_app):
        # 获取主窗口下所有 Edit 控件
        all_edits = QQMusic_app.win.descendants(control_type="Edit")
        # 这里只有一个“Edit”(输入框)窗口
        search_edit = all_edits[0]
        #点击“Edit”窗口
        search_edit.click_input()
        #先ctrl+A全部选中输入框中的内容,防止输入框中本身就有内容
        search_edit.type_keys("^a")
        #输入内容“邓紫棋”并按下回车键
        search_edit.type_keys("邓紫棋{ENTER}")
        time.sleep(1)
def test_logo(self, QQMusic_app):
# 获取主窗口下所有 Edit 控件
all_edits = QQMusic_app.win.descendants(control_type="Edit")
# 这里只有一个“Edit”(输入框)窗口
search_edit = all_edits[0]
#点击“Edit”窗口
search_edit.click_input()
#先ctrl+A全部选中输入框中的内容,防止输入框中本身就有内容
search_edit.type_keys("^a")
#输入内容“邓紫棋”并按下回车键
search_edit.type_keys("邓紫棋{ENTER}")
time.sleep(1)
#all_result查找所有控制类型为链接的窗口(因为歌手名字其实是一个超链接,点击会跳转到歌手页面)
all_result=QQMusic_app.win.descendants(control_type="Hyperlink")
#result筛选出来这些链接中包含“邓紫棋”的结果
result=[link for link in all_result if re.search("邓紫棋",link.window_text())]
#如果result结果不为0,则测试成功
assert len(result)>0, "搜索结果中未找到包含'邓紫棋'的条目"反例测试:搜索不相关内容,应显示无结果界面:
    def test_search_fail(self,QQMusic_app):
        # 获取主窗口下所有 Edit 控件
        all_edits = QQMusic_app.win.descendants(control_type="Edit")
        # 这里只有一个“Edit”(输入框)窗口
        search_edit = all_edits[0]
        # 点击“Edit”窗口
        search_edit.click_input()
        # 先ctrl+A全部选中输入框中的内容,防止输入框中本身就有内容
        search_edit.type_keys("^a")
        # 输入内容“10203344”并按下回车键
        search_edit.type_keys("10203344{ENTER}")
        time.sleep(1)
        # all_result查找所有控制类型为链接的窗口
        all_result = QQMusic_app.win.descendants(title="输入的关键词是否有误或过长")
        # 如果result结果不为0,则测试成功
assert len(all_result) > 0, "并未给出错误输入提示"窗口最小化/最大化测试,直接使用窗口对象的is_minimized()等方法:
    def test_window_mini(self,QQMusic_app):
        #找到最小化窗口
        all_result = QQMusic_app.win.descendants(title="最小化",control_type="Button")
        result=all_result[0]
        #点击最小化按钮
        result.click_input()
        #判断窗口目前是否是最小化状态
        assert QQMusic_app.win.is_minimized()
        #还原窗口
QQMusic_app.win.restore()| 方法 | 作用 | 返回值 |
|---|---|---|
| 判断是否最小化 | / | |
| 判断是否最大化 | / | |
| 判断是否正常大小(既非最小也非最大) | / | |
| 最小化窗口 | 无 | |
| 最大化窗口 | 无 | |
| 恢复正常大小 | 无 | |
| 获取窗口显示状态编号 | =正常, =最大化, =最小化 |
    def test_window_maxi(self, QQMusic_app):
        # 找到最大化窗口
        all_result = QQMusic_app.win.descendants(title="最大化", control_type="Button")
        result = all_result[0]
        # 点击最大化按钮
        result.click_input()
        # 判断窗口目前是否是最大化状态
        assert QQMusic_app.win.is_maximized()
        # 还原窗口
        QQMusic_app.win.restore()
音乐导入与删除测试
音乐导入流程:点击“添加” → 选择“手动添加歌曲” → 输入文件路径 → 点击“打开”。关键步骤代码:
# 1. 点击“本地和下载”
        all_local = QQMusic_app.win.descendants(title="本地和下载", control_type="Pane")
        all_local[0].click_input()
        time.sleep(1)
# 2. 点击“添加”按钮
all_result = QQMusic_app.win.descendants(title="添加", control_type="Button")
all_result[0].click_input()
time.sleep(0.5)# 3. 键盘选择“手动添加歌曲”(如果你坚持用键盘,也可替换为坐标)
send_keys("{DOWN}")
time.sleep(0.2)
send_keys("{ENTER}")# 4. 等待对话框作为主窗口的子控件出现
time.sleep(2)
# 直接从主窗口查找对话框(使用 class_name 更准)
open_dlg_list = QQMusic_app.win.descendants(title="打开", control_type="Window")
open_dlg=open_dlg_list[0]
time.sleep(1)# 5. 输入文件路径
edit_list = open_dlg.descendants(title="文件名(N):", control_type="Edit")
edit=edit_list[0]
time.sleep(0.3)
edit.click_input()
time.sleep(0.3)
edit.type_keys("^a")
edit.type_keys(r"C:\Users\lenovo\Desktop\QQMusicAuto\Music\M800001ASMC447Mslm.mp3")
# 6. 点击“打开”按钮
open_btn_list = open_dlg.descendants(title="打开(O)", control_type="Button")
open_btn=open_btn_list[0]
open_btn.click_input()添加后验证歌名:
# 7. 验证是否添加成功
        music_name_list=QQMusic_app.win.descendants(title="童话镇",control_type="Hyperlink")
        music_name=music_name_list[0]
        #看一下有没有名字为“童话镇的歌曲”
        assert "童话镇" in music_name.window_text(), f"未找到'童话镇',实际为'{music_name.window_text()}'"
⚠️ 注意:重复运行会导致控件变化,建议补充删除功能以保持测试幂等性。
删除测试:右键点击歌曲 → 选择删除。通过键盘模拟实现:
    def test_import_delete(self, QQMusic_app):
        QQMusic_app.logger.info("========== 开始测试:删除歌曲 ==========")
        music_name_list = QQMusic_app.win.descendants(title="童话镇", control_type="Hyperlink")
        music_name = music_name_list[0]
        music_name.right_click_input()
        QQMusic_app.logger.info("右键点击歌曲'童话镇',弹出菜单")
        # 应对弹出的选项卡
        for i in range(3):
            send_keys("{UP}")
        send_keys("{ENTER}")
        send_keys("{ENTER}")
        QQMusic_app.logger.info("键盘选择'删除'并确认")
        time.sleep(2)
        music_find_list=QQMusic_app.win.descendants(title="童话镇", control_type="Hyperlink")
        # 如果能找到“童话镇”的歌曲,证明已删除
        assert len(music_find_list) == 0, "删除失败,歌曲依然存在"
        QQMusic_app.logger.info("验证通过:歌曲已删除,显示'没有本地歌曲'")
        QQMusic_app.logger.info("========== 测试完成:删除歌曲 ==========")
️ 图像识别:攻克自绘控件
对于自绘按钮(如播放模式切换),UIA框架无法识别其属性。此时需要图像识别:
| 对比项 | 控件识别() | 图像识别() |
|---|---|---|
| 原理 | 通过 UI Automation 接口,直接读取程序的“控件户口本”,拿到按钮的名字、ID、坐标。 | 截取整个屏幕(或窗口),在像素矩阵里搜索和你提供的图片最相似的一块区域。 |
| 依赖 | 程序必须把控件信息注册到系统中。 | 只依赖屏幕显示内容,不关心程序内部如何实现。 |
| 优点 | 速度快、稳定、能读取文本内容、不受窗口遮挡或分辨率影响。 | 无视任何自绘、跨平台框架、游戏界面。只要肉眼能看到,它就能点。 |
| 缺点 | 遇到自绘控件、Web 内嵌页面直接“瞎”。 | 速度稍慢、依赖屏幕分辨率/DPI/主题颜色、窗口被遮挡时会失败、无法读取文字。 |
封装图像识别函数,自动点击播放模式按钮:
# 点击播放模式的按钮
def click_play_mode_icon():
    """尝试匹配多种播放模式图标,点击第一个找到的"""
    icon_images = [
        r'C:\Users\lenovo\Desktop\QQMusicAuto\find_img\radom.png',  # 随机播放时的图标
        r'C:\Users\lenovo\Desktop\QQMusicAuto\find_img\cycle.png',  # 列表循环时的图标
        r'C:\Users\lenovo\Desktop\QQMusicAuto\find_img\one_cycle.png',  # 单曲循环时的图标
        r'C:\Users\lenovo\Desktop\QQMusicAuto\find_img\sequence.png'  # 顺序播放时的图标
    ]
    for img_path in icon_images:
        try:
            x, y = pyautogui.locateCenterOnScreen(img_path, confidence=0.8)
            pyautogui.click(x, y)
            return True
        except pyautogui.ImageNotFoundException:
            continue
raise Exception("未找到任何播放模式图标,请检查")随机播放测试:点击“下一首”三次,若连续顺序播放则判定为Bug:
# 移动鼠标到目标位置并点击
        pyautogui.moveTo(x, y, duration=0.5)  # 0.5秒内平滑移动,便于观察
        pyautogui.click()
time.sleep(2)
next_image=r'C:\Users\lenovo\Desktop\QQMusicAuto\find_img\next.png'
x, y = pyautogui.locateCenterOnScreen(next_image, confidence=0.8)
pyautogui.moveTo(x, y, duration=0.5)
pyautogui.click()
current_title1 = QQMusic_app.win.window_text()
match = re.search(r'第(\d+)集', current_title1)
num1 = match.group(1) # 直接拿到数字
if num1 == '2':
# 点击“下一首”
time.sleep(2)
next_image = r'C:\Users\lenovo\Desktop\QQMusicAuto\find_img\next.png'
x, y = pyautogui.locateCenterOnScreen(next_image, confidence=0.8)
pyautogui.moveTo(x, y, duration=0.5)
pyautogui.click()
current_title1 = QQMusic_app.win.window_text()
match1 = re.search(r'第(\d+)集', current_title1)
num2 = match1.group(1) # 直接拿到数字
if num2 == '3':
# 点击“下一首”
time.sleep(2)
next_image = r'C:\Users\lenovo\Desktop\QQMusicAuto\find_img\next.png'
x, y = pyautogui.locateCenterOnScreen(next_image, confidence=0.8)
pyautogui.moveTo(x, y, duration=0.5)
pyautogui.click()
current_title2 = QQMusic_app.win.window_text()
match2 = re.search(r'第(\d+)集', current_title2)
num3 = match2.group(1) # 直接拿到数字
if num3 == '4':
assert False,"随机播放出现问题"# 点击播放模式的按钮
def click_play_mode_icon():
"""尝试匹配多种播放模式图标,点击第一个找到的"""
icon_images = [
r'C:\Users\lenovo\Desktop\QQMusicAuto\find_img\radom.png', # 随机播放时的图标
r'C:\Users\lenovo\Desktop\QQMusicAuto\find_img\cycle.png', # 列表循环时的图标
r'C:\Users\lenovo\Desktop\QQMusicAuto\find_img\one_cycle.png', # 单曲循环时的图标
r'C:\Users\lenovo\Desktop\QQMusicAuto\find_img\sequence.png' # 顺序播放时的图标
]
for img_path in icon_images:
try:
x, y = pyautogui.locateCenterOnScreen(img_path, confidence=0.8)
pyautogui.click(x, y)
return True
except pyautogui.ImageNotFoundException:
continue
raise Exception("未找到任何播放模式图标,请检查")
class TestCommon:
def test_radom(self, QQMusic_app):
# 这段部分就是找搜索框,和前面的差不多
all_edits = QQMusic_app.win.descendants(control_type="Edit")
# 这里只有一个“Edit”(输入框)窗口
search_edit = all_edits[0]
# 点击“Edit”窗口
search_edit.click_input()
# 先ctrl+A全部选中输入框中的内容,防止输入框中本身就有内容
search_edit.type_keys("^a")
# 输入内容“蛊真人|全网更新最快|多人有声”并按下回车键
search_edit.type_keys("蛊真人|全网更新最快|多人有声{ENTER}")
time.sleep(1)
# 点击“专辑”选项
album_list = QQMusic_app.win.descendants(title="专辑", control_type="Button")
album = album_list[0]
album.click_input()
time.sleep(1)
# 找到"蛊真人|全网更新最快|多人有声剧|大爱仙尊|曲中人工作室|大爱仙尊|古月方源春秋蝉|爆更"并点击
all_novel = QQMusic_app.win.descendants(title="蛊真人|全网更新最快|多人有声剧|大爱仙尊|曲中人工作室|大爱仙尊|古月方源春秋蝉|爆更"
, control_type="Hyperlink")
novel = all_novel[0]
novel.click_input()
time.sleep(3)
# 切换模式到随机播放
click_play_mode_icon()
time.sleep(2)
# 找到选项列表的随机播放
judge_radom = r"C:\Users\lenovo\Desktop\QQMusicAuto\find_img\judge_radom.png"
x, y = pyautogui.locateCenterOnScreen(judge_radom, confidence=0.8)
pyautogui.moveTo(x, y, duration=0.5)
pyautogui.click()
# 点击播放全部,从第一首开始放
# 这里加载慢,我们等久一点
time.sleep(1)
play_all_image = r'C:\Users\lenovo\Desktop\QQMusicAuto\find_img\play_all.png'
# 在屏幕上查找目标图片,返回图像中心点坐标
# confidence=0.8 表示匹配度要求为80%,可根据实际情况调整
# 注意:confidence参数需要安装opencv-python库
x, y = pyautogui.locateCenterOnScreen(play_all_image, confidence=0.8)
# 移动鼠标到目标位置并点击
pyautogui.moveTo(x, y, duration=0.5) # 0.5秒内平滑移动,便于观察
pyautogui.click()循环播放与单曲循环测试:
    def test_cycle(self, QQMusic_app):
        # 点击“播放全部”,从第一集播放
        play_all_image = r'C:\Users\lenovo\Desktop\QQMusicAuto\find_img\play_all.png'
        x, y = pyautogui.locateCenterOnScreen(play_all_image, confidence=0.8)
        # 移动鼠标到目标位置并点击
        pyautogui.moveTo(x, y, duration=0.5)  # 0.5秒内平滑移动,便于观察
        pyautogui.click()
        click_play_mode_icon()
        time.sleep(2)
        judge_radom = r"C:\Users\lenovo\Desktop\QQMusicAuto\find_img\judge_sequence.png"
        x, y = pyautogui.locateCenterOnScreen(judge_radom, confidence=0.8)
        pyautogui.moveTo(x, y, duration=0.5)
        pyautogui.click()
        for i in range(9):
            time.sleep(1)
            # 判断
            match = re.search(r'第(\d+)集', QQMusic_app.win.window_text())
            if i+1 != int(match.group(1)):
                assert False,"顺序播放出现问题"
            #点击“下一首”
            next_image = r'C:\Users\lenovo\Desktop\QQMusicAuto\find_img\next.png'
            x, y = pyautogui.locateCenterOnScreen(next_image, confidence=0.8)
            pyautogui.moveTo(x, y, duration=0.5)
            pyautogui.click()
# 点击播放全部
play_all_image = r'C:\Users\lenovo\Desktop\QQMusicAuto\find_img\play_all.png'
x, y = pyautogui.locateCenterOnScreen(play_all_image, confidence=0.8)
# 移动鼠标到目标位置并点击
pyautogui.moveTo(x, y, duration=0.5) # 0.5秒内平滑移动,便于观察
pyautogui.click()
# 切换到单曲循环模式
click_play_mode_icon()
time.sleep(2)
judge_radom = r"C:\Users\lenovo\Desktop\QQMusicAuto\find_img\judge_one_cycle.png"
x, y = pyautogui.locateCenterOnScreen(judge_radom, confidence=0.8)
pyautogui.moveTo(x, y, duration=0.5)
pyautogui.click()
title1 = QQMusic_app.win.window_text()单曲循环需将进度条拖至末尾。通过图像识别定位进度条,并偏移像素点击末端:
time.sleep(3)
# 点击13:33(第一集结束时间)向左43的位置
time_end_image = r'C:\Users\lenovo\Desktop\QQMusicAuto\find_img\time_end.png'
x, y = pyautogui.locateCenterOnScreen(time_end_image, confidence=0.8)
# 移动鼠标到目标位置并点击
pyautogui.moveTo(x-43, y, duration=0.5) # 0.5秒内平滑移动,便于观察
pyautogui.click()
time.sleep(2)
title2 = QQMusic_app.win.window_text()
if title1!=title2:
assert None,"单曲循环错误" def test_one_cycle(self, QQMusic_app):
# 点击播放全部
        play_all_image = r'C:\Users\lenovo\Desktop\QQMusicAuto\find_img\play_all.png'
        x, y = pyautogui.locateCenterOnScreen(play_all_image, confidence=0.8)
        # 移动鼠标到目标位置并点击
        pyautogui.moveTo(x, y, duration=0.5)  # 0.5秒内平滑移动,便于观察
        pyautogui.click()
        # 切换到单曲循环模式
        click_play_mode_icon()
        time.sleep(2)
        judge_radom = r"C:\Users\lenovo\Desktop\QQMusicAuto\find_img\judge_one_cycle.png"
        x, y = pyautogui.locateCenterOnScreen(judge_radom, confidence=0.8)
        pyautogui.moveTo(x, y, duration=0.5)
        pyautogui.click()
        title1 = QQMusic_app.win.window_text()
time.sleep(3)
# 点击13:33(第一集结束时间)向左43的位置
time_end_image = r'C:\Users\lenovo\Desktop\QQMusicAuto\find_img\time_end.png'
x, y = pyautogui.locateCenterOnScreen(time_end_image, confidence=0.8)
# 移动鼠标到目标位置并点击
pyautogui.moveTo(x-43, y, duration=0.5)  # 0.5秒内平滑移动,便于观察
pyautogui.click()
time.sleep(2)
title2 = QQMusic_app.win.window_text()
if title1!=title2:
    assert None,"单曲循环错误"
# 按个暂停
stop_list=QQMusic_app.win.descendants(title="暂停",control_type="Button")
stop=stop_list[0]
stop.click_input()音量调节与换肤测试
音量滑块也是自绘控件。方案一(pyautogui拖拽)失败后,采用方案二:以小喇叭图标为参照,点击音量条的不同位置:
 # 找到音量条的位置并点击不同位置
        x,y=pyautogui.locateCenterOnScreen(volume_image, confidence=0.8)
        # 静音
        pyautogui.moveTo(x+5,y-100, duration=0.5)
        pyautogui.click()
        # 调高到33%
        time.sleep(1)
        pyautogui.moveTo(x + 5, y - 250, duration=0.5)
        pyautogui.click()
        # 调高到75%
        time.sleep(1)
        pyautogui.moveTo(x + 5, y - 320, duration=0.5)
        pyautogui.click()
幸运的是,音量值可通过UIA直接获取:
    def test_volume(self, QQMusic_app):
        # 单击音乐调节按钮
        volume_image = r'C:\Users\lenovo\Desktop\QQMusicAuto\find_img\volume.png'
        pyautogui.moveTo(volume_image, duration=0.5)
        pyautogui.click()
        time.sleep(0.3)
        x, y = pyautogui.locateCenterOnScreen(volume_image, confidence=0.8)
        # 调高到33%~35%
        pyautogui.moveTo(x + 5, y - 252, duration=0.5)
        pyautogui.click()
        time.sleep(0.3)
        all_btns = QQMusic_app.win.descendants(control_type="Button")
        vol_list = [btn for btn in all_btns if re.search(r'音量:\d+%', btn.window_text())]
        vol = vol_list[0]
        vol_num = re.search(r'\d+', vol.window_text()).group()
        assert 33 <= int(vol_num) <= 35
        # 调高到75%
        time.sleep(0.3)
        pyautogui.moveTo(x + 5, y - 320, duration=0.5)
        pyautogui.click()
        time.sleep(0.3)
        all_btns = QQMusic_app.win.descendants(control_type="Button")
        vol_list = [btn for btn in all_btns if re.search(r'音量:\d+%', btn.window_text())]
        vol = vol_list[0]
        vol_num = re.search(r'\d+', vol.window_text()).group()
        assert 74 <= int(vol_num) <= 76
        # 静音
        time.sleep(0.3)
        pyautogui.moveTo(x + 5, y - 100, duration=0.5)
        pyautogui.click()
        time.sleep(0.3)
        all_btns = QQMusic_app.win.descendants(control_type="Button")
        mute_list = [btn for btn in all_btns if re.search(r'静音', btn.window_text())]
        mute = mute_list[0]
        mute_text = mute.window_text()
assert "静音" in mute_text换肤测试:进入换肤页面,通过鼠标悬停触发“立即使用”按钮,并验证当前皮肤状态:
# 点击换肤按钮
        skin_list = QQMusic_app.win.descendants(title="换肤", control_type="Button")
        skin_list[0].click_input()
        time.sleep(1)
# 2. 从当前位置向上移动500像素,并向右移动500像素
pyautogui.moveRel(500, -500, duration=0.5)
# 在当前位置向上滚动250个单位
pyautogui.scroll(-250)
time.sleep(1)# 定位到黑色并点击
skin_black = r'C:\Users\lenovo\Desktop\QQMusicAuto\find_img\black.png'
x, y = pyautogui.locateCenterOnScreen(skin_black, confidence=0.8)
time.sleep(0.5)
pyautogui.moveTo(x - 20, y + 20)
pyautogui.click()# 定位到白色并点击
skin_black = r'C:\Users\lenovo\Desktop\QQMusicAuto\find_img\white.png'
x, y = pyautogui.locateCenterOnScreen(skin_black, confidence=0.8)
time.sleep(0.5)
pyautogui.moveTo(x - 20, y + 20)
pyautogui.click() def test_change_skin(self, QQMusic_app):
# 点击换肤按钮
skin_list = QQMusic_app.win.descendants(title="换肤", control_type="Button")
skin_list[0].click_input()
time.sleep(1)
# 2. 从当前位置向上移动500像素,并向右移动500像素
        pyautogui.moveRel(500, -500, duration=0.5)
        # 在当前位置向上滚动250个单位
        pyautogui.scroll(-250)
        time.sleep(1)
# 定位到黑色并点击
        skin_black = r'C:\Users\lenovo\Desktop\QQMusicAuto\find_img\black.png'
        x, y = pyautogui.locateCenterOnScreen(skin_black, confidence=0.8)
        time.sleep(0.5)
        pyautogui.moveTo(x - 20, y + 20)
        pyautogui.click()
# 验证黑色主题
judge_black = r'C:\Users\lenovo\Desktop\QQMusicAuto\find_img\judge_black.png'
try:
pyautogui.locateCenterOnScreen(judge_black, confidence=0.8)
except pyautogui.ImageNotFoundException:
assert False, "黑色主题验证失败,未检测到黑色主题特征"
# 定位到白色并点击
        skin_black = r'C:\Users\lenovo\Desktop\QQMusicAuto\find_img\white.png'
        x, y = pyautogui.locateCenterOnScreen(skin_black, confidence=0.8)
        time.sleep(0.5)
        pyautogui.moveTo(x - 20, y + 20)
        pyautogui.click()
time.sleep(1)
#验证白色主题
judge_white=r'C:\Users\lenovo\Desktop\QQMusicAuto\find_img\judge_white.png'
try:
pyautogui.locateCenterOnScreen(judge_white, confidence=0.8)
except pyautogui.ImageNotFoundException:
assert False, "白色主题验证失败,未检测到白色主题特征"✅ 总结
本文从零搭建了QQ音乐的自动化测试体系,涵盖了:框架封装、日志配置、控件定位、图像识别、播放模式测试、音量与换肤等核心模块。关键技术点包括:
- 使用
Desktop全局搜索避免启动程序不可定位 - 类变量实现日志全局共享
- 图像识别突破自绘控件限制
- 偏移点击与鼠标悬停解决复杂交互
希望这篇指南能帮助你快速上手桌面应用的自动化测试,无论是Python、Java还是TypeScript开发者,都能从中汲取实用技巧。
error.log%(asctime)s2025-06-30 14:23:45,1232025-06-30 14:23:45,123%(levelname)sINFO[%(name)s]getLogger(__name__)[qqmusic_test][%(filename)s[main.py(%(funcName)s(launch:%(lineno)d]:42]- %(message)slogger.info("xxx")- 程序启动-v-sprint-p no:faulthandlerfaulthandleris_minimized()TrueFalseis_maximized()TrueFalseis_normal()TrueFalseminimize()maximize()restore()get_show_state()012pywinautopyautogui


 浙公网安备 33010602011771号