深入理解系统调用
实验要求
- 找一个系统调用,系统调用号为学号最后2位相同的系统调用
- 通过汇编指令触发该系统调用
- 通过gdb跟踪该系统调用的内核处理过程
- 重点阅读分析系统调用入口的保存现场、恢复现场和系统调用返回,以及重点关注系统调用过程中内核堆栈状态的变化
理论知识
用户态
用户态是用户程序执行时机器所处的状态,是具有较低特权的执行状态,它只能执行规定的指令,只能访问指定的寄存器和存储区。
核心态
核心态是操作系统管理程序执行时机器所处的状态。它具有较高的特权,能执行包括特权指令的一切指令,能访问所有寄存器和存储区。特权指令只能由操作系统内核使用,如IO指令、设置中断屏蔽指令、清内存指令、存储保护指令和设置时钟指令
用户态和核心态的转换
划分核心态和用户态后,这两类程序以及各自的存储空间被严格区分。当用户态想要调用核心态程序时,可以通过系统调用,即执行访问核心态的命令,引起中断,由中断系统转入操作系统内的相应程序
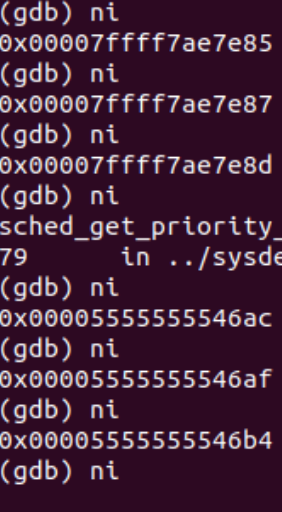
系统调用过程
- 首先准备并传递系统调用所需的参数,通过陷入trap指令(汇编中的entry_INT80_32或entry_SYSCALL_64)进入操作系统的内核,此时将从用户态进入核心态;
- 执行相应的系统调用函数,使用特定的内核功能;
- 最后将处理结果返回给用户进程,此时将从内核态返回用户态
![]()
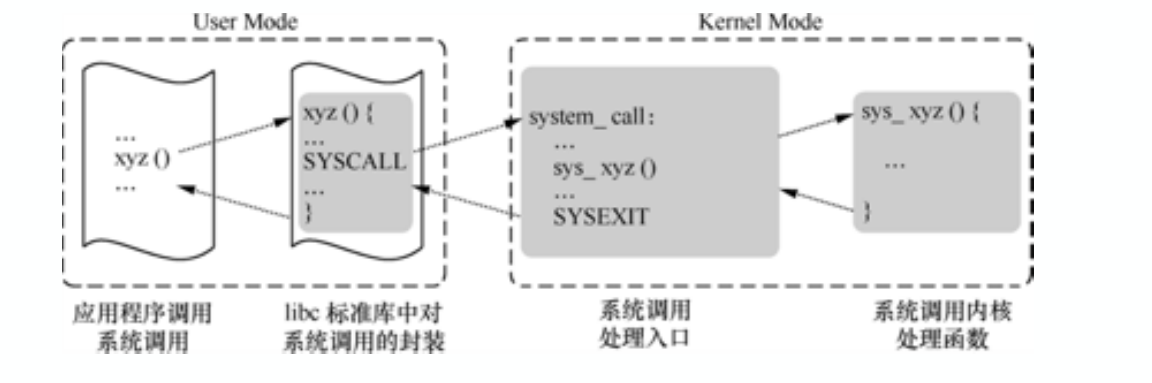
linux的系统调用
- 在linux中参数传递中通过压栈完成。64位x86体系结构下普通的函数调用和系统调用都是通过寄存器传递参数,RDI、RSI、RDX、RCX、R8、R9这6个寄存器用作函数/系统调用参数传递,依次对应第 1 参数到第 6 个参数
- 然后通过使用C库函数和int $0x80/syscall汇编代码触发系统调用,引发中断时会有保存现场,执行中断函数,恢复现场,中断返回等操作
- 返回结果ret
搭建实验环境
下载内核源码
注意,由于使用实验一的搭建的内核会出现很多莫名的错误,所以重新使用实验一下载好的tar压缩包重新解压搭建。另外需要的工具也与实验一一致,详见https://www.cnblogs.com/junljw/p/12878158.html
tar -xvf linux-5.4.34.tar
cd linux-5.4.34
配置内核选项
make defconfig
make menuconfig
选中Kernel hacking --->
再选中Compile-time checks and compiler options --->
勾选Compile the kernel with debug info 和 Provide GDB scripts for kernel debugging
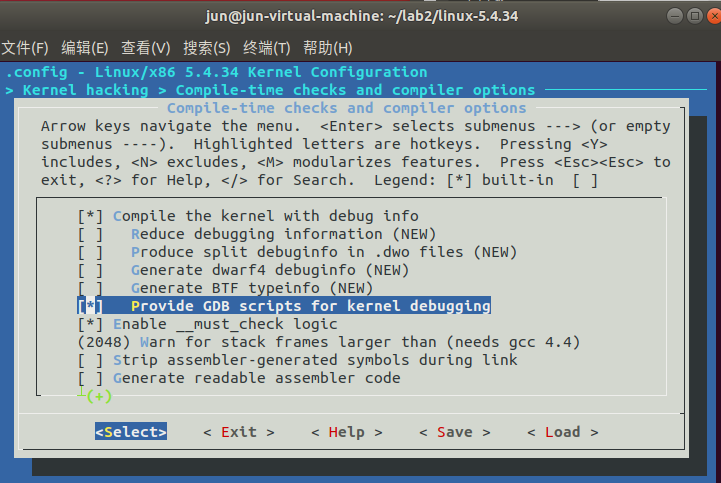
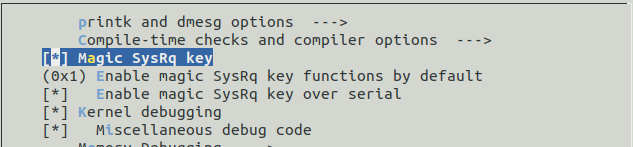
返回上一页,勾选Kernel debugging
返回首页,选中Processor type and features ---->
关闭Randomize the address of the kernel image (KASLR)

保存后退出即可
编译和运行内核
make -j$(nproc)#时间较长,耐心等待
qemu-system-x86_64 -kernel arch/x86/boot/bzImage
此时内核不能正常加载属于正常
制作根文件系统
axel -n 20 https://busybox.net/downloads/busybox-1.31.1.tar.bz2
注意请下载在根文件目录,而不是linux-5.4.34内
tar -jxvf busybox-1.31.1.tar.bz2
cd busybox-1.31.1
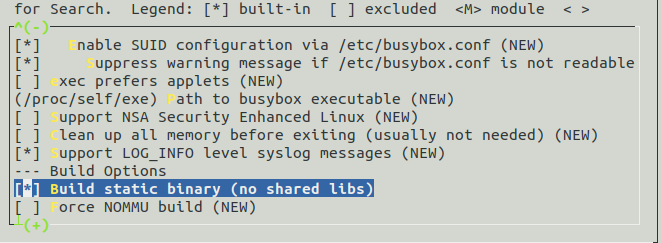
make menuconfig
选中Settings --->
然后勾选Build static binary (no shared libs)
make -j$(nproc) && make install #编译安装
mkdir rootfs
 cd rootfs
 cp ../busybox-1.31.1/_install/* ./ -rf
 mkdir dev proc sys home
 sudo cp -a /dev/{null,console,tty,tty1,tty2,tty3,tty4} dev/
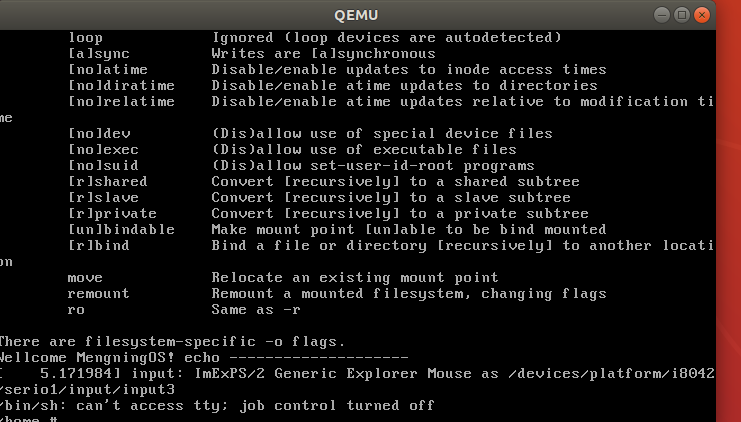
准备init脚本文件放在根文件系统跟⽬录下(rootfs/init),init文件内容如下
 #!/bin/sh
 mount -t proc none /proc
 mount -t sysfs none /sys
 echo "Wellcome MengningOS!"
 echo "--------------------"
 cd home
 /bin/sh
给init文件加上权限
chmod +x init
镜像设置
find . -print0 | cpio --null -ov --format=newc | gzip -9 > ../ rootfs.cpio.gz #打包成内存根文件系统镜像
下面在根目录下用指令进入看是否成功
qemu-system-x86_64 -kernel linux-5.4.34/arch/x86/boot/bzImage -initrd rootfs.cpio.gz

查看系统调用指令
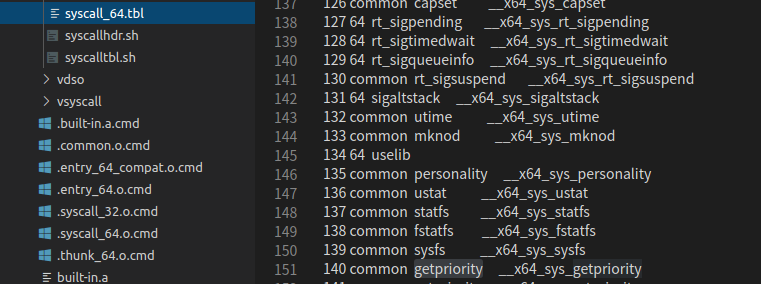
选定系统调用getpriority
由于我的学号尾数为40,首先查看了sendfile指令
但由于sendfile会触发read和write的系统调用,引发多次上下文切换,不易于跟踪,查看了140的系统调用为getpriority
getpriority分析
getpriority函数原型为int getpriority( int which, int two );
该函数返回一组进程的优先级。参数 which 和 who 组合确定返回哪一组进程的优先级。which 的可能取值以及 who 的意义如下:
编写代码mytest.c触发系统调用,mytest.c内容如下
#include <stdio.h>
#include <sys/types.h>
#include <unistd.h>
#include <sys/resource.h>
#include <sys/wait.h>
#include <stdlib.h>

int main(void)
{
    pid_t pid;
   int stat_val = 0;
   int oldpri, newpri;

    printf("nice study\n");

    pid = fork();
   switch( pid ) {
       case 0:
       printf("Child is running, Curpid is %d, Parentpid is %d\n",
           pid, getppid());

       oldpri = getpriority(PRIO_PROCESS, getpid());
       printf("Old priority = %d\n", oldpri);

       newpri = nice(2);
       printf("New priority = %d\n", newpri);

       exit(0);

       case -1:
       perror("Process creation failed\n");
       break;

       default:
       printf("Parent is running,Childpid is %d, Parentpid is %d\n", pid, getpid());
       break;
    }

    wait(&stat_val);
    exit(0);
}
输出结果如下:

gdb跟踪调试
重新打包根文件目录
find . -print0 | cpio --nll -ov --format=newc | gzip -9 > ../ rootfs.cpio.gz
启动内核
qemu-system-x86_64 -kernel linux-5.4.34/arch/x86/boot/bzImage -initrd rootfs.cpio.gz -S -s -nographic -append "console=ttyS0"

此时内核暂停于此,再另开一个终端进入gdb调试
·gdb vmlinux·
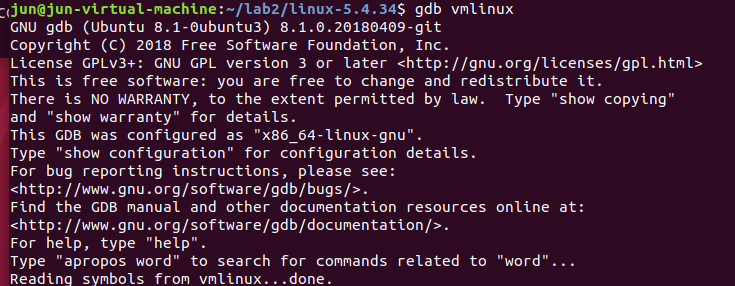
·target remote:1234·

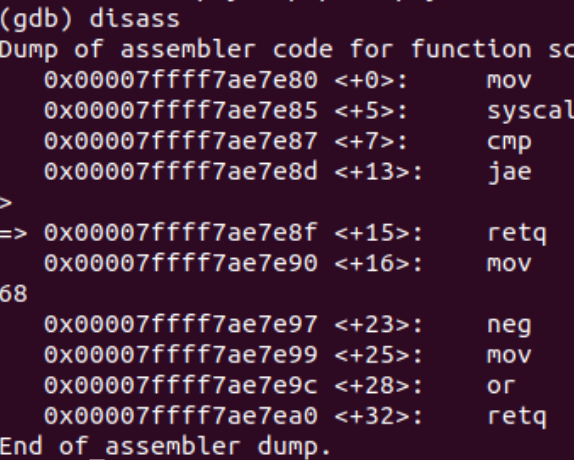
查看得知系统调用入口为__x64_sys_getpriority,设置断点
b __x64_sys_getpriority

单步调试
显示步骤详情
总结
getpriority函数内有两个参数,其首先将其压栈值RDI、RSI寄存器,然后发生中断,从__x64_sys_getpriority入口进入,最后获取的优先级返回。该过程与理论分析基本一致。

 浙公网安备 33010602011771号