vue的生命函数周期以及钩子函数的详解
首先我们先附上官网的图
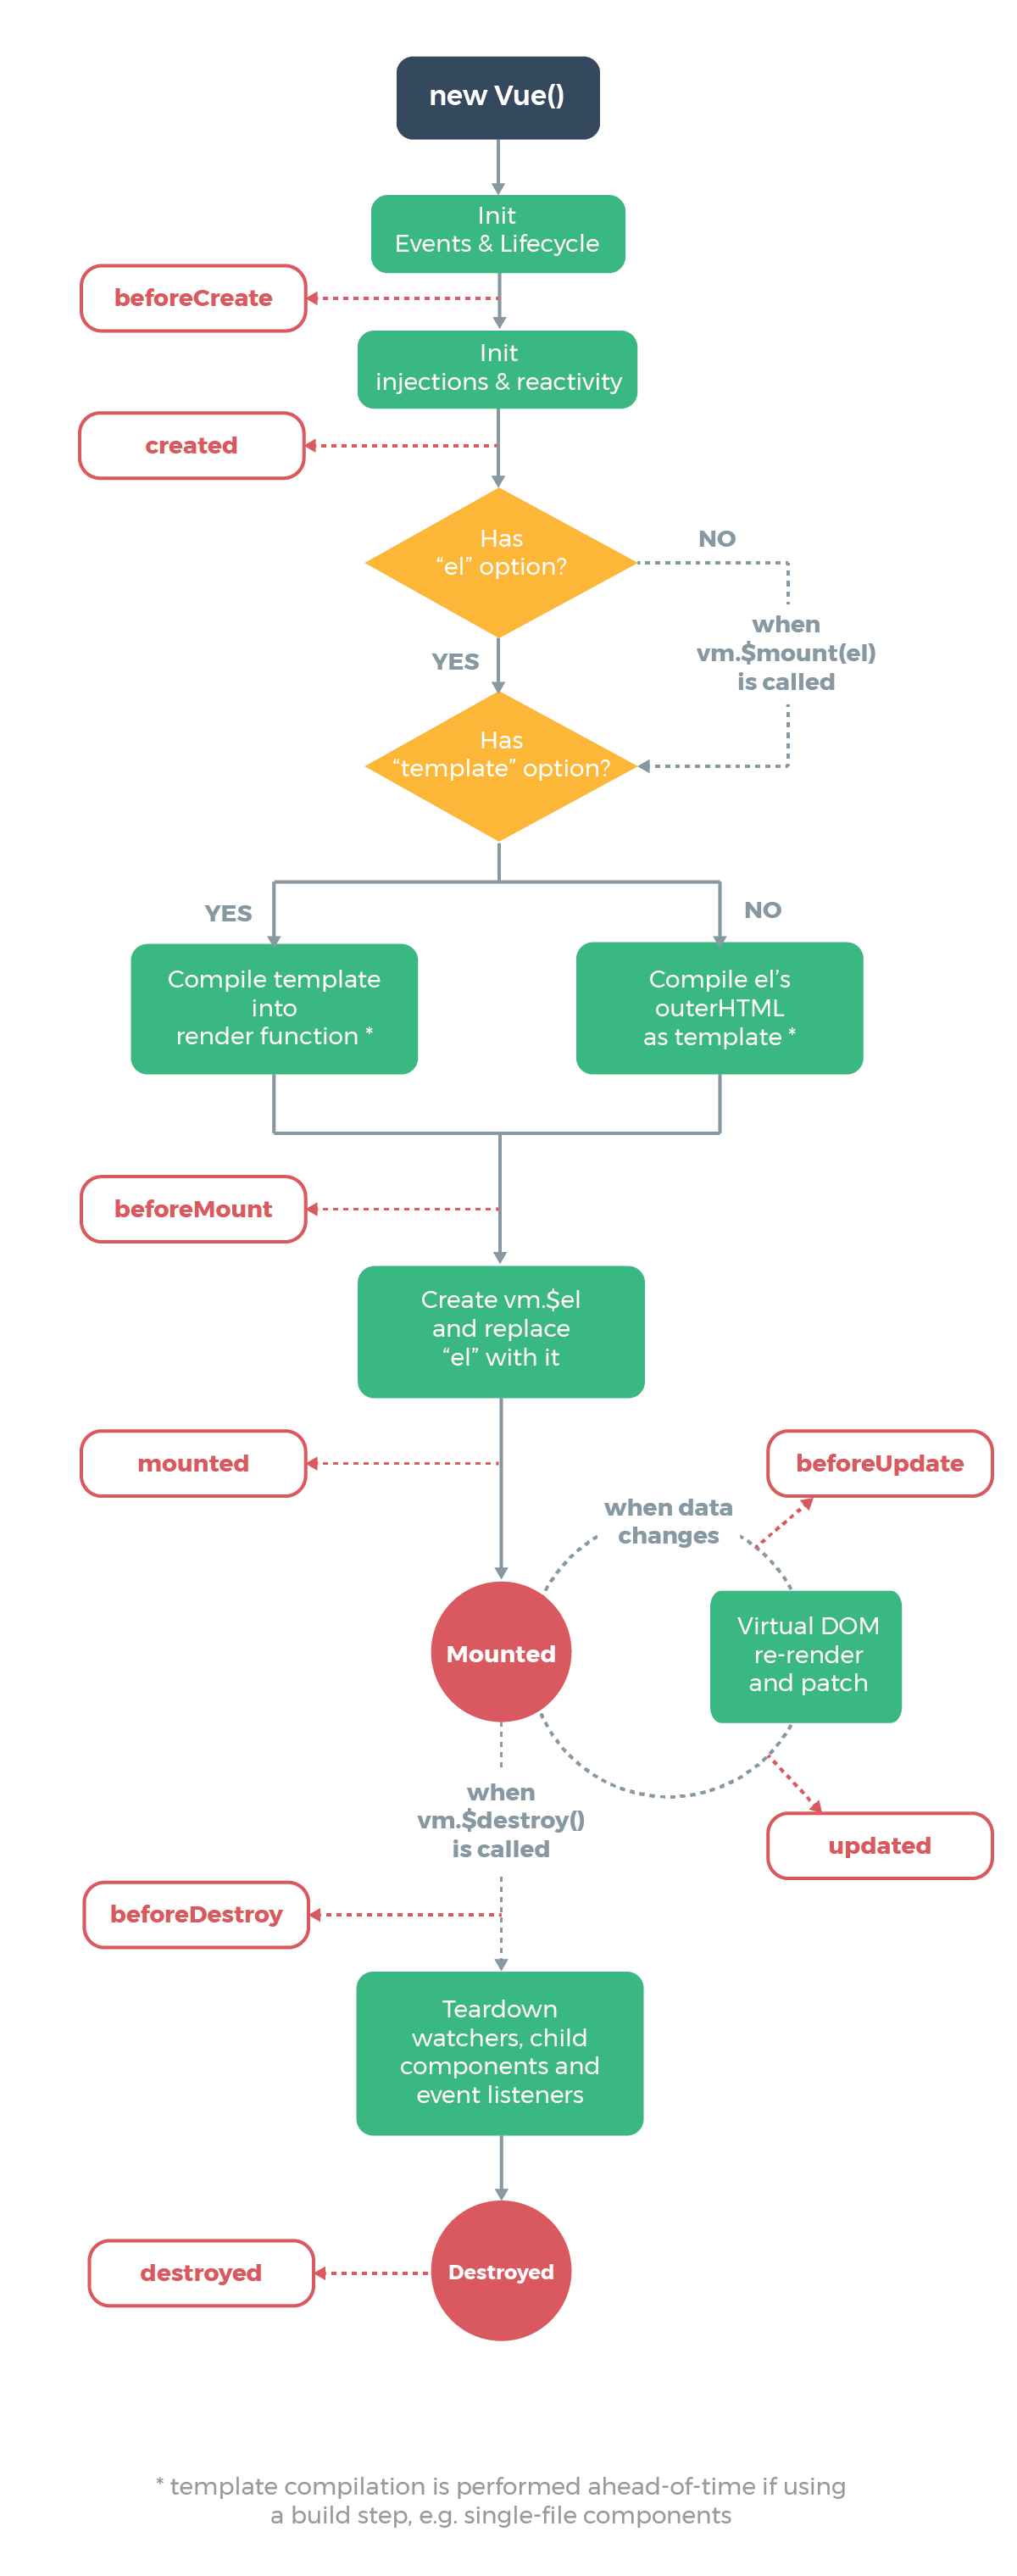
图中展现出的是vue整个生命周期以及钩子函数
1- beforeCreate(创建前)
2- created(创建完成)
3- beforeMount(挂载前)
4- mounted(挂载完成)
5- beforeUpdate(更新前)
6- updated(更新完成)
7- beforeDestroy(销毁前)
8- destroyed(销毁完成)
<!DOCTYPE html>
<html lang="en">

<head>
  <meta charset="UTF-8">
  <meta name="viewport" content="width=device-width, initial-scale=1.0">
  <title>Document</title>
</head>

<body>
  <div id='app'>
    <button @click="btnclick">点击更新</button>
    <h1>{{message}}我是outerHTML</h1>
  </div>
<script src="https://cdn.jsdelivr.net/npm/vue"></script>
  <script>
    const app = new Vue({
      el: '#app',
      //template:"<h2>{{message}}--我位于template里</h2>", // vue实例内部
      // render:function(creatElement){
      //   return creatElement("h2","this is renter函数内部")
      // },
      data: {
        message:"hello vue!"
      },
      beforeCreate:function(){
        console.log("beforeCreate(创建前):");
        console.log(this.$el);
        console.log(this.$data);
        console.log(this.message);
      },
      created: function () {
        console.log("created(创建完成):");
        console.log(this.$el);
        console.log(this.$data);
        console.log(this.message);
      },
      beforeMount: function () {
        console.log("beforeMounted(挂载前):");
        console.log(this.$el);
        console.log(this.$data);
        console.log(this.message);
      },
      mounted: function () {
        console.log("mounted(挂载完成):");
        console.log(this.$el);
        console.log(this.$data);
        console.log(this.message);
      },
      beforeUpdate: function () {
        console.log("beforeUpdate(更新前):");
        console.log(this.$el);
        console.log(this.$data);
        console.log(this.message);
      },
      updated: function () {
        console.log("updated(更新后):");
        console.log(this.$el);
        console.log(this.$data);
        console.log(this.message);
      },
      beforeDestroy: function () {
        console.log("beforeDestroy(销毁前):");
        console.log(this.$el);
        console.log(this.$data);
        console.log(this.message);
      },
      destroyed: function () {
        console.log("destroyed(销毁后):");
        console.log(this.$el);
        console.log(this.$data);
        console.log(this.message);
      },
      methods:{
        btnclick:function(){
          this.message = "hello world!";
        }
      }

    })
  </script>
</body>

</html>
源代码如上,运行结果,之后点击更新按钮,控制台截图
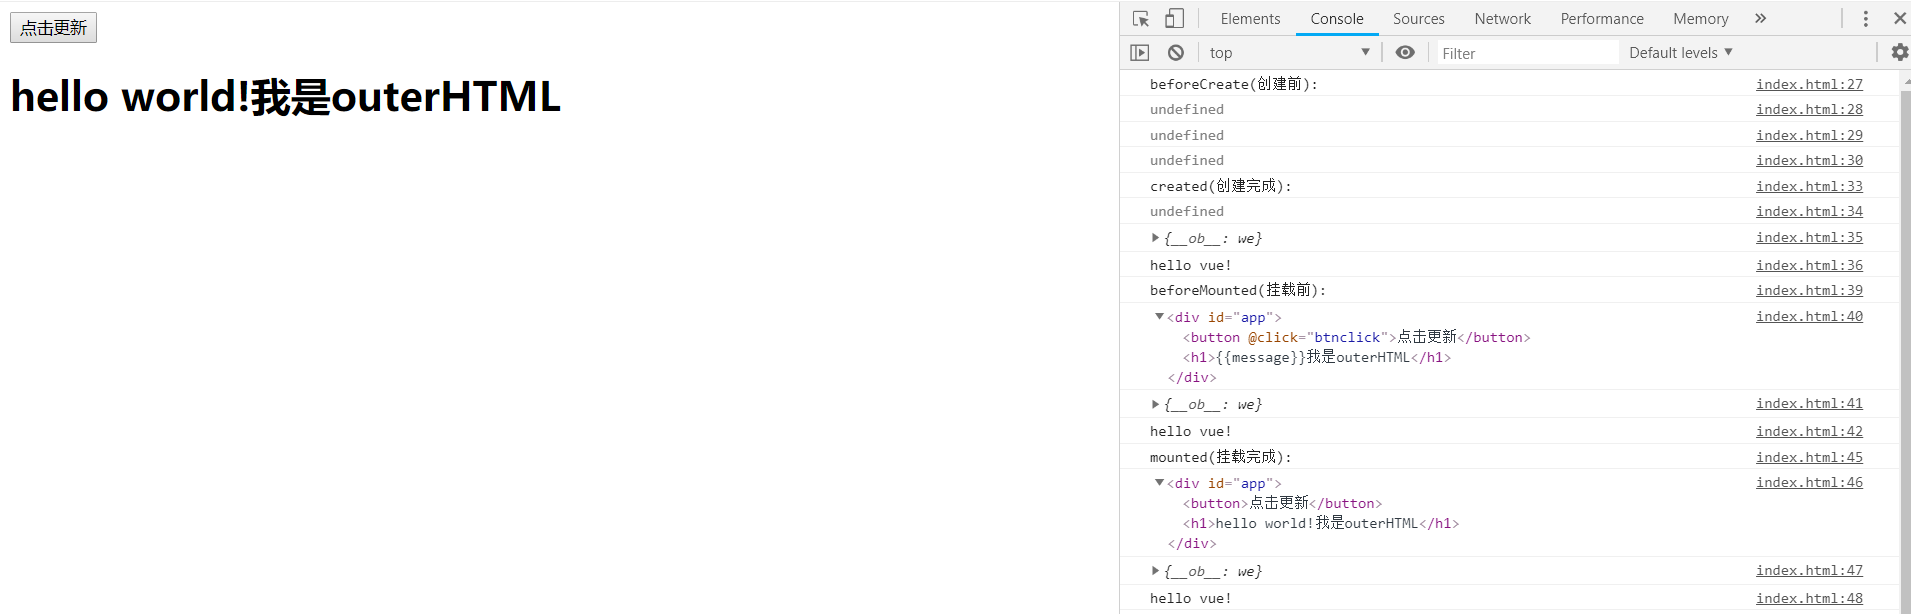
调用了一些我们的钩子函数
1. 在beforeCreate和created之间
进行初始化事件,数据的观测,在 created 的时候数据已经和 data 属性进行绑定。但此时尚未挂载,el 还不可用。
2. 在created和beforeMount之间
首先会先判断对象是否有el选项,如果有则继续向下编译,如果没有就会停止编译,也就意味着停止了生命周期,直到在该 Vue 实例上调用 vm.$mount(el)。
当我们没有el选项时,注释掉el选项,再运行看控制台:

我们可以看到,没有el选项时,直接到created就结束了.
当我们有el选项时,
则会进行下一步,看看对象是否有template选项
render>template>outerhtml
outerHTML就是在html代码块中的代码模板
template在vue实例内部定义的模板
render函数
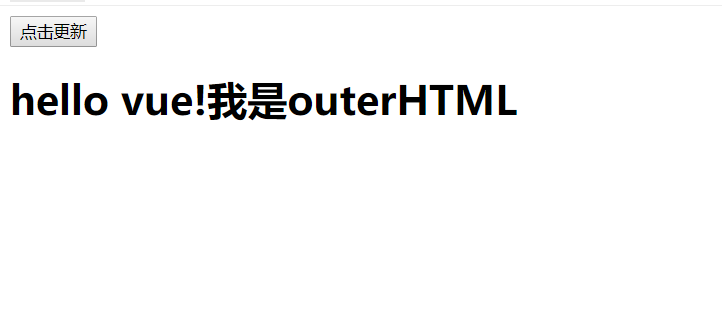
下面我们先写上outerHTML,运行看结果:
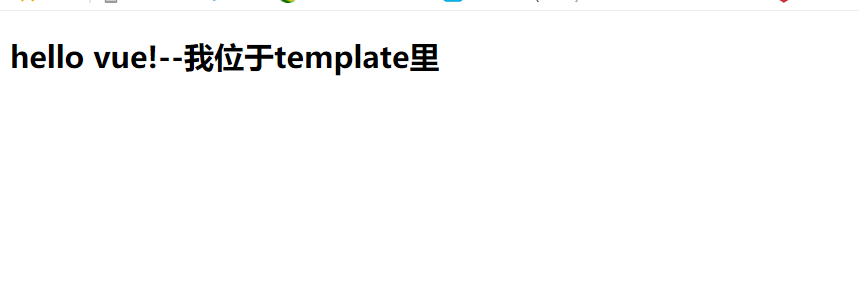
然后在这个得基础上去掉代码中的template选项的注释,我们运行下看结果:
然后在上面的基础上,我们将render函数选项注释去掉,再来看看我们的结果:
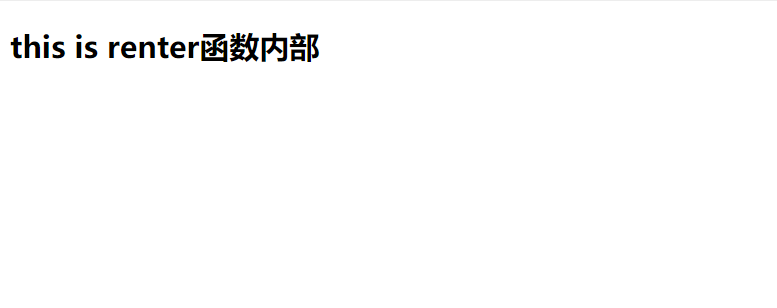
很明显,我们就比较出了,他们的优先级别: render > template >outerHTML
3. 在beforeMount和Mounted之间
给对象添加了el选项,我们也可以看替换掉挂载的 DOM 元素。
4.mounted
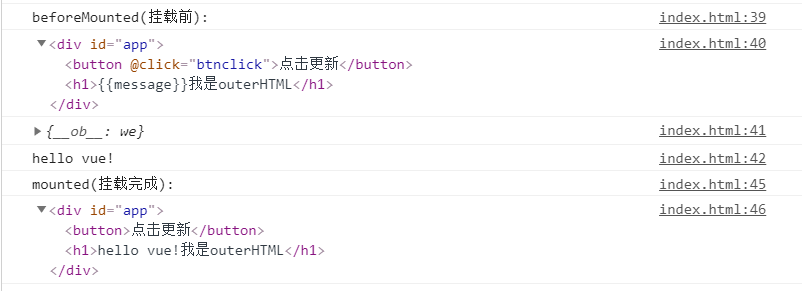
在beforeMounted时,h1中的内容通过{{message}}进行占位,此时还没有被挂载到页面上,还是处于VDOM的形式存在. 在mounted之后才被挂载完成
5.在beforeUpdate和update之间
我们图中有按钮,点击更新则会触发这两个钩子函数
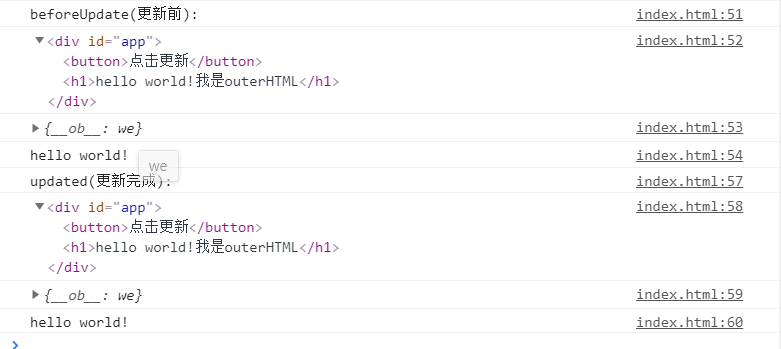
当vue发现data中的数据发生了改变,会触发对应组件的重新渲染,先后调用beforeUpdate和updated钩子函数。
当更新完成后,执行updated,数据已经更改完成,DOM也重新render完成,可以操作更新后的VDOM.
7. 当经过某种途径调用$destroy方法后,在实例销毁之前 立即执行beforeDestroy,在实例销毁之前调用。在这一步,实例仍然完全可用。一般在这里做一些善后工作,例如清除计时器、清除非指令绑定的事件等等
8. 组件的数据绑定、监听...去掉后只剩下DOM空壳,这个时候,执行 destroyed钩子函数。调用后,Vue 实例指示的所有东西都会解除绑定,所有的事件监听器会被移除,所有的子实例也会被销毁。 在Vue 实例销毁后调用.

 浙公网安备 33010602011771号