基于netty的多人单聊天室
最近正好公司需要做一个聊天室的功能,所以就选择用netty做一个聊天室,觉得蛮有意思的,netty是一个非常优秀的框架,在之后的文章中会整理出有关netty学习的文章。
项目要求做的是多人多个聊天室,目前大多数项目中需要的是多人多聊天室,我是采用的redis实现的多聊天室,万事都要循序渐进,这篇文章先分享一下多人单聊天室的功能实现,后续的文章中会分享多人多聊天室的功能实现。
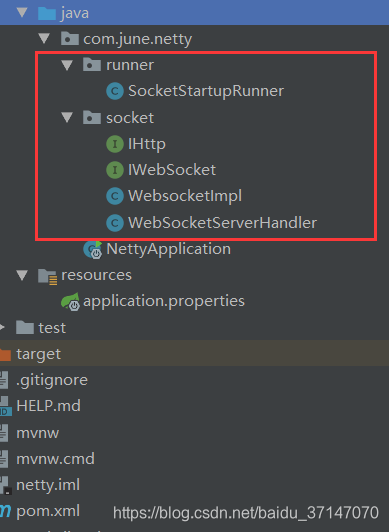
项目使用的是springboot,然后把socket初始化放在项目启动之后,而不是网上广为流传的使用另外的main方法启动,下图是主要文件:
本着面向接口编程的思想,把http和websocket的两个方法抽到了接口文件中,首先是 IHttp接口:
package com.june.netty.socket;

import io.netty.channel.ChannelHandlerContext;
import io.netty.handler.codec.http.FullHttpRequest;

public interface IHttp {

    void handleHttpRequset(ChannelHandlerContext ctx, FullHttpRequest request);
}
IWebSocket接口:
package com.june.netty.socket;

import io.netty.channel.ChannelHandlerContext;
import io.netty.handler.codec.http.websocketx.TextWebSocketFrame;

public interface IWebSocket {

     void textdoMessage(ChannelHandlerContext ctx, TextWebSocketFrame msg);

}
然后是实现类WebsocketImpl,实现了IHttp和IWebSocket两个接口,关于消息的发送方法和初始化方法就在这个类中:
package com.june.netty.socket;

import com.alibaba.fastjson.JSON;
import com.google.gson.Gson;
import io.netty.bootstrap.ServerBootstrap;
import io.netty.channel.*;
import io.netty.channel.group.ChannelGroup;
import io.netty.channel.group.DefaultChannelGroup;
import io.netty.channel.nio.NioEventLoopGroup;
import io.netty.channel.socket.nio.NioServerSocketChannel;
import io.netty.handler.codec.http.FullHttpRequest;
import io.netty.handler.codec.http.HttpHeaderNames;
import io.netty.handler.codec.http.HttpObjectAggregator;
import io.netty.handler.codec.http.HttpServerCodec;
import io.netty.handler.codec.http.websocketx.TextWebSocketFrame;
import io.netty.handler.codec.http.websocketx.WebSocketServerHandshaker;
import io.netty.handler.codec.http.websocketx.WebSocketServerHandshakerFactory;
import io.netty.handler.stream.ChunkedWriteHandler;
import io.netty.util.AttributeKey;
import io.netty.util.concurrent.GlobalEventExecutor;
import java.util.HashMap;
import java.util.Map;
import java.util.concurrent.ConcurrentHashMap;

public class WebsocketImpl implements IHttp,IWebSocket{
    private static final String HN_HTTP_CODEC = "HN_HTTP_CODEC";
    private static final String NH_HTTP_AGGREGATOR ="NH_HTTP_AGGREGATOR";
    private static final String NH_HTTP_CHUNK = "HN_HTTP_CHUNK";
    private static final String NH_SERVER = "NH_LOGIC";

    private static final AttributeKey<WebSocketServerHandshaker> ATTR_HANDSHAKER = AttributeKey.newInstance("ATTR_KEY_CHANNELID");

    private static final int MAX_CONTENT_LENGTH = 65536;

    private static final String WEBSOCKET_URI_ROOT_PATTERN = "ws://%s:%d";
    //websocket地址
    private String host;
    //websocket端口号
    private int port;
    //存放websocket连接
    private Map<ChannelId, Channel> channelMap = new ConcurrentHashMap<ChannelId, Channel>();
    private ChannelGroup group = new DefaultChannelGroup(GlobalEventExecutor.INSTANCE);
    private final String WEBSOCKET_URI_ROOT;
    public WebsocketImpl(String host, int port) {
        super();
        this.host = host;
        this.port = port;
        WEBSOCKET_URI_ROOT = String.format(WEBSOCKET_URI_ROOT_PATTERN, host, port);
    }
    //socket初始化方法
    public void start(){
        EventLoopGroup bossGroup = new NioEventLoopGroup();
        EventLoopGroup workerGroup = new NioEventLoopGroup();
        ServerBootstrap sb = new ServerBootstrap();
        sb.group(bossGroup, workerGroup);
        sb.channel(NioServerSocketChannel.class);
        sb.childHandler(new ChannelInitializer<Channel>() {
            @Override
            protected void initChannel(Channel ch) throws Exception {
                // TODO Auto-generated method stub
                ChannelPipeline pl = ch.pipeline();
                //保存引用
                channelMap.put(ch.id(), ch);
                group.add(ch);
                ch.closeFuture().addListener(new ChannelFutureListener() {
                    @Override
                    public void operationComplete(ChannelFuture future) throws Exception {
                        // TODO Auto-generated method stub
                        //关闭后抛弃
                        channelMap.remove(future.channel().id());
                        group.remove(ch);
                    }
                });
                pl.addLast(HN_HTTP_CODEC,new HttpServerCodec());
                pl.addLast(NH_HTTP_AGGREGATOR,new HttpObjectAggregator(MAX_CONTENT_LENGTH));
                pl.addLast(NH_HTTP_CHUNK,new ChunkedWriteHandler());
                pl.addLast(NH_SERVER,new WebSocketServerHandler(WebsocketImpl.this,WebsocketImpl.this));
            }
        });
        try {
            ChannelFuture future = sb.bind(host,port).addListener(new ChannelFutureListener() {
                @Override
                public void operationComplete(ChannelFuture future) throws Exception {
                    // TODO Auto-generated method stub
                    if(future.isSuccess()){
                        System.out.println("websocket started");
                    }
                }
            }).sync();
            future.channel().closeFuture().addListener(new ChannelFutureListener() {
                @Override
                public void operationComplete(ChannelFuture future) throws Exception {
                    // TODO Auto-generated method stub
                    System.out.println("channel is closed");
                }
            }).sync();
        } catch (InterruptedException e) {
            // TODO Auto-generated catch block
            e.printStackTrace();
        } finally{
            bossGroup.shutdownGracefully();
            workerGroup.shutdownGracefully();
        }
        System.out.println("websocket stoped");
    }

    @Override
    public void handleHttpRequset(ChannelHandlerContext ctx, FullHttpRequest request) {
            String subProtocols = request.headers().get(HttpHeaderNames.SEC_WEBSOCKET_PROTOCOL);
            WebSocketServerHandshakerFactory factory = new WebSocketServerHandshakerFactory(WEBSOCKET_URI_ROOT, subProtocols, false);
            WebSocketServerHandshaker handshaker = factory.newHandshaker(request);
            if(handshaker == null){
                WebSocketServerHandshakerFactory.sendUnsupportedVersionResponse(ctx.channel());
            }else{
                handshaker.handshake(ctx.channel(), request);
                ctx.channel().attr(ATTR_HANDSHAKER).set(handshaker);
            }
            return;
    }

    @Override
    public void textdoMessage(ChannelHandlerContext ctx, TextWebSocketFrame msg) {
        Map<String,Object> maps = (Map) JSON.parse(msg.text());
        String value = (String) maps.get("msg");
        Map<String,String> backMap = new HashMap<String,String>();
        backMap.put("msg",value);
        Gson gson = new Gson();
        group.writeAndFlush(new TextWebSocketFrame(gson.toJson(backMap)));
    }
}
然后是消息的接收方法类:
package com.june.netty.socket;

import io.netty.channel.ChannelHandlerContext;
import io.netty.channel.SimpleChannelInboundHandler;
import io.netty.handler.codec.http.FullHttpRequest;
import io.netty.handler.codec.http.websocketx.TextWebSocketFrame;

public class WebSocketServerHandler extends SimpleChannelInboundHandler<Object>{
    private IWebSocket iWebSocket;

    private IHttp iHttp;

    public WebSocketServerHandler(IWebSocket iWebSocket,
                                  IHttp iHttp) {
        super();
        this.iWebSocket = iWebSocket;
        this.iHttp = iHttp;
    }

    @Override
    protected void channelRead0(ChannelHandlerContext ctx, Object msg)
            throws Exception {
        // TODO Auto-generated method stub
        if (msg instanceof TextWebSocketFrame){
            iWebSocket.textdoMessage(ctx,(TextWebSocketFrame)msg);
        }if(msg instanceof FullHttpRequest){
            iHttp.handleHttpRequset(ctx, (FullHttpRequest)msg);
        }
    }
    @Override
    public void channelReadComplete(ChannelHandlerContext ctx) throws Exception {
        // TODO Auto-generated method stub
        ctx.flush();
    }


}
最后是随着项目一起启动和初始化websocket的类SocketStartupRunner
package com.june.netty.runner;

import com.june.netty.socket.WebsocketImpl;
import org.springframework.boot.CommandLineRunner;
import org.springframework.core.annotation.Order;
import org.springframework.stereotype.Component;

@Component
@Order(value = 2)
public class SocketStartupRunner implements CommandLineRunner {
    @Override
    public void run(String... args) throws Exception {
        WebsocketImpl socket = new WebsocketImpl("localhost", 8009);
        socket.start();
    }

}
关于pom.xml文件中的配置,主要的是netty的包,因为后续还有别的功能,所以里面多余的包可以看自己情况去掉:
<?xml version="1.0" encoding="UTF-8"?>
<project xmlns="http://maven.apache.org/POM/4.0.0" xmlns:xsi="http://www.w3.org/2001/XMLSchema-instance"
         xsi:schemaLocation="http://maven.apache.org/POM/4.0.0 http://maven.apache.org/xsd/maven-4.0.0.xsd">
    <modelVersion>4.0.0</modelVersion>
    <parent>
        <groupId>org.springframework.boot</groupId>
        <artifactId>spring-boot-starter-parent</artifactId>
        <version>2.1.7.RELEASE</version>
        <relativePath/> <!-- lookup parent from repository -->
    </parent>
    <groupId>com.june</groupId>
    <artifactId>netty</artifactId>
    <version>0.0.1-SNAPSHOT</version>
    <name>netty</name>
    <description>Demo project for Spring Boot</description>

    <properties>
        <project.build.sourceEncoding>UTF-8</project.build.sourceEncoding>
        <project.reporting.outputEncoding>UTF-8</project.reporting.outputEncoding>
        <java.version>1.8</java.version>
        <fastjson.version>1.2.15</fastjson.version>
    </properties>
    <dependencies>
        <dependency>
            <groupId>org.springframework.boot</groupId>
            <artifactId>spring-boot-starter-data-redis-reactive</artifactId>
        </dependency>
        <dependency>
            <groupId>org.springframework.boot</groupId>
            <artifactId>spring-boot-starter-websocket</artifactId>
        </dependency>

        <dependency>
            <groupId>org.springframework.boot</groupId>
            <artifactId>spring-boot-starter-test</artifactId>
            <scope>test</scope>
        </dependency>
        <!-- fastjson json -->
        <dependency>
            <groupId>com.alibaba</groupId>
            <artifactId>fastjson</artifactId>
            <version>${fastjson.version}</version>
        </dependency>
        <dependency>
            <groupId>org.springframework</groupId>
            <artifactId>spring-test</artifactId>
            <scope>compile</scope>
        </dependency>

        <!-- spring security -->
        <dependency>
            <groupId>io.jsonwebtoken</groupId>
            <artifactId>jjwt</artifactId>
            <version>0.7.0</version>
        </dependency>
        <dependency>
            <groupId>redis.clients</groupId>
            <artifactId>jedis</artifactId>
            <version>2.8.1</version>
        </dependency>
        <dependency>
            <groupId>com.google.guava</groupId>
            <artifactId>guava</artifactId>
            <version>18.0</version>
        </dependency>
        <dependency>
            <groupId>com.google.code.gson</groupId>
            <artifactId>gson</artifactId>
            <version>${gson.version}</version>
        </dependency>
        <dependency>
            <groupId>commons-io</groupId>
            <artifactId>commons-io</artifactId>
            <version>2.5</version>
        </dependency>
        <dependency>
            <groupId>io.netty</groupId>
            <artifactId>netty-all</artifactId>
            <version>4.1.6.Final</version>
        </dependency>

    </dependencies>

    <build>
        <plugins>
            <plugin>
                <groupId>org.springframework.boot</groupId>
                <artifactId>spring-boot-maven-plugin</artifactId>
            </plugin>
        </plugins>
    </build>

</project>
这些是后台的代码,启动后console打印websocket started,表示已经启动成功了。
然后是前端的静态页面,随手写了一个简单的h5文件,没写样式比较丑,但是实现了功能,也有在vue中实现的,会在后续的多聊天室中补上
<!DOCTYPE html PUBLIC "-//W3C//DTD XHTML 1.0 Transitional//EN" "http://www.w3.org/TR/xhtml1/DTD/xhtml1-transitional.dtd">
<html xmlns="http://www.w3.org/1999/xhtml">
<head>
<meta http-equiv="Content-Type" content="text/html; charset=utf-8" />
<title></title>
</head>
  </head>
  <script type="text/javascript">
  var socket;
  if(!window.WebSocket){
      window.WebSocket = window.MozWebSocket;
  }
  if(window.WebSocket){
      socket = new WebSocket("ws://localhost:8009");
      socket.onmessage = function(event){
            appendln("收到:" + JSON.parse(event.data).msg);
      };
      socket.onopen = function(event){
            appendln("链接已打开");
      };
      socket.onclose = function(event){
            appendln("链接已关闭");
      };
  }else{
        alert("链接丢失");
  }

  function send(message){
    if(!window.WebSocket){return;}
    if(socket.readyState == WebSocket.OPEN){
        var messages = {"name": "admin","msg":message}
        socket.send(JSON.stringify(messages));
        appendln("发送:" + message);
    }else{
        alert("发送失败,链接丢失");
    }

  }

  function appendln(text) {
    var ta = document.getElementById('responseMsg');
    ta.value += text + "\r\n";
  }

  function clear() {
    var ta = document.getElementById('responseMsg');
    ta.value = "";
  }

  </script>
  <body>
    <form onSubmit="return false;">
        <input type = "text" name="message" value="你好啊,朋友"/>
        <br/><br/>
        <input type="button" value="send" onClick="send(this.form.message.value)"/>
        <hr/>
        <h3>聊天室</h3>
        <textarea id="responseMsg" style="width: 1000px;height: 600px;"></textarea>
    </form>
  </body>
</html>
下面是效果图,第一个人发送消息:

第二个人看到的:

到这里,一个简单的聊天室就完成了,这是多人单聊天室,多人多聊天室也不难,有很多方式实现,我用的是redis,会在后续的文章中更新,代码的不足之处,还请指正。
🌈😀路漫漫其修远兮
吾将上下而求索😀🌈

 浙公网安备 33010602011771号