Tigase 8.0开发环境搭建
源码下载地址
https://repository.tigase.org/git/tigase-server.git 小编现在一直没有下载成功(8.0)
官方文档地址
https://docs.tigase.net/tigase-server/8.0.0/
eclipse 配置git
eclipse 下载tigase源码
https://docs.tigase.net/tigase-server/8.0.0/Development_Guide/html/#hackingTigase Tigase 官方二次开发文档
https://blog.csdn.net/cdnight/article/details/85222028 xmpp即时通信开发—1、tigase源代码的编译—idea+postgresql+gradle
https://www.cnblogs.com/eyecool/p/7266411.html?utm_source=itdadao&utm_medium=referral 小编下载8.0还是没有成功
https://blog.csdn.net/lylwo317/article/details/45170509
官网上下载时一直提示需要账号密码,是不是不开源了,提示权限错误
git下载地址
https://github.com/nnjoshi14/tigase-mobilemessenger
https://github.com/jooejooe/tigase-mobilemessenger
https://tigase.tech/projects/tigase-server/files 官方部署文件
https://docs.tigase.net/tigase-server/8.0.0/Administration_Guide/html/#QuickStart Tigase管理指南
https://blog.csdn.net/fy_401/article/details/61201190 Tigase手动安装过程
Plugin execution not covered by lifecycle configuration: org.codehaus.gmaven
解决办法:
https://yq.aliyun.com/articles/45447
https://www.cnblogs.com/whx7762/p/7903226.html
https://blog.csdn.net/xyr05288/article/details/79569183
https://blog.csdn.net/mm_bit/article/details/50833599
https://blog.csdn.net/xxd851116/article/details/25197373
https://blog.csdn.net/lqglqglqg/article/details/43267757 tigase集群配置 Tigase XMPP Server configuration properties
https://blog.csdn.net/cdnight/article/details/85072283 tigase客户端之smack4.3用法【草稿】 JXMPP
https://blog.csdn.net/jerry0827/article/details/8860716 Tigase客户端Jaxmpp的简单使用(二)
https://blog.csdn.net/sunweijm/article/details/72329709 tigase使用message-archiving组件进行消息存储,版本7.2.0-SNAPSHOT
https://blog.csdn.net/lqglqglqg/article/details/41046279 tigase增加离线消息和保存历史记录
https://blog.csdn.net/jerry0827/article/details/8860745 Tigase客户端Jaxmpp使用之群聊(四)
https://blog.csdn.net/hurryjiang/article/details/47974445 Tigase开发笔记2:Tigase组件详解
https://blog.csdn.net/wenmeishuai/article/details/46327163 XMPP之tigase源码部署
https://linyu19872008.iteye.com/blog/1681508 eclipse部署tigase源码
http://blog.sina.com.cn/s/blog_6b5b4a480102wpsr.html Tigase开发笔记:Tigase组件详解 (2017-05-03 16:32:26)
https://weibo.com/p/2304186b5b4a480102wpsr
https://blog.csdn.net/nitianwulai/article/details/50418677 深入认识Tigase XMPP Server
https://build.tigase.net/nightlies/dists/latest/
https://build.tigase.net/
https://maven-repo.tigase.net/#browse~release
https://docs.tigase.net/tigase-server/8.0.0/Administration_Guide/html/#QuickStart
https://tigase.net/blog-entry/tigase-xmpp-server-800-general-availability-released
https://docs.tigase.net/
https://build.tigase.net/jenkins/
https://docs.tigase.net/tigase-server/8.0.0/Administration_Guide/html/#_default_virtual_host_property_changes
https://docs.tigase.net/tigase-server/8.0.0/Administration_Guide/html/#_kernel_and_beans_configuration
https://docs.tigase.net/tigase-server/8.0.0/Development_Guide/html/#tigasekernel
https://docs.tigase.net/tigase-server/snapshot/Administration_Guide/html/#manualinstall
https://blog.csdn.net/yuruixin_china/article/details/76348812
更新于2019年5月30日 18:30
https://blog.csdn.net/DragonFy9/article/details/50012687 centos tigase连接mongodb
https://www.cnblogs.com/zfyouxi/p/4559016.html Tigase XMPP Server在CentOS部署与配置
https://blog.csdn.net/meiru8/article/details/38756969 Tigase数据库结构(1)
https://blog.csdn.net/hurryjiang/article/details/47974169 Tigase开发笔记1:深入认识XMPP协议
https://blog.csdn.net/hurryjiang/article/details/47973645 Tigase开发笔记4:Tigase Component组件开发
https://blog.csdn.net/u013934901/article/details/84696050 tigase源码分析4:packet处理
https://blog.csdn.net/wenmeishuai/article/details/46327163 XMPP之tigase源码部署
https://blog.csdn.net/lqglqglqg/article/details/41046405
tigase组件安装及调试过程
https://blog.csdn.net/chszs/article/details/49886247 Tigase负载均衡策略
https://blog.csdn.net/weixin_33948416/article/details/86313906 Tigase集群设置
https://blog.csdn.net/lqglqglqg/article/details/41046043 Tigase集群设置
https://blog.csdn.net/qq_38607742/article/details/83687502 nginx1.9 实现tigase的负载均衡搭建,TCP转发
https://blog.csdn.net/sunweijm/article/details/78184726 nginx实现tigase登录的简单负载均衡
https://blog.csdn.net/lqglqglqg/article/details/41046043 Tigase集群设置
https://blog.csdn.net/cdnight/article/details/85003059 tigase搭建开发环境
https://blog.csdn.net/lqglqglqg/article/details/43267757 tigase集群配置
https://blog.csdn.net/Irelia_/article/details/82387747 Tigase注册流程总结
https://blog.csdn.net/u010016848/article/details/29558927 tigase下的聊天室创建与配置
更新于2.19年5月31日 7:26 工艺美家属院
解压下载的文件
tar -zxvf tigase-server-xxx-dist-max.tar.gz
- 1
或
gzip  -d  tigase-xxx.tar.gz
tar -xvf  tigase-xxx.tar
- 1
- 2
https://blog.csdn.net/u011095110/article/details/76945016 tigase7.1.0 服务器在centos上搭建spark测试
CentOSer7 mongodb4.0(目前最新版本) 安装
https://www.mongodb.com/ 官网,选择 Resources 资源中的 文档 Documentation Guides MongoDB Server Installation
https://docs.mongodb.com/manual/installation/
https://docs.mongodb.com/manual/tutorial/install-mongodb-on-red-hat/ mongodb 官网 安装教程
创建一个/etc/yum.repos.d/mongodb-org-4.0.repo
[mongodb-org-4.0]
name = MongoDB Repository
baseurl = https://repo.mongodb.org/yum/redhat/$releasever/mongodb-org/4.0/x86_64/
gpgcheck = 1
enabled = 1
gpgkey = https:// www.mongodb.org/static/pgp/server-4.0.asc
- 1
- 2
- 3
- 4
- 5
- 6
sudo yum install -y mongodb-org
- 1
默认情况下,MongoDB使用mongod用户帐户运行并使用以下默认目录:
/var/lib/mongo (数据目录)
/var/log/mongodb (日志目录)
sudo service mongod start  启动
sudo service mongod stop  停止
sudo service mongod restart  重启
- 1
- 2
- 3
使用
mongo 不要写错(写成mongod)
- 1
tail -f /var/log/mongodb/mongod.log 查看是否启动成功
- 1
mongodb 卸载(默认安装路径)
sudo service mongod stop
sudo yum erase $(rpm -qa | grep mongodb-org)
sudo rm -r /var/log/mongodb
sudo rm -r /var/lib/mongo
- 1
- 2
- 3
- 4
跟随系统自动启动
sudo chkconfig mongod on
- 1
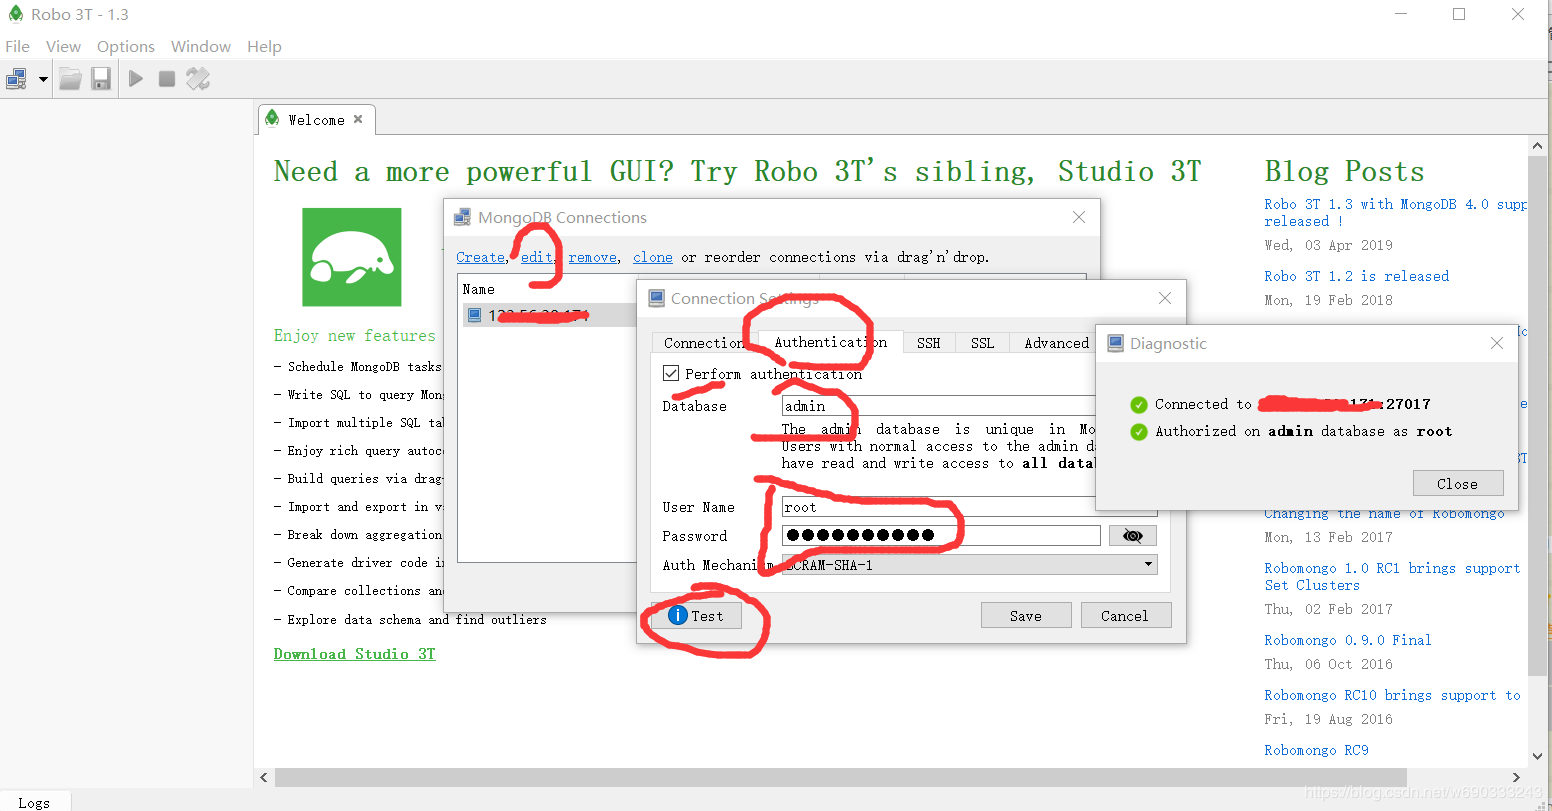
mongodb 可视化工具
https://robomongo.org/download
更新于2019年6月2日 2:40
https://blog.csdn.net/dashen180309/article/details/81138730 MongoDB启动异常 报错 及 正确的关闭方法
Mongo的远程连接 mongodb 4.0.10
注意:Mongo的远程连接需要打开权限控制
mongo
use admin;
#首先添加个管理员账号(root权限):
db.createUser({user:"root",pwd:"xxx",roles:[{role:"root",db:"admin"}]});
db.auth("root","xxx");返回1表示成功
#添加个普通账号(读写权限): (命令中的db 代表用户所分配的数据库)
db.createUser({user:"abc",pwd:"xxx",roles:[{role:"readWrite",db:"admin"}]});
db.auth("abc","xxx") ;返回1表示成功
- 1
- 2
- 3
- 4
- 5
- 6
- 7
- 8
停止服务
service mongod stop
- 1
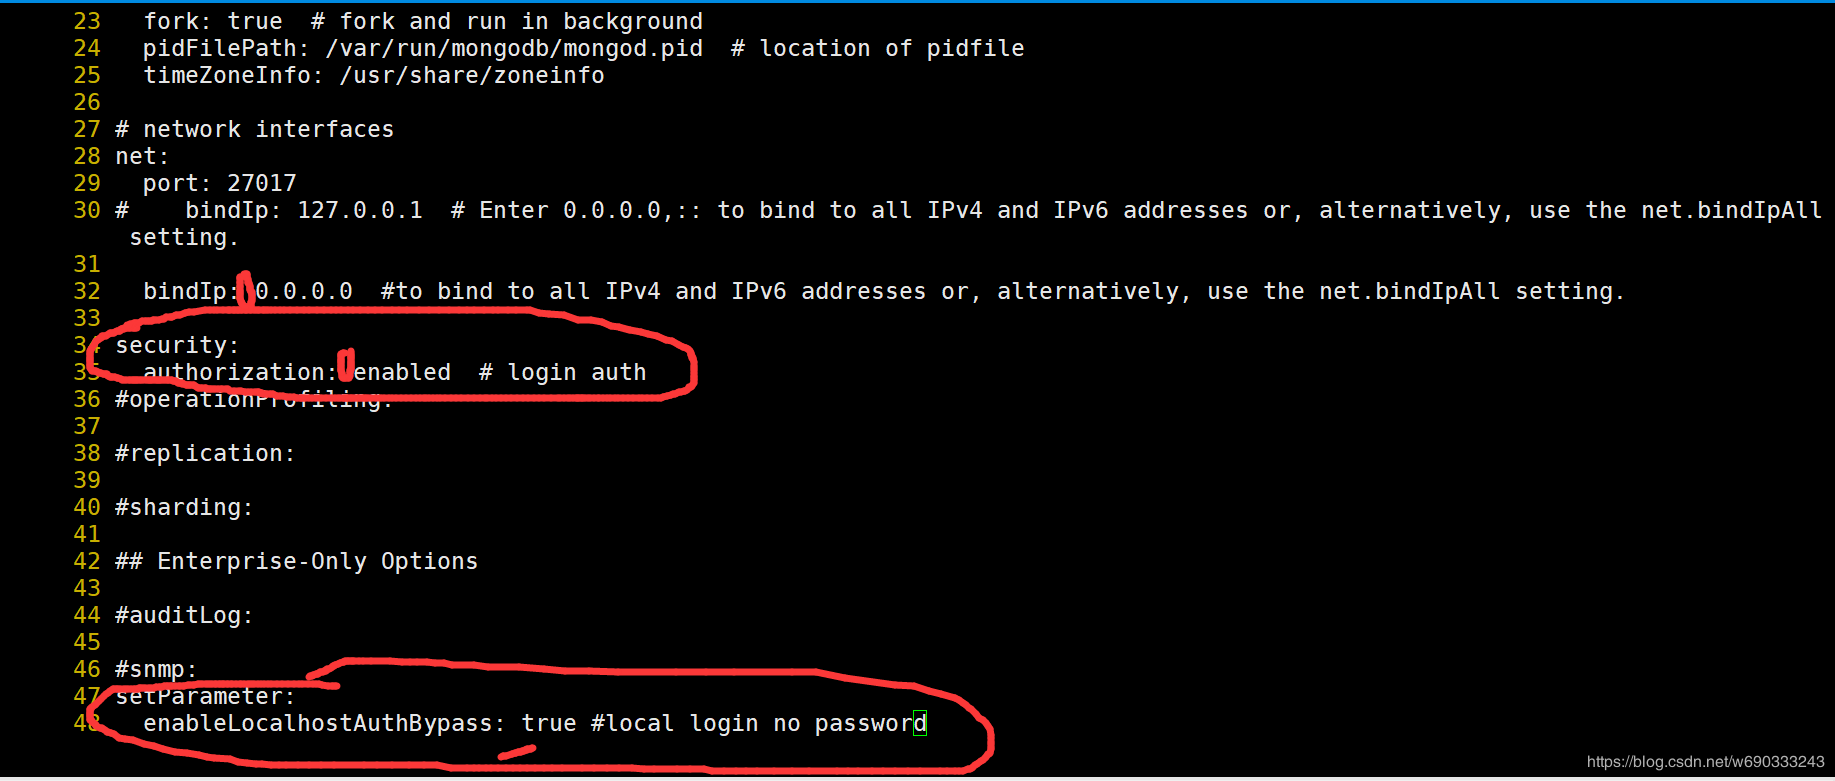
修改 /etc/mongod.conf 配置文件
vi /etc/mongod.conf
- 1
net:
    bindIp: 0.0.0.0    注意bindIp:后面有空格,空格
serurity:
     authorization: enabled       #开启远程密码验证
setParameter:
     enableLocalhostAuthBypass: true  #  本地登录时不需要密码
- 1
- 2
- 3
- 4
- 5
- 6
一定要注意 冒号后面需要空格
service mongod restart
- 1
mongo --port 27017 -u myUserAdmin -p 'abc123' --authenticationDatabase 'admin'
- 1
mongo --version 4.0.10
cat /proc/version 查看CentOS版本
https://blog.csdn.net/wangdatao_/article/details/78077774
更新于2019年6月2日 10:22
https://blog.csdn.net/Navagate/article/details/45956293 XMPP协议 搭建Tigase开发环境
tigase 配置
vi etc/config.tdsl
'config-type' = 'setup'
http () {

setup () {

'admin-user' = 'admin'

'admin-password' = '123456'

}

}

dataSource {

default () {

uri = 'mongodb://user:123456@localhost/tigasedb'

}

}

userRepository {

default () {}

}

authRepository {

default () {}

}
- 1
- 2
- 3
- 4
- 5
- 6
- 7
- 8
- 9
- 10
- 11
- 12
- 13
- 14
- 15
- 16
- 17
- 18
- 19
日志配置
debug = [ 'xmpp.XMPPIOService' ]
You can also have debugging switched on for many packages/classes at the same time:
debug = [ 'cluster' , 'xmpp.XMPPIOService' ]
Other packages you might be interested in are:
io can print out what is going on a very low level network level including TLS/SSL stuff.
xml would print the XML parser debugging data.
cluster would print all the clustering related stuff.
xmpp.impl would print logs from all plugins loaded to Tigase server.
Non-Tigase packages

To enable logging for your own packages from those different than Tigase, you have to use another option which has been made available for this:

debug-packages = [ your.com.package ]
- 1
- 2
- 3
- 4
- 5
- 6
- 7
- 8
- 9
- 10
- 11
- 12
tigase.conf配置
TIGASE_OPTIONS=" --property-file etc/config.tdsl "
- 1
系统服务
For systemd-based linux distributions
Once installation is complete you may start Tigase as a typical systemd service using following command:
sudo systemctl start tigase-server

To stop it, you may run following command:
sudo systemctl stop tigase-server

It is also possible to enable service, to make it start during startup of the operating system:
sudo systemctl enable tigase-server

For other linux distributions

Once installation is complete, you should be able to start Tigase using the following command:
service tigase start

Tigase should begin running in the background. Since Tigase is now installed as a service, it can be controlled with any of the service commands, such as:
service tigase stop
service tigase restart
- 1
- 2
- 3
- 4
- 5
- 6
- 7
- 8
- 9
- 10
- 11
- 12
- 13
- 14
- 15
- 16
- 17
- 18
- 19
参考配置
# Enable cluster mode
--cluster-mode = true
# Enable debugging for server and xmpp.impl
--debug = 'server,xmpp.impl'
# Set list of virtual hosts (old way)
--virt-hosts = 'example.com,test-1.example.com,test-2.example.com'
# Configure list of administrator jids

admins = [ 'admin@zeus', 'http@macbook-pro-andrzej.local' ]

# Set config type

config-type = '--gen-config-def'
# Configure dataSource bean with database configuration

dataSource {

# Configure default data source (using default implementation so class is omitted)

default () {

uri = 'jdbc:postgresql://127.0.0.1/tigase?user=test&password=test&autoCreateUser=true'

}
# Configure data source with name exaple.com (will be used by domain example.com)

'example.com' () {

uri = 'jdbc:mysq://127.0.0.1/example?user=test&password=test&autoCreateUser=true'

}

}
# Configure C2S component

c2s {

# Enable Stream Management bean

'urn:xmpp:sm:3' () {}
# Register tigase.server.xmppclient.SeeOtherHostDualIP as seeOtherHost bean

seeOtherHost (class: tigase.server.xmppclient.SeeOtherHostDualIP) {}
# Add additional port 5224 which is SSL port and disable port 5223

connections () {

'5224' () {

socket = ssl

}

'5223' (active: false) {}

}

}
# Configure HTTP API component

http {

# Set list of API keys

api-keys = [ 'test1234', 'test2356' ]

rest {

# Set value of environment property as a path to look for REST scripts

rest-scripts-dir = env('TIGASE_REST_SCRIPTS_DIR')

}

}
# Register pubsub-2 (class is passed as pubsub-2 name do not have default class assigned)

pubsub-2 (class: tigase.pubsub.cluster.PubSubComponentClustered) {

# Set configuration bean properties

pubsubConfig {

persistentPep = true

}

# Use tigase.pubsub.cluster.ClusteredNodeStrategy as advanced clustering strategy

strategy (class: tigase.pubsub.cluster.ClusteredNodeStrategy) {}

}
# Configure Session Manager

sess-man {

# Here we enable pep, urn:xmpp:mam:1 processors and disable message-archive-xep-0136 processor

pep () {}

'urn:xmpp:mam:1' () {}

message-archive-xep-0136 (active: false) {}
# Define class used as clustering strategy (it is different than default so class is required)

strategy (class: tigase.server.cluster.strategy.OnlineUsersCachingStrategy) {}

}
- 1
- 2
- 3
- 4
- 5
- 6
- 7
- 8
- 9
- 10
- 11
- 12
- 13
- 14
- 15
- 16
- 17
- 18
- 19
- 20
- 21
- 22
- 23
- 24
- 25
- 26
- 27
- 28
- 29
- 30
- 31
- 32
- 33
- 34
- 35
- 36
- 37
- 38
- 39
- 40
- 41
- 42
- 43
- 44
- 45
- 46
- 47
- 48
- 49
- 50
- 51
- 52
- 53
- 54
- 55
- 56
- 57
- 58
- 59
- 60
- 61
- 62
- 63
- 64
- 65
- 66
- 67
- 68
- 69
- 70
- 71
- 72
debug配置
# Enable debugging for server and xmpp.impl
--debug = 'server,xmpp.impl,xmpp.XMPPIOService'
debug = [ 'cluster' , 'xmpp.XMPPIOService' ]
debug = [ 'server', 'xmpp.impl','xmpp.XMPPIOService','server.ext.handlers' ]
debug = [ 'xmpp.XMPPIOService' ]
debug-packages = [ your.com.package ]
debug = [ 'server', 'xmpp.init' ]
debug-packages = [ 'com.company.CustomPlugin' , 'com.company.custom' ]
It is possible to enable logging of dropped messages by adding spam to comma separate list of values for --debug property.

--debug=spam
- 1
- 2
- 3
- 4
- 5
- 6
- 7
- 8
- 9
- 10
- 11
- 12
启动
scripts/tigase.sh start etc/tigase.conf
- 1
停止运行
scripts/tigase.sh stop etc/tigase.conf
- 1
tigase 配置
按照上述配置后,点击以上链接,一路next
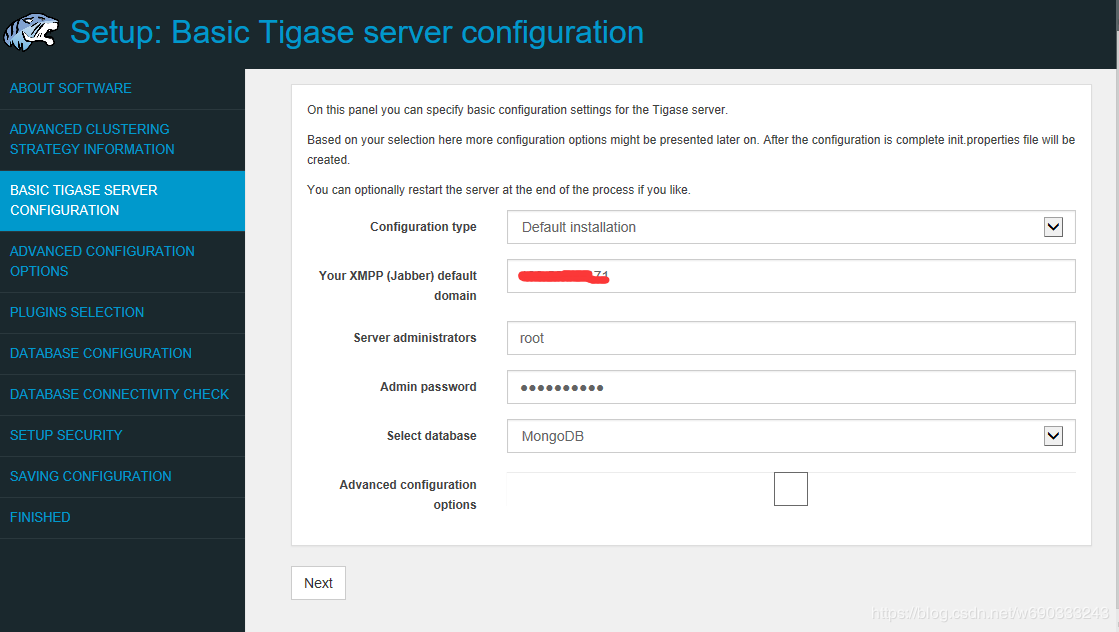
分别填写你的主机ip
centos登录的用户名,密码,选择你使用的数据库
数据库配置
如下图
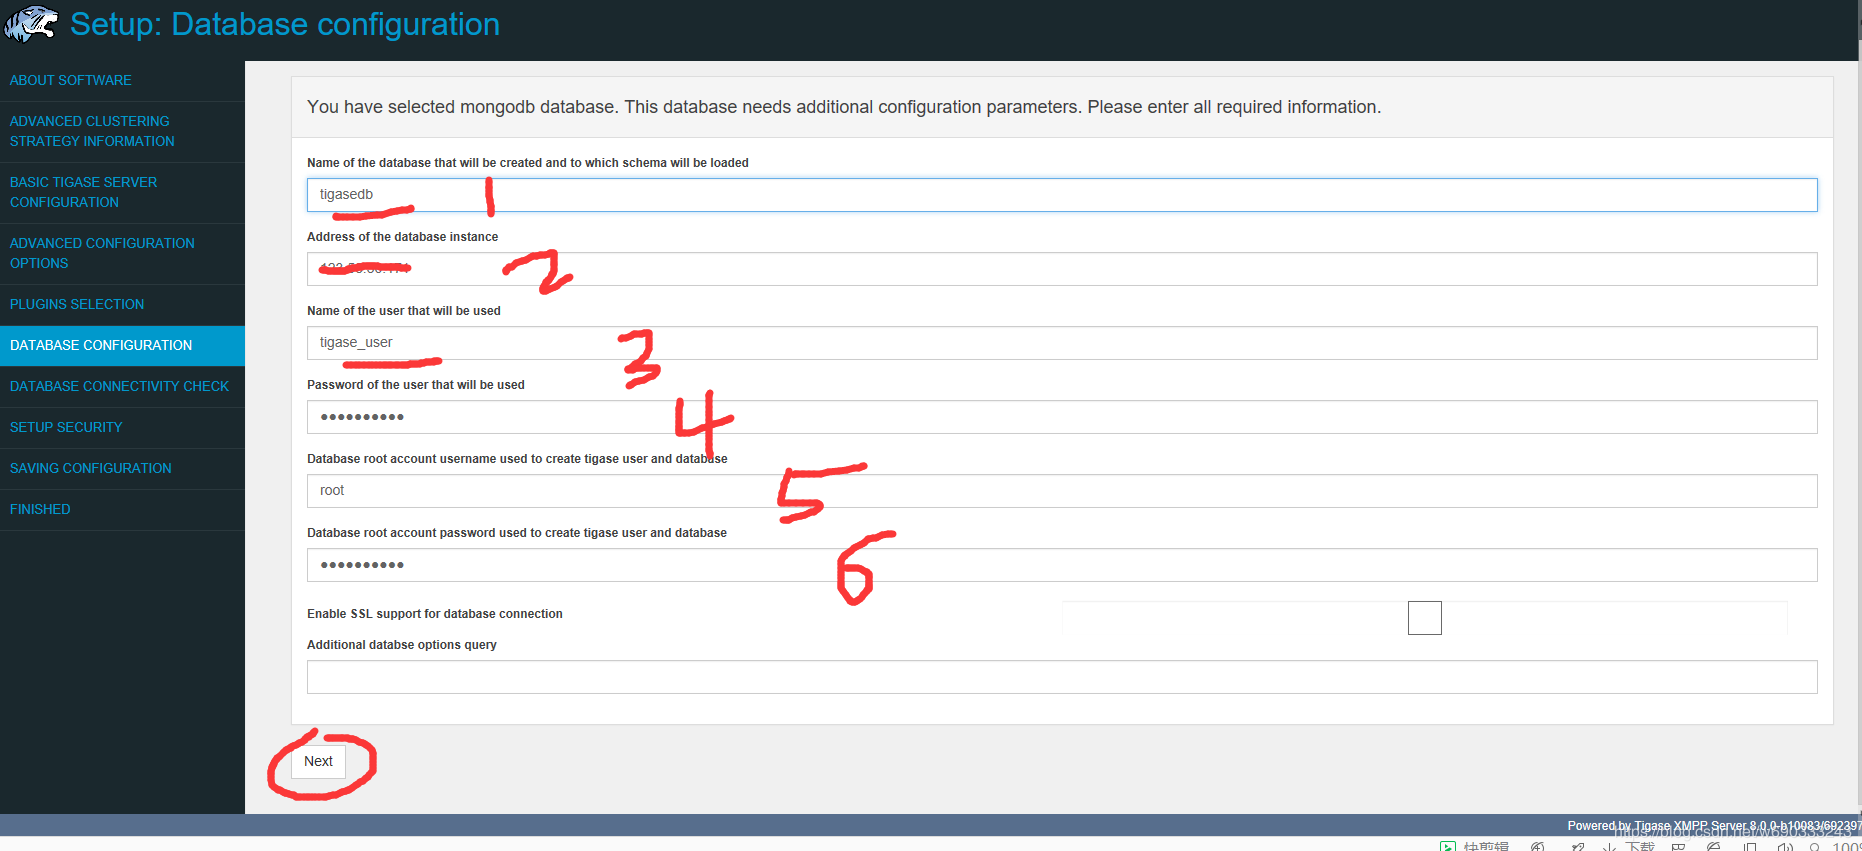
1、你将要创建的数据名
2、填写你的主机ip,这里使用mongodb的默认端口12707
3、填写你将要使用的mongodb账户 用户名A
4、填写你将要使用的mongodb账户 密码P
5、填写你的mongodb创建的具有root权限用户的账号
6、填写填写你的mongodb创建的具有root权限用户的密码
tigase会使用5、6自动创建3、4数据库用户及密码
点击next后,如果没有问题,则check界面一路绿灯
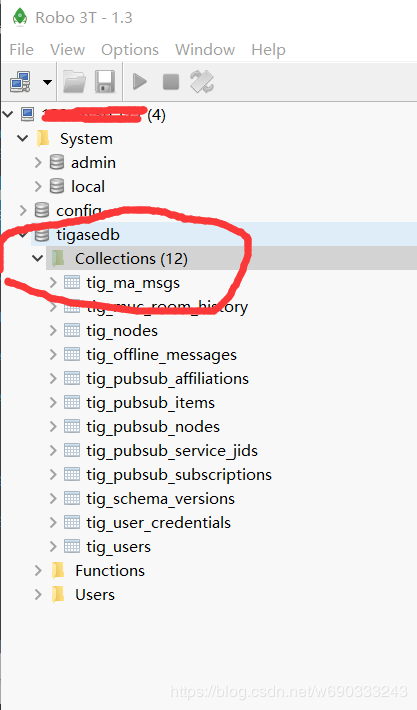
数据库已经自动创建成功
重启服务
./scripts/tigase.sh stop
./scripts/{OS}/init.d/tigase start etc/tigase.conf
- 1
- 2
where {OS} is your type of Linux, gentoo, debian, mandriva, or redhat
https://docs.tigase.net/tigase-server/snapshot/Administration_Guide/html/#manualinstall
https://blog.csdn.net/Pai_Da_Xing/article/details/88882059
https://blog.csdn.net/ahua186186/article/details/84447978 XMPP服务器的性能分析和优化
https://blog.csdn.net/chenxinxin2/article/details/84913266 Tigase即时通信组件性能测试(Tsung测试工具)
查下你现在连了多少 连接数
show variables like '%max_connections%';
 show global status like 'Max_used_connections';
- 1
- 2
- 3
https://blog.csdn.net/nginxs/article/details/77050959 Tigase-01 使用spark或spi登录Tigase服务器
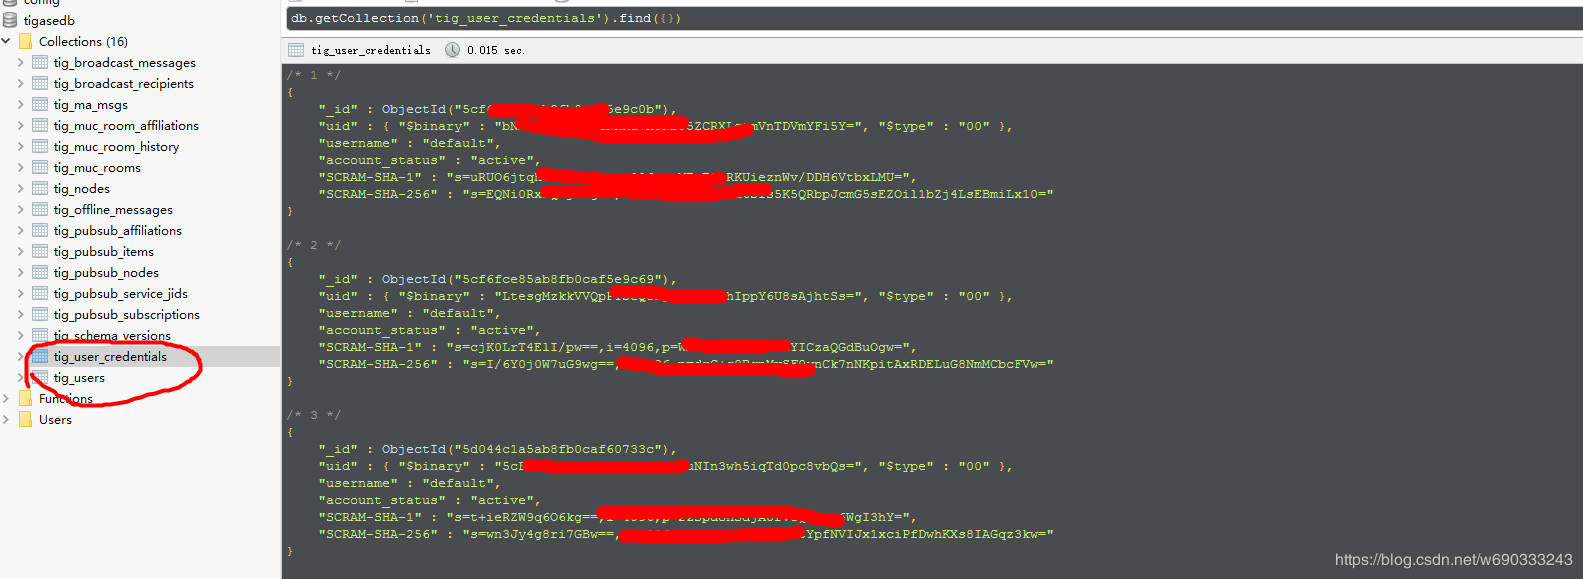
Tigase8.0 配置Mongodb,数据库表中已经没有tig_paris表
官方工作人员回复:This works as expected as Tigase schema for MongoDB does not require tig_pairs table, see Tigase XMPP Server Schema topic in side https://docs.tigase.net/tigase-server/snapshot/Administration_Guide/html/#mongoDBSupport section.

好友关系信息

更新于2019年6月13日 9:50
账号密码
更新于2019年10月21日 11:26
https://blog.csdn.net/lqglqglqg/article/details/43267757 tigase集群配置
https://blog.csdn.net/chszs/article/details/49886247 Tigase负载均衡策略
https://blog.csdn.net/lqglqglqg/article/details/41046043 Tigase集群设置
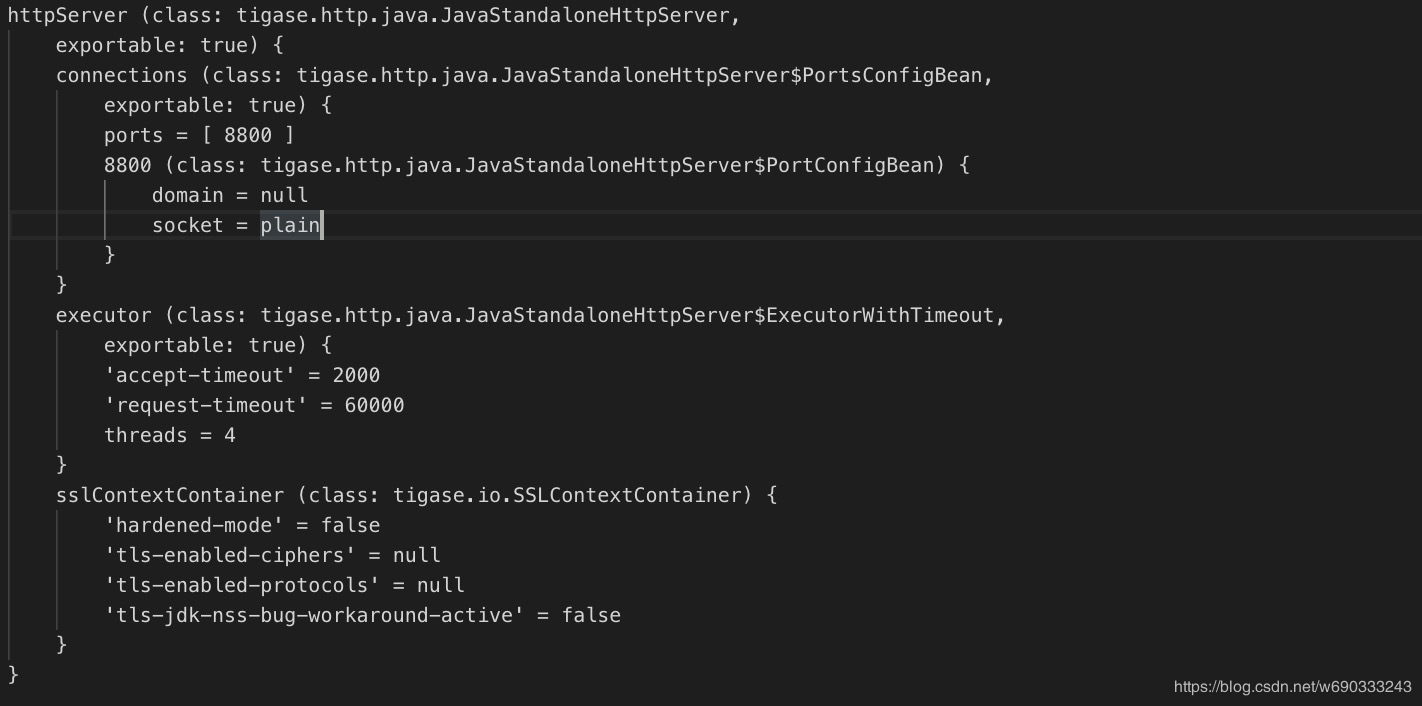
tigase 8.0 修改端口
Windows eclipse环境搭建
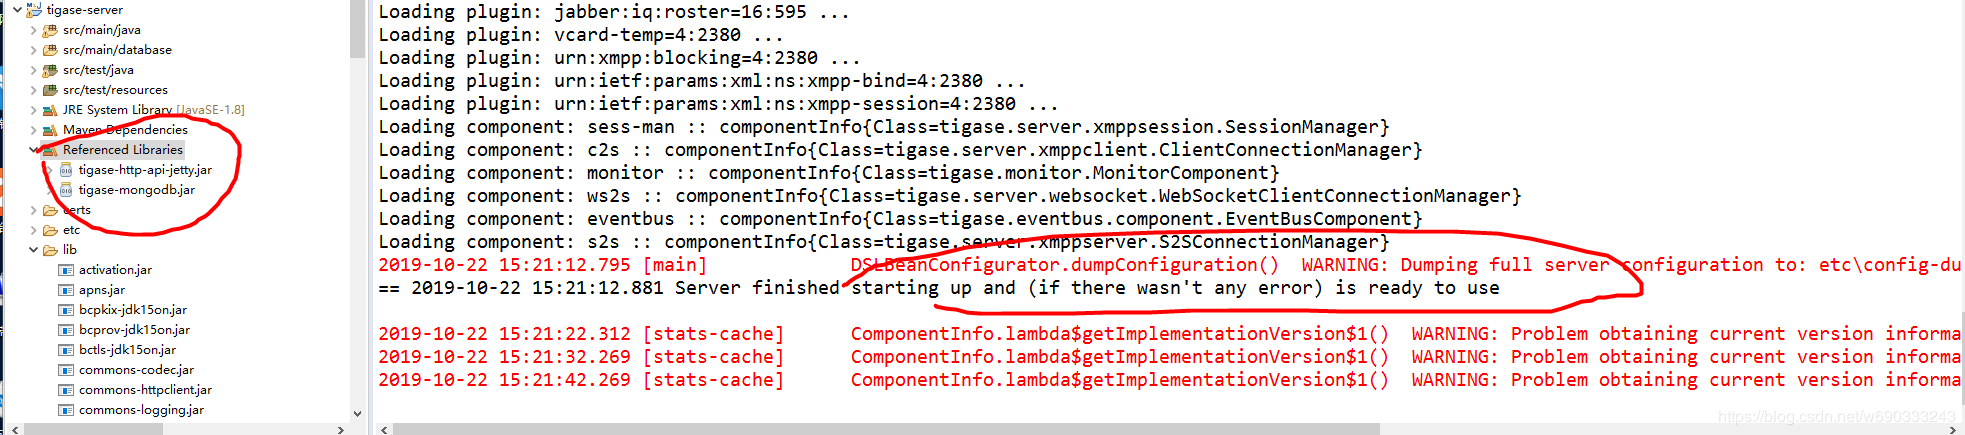
将 tigase-mongodb.jar ,tigase-http-api-jetty.jar 导入
pom.xml 中添加依赖
<dependency>
    <groupId>org.mongodb</groupId>
    <artifactId>mongodb-driver</artifactId>
    <version>3.11.1</version>
</dependency>
- 1
- 2
- 3
- 4
- 5
编辑C:\Windows\System32\drivers\etc\hosts文件
添加
127.0.0.1(或你自己电脑的ip) xxx.com
- 1
注释: xxx.com 为你设置的xmpp服务器的域名,手机需要和电脑使用同一个网段。手机和电脑连接同一个WIFI即可
编辑config.tdsl文件
'config-type' = 'default'
'debug' = 'server','xmpp.impl','xmpp.XMPPIOService','server.ext.handlers.SASLProcessor','spam'
'default-virtual-host' = 'xxx.com'
dataSource () {
    default () {
        uri = 'mongodb://tigase_user:密码@ip地址/tigasedb'
    }
}
http () {
    setup () {
        'admin-password' = 'xxx..xx'
        'admin-user' = 'admin'
    }
}
- 1
- 2
- 3
- 4
- 5
- 6
- 7
- 8
- 9
- 10
- 11
- 12
- 13
- 14
tigase.conf
#osgiEnabled=(true|false)
#osgiEnabled=false
OSGI=${osgiEnabled}
ENC="-Dfile.encoding=UTF-8 -Dsun.jnu.encoding=UTF-8"
DRV="-Djdbc.drivers=com.mysql.jdbc.Driver:org.postgresql.Driver:org.apache.derby.jdbc.EmbeddedDriver"
#GC="-XX:+UseBiasedLocking -XX:+UseConcMarkSweepGC -XX:+UseParNewGC -XX:NewRatio=2 -XX:+CMSIncrementalMode -XX:ParallelCMSThreads=2 -XX:-ReduceInitialCardMarks -XX:CMSInitiatingOccupancyFraction=70  -XX:+UseCMSInitiatingOccupancyOnly"
#EX="-XX:+OptimizeStringConcat -XX:+DoEscapeAnalysis -XX:+UseNUMA"
REMOTE_DEBUG=" -agentlib:jdwp=transport=dt_socket,server=y,address=8000,suspend=n "
GC_DEBUG=" -XX:+PrintTenuringDistribution -XX:+PrintGCDetails -XX:+PrintGCDateStamps -XX:+PrintGCTimeStamps -Xloggc:logs/jvm.log -verbose:gc "
JMX_REMOTE_IP="-Djava.rmi.server.hostname=0.0.0.0"
AWS hostname resolver
export INTERNAL_IP="$(curl -s http://169.254.169.254/latest/meta-data/local-hostname)"
export EXTERNAL_IP="$(curl -s http://169.254.169.254/latest/meta-data/public-hostname)"
JAVA_HOME="C:\Program Files\Java\jdk1.8.0_201"

CLASSPATH=""
Possible memory allocation improvements on some CentOS/RHEL systems
https://www.ibm.com/developerworks/community/blogs/kevgrig/entry/linux_glibc_2_10_rhel_6_malloc_may_show_excessive_virtual_memory_usage?lang=en
export MALLOC_ARENA_MAX=4
You should explicitly set young gen size only if you know what you are doing and only after running Load Tests that confirms the assumption!
JAVA_YOUNG_GEN_EXPLICIT_SIZE=" -Xmn<young size>[g|m|k] "
PRODUCTION_HEAP_SETTINGS=" -Xms5g -Xmx5g ${JAVA_YOUNG_GEN_EXPLICIT_SIZE} " # heap memory settings must be adjusted on per deployment-base!
JAVA_XSS=" -Xss228k "

JAVA_DIRECT_MEMORY=" -XX:MaxDirectMemorySize=128m "

JAVA_METASPACE=" -XX:MaxMetaspaceSize=128m "
JAVA_OPTIONS="${GC} ${GC_DEBUG} ${REMOTE_DEBUG} ${EX} ${ENC} ${DRV} ${JMX_REMOTE_IP} -server ${PRODUCTION_HEAP_SETTINGS} ${JAVA_XSS} ${JAVA_DIRECT_MEMORY} ${JAVA_METASPACE} "
TIGASE_OPTIONS=" "
TIGASE_OPTIONS=" --property-file config.tdsl "
- 1
- 2
- 3
- 4
- 5
- 6
- 7
- 8
- 9
- 10
- 11
- 12
- 13
- 14
- 15
- 16
- 17
- 18
- 19
- 20
- 21
- 22
- 23
- 24
- 25
- 26
- 27
- 28
- 29
- 30
- 31
- 32
- 33
- 34
- 35
https://segmentfault.com/a/1190000019632575 tigase7.02升级8.0
https://docs.tigase.org/#collapse-tigase-server-800-head tigase 配置 文档
https://docs.tigase.org/tigase-server/8.0.0/Administration_Guide/html/
https://docs.tigase.org/tigase-server/7.1.5/User_Guide/html/
https://docs.tigase.org/tigase-server/7.1.5/Administration_Guide/html/
https://docs.tigase.org/tigase-server/7.1.5/Development_Guide/html/
https://docs.tigase.org/tigase-server/7.1.5/Properties_Guide/html/
https://docs.tigase.net/tigase-server/stable-snapshot/Administration_Guide/html/#configuration_instructions_for_psi
https://docs.tigase.net/tigase-server/stable-snapshot/Administration_Guide/html/#pushConfig
https://blog.csdn.net/Pai_Da_Xing/article/details/88882059 XMPP tigase 8.0 与 strophe.js 测试Web聊天服务/即时通信
https://www.cnblogs.com/luffigo/p/5379142.html Eclipse中配置Git
https://blog.csdn.net/Irelia/article/details/81540787 Tigase开发环境部署
http://www.likecs.com/show-49340.html IDEA 上 Tigase8.0 源代码编译运行
https://www.cnblogs.com/eyecool/p/7266411.html Tigase-02 tigase-server7.1.0使用git 克隆下来,并在eclipse 上运行调试
https://www.cnblogs.com/eyecool/p/10407041.html Tigase8.0 源代码分析:一、启动篇
https://www.cnblogs.com/eyecool/p/10307879.html IDEA 上 Tigase8.0 源代码编译运行
https://blog.csdn.net/u010016848/article/details/41959405 windows平台下搭建tigase服务器
https://www.cnblogs.com/eyecool/p/9885062.html Tigase 发送消息的流程源码分析
原文地址:https://blog.csdn.net/w690333243/article/details/90550837

 浙公网安备 33010602011771号