Spring boot 项目导出可执行jar
配置文件中添加插件
<plugin>
    <groupId>org.springframework.boot</groupId>
    <artifactId>spring-boot-maven-plugin</artifactId>
    <version>2.0.5.RELEASE</version>
    <executions>
        <execution>
            <goals>
                <goal>repackage</goal>
            </goals>
        </execution>
    </executions>
</plugin>
示例如下:
1. 新建Maven 项目 exejar
2. pom.xml
<project xmlns="http://maven.apache.org/POM/4.0.0"
    xmlns:xsi="http://www.w3.org/2001/XMLSchema-instance"
    xsi:schemaLocation="http://maven.apache.org/POM/4.0.0
        http://maven.apache.org/xsd/maven-4.0.0.xsd">


    <modelVersion>4.0.0</modelVersion>
    <groupId>com.java</groupId>
    <artifactId>exejar</artifactId>
    <version>1.0.0-SNAPSHOT</version>

    <parent>
        <groupId>org.springframework.boot</groupId>
        <artifactId>spring-boot-starter-parent</artifactId>
        <version>2.0.5.RELEASE</version>
    </parent>


    <!-- 配置版本常量 -->
    <properties>
        <jdk.version>1.8</jdk.version>
    </properties>

    <dependencies>

        <!-- Spring Boot -->
        <dependency>
            <groupId>org.springframework.boot</groupId>
            <artifactId>spring-boot-starter-web</artifactId>
        </dependency>


    </dependencies>

    <build>
        <finalName>${project.artifactId}</finalName>
        <plugins>
            <plugin>
                <groupId>org.apache.maven.plugins</groupId>
                <artifactId>maven-compiler-plugin</artifactId>
                <configuration>
                    <source>${jdk.version}</source>
                    <target>${jdk.version}</target>
                    <encoding>UTF-8</encoding>
                </configuration>
            </plugin>

            <plugin>
                <groupId>org.springframework.boot</groupId>
                <artifactId>spring-boot-maven-plugin</artifactId>
                <executions>
                    <execution>
                        <goals>
                            <goal>repackage</goal>
                        </goals>
                    </execution>
                </executions>
            </plugin>
        </plugins>
    </build>
</project>
3. DemoStarter.java
package com.java.demo;

import org.springframework.boot.SpringApplication;
import org.springframework.boot.autoconfigure.SpringBootApplication;

@SpringBootApplication
public class DemoStarter {
    public static void main(String[] args) {
        SpringApplication.run(DemoStarter.class, args);
    }

}
4. HelloController.java
package com.java.demo.controller;

import java.util.HashMap;
import java.util.Map;

import org.springframework.web.bind.annotation.GetMapping;
import org.springframework.web.bind.annotation.PathVariable;
import org.springframework.web.bind.annotation.RequestMapping;
import org.springframework.web.bind.annotation.RestController;

@RestController
@RequestMapping("/hello")
public class HelloController {

    @GetMapping("/{name}")
    public Map<String, Object> sayHello(@PathVariable String name) {
        Map<String, Object> map = new HashMap<>();
        map.put("name", name);
        map.put("greet", "Hello " + name);
        return map;
    }

}
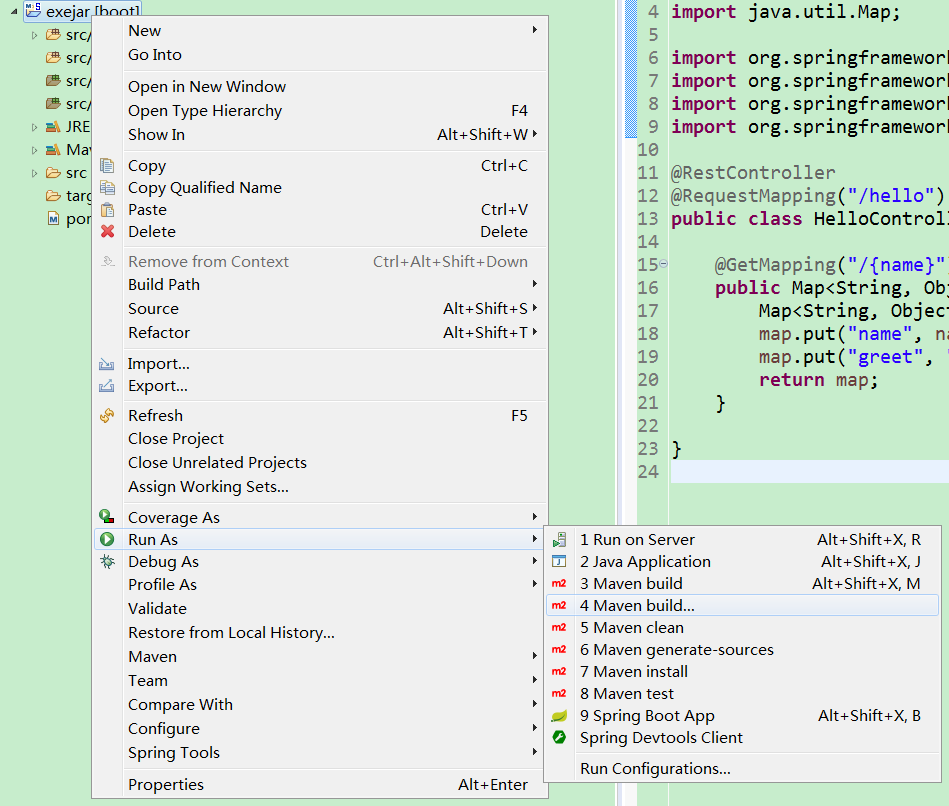
5. 在项目上单击右键 》 Run As 》 Maven build... 》。 如下图:
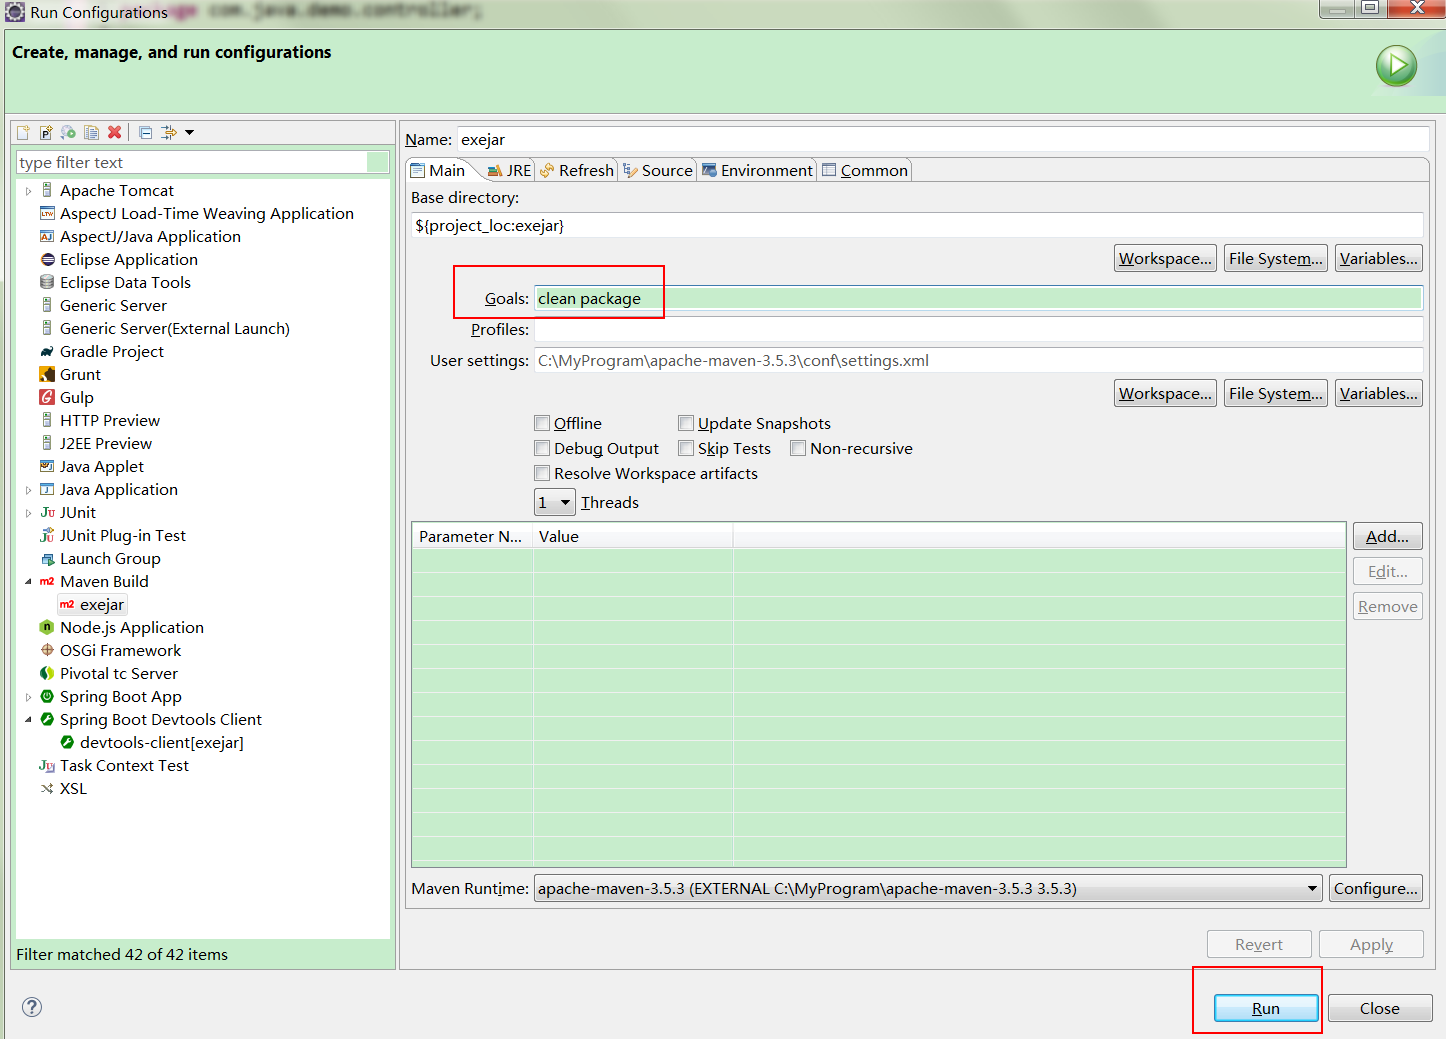
在Goals 里输入 clean package , 单击【Run】。如下图
控制台打出BUILD SUCCESS ,打包完成。
打开target 目录,测试运行
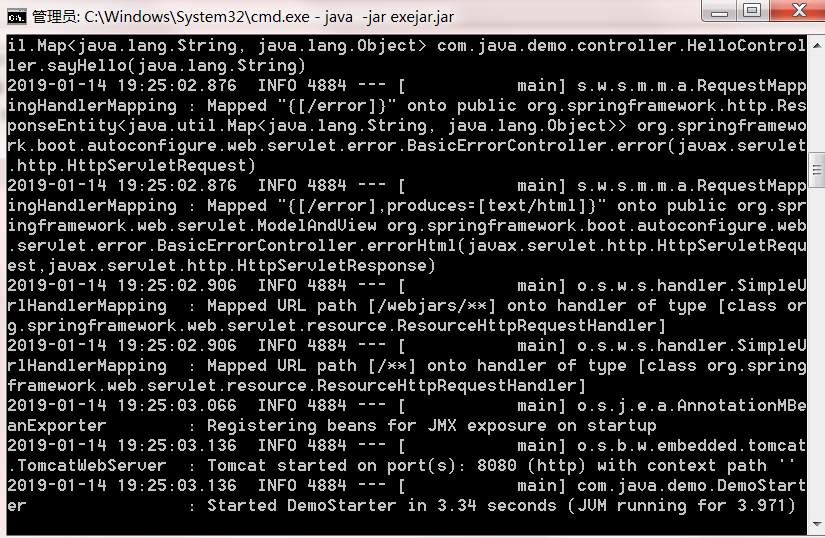
在命令行窗口输入
java -jar exejar.jar
回车执行,如下图
浏览器输入URL
http://127.0.0.1:8080/hello/Logen
效果如下图
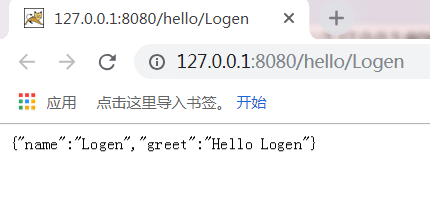
打包成功。
.

 浙公网安备 33010602011771号